


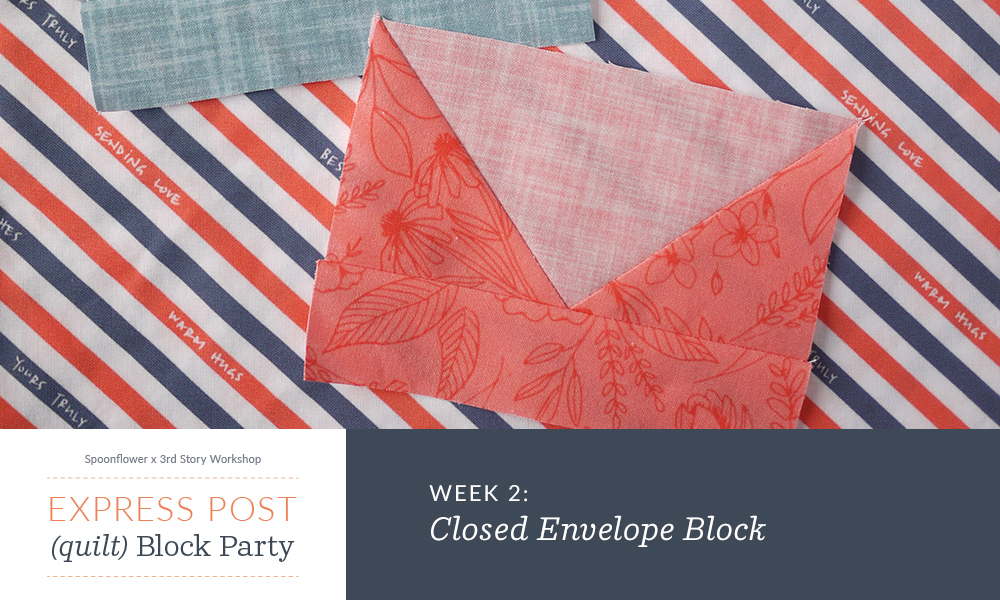
Express Post (Quilt) Block Party Week 2!

Continuing our “block party” in celebration of National Quilt Month, artist, designer, quilt maker and Spoonflower Ambassador Andrea Tsang Jackson of 3rd Story Workshop will be showing you how to make a closed envelope quilt block from her Express Quilt. This beginner-friendly quilt project is made with Spoonflower’s Cotton Poplin and Fill-A-Yard®, but any of our quilting-weight cotton fabrics will work great. This is the second of our four-part “block party,” so be sure to tune back in every Friday in March for more!
Express Post (Quilt) Block Party Posts
Part 1: How To Choose Designs

Part 3: How To Make A Heart Block

Part 4: How To Make an Open Envelope Block

Part 2: How To Make a Closed Envelope Block
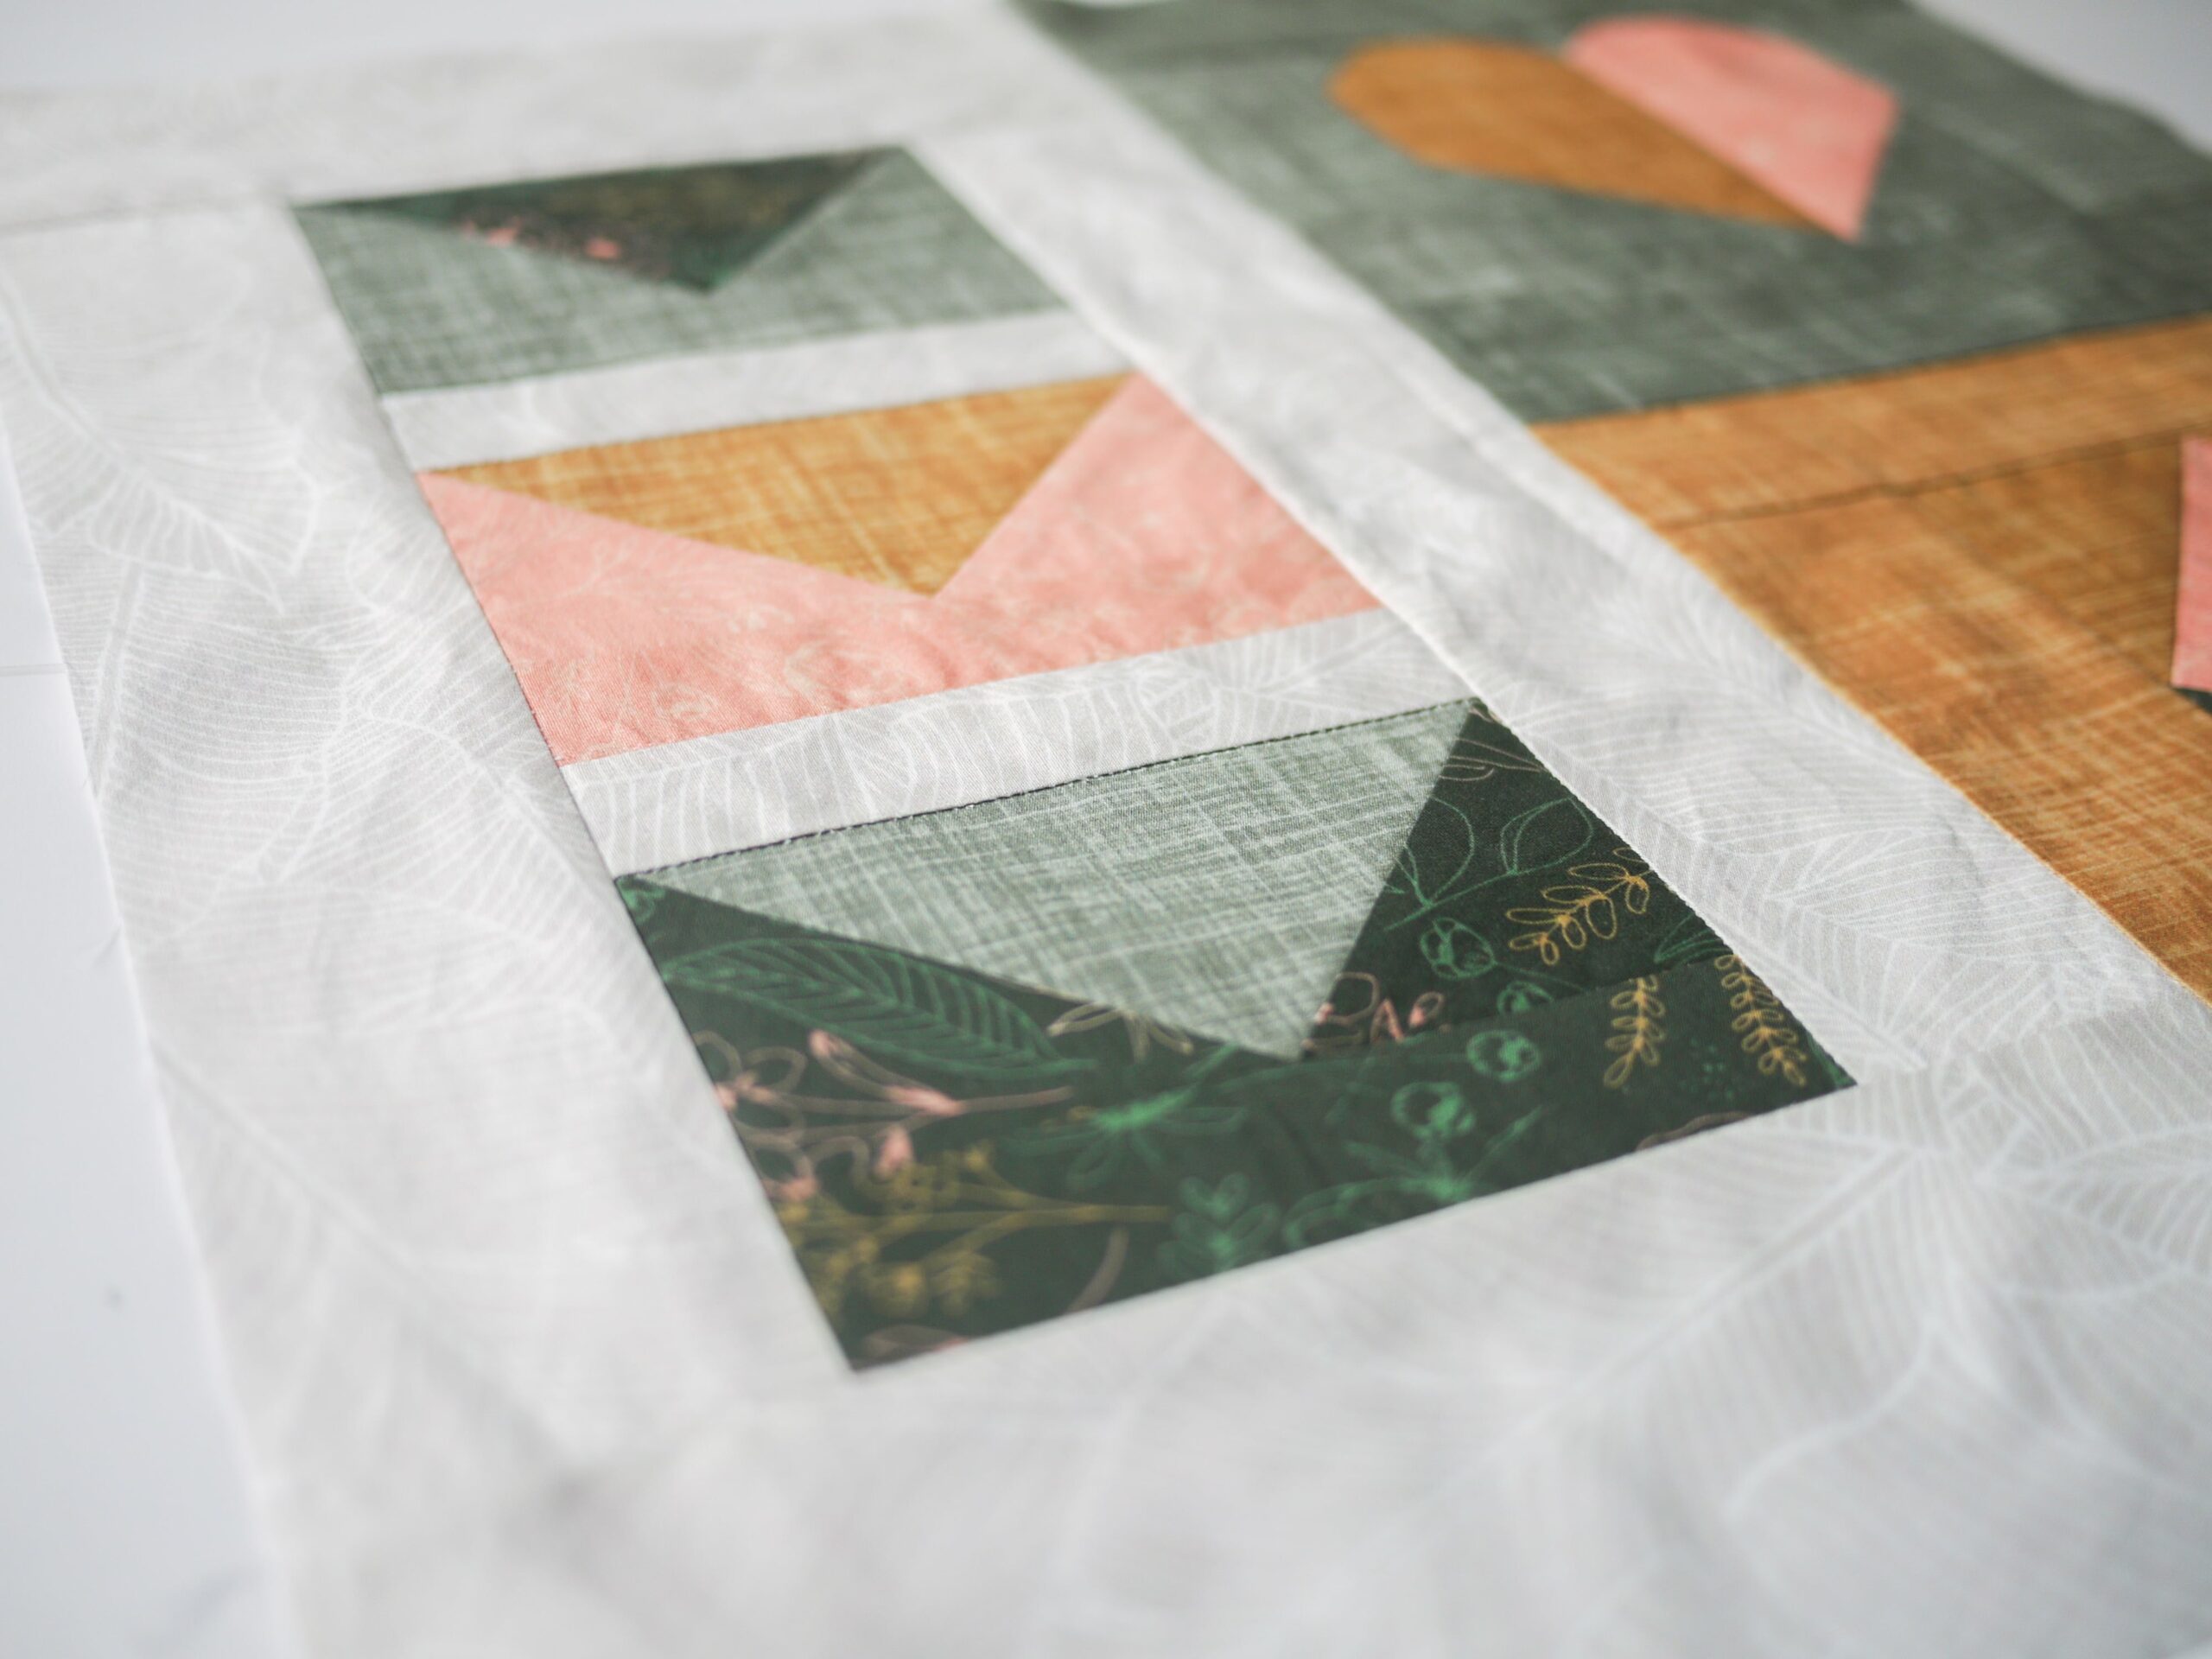
Andrea: This first block starts with a traditional flying geese block and transforms it into your favorite stationery! You can make the individual blocks with your own scraps, or use the recommended fabric requirements for the whole #ExpressPostBlockParty project.
How to Make a Closed Envelope Quilt Block
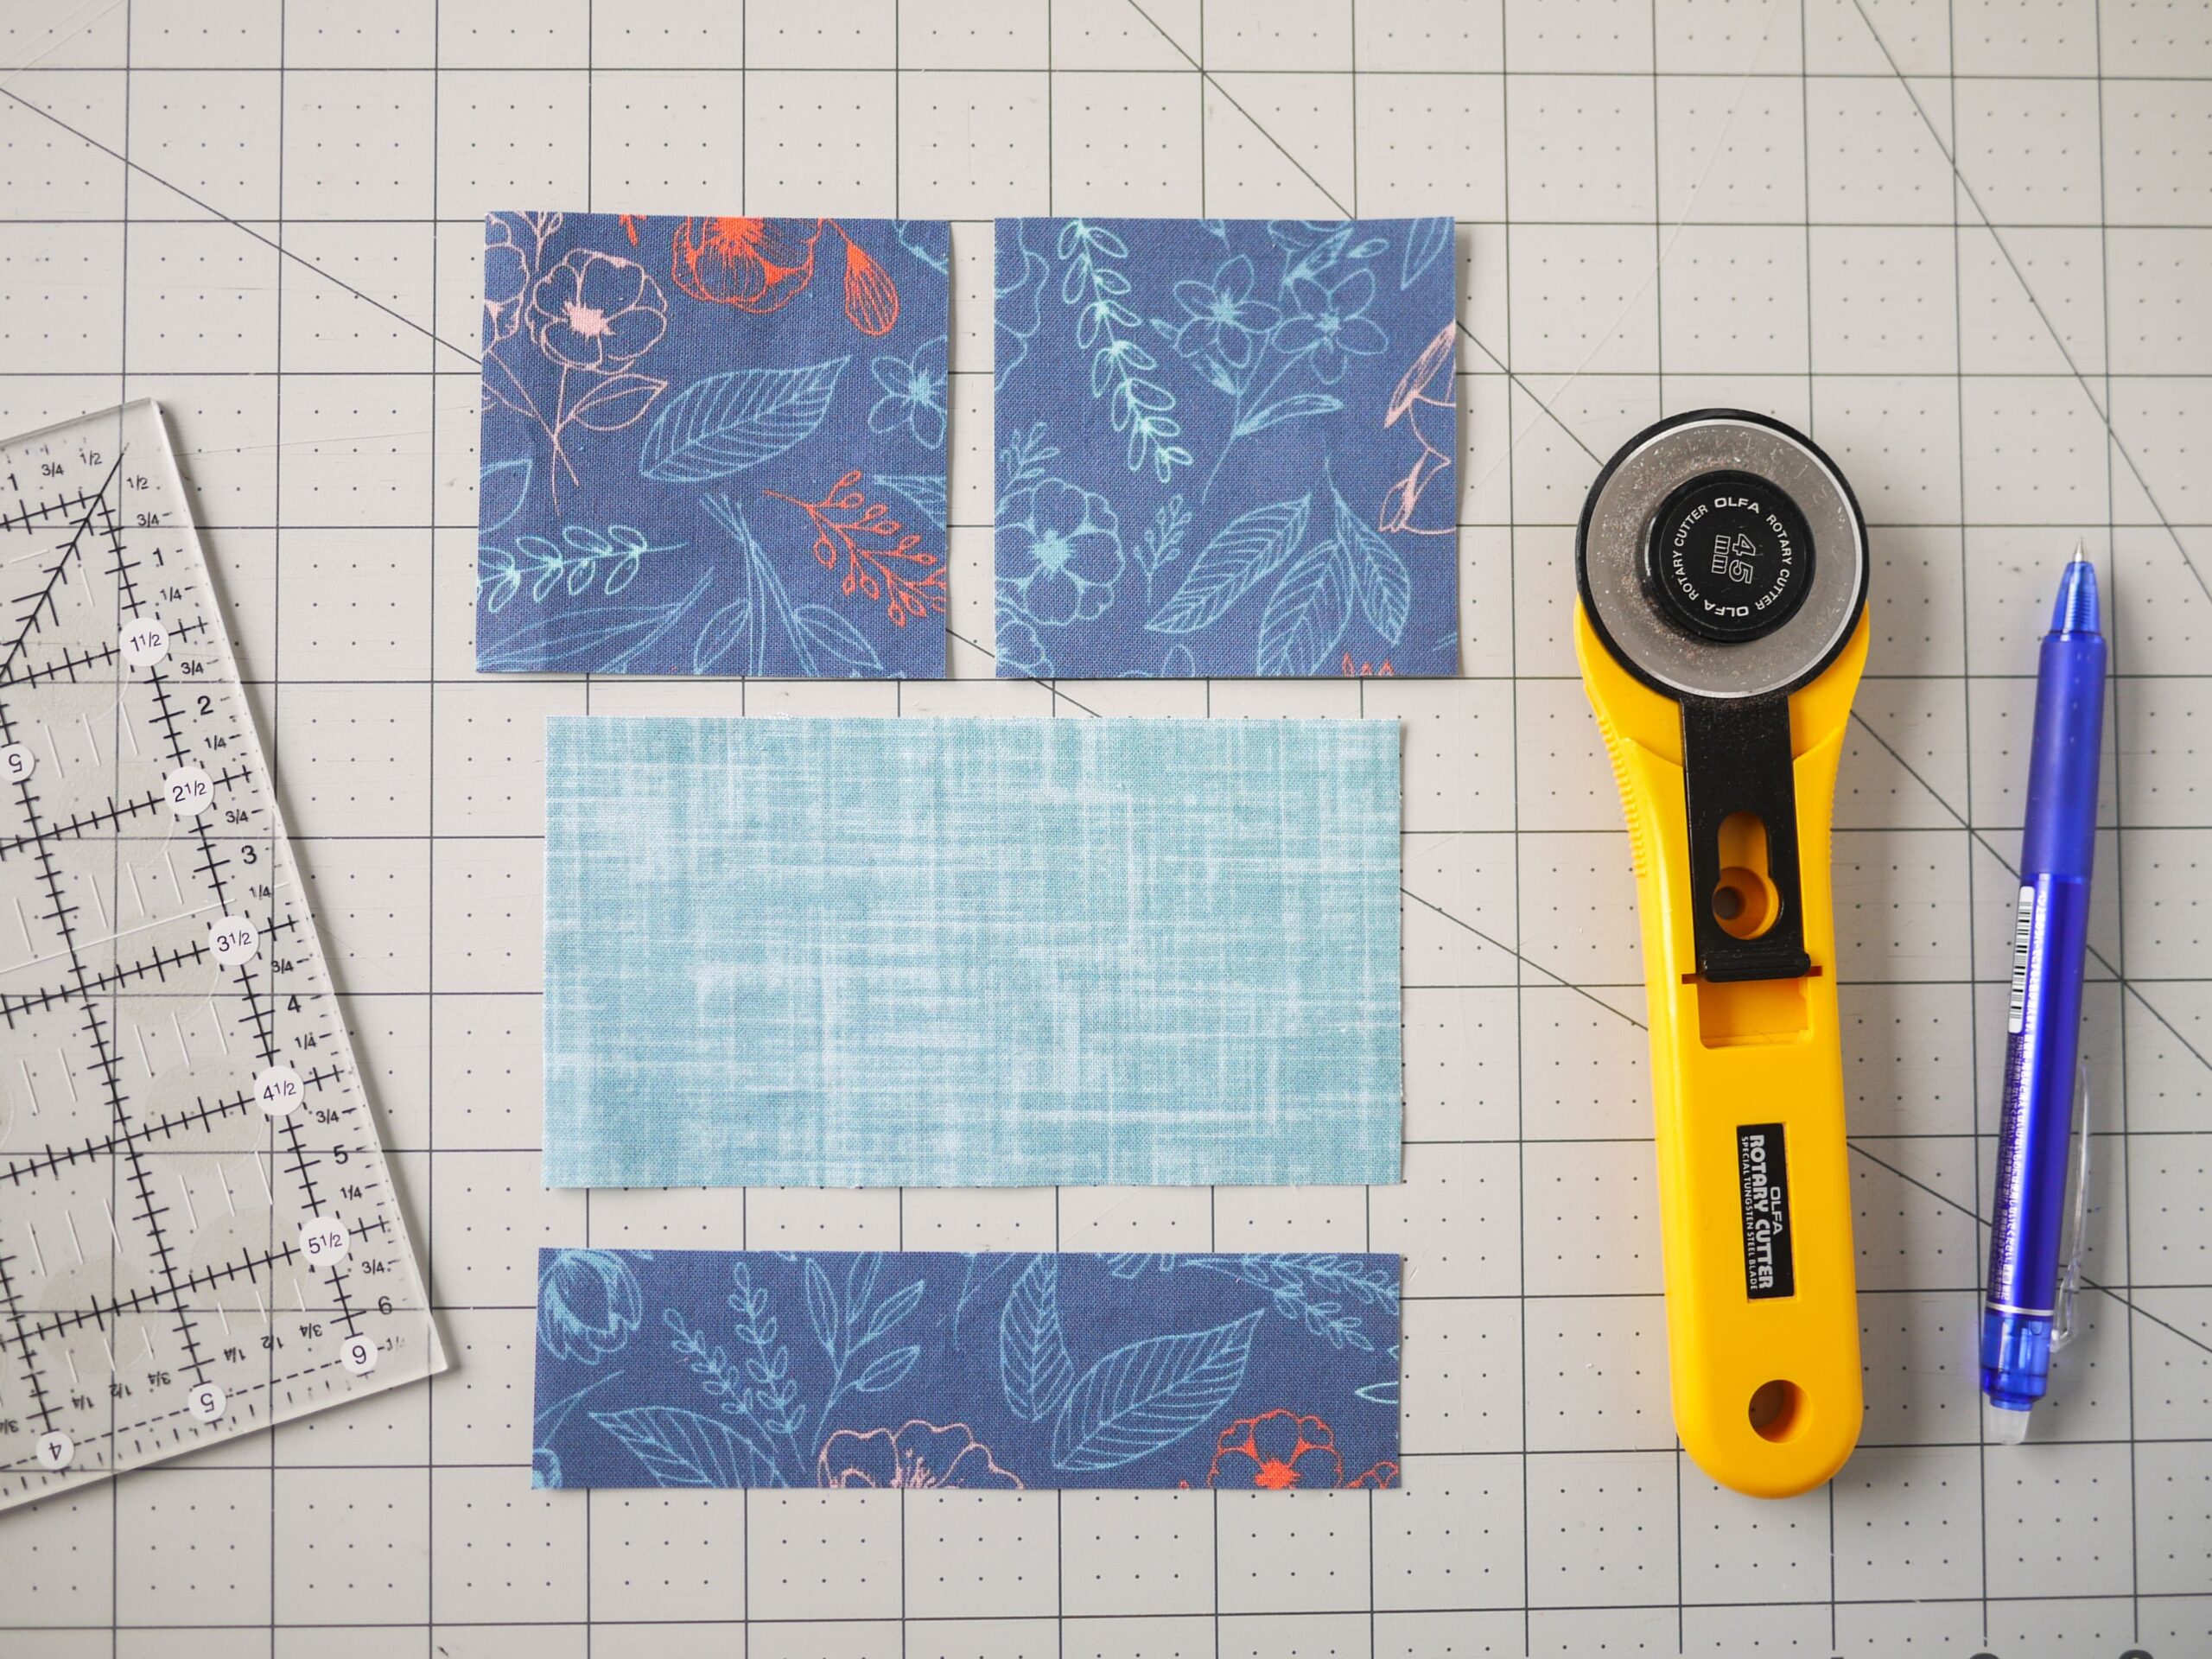
Step 1. Prep Your Closed Envelope Block Fabric
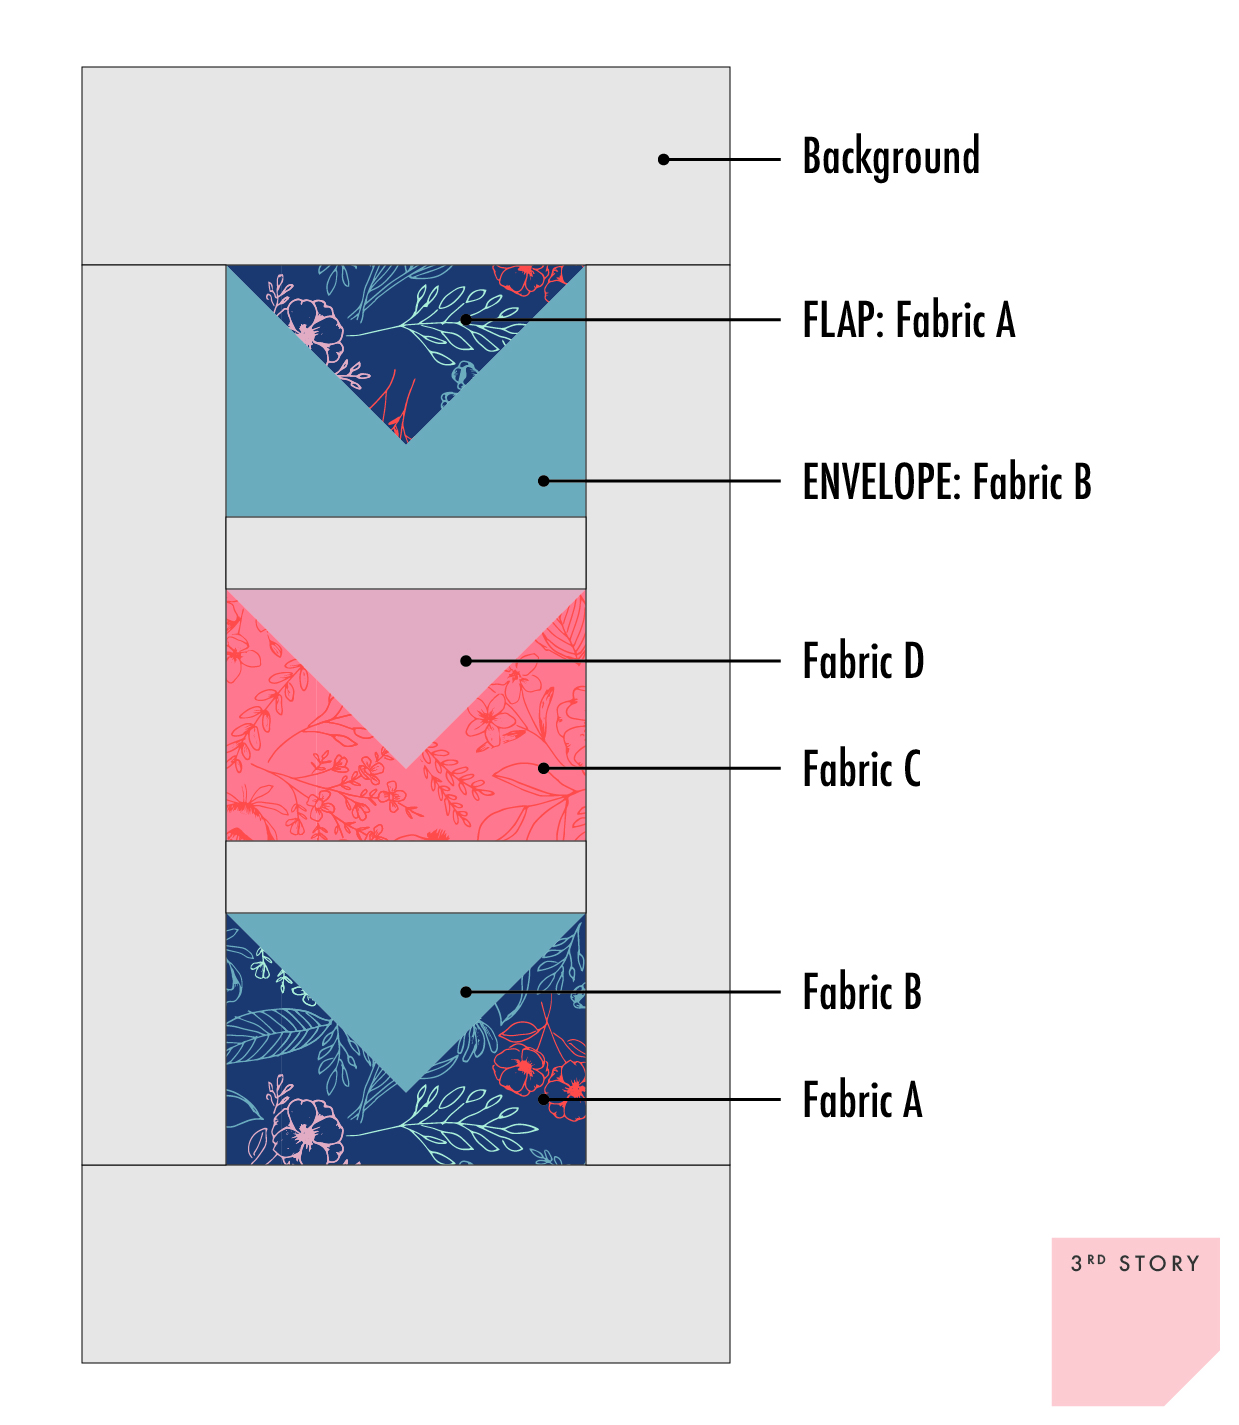
This pillow/mini quilt project calls for THREE envelopes. For EACH envelope, cut:
Main envelope fabric:
- (2x) 3″ (8 cm) squares
- (1x) 1.5″ x 5.5″ (4 x 14 cm) rectangle
Envelope “flap” fabric:
- (1x) 3″ x 5.5″ (8 x 14 cm) rectangle
To put the three envelopes together, cut the background fabric:
- (2x) 3.25″ x 9.5″ (8.5 x 24.5 cm) rectangles
- (2x) 2.5″ x 13″ (6.5 x 33 cm) rectangles
- (2x) 1.5″ x 5.5″ (8 x 14 cm) rectangles
Step 2. Make The Flying Geese Quilt Block
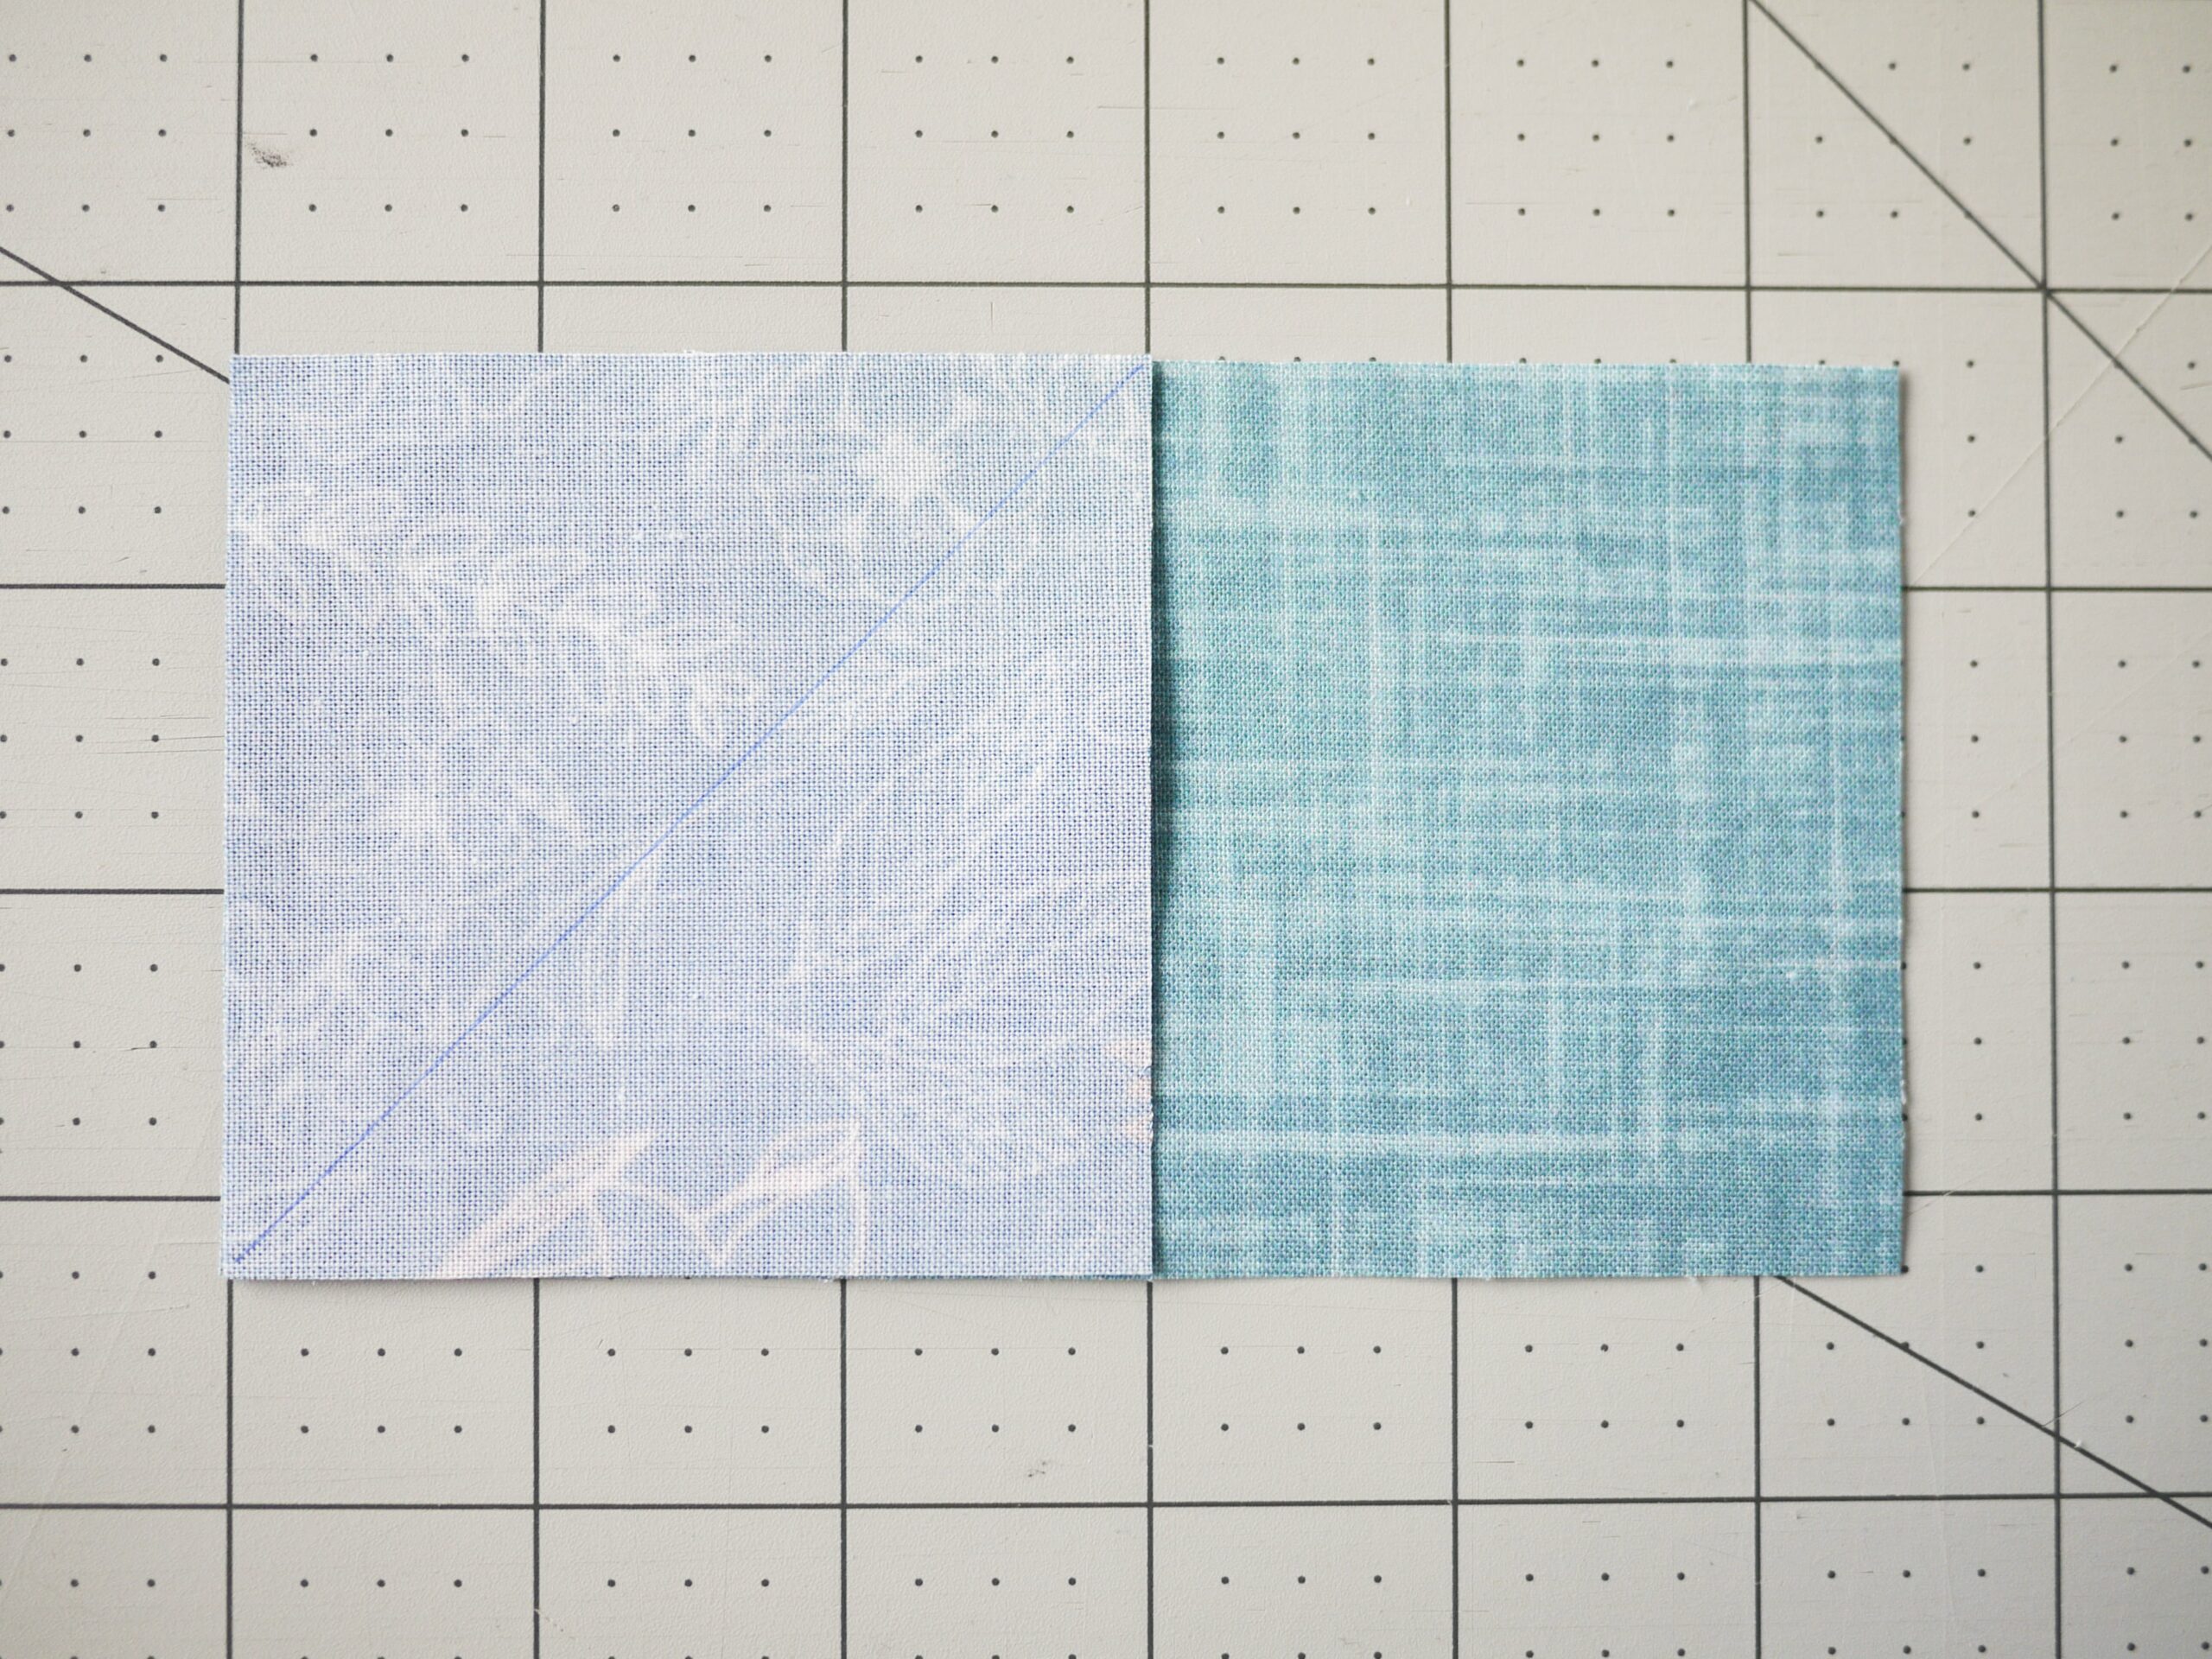
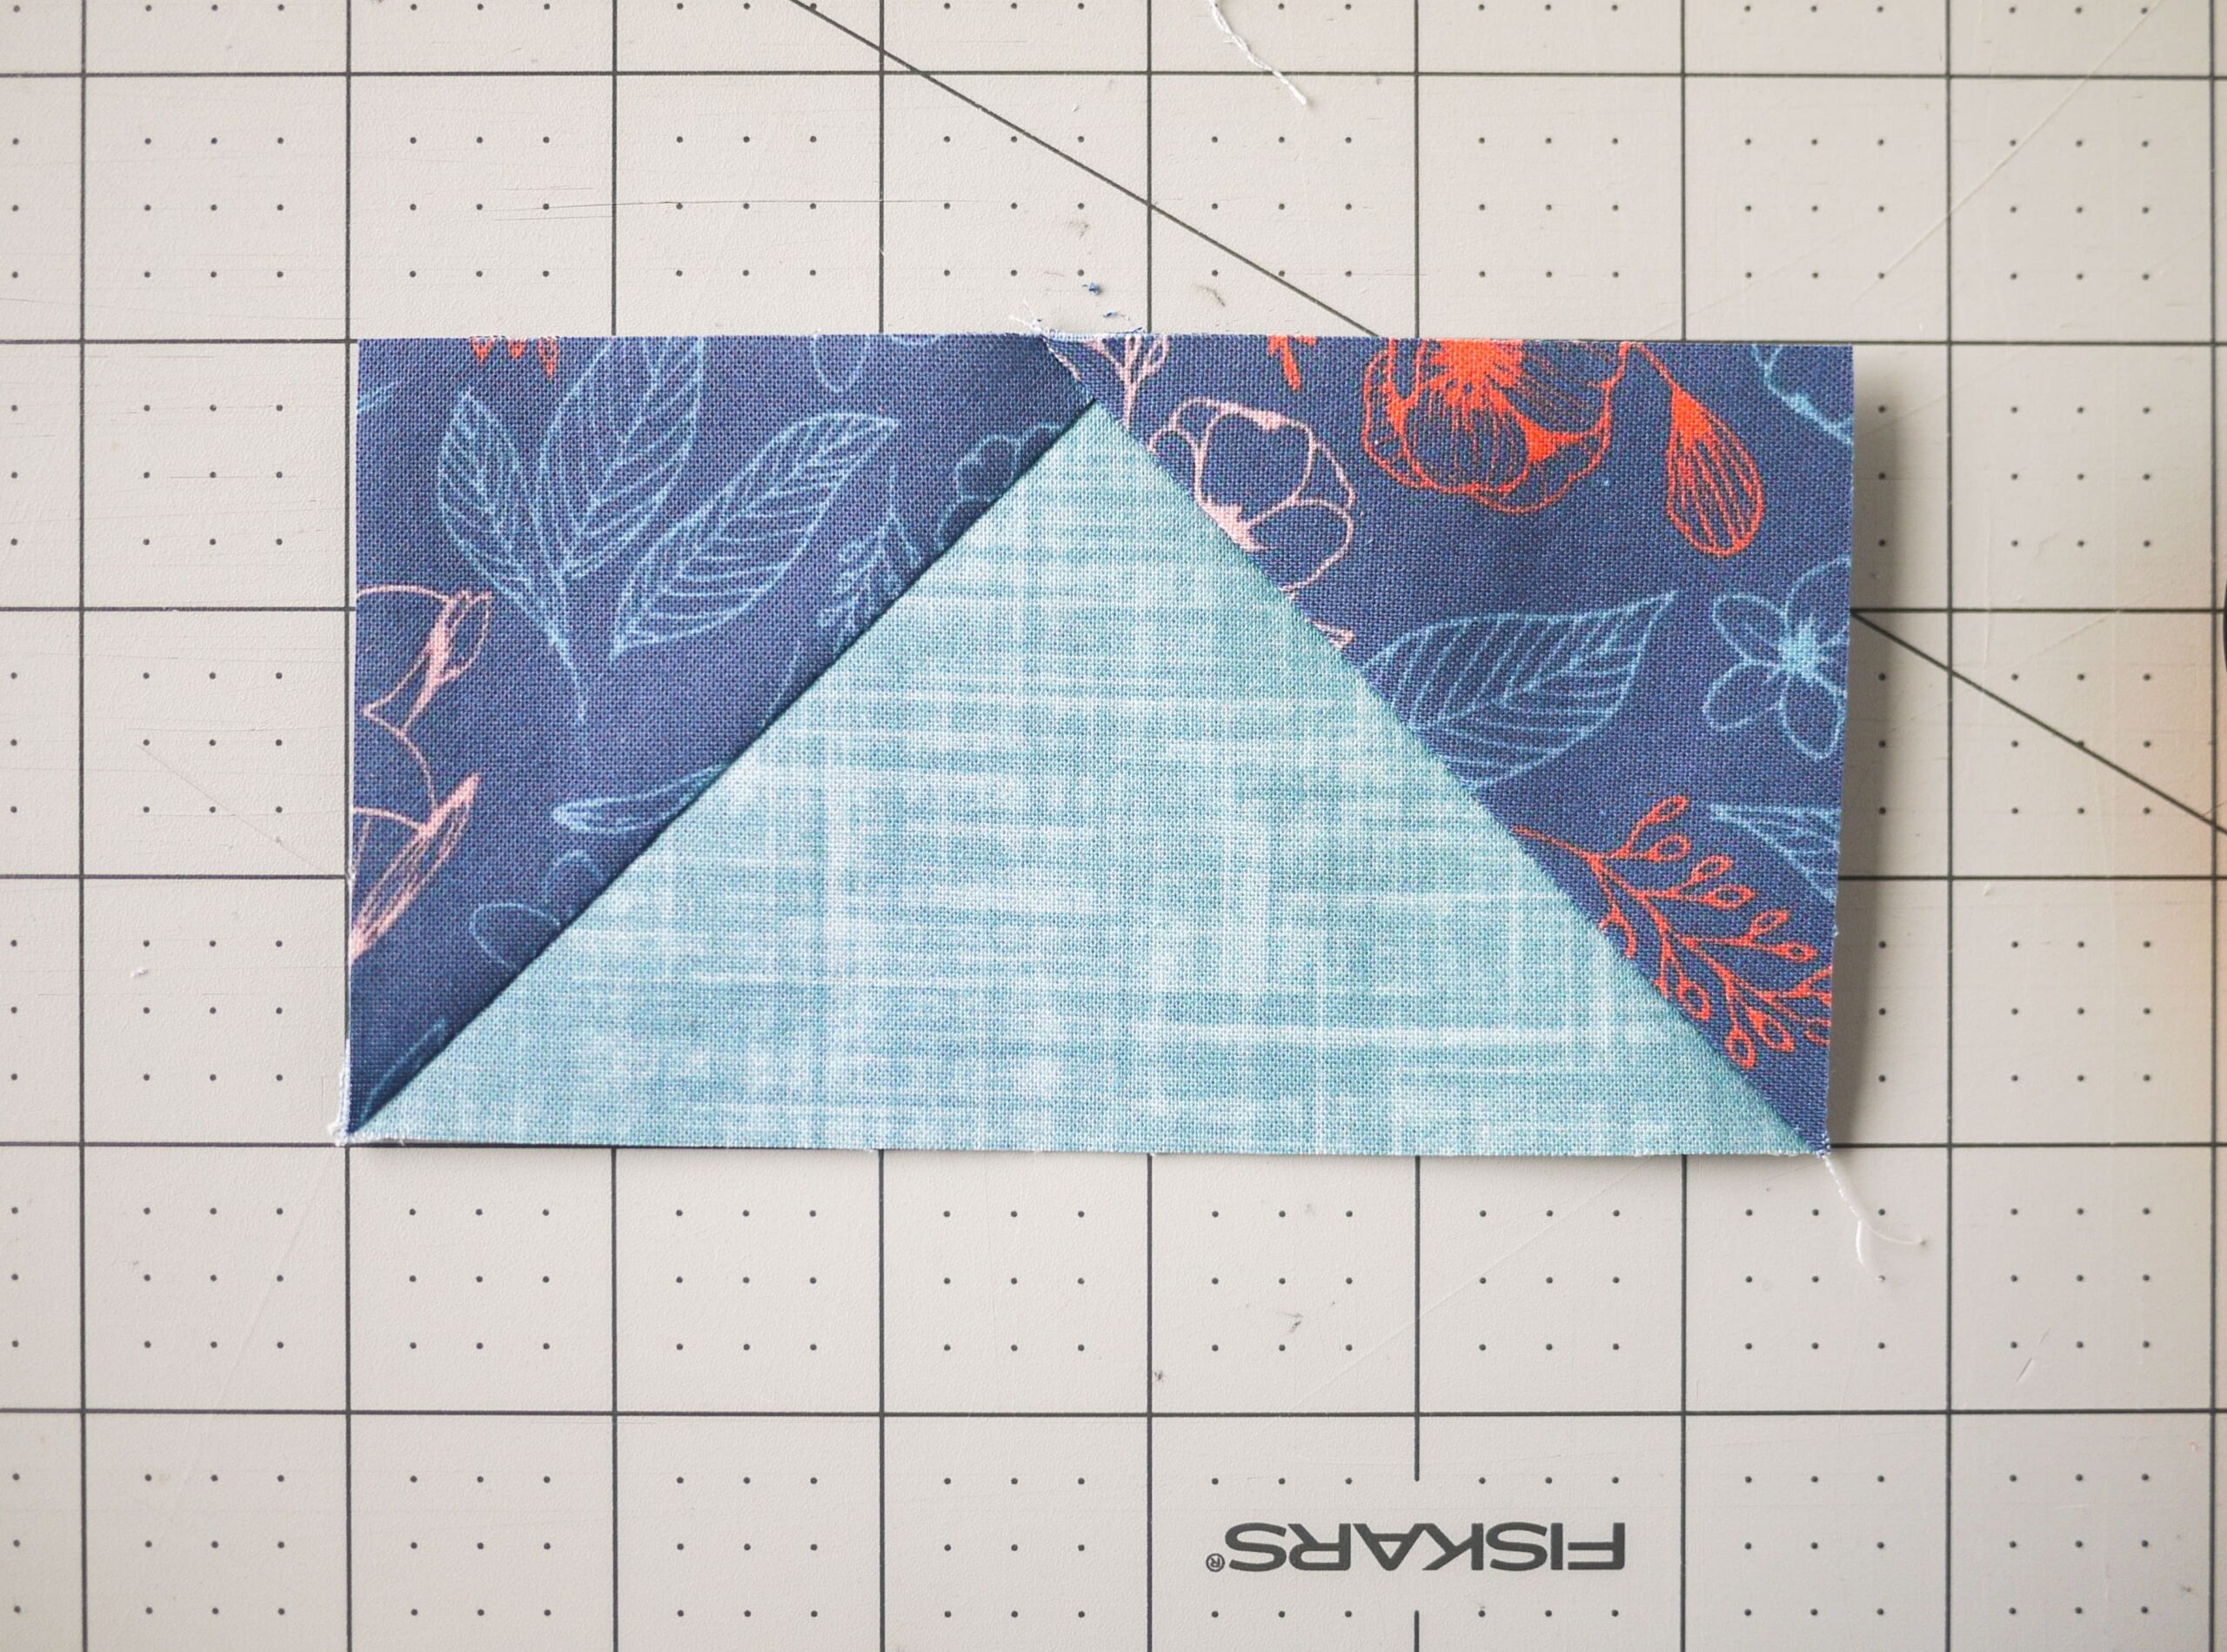
Mark a diagonal line on the black of both 3″ (8 cm) squares of main envelope fabric.
With the wrong sides together, place one of the 3″ (8 cm) squares on top of the “flap” fabric, aligning the edges.
Sew along the marked line.
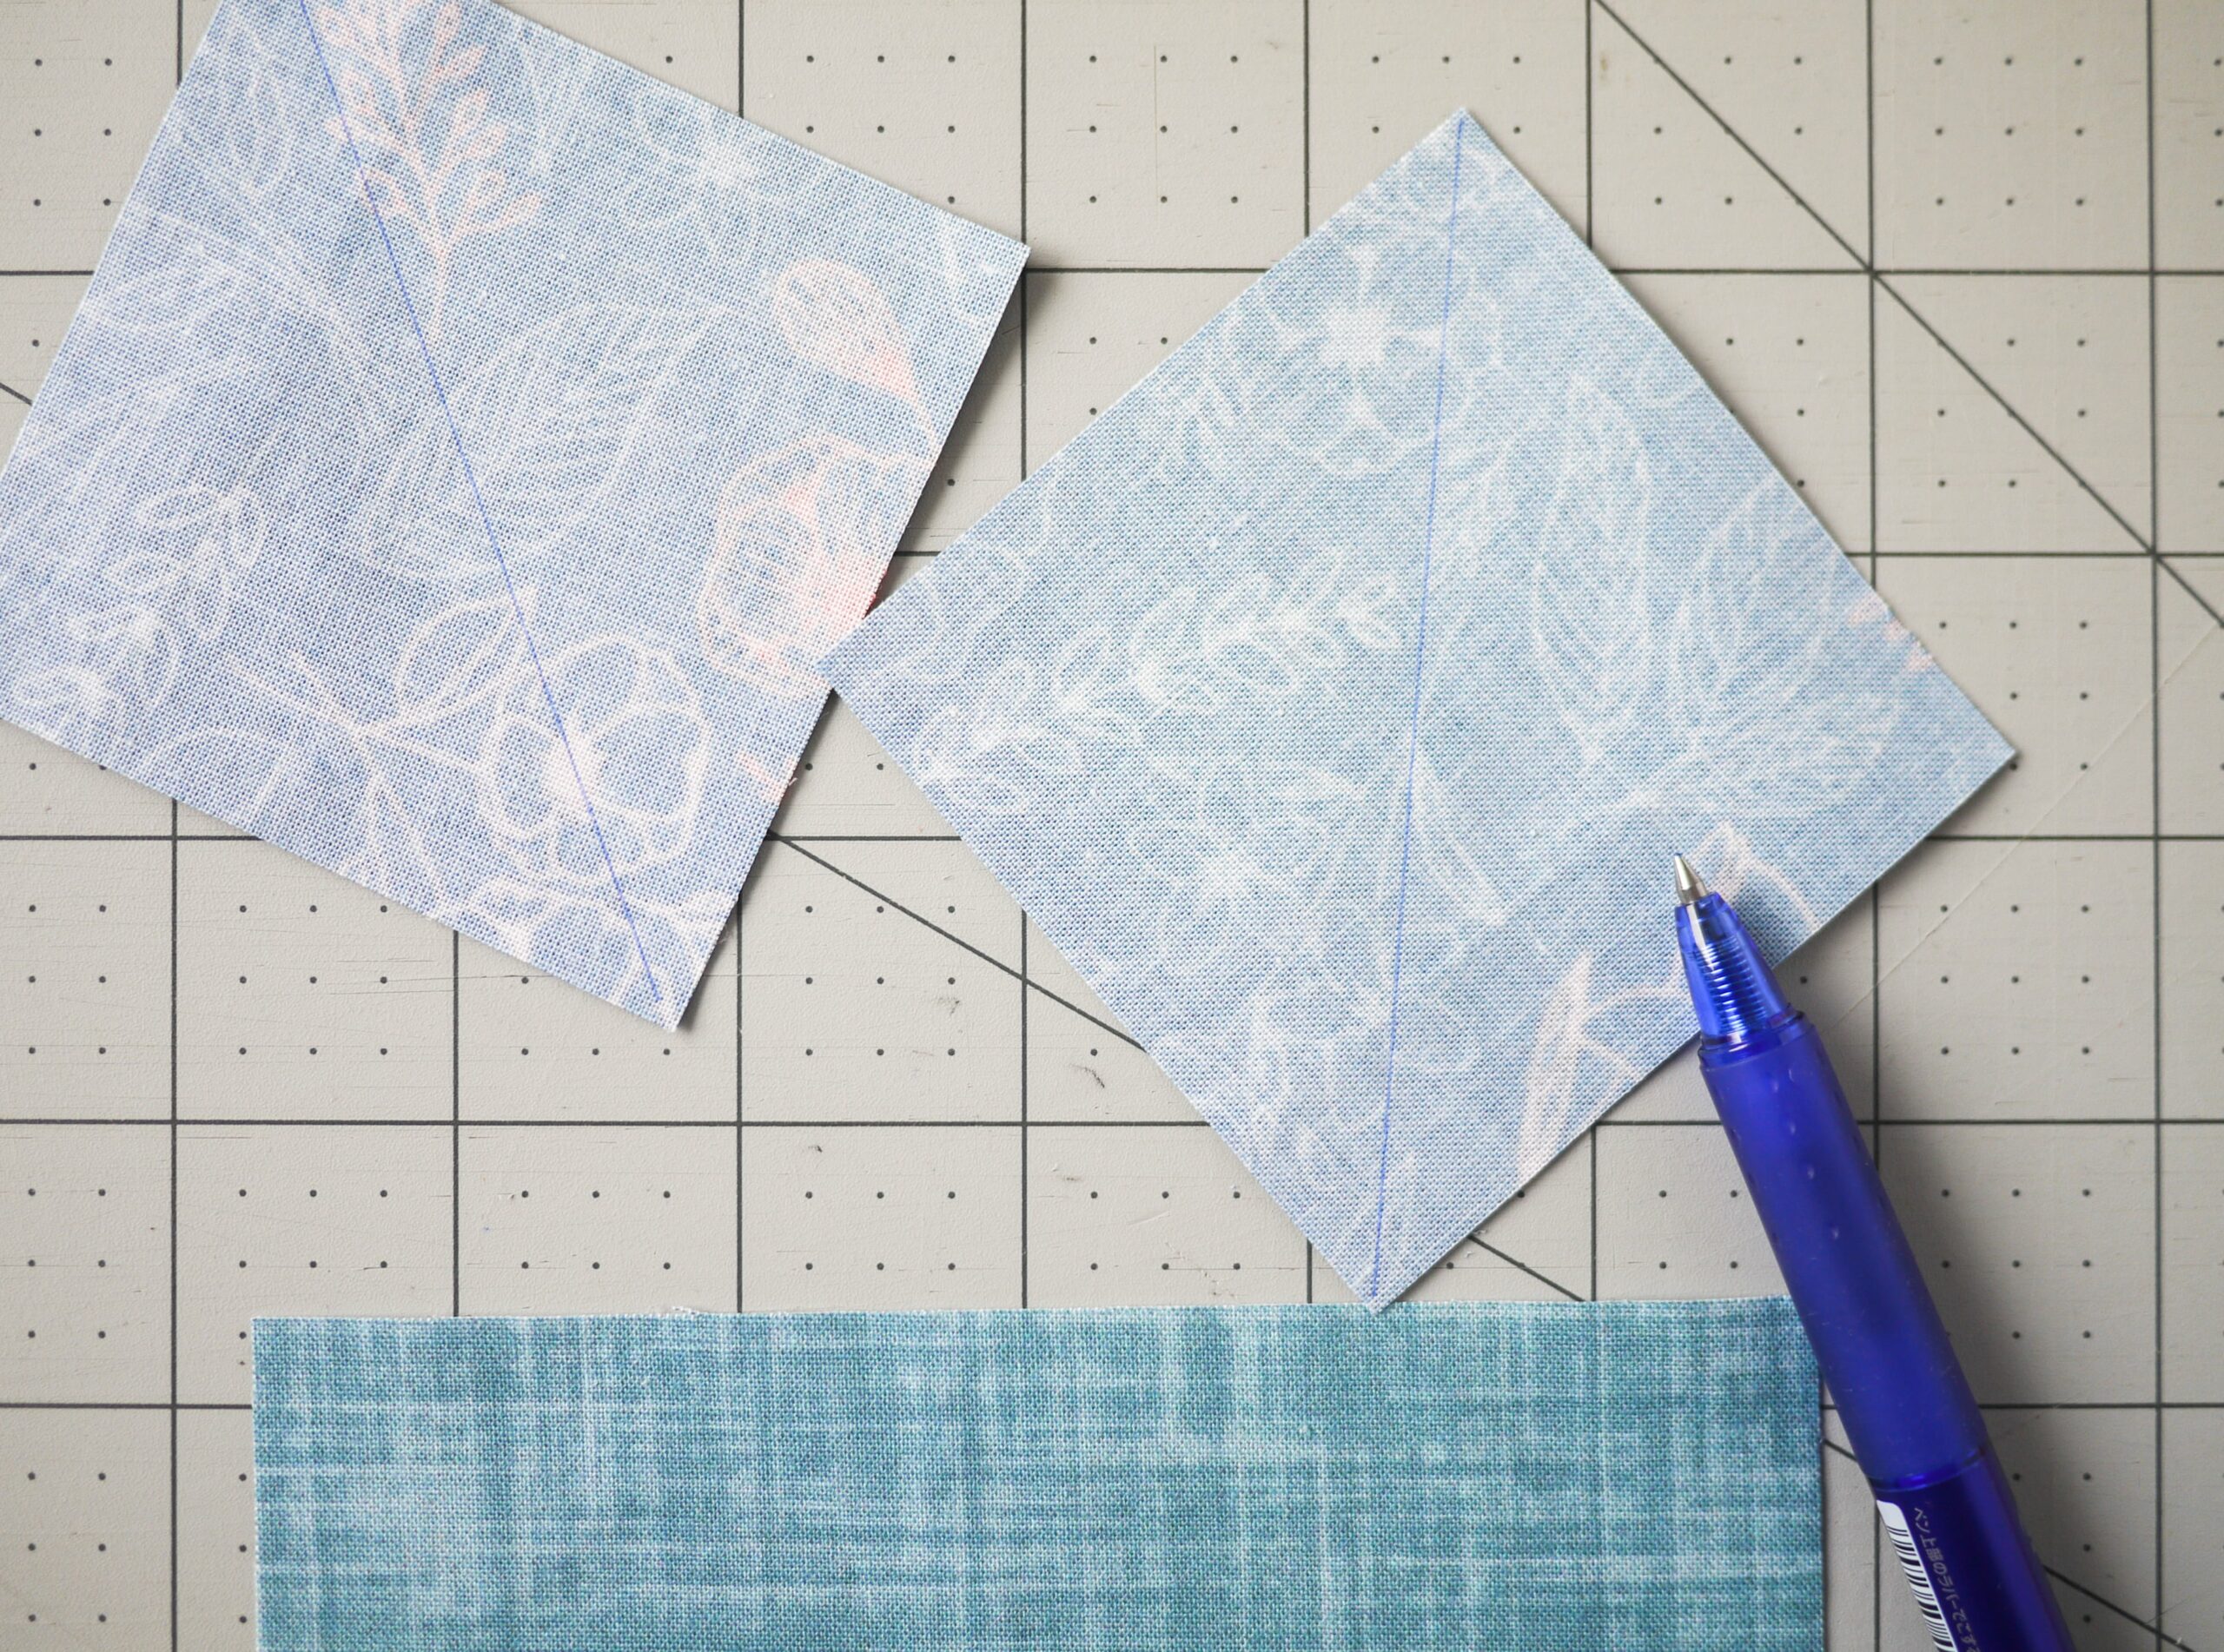
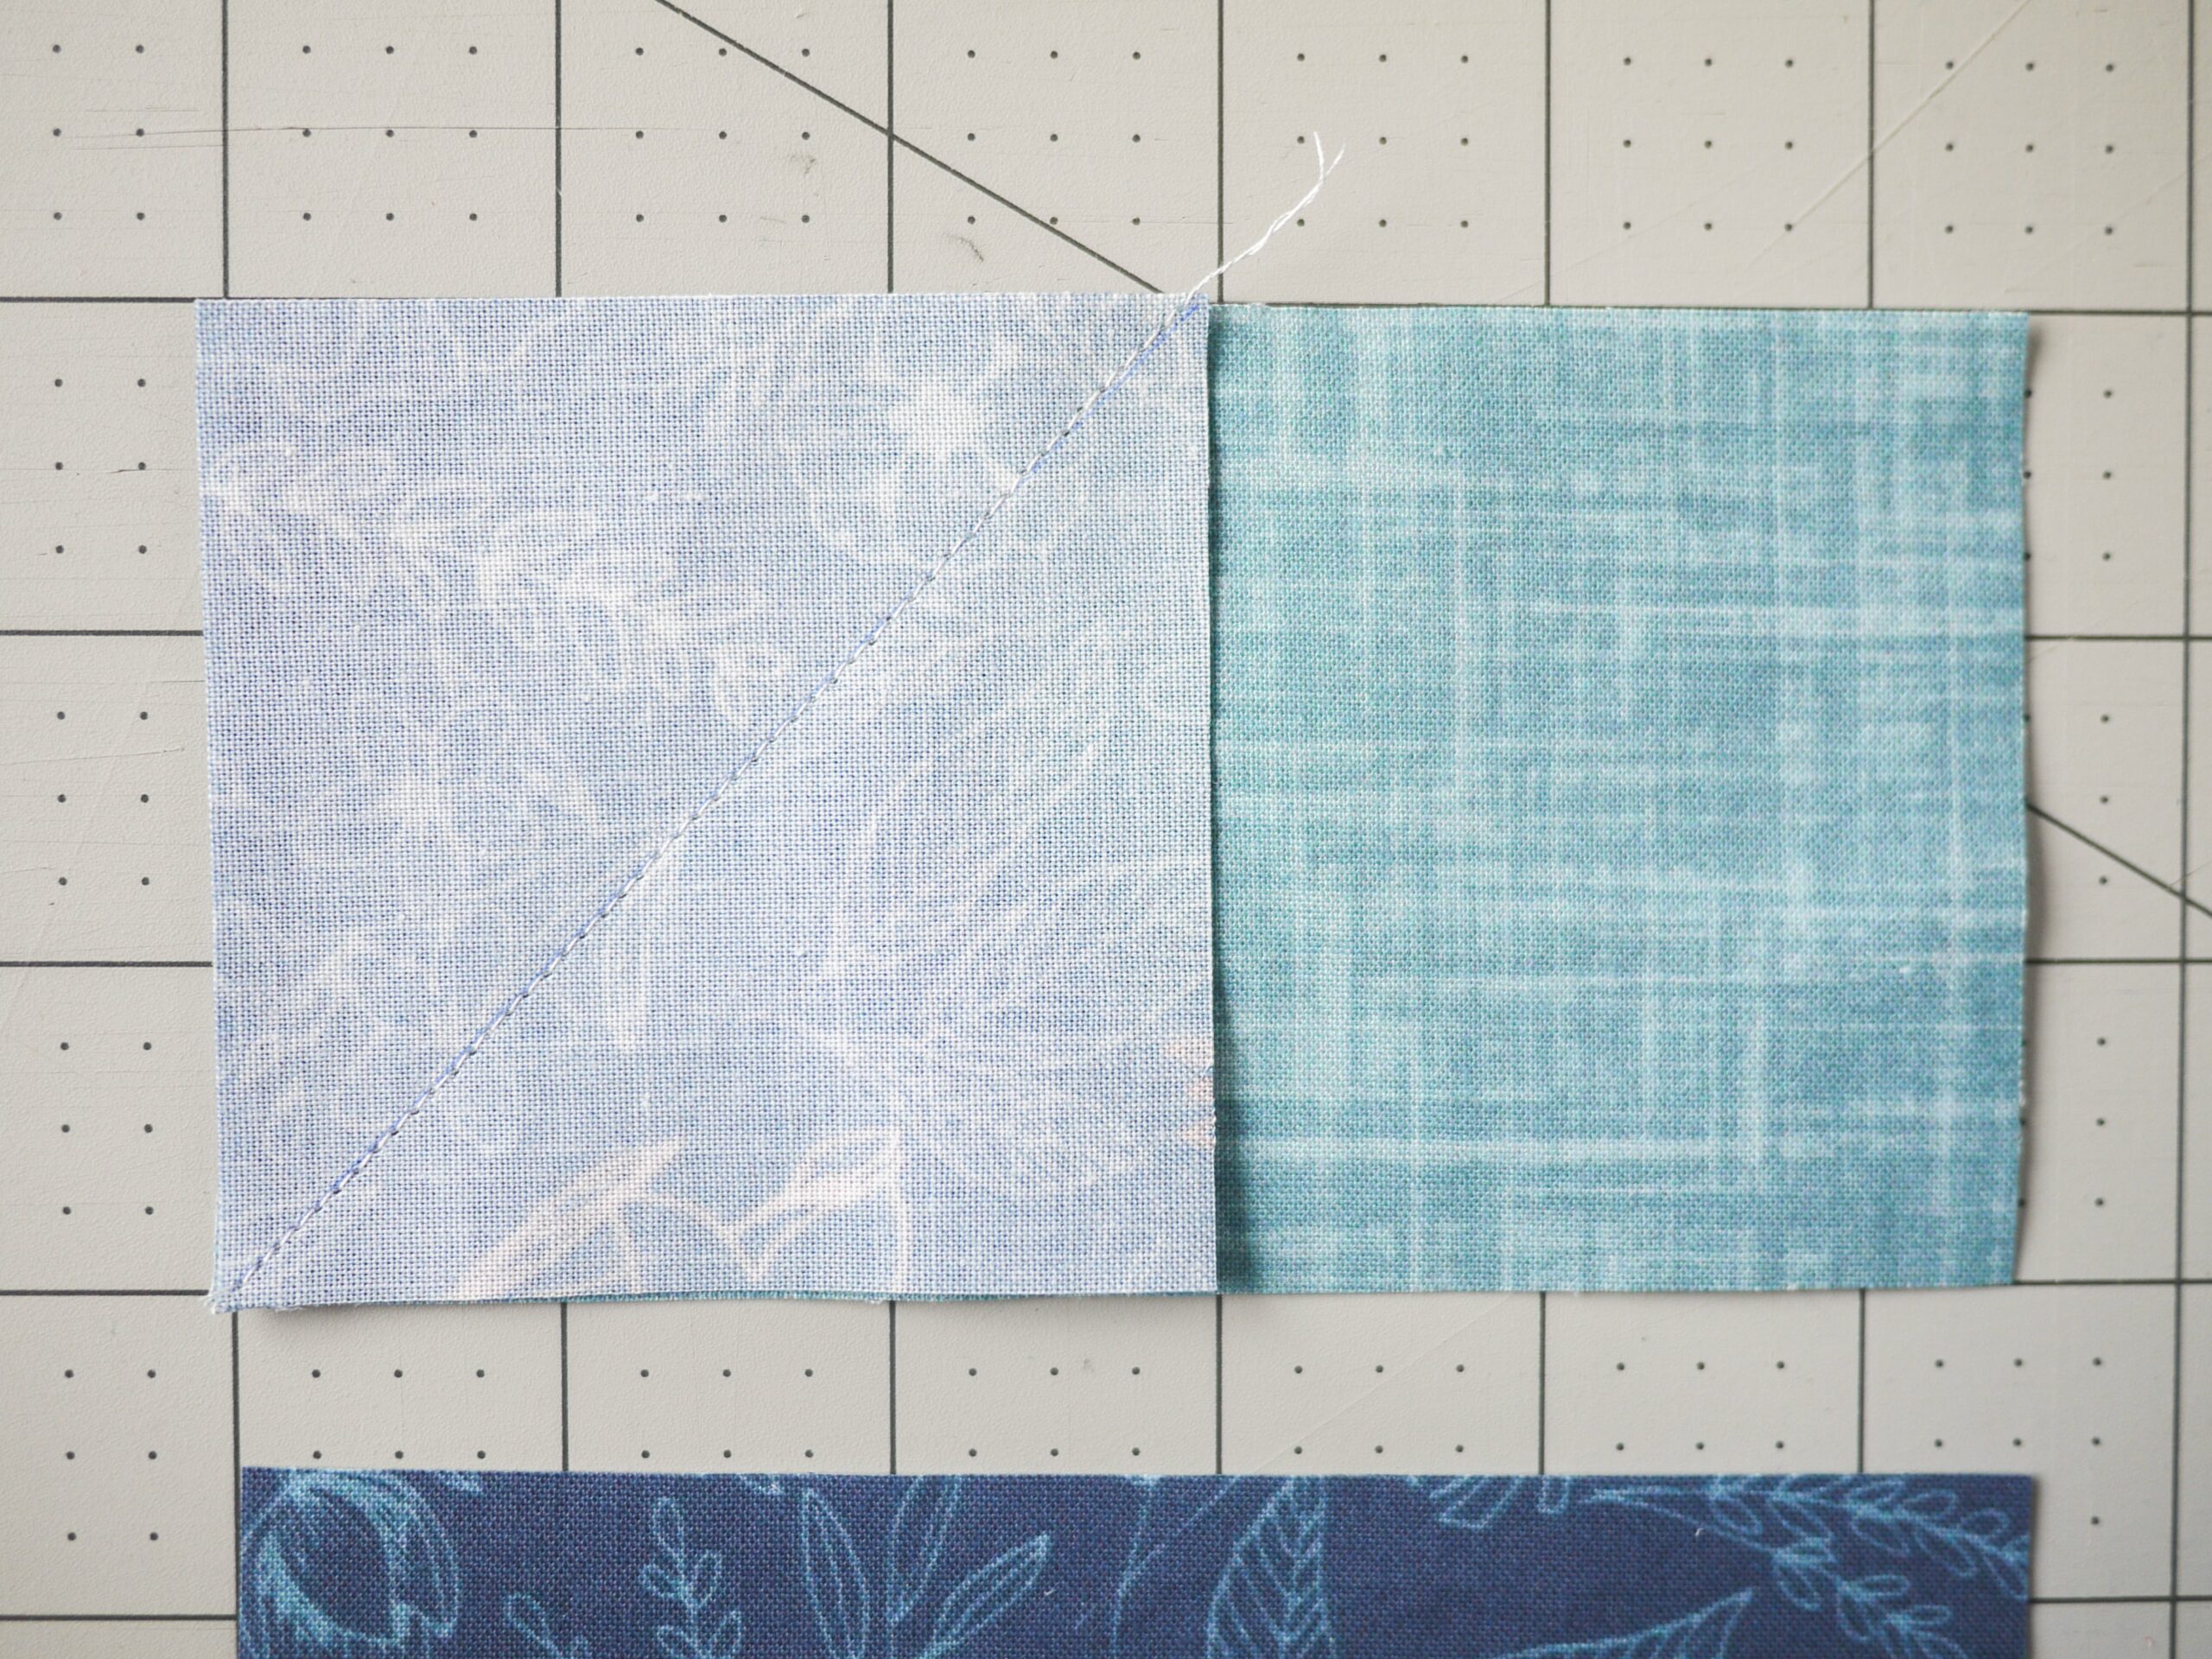
Trim off the corners 1/4″ (2/3 cm) away from the stitch line and press the seam toward the main envelope fabric.
Repeat with the other 3″ (8 cm) square of main envelope fabric at the other end of the triangle. Note the orientation of the diagonal line.
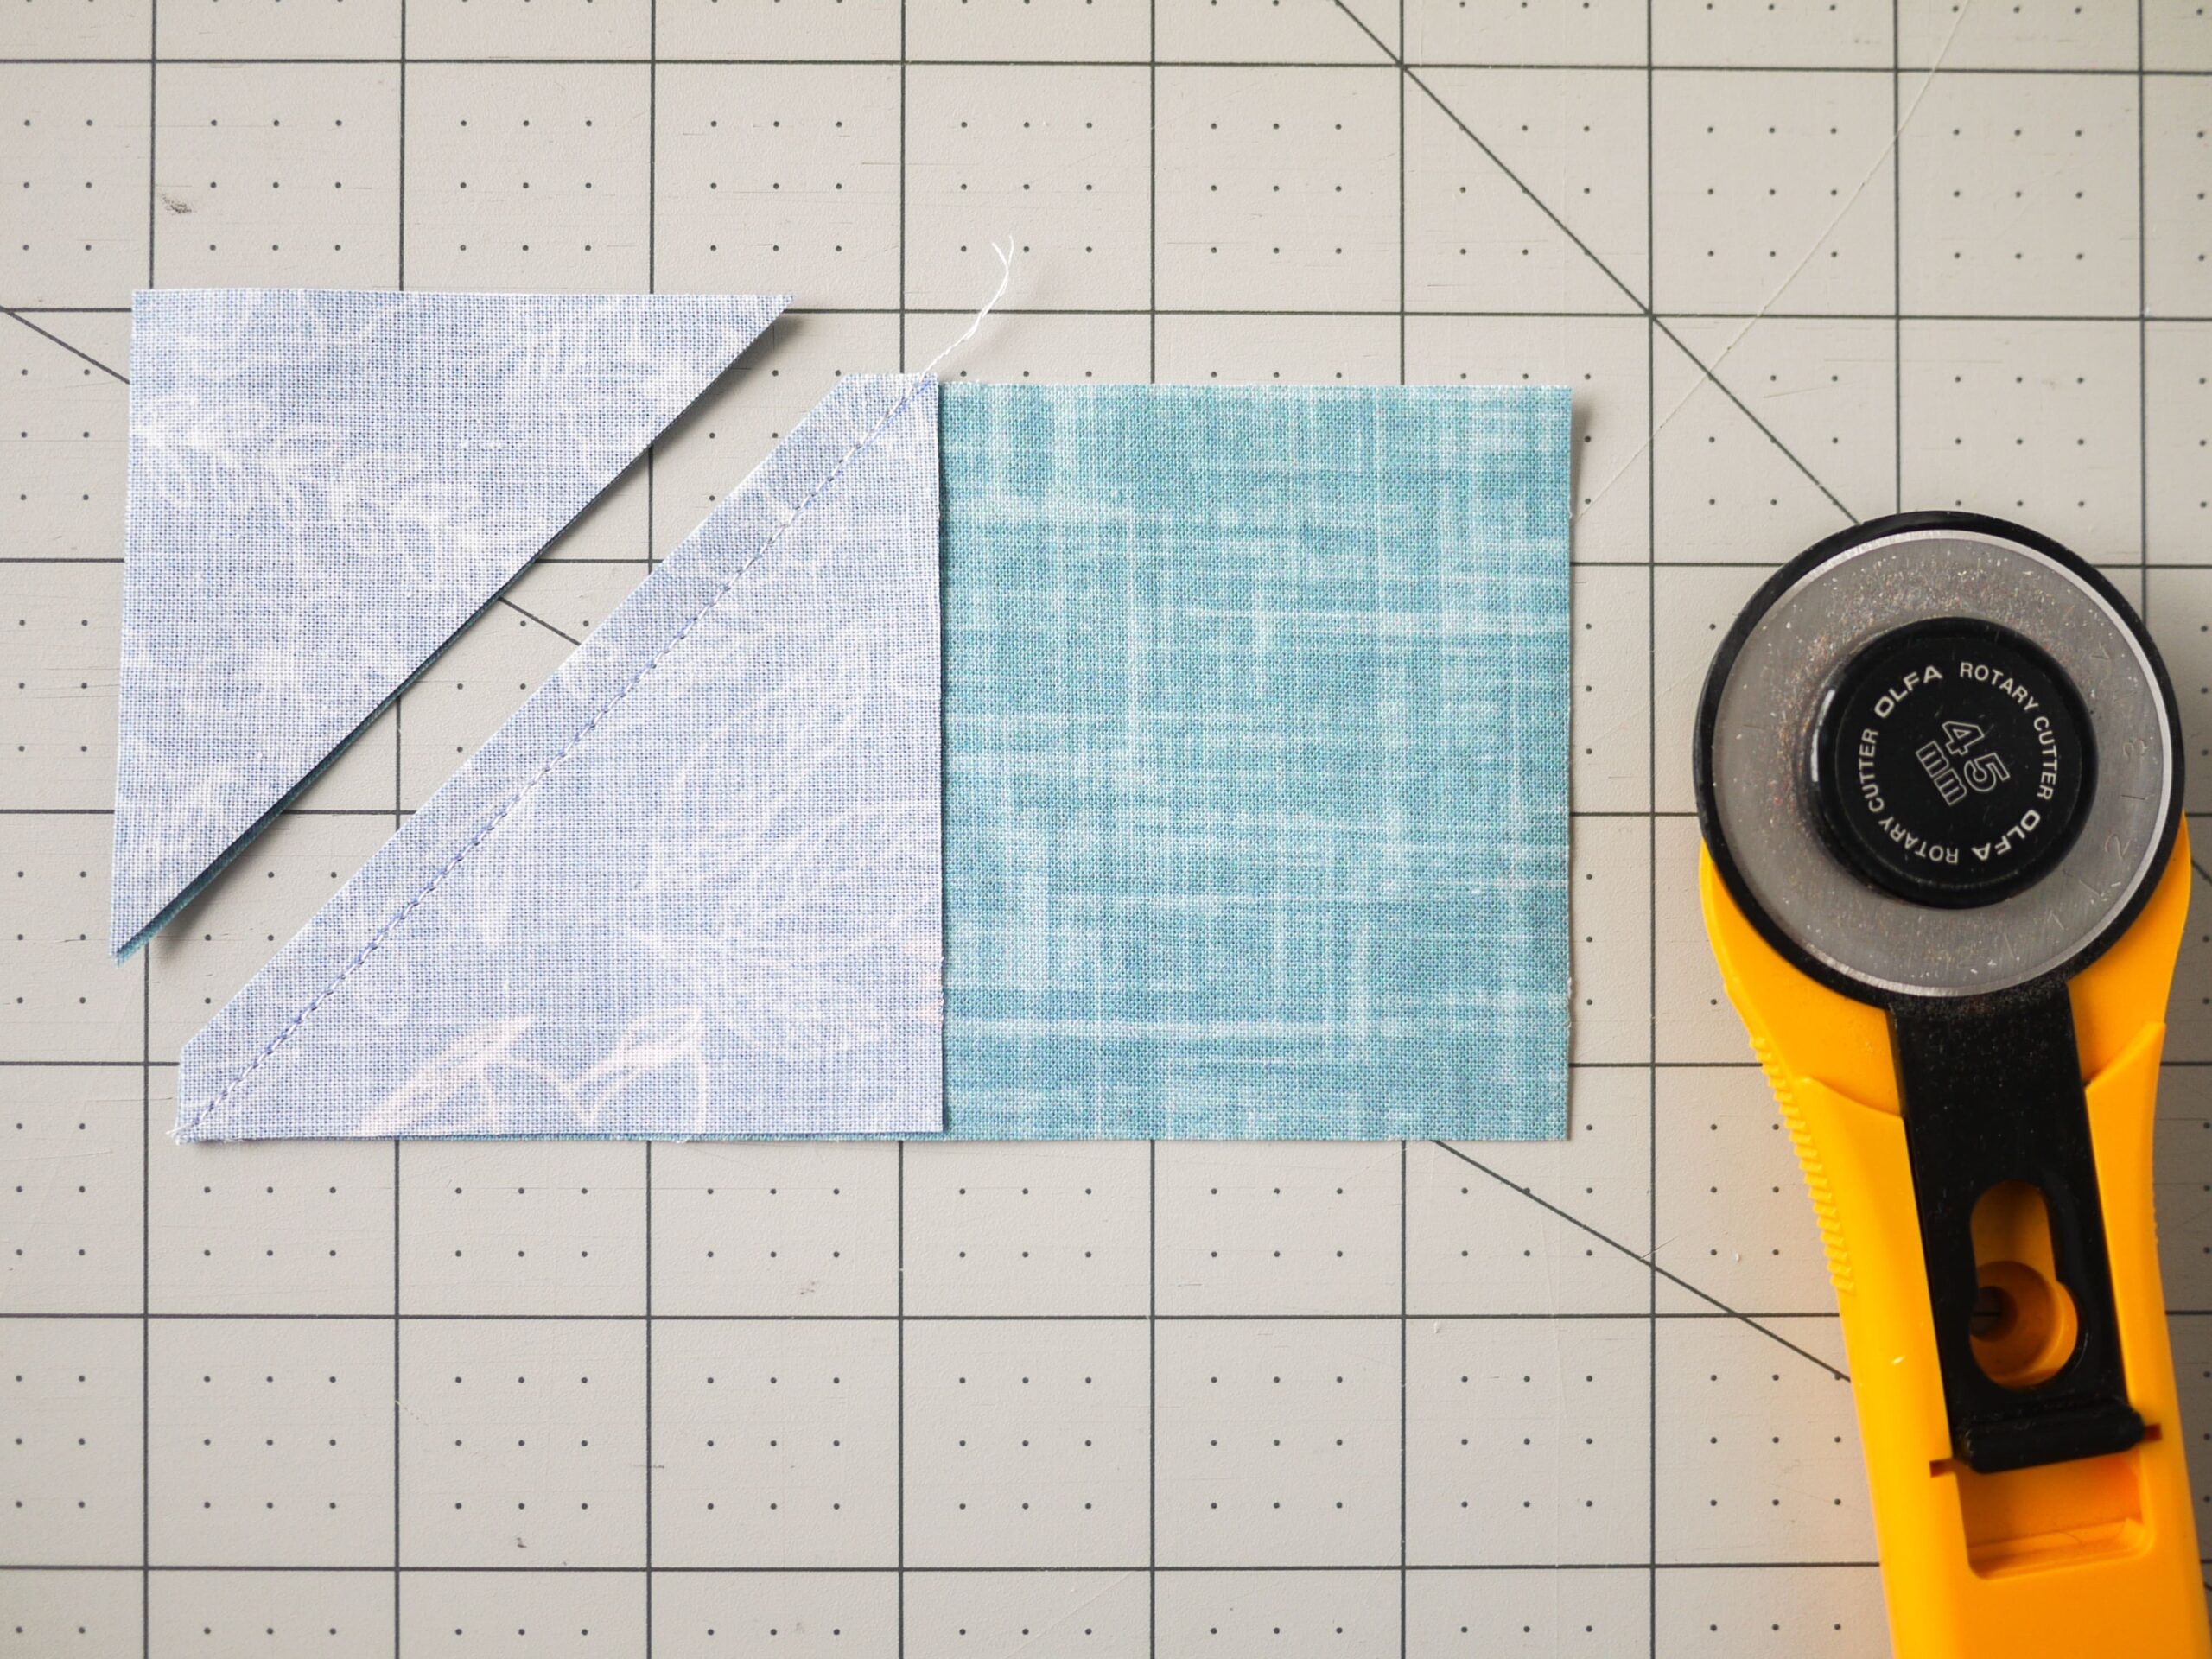
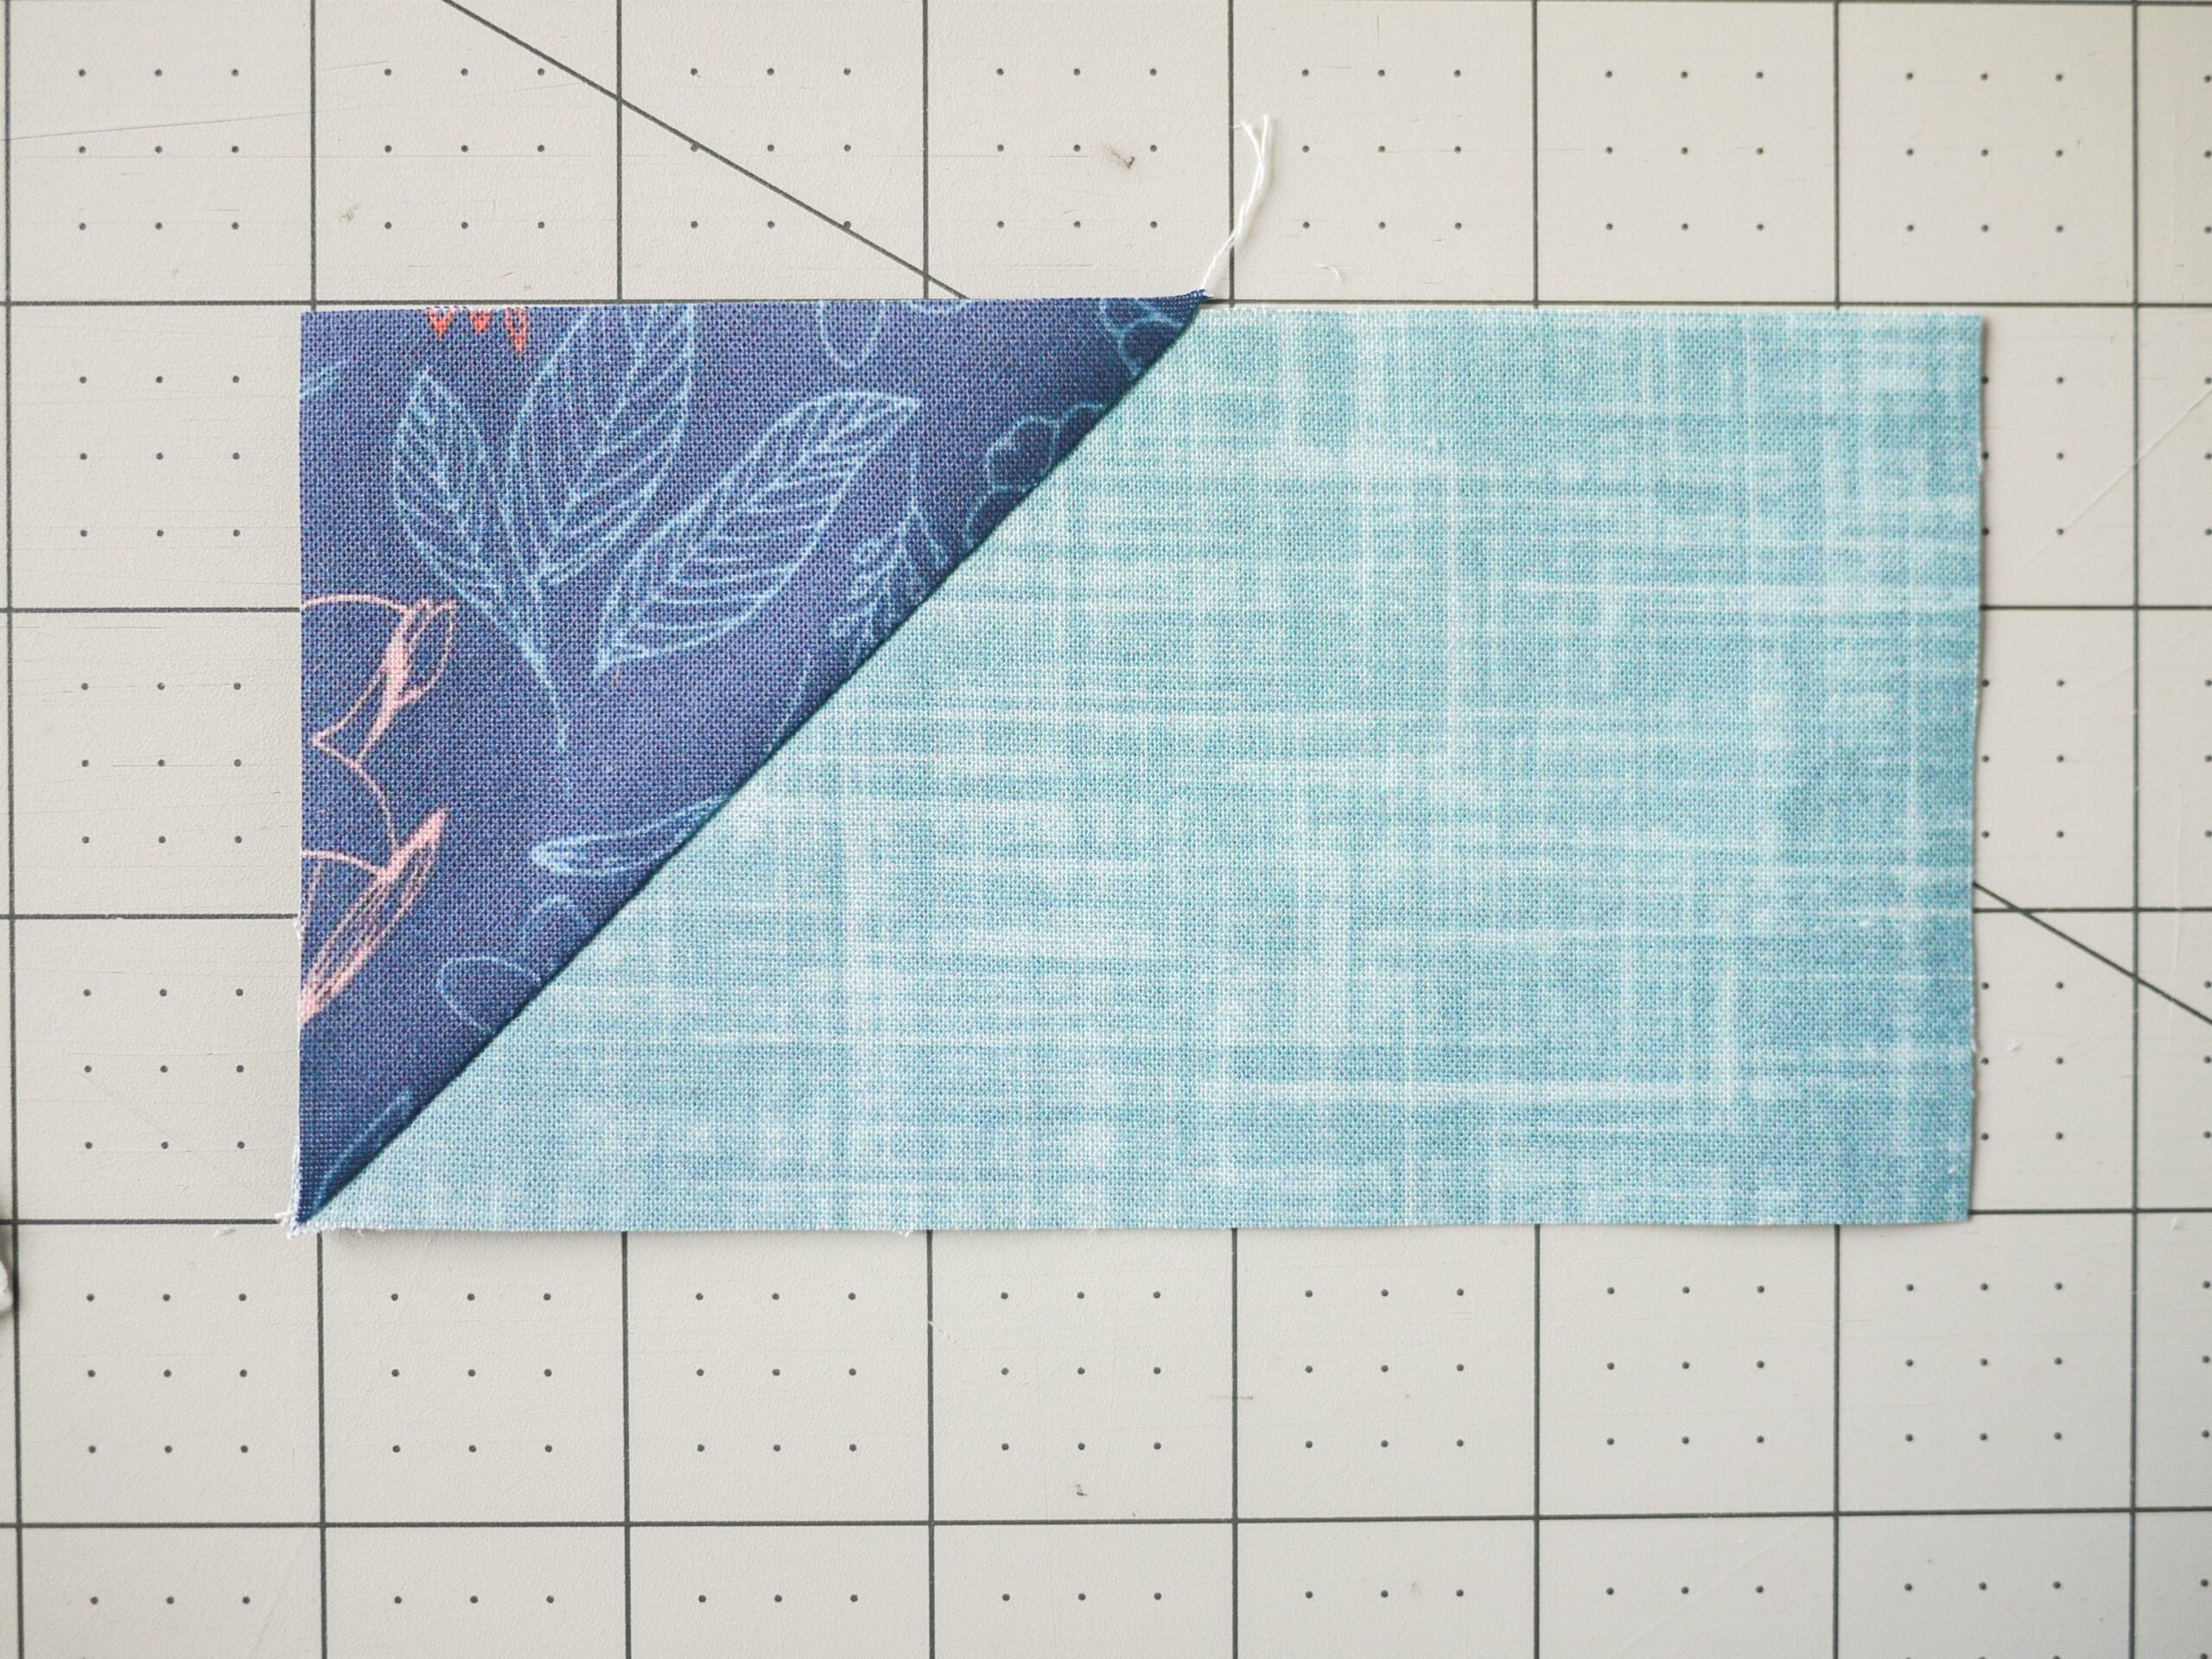


Voila! A flying geese block!
Love this classic flying geese block? You can make four-at-a-time no-waste flying geese—check out my tutorial!
Step 3. Make the Closed Envelope Quilt Block
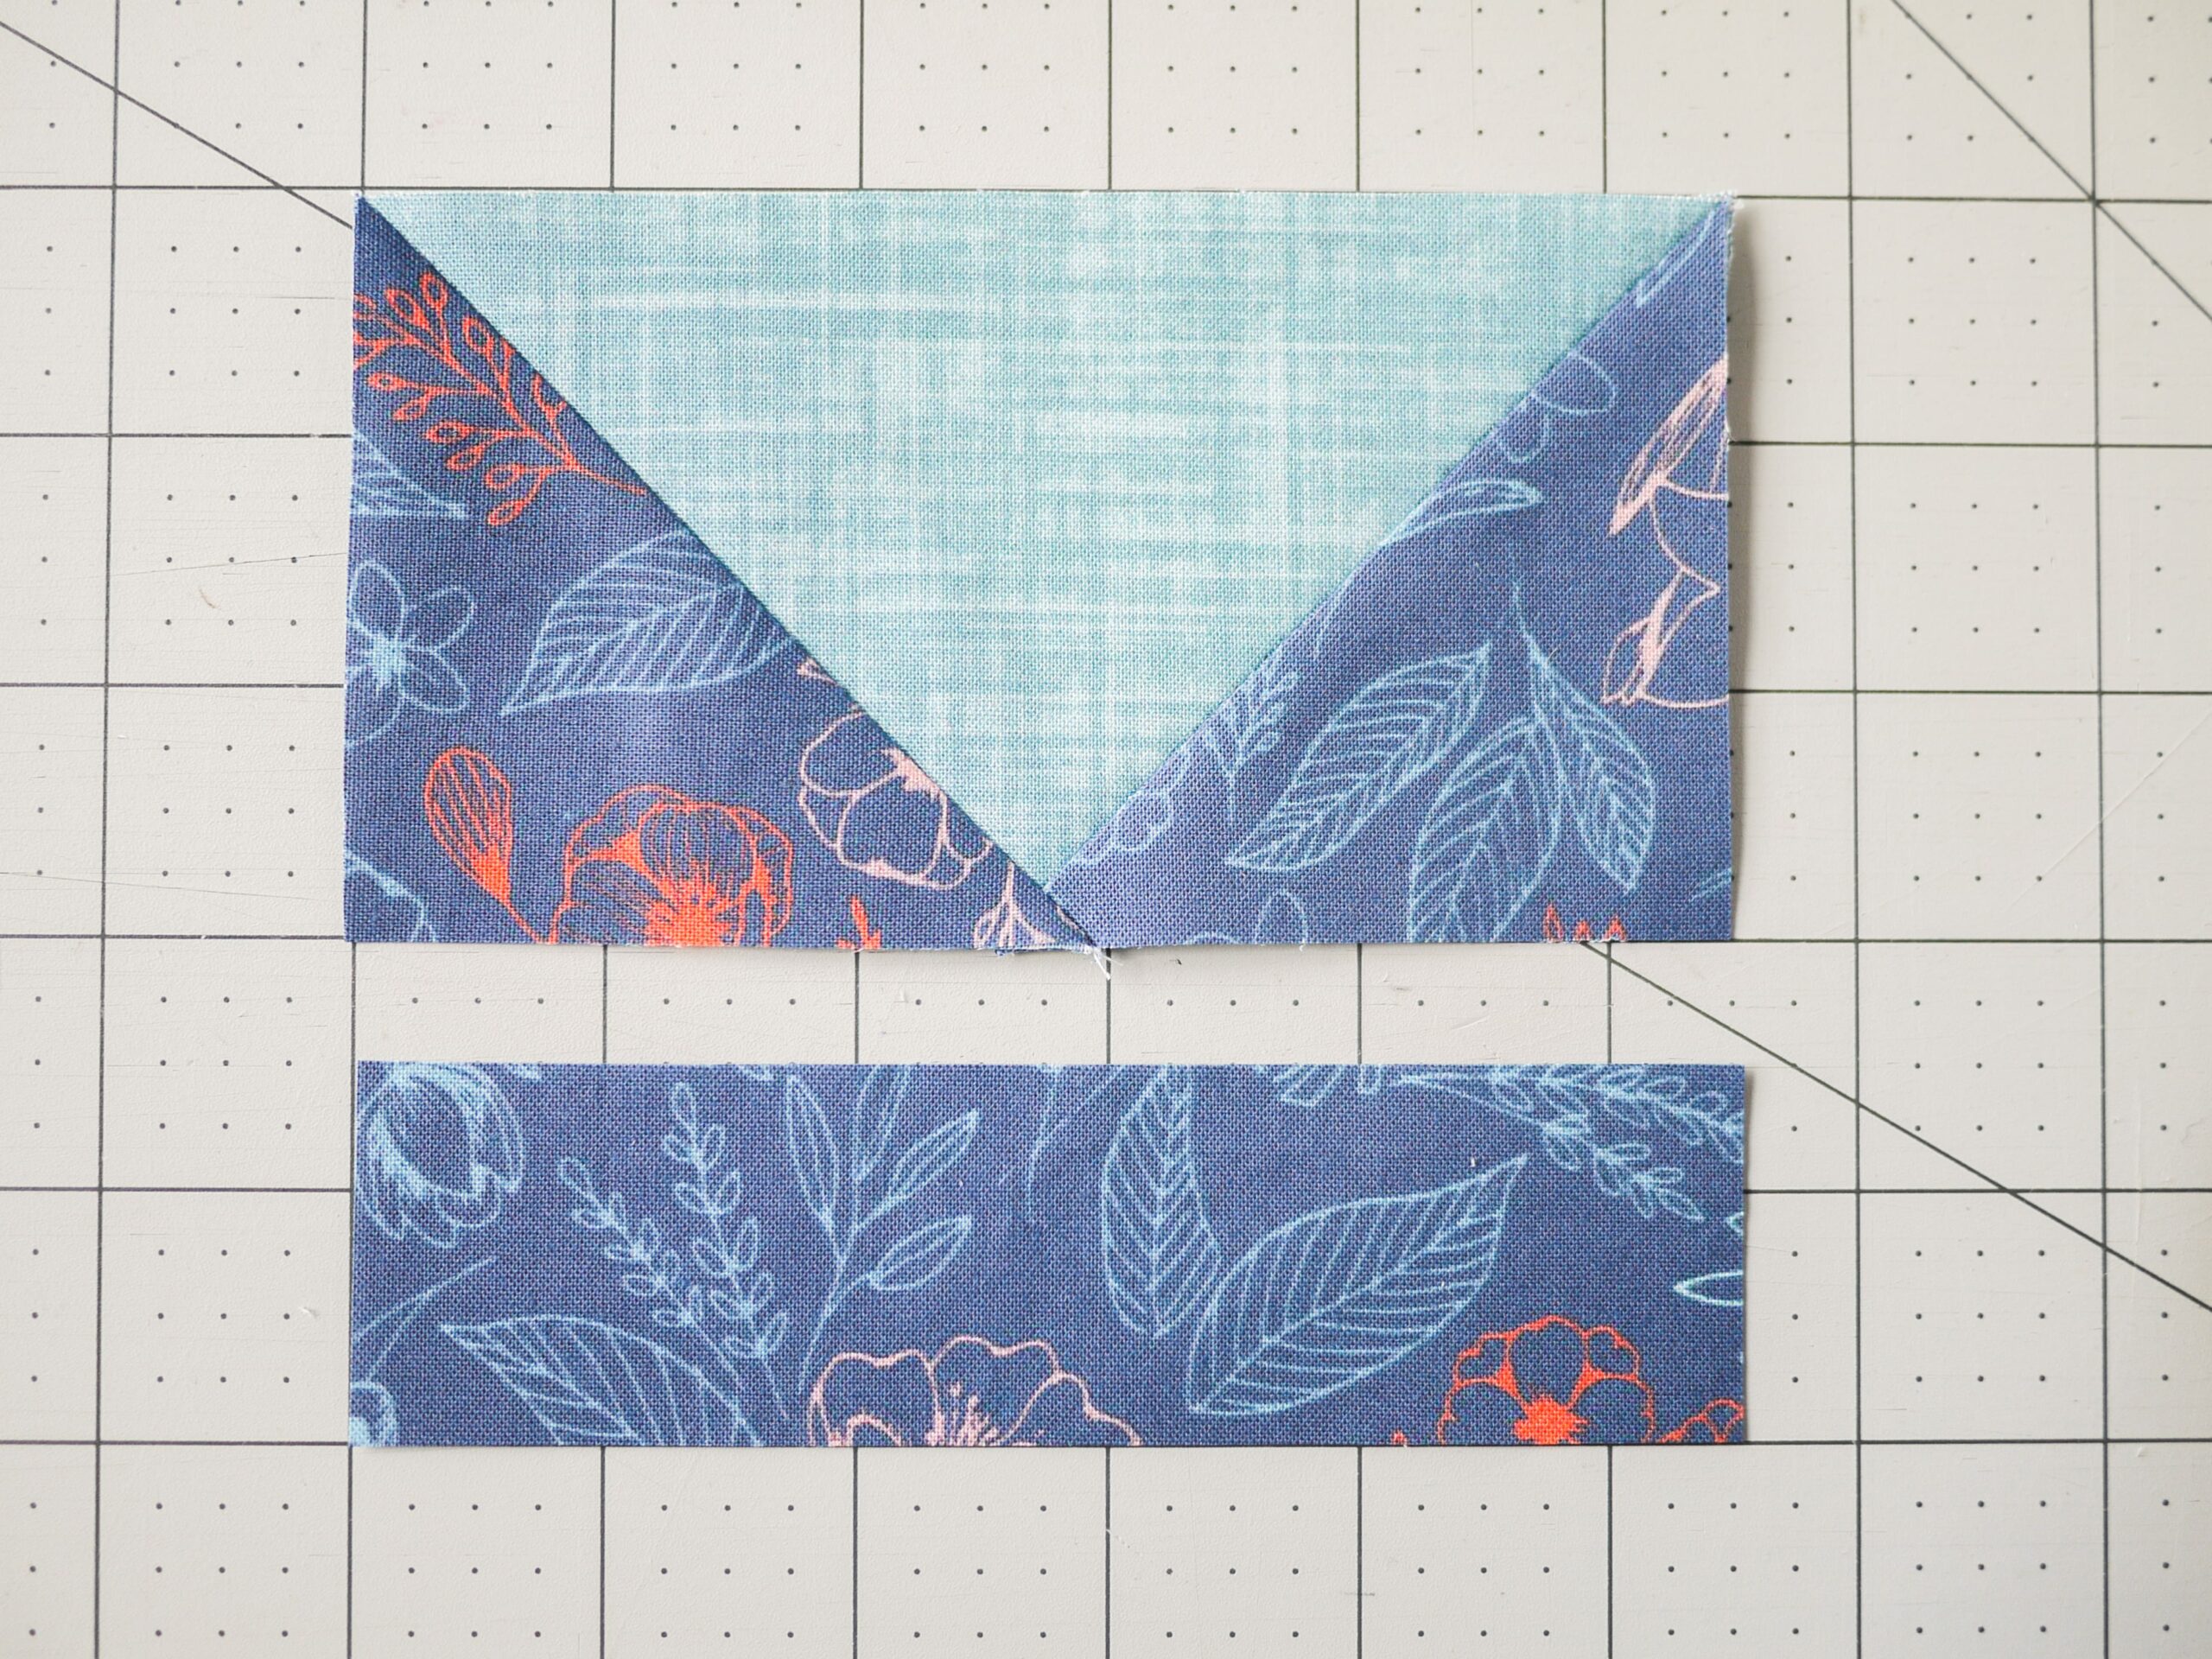
When assembling the rest of the block, you’ll want to use a scant 1/4” seam allowance (2/3 cm). This will get you the most accurate block size.
Using the scant 1/4″ seam allowance, join the 1.5″ x 5.5″ (4 x 14 cm) rectangle of main envelope fabric to the flying geese block along the edge with the triangle point.
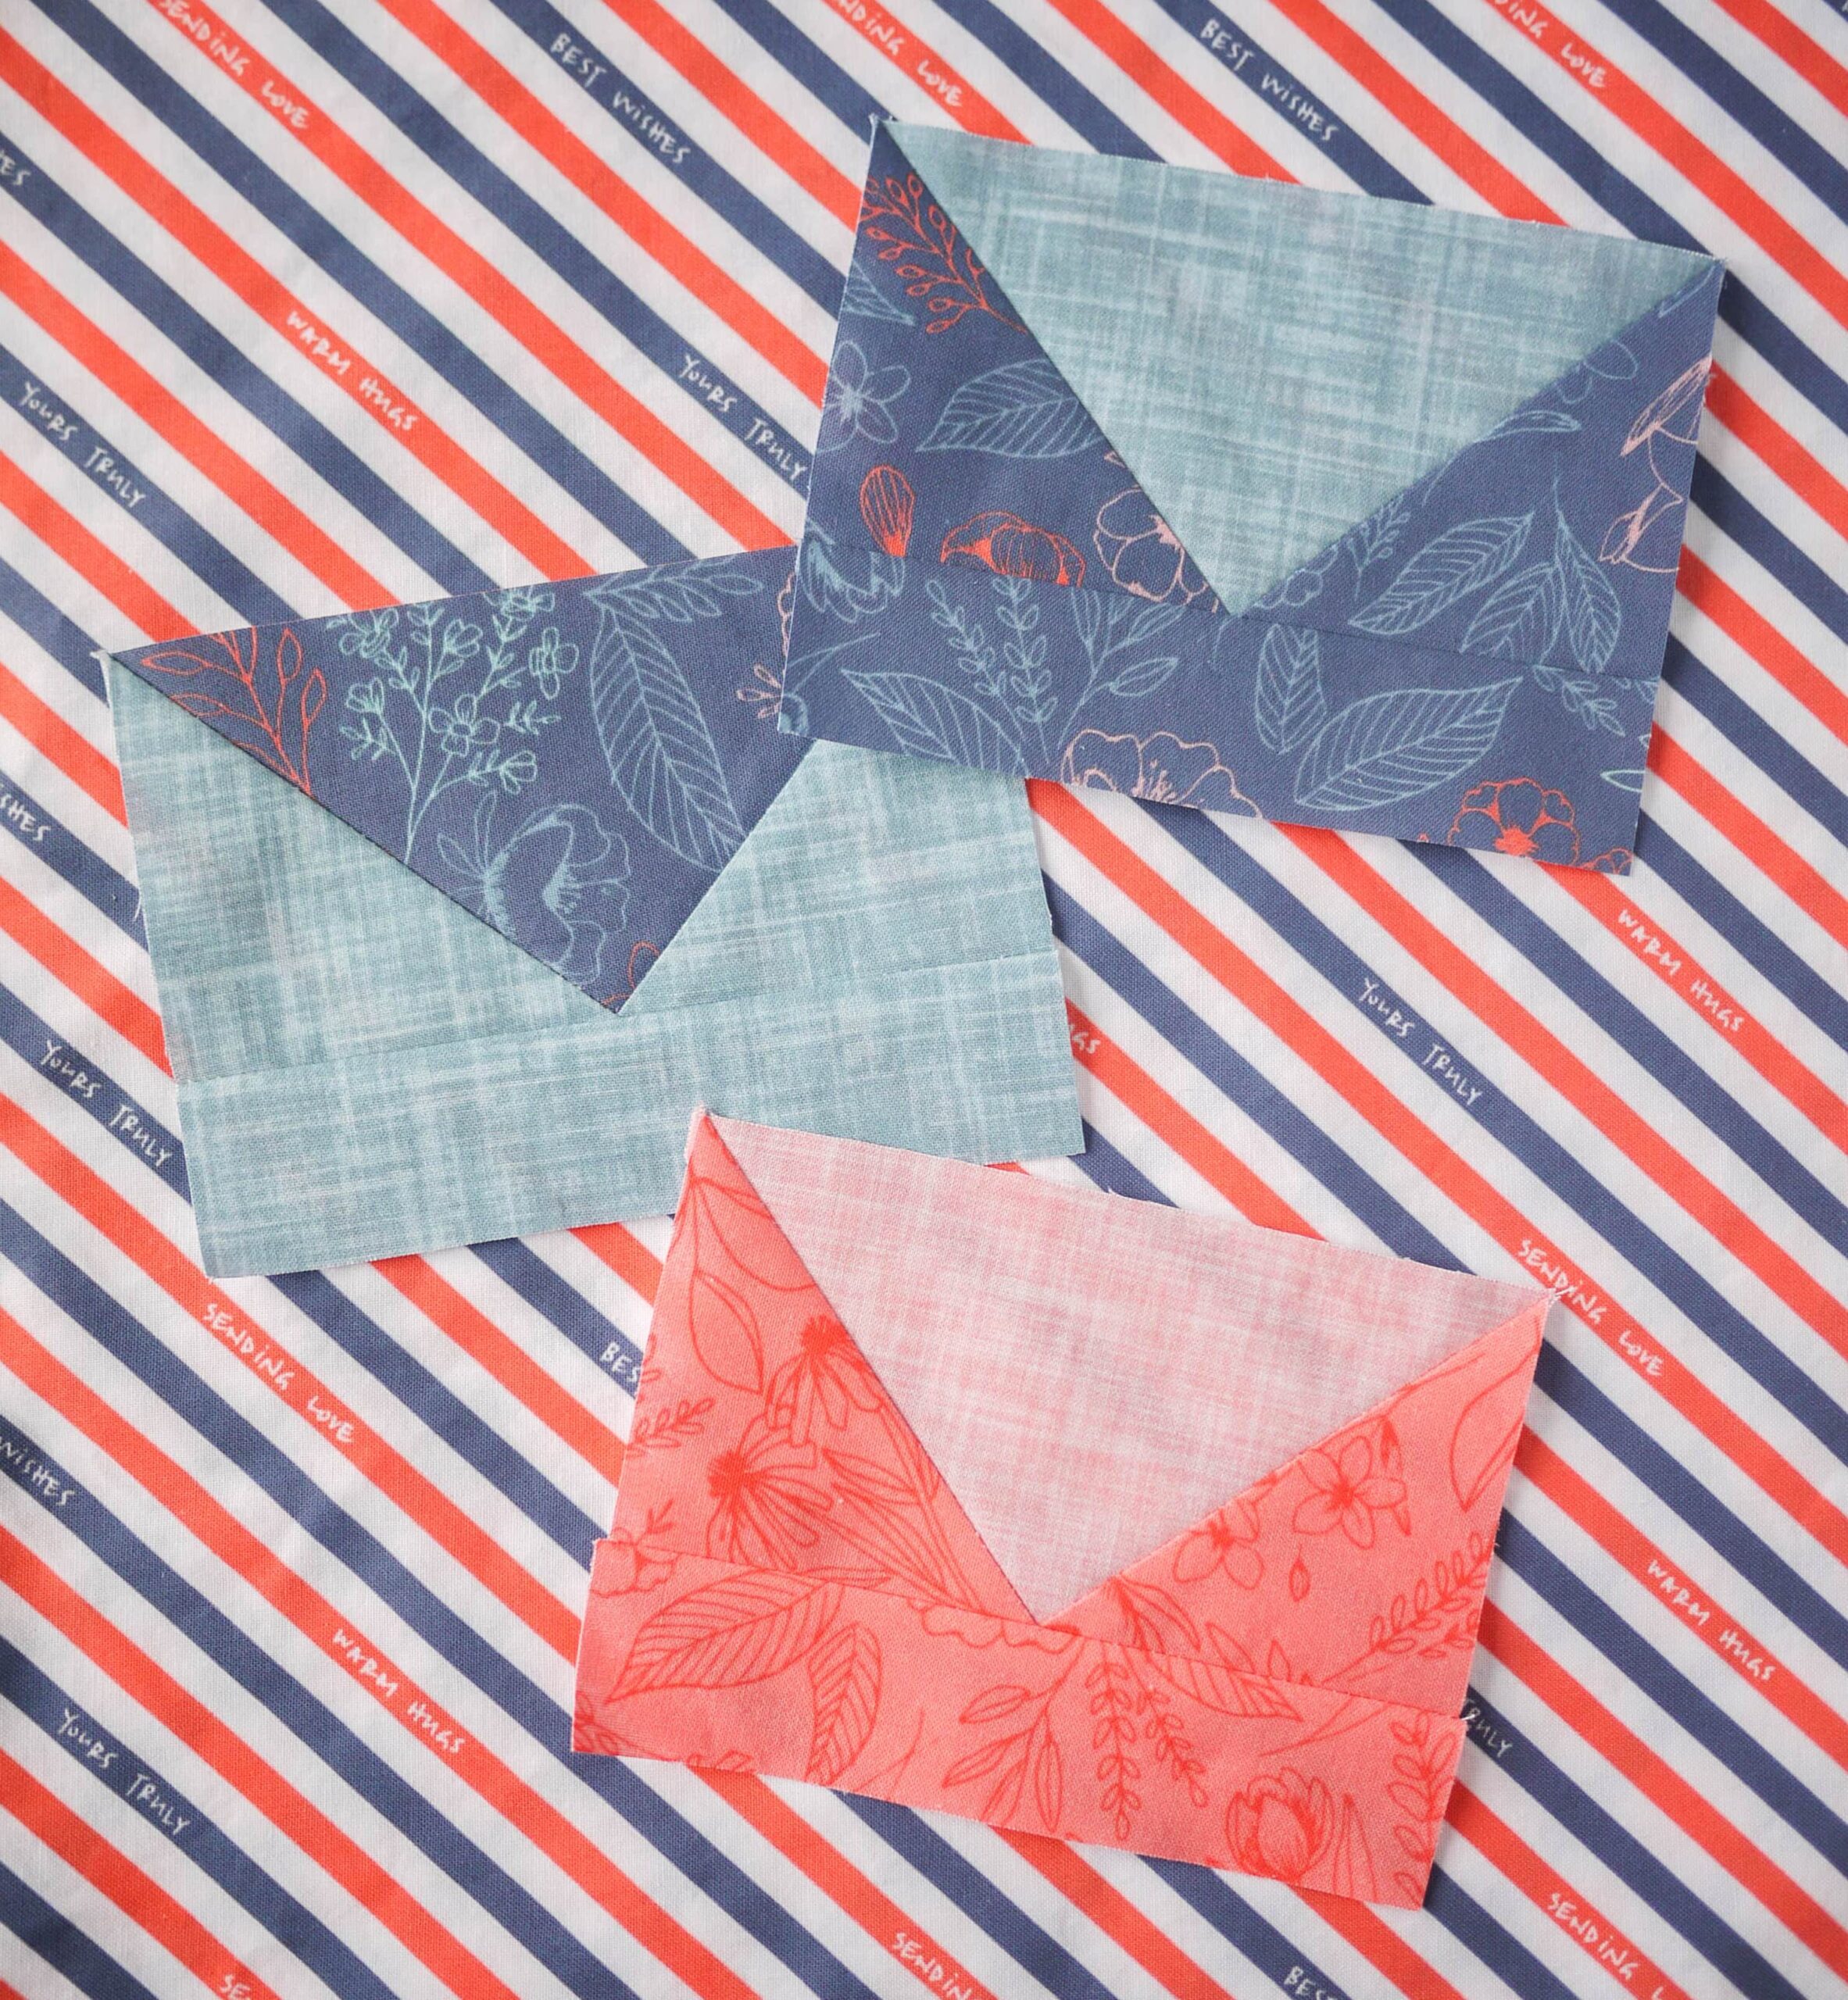
There’s your envelope! It should measure 5.5″ x 4″ (14 x 10 cm). Repeat to create a total of three envelopes.
Step 4. Sew The Closed Envelope Quilt Blocks Together
Join the envelopes together with the 1.5″ x 5.5″ (4 x 14 cm) background rectangles. Press the seam allowance away from the envelopes (make sure you keep using the scant 1/4 seam allowance!).
Add the side borders: Join the 2.5″ x 13″ (6.5 x 33 cm) background rectangles to the right and left of the three envelopes. Press the seam allowance away from the envelopes.
Add the top and bottom borders: Join the 3.25″ x 9.5″ (8.5 x 24.5 cm) background rectangles to the top and bottom of the heart. Press the seam allowance away from the envelopes.
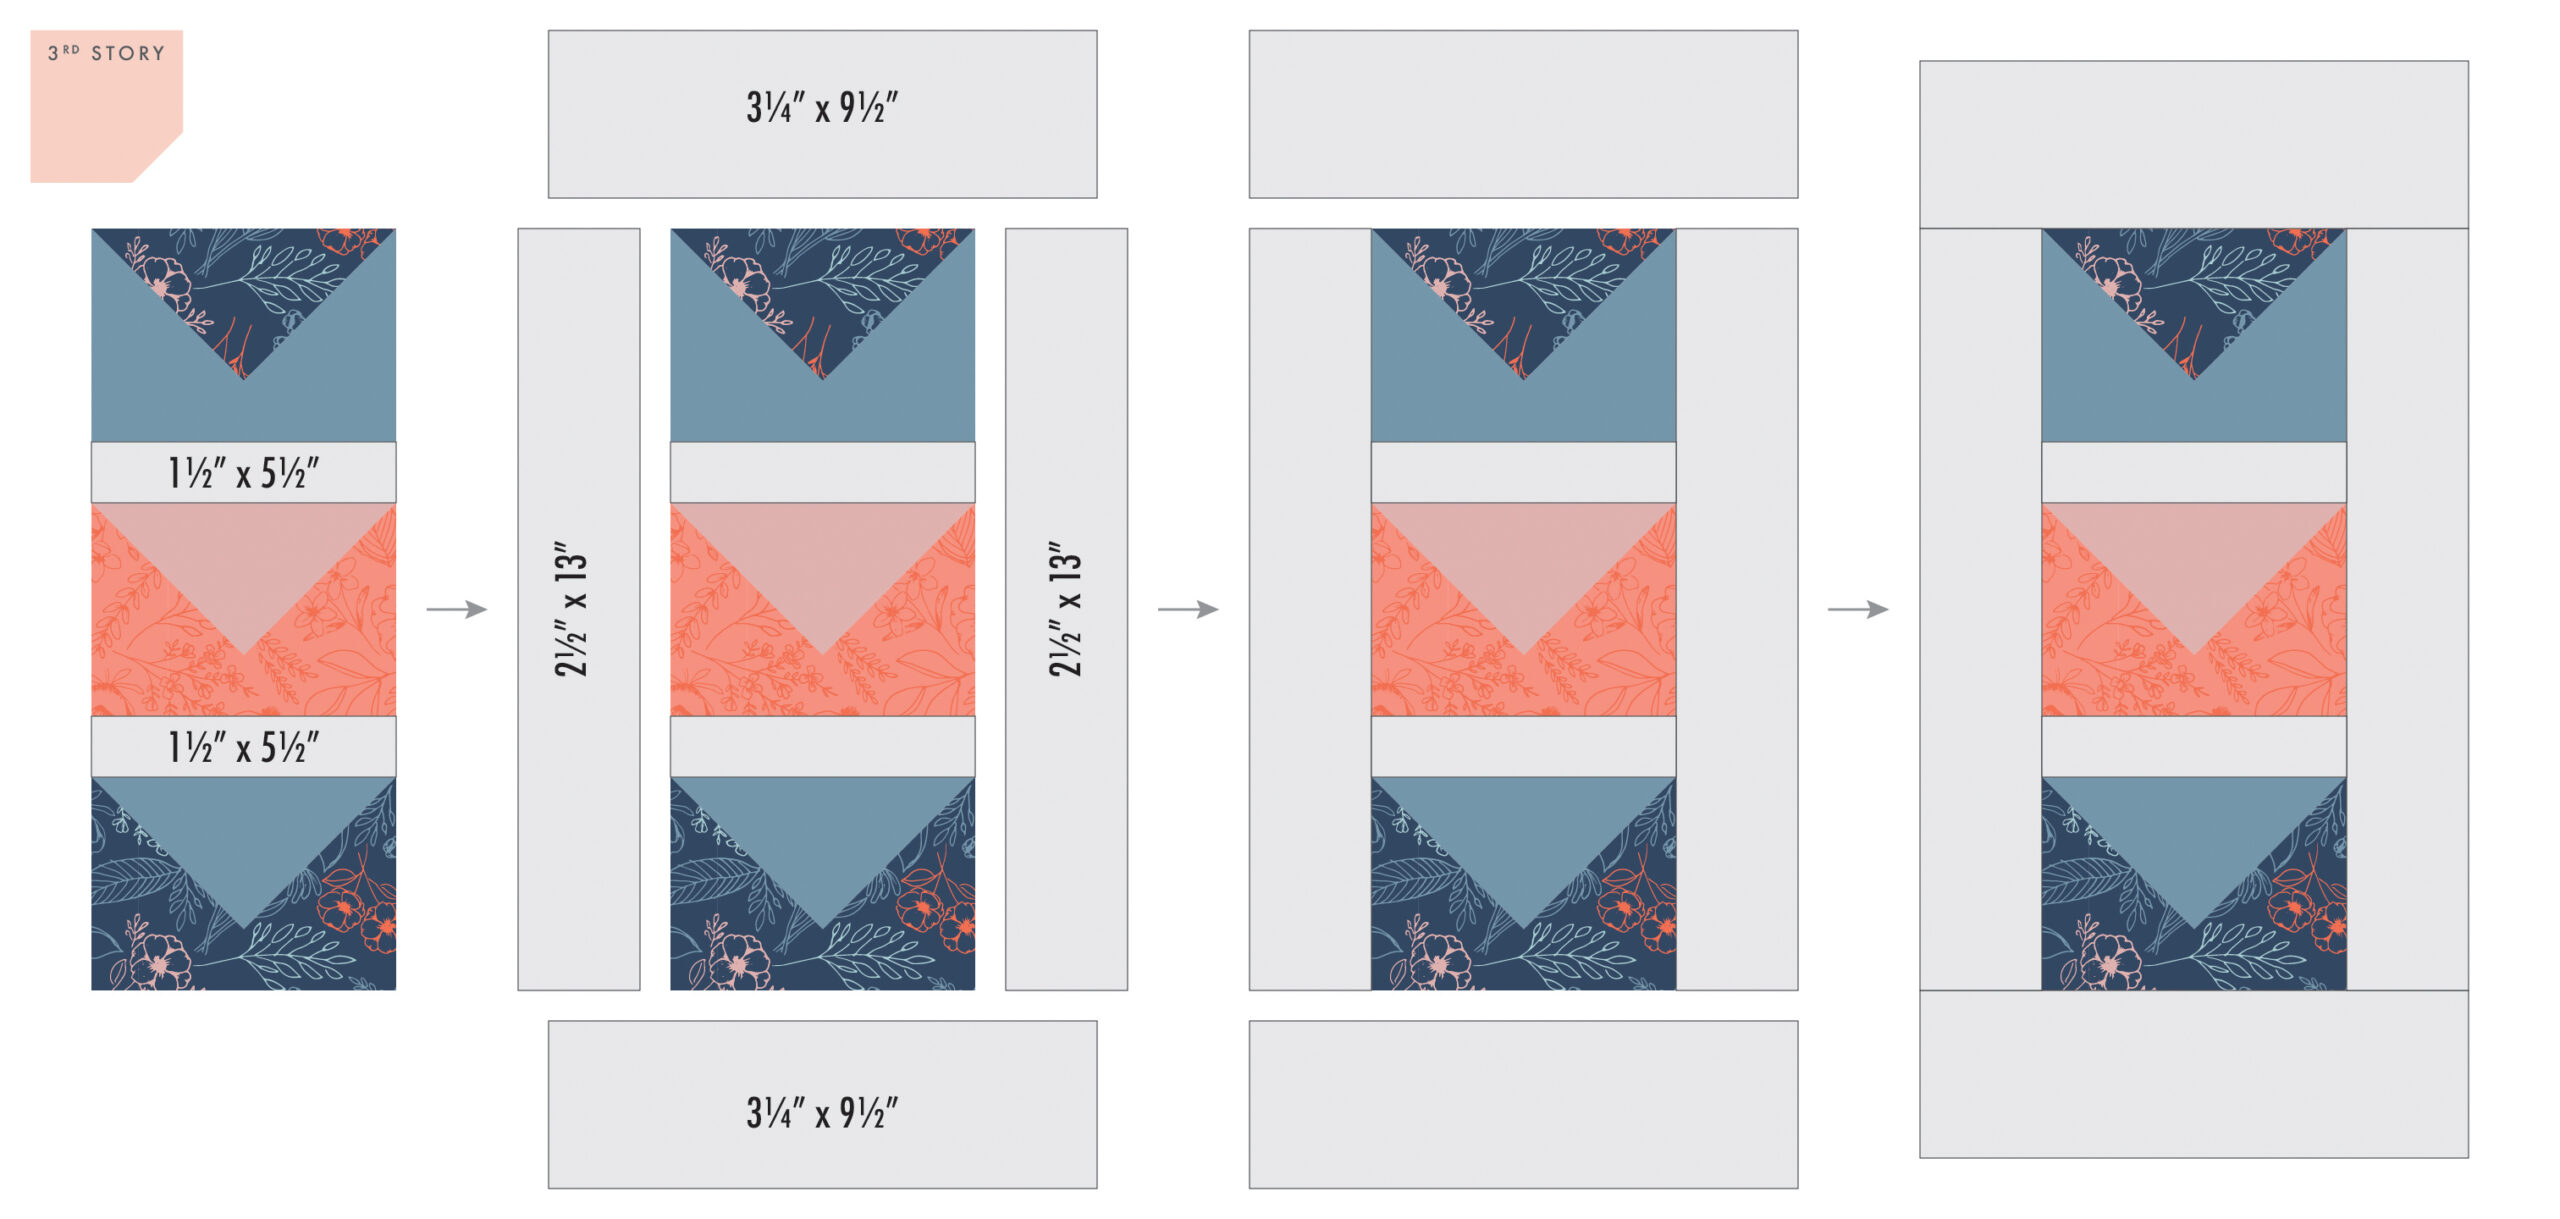

The finished unit should measure 9.5″ x 18.5″ (24 x 47 cm).
Frequently Asked Questions

Meet Andrea
Andrea Tsang Jackson of 3rd Story Workshop is a textile artist, quilt designer, author and educator. After working in various design fields and settings ranging from architecture to museums, the quilting medium called to her as a way to explore place, belonging and agency. Andrea lives in Halifax, Nova Scotia, Canada with her husband and two sons.


