


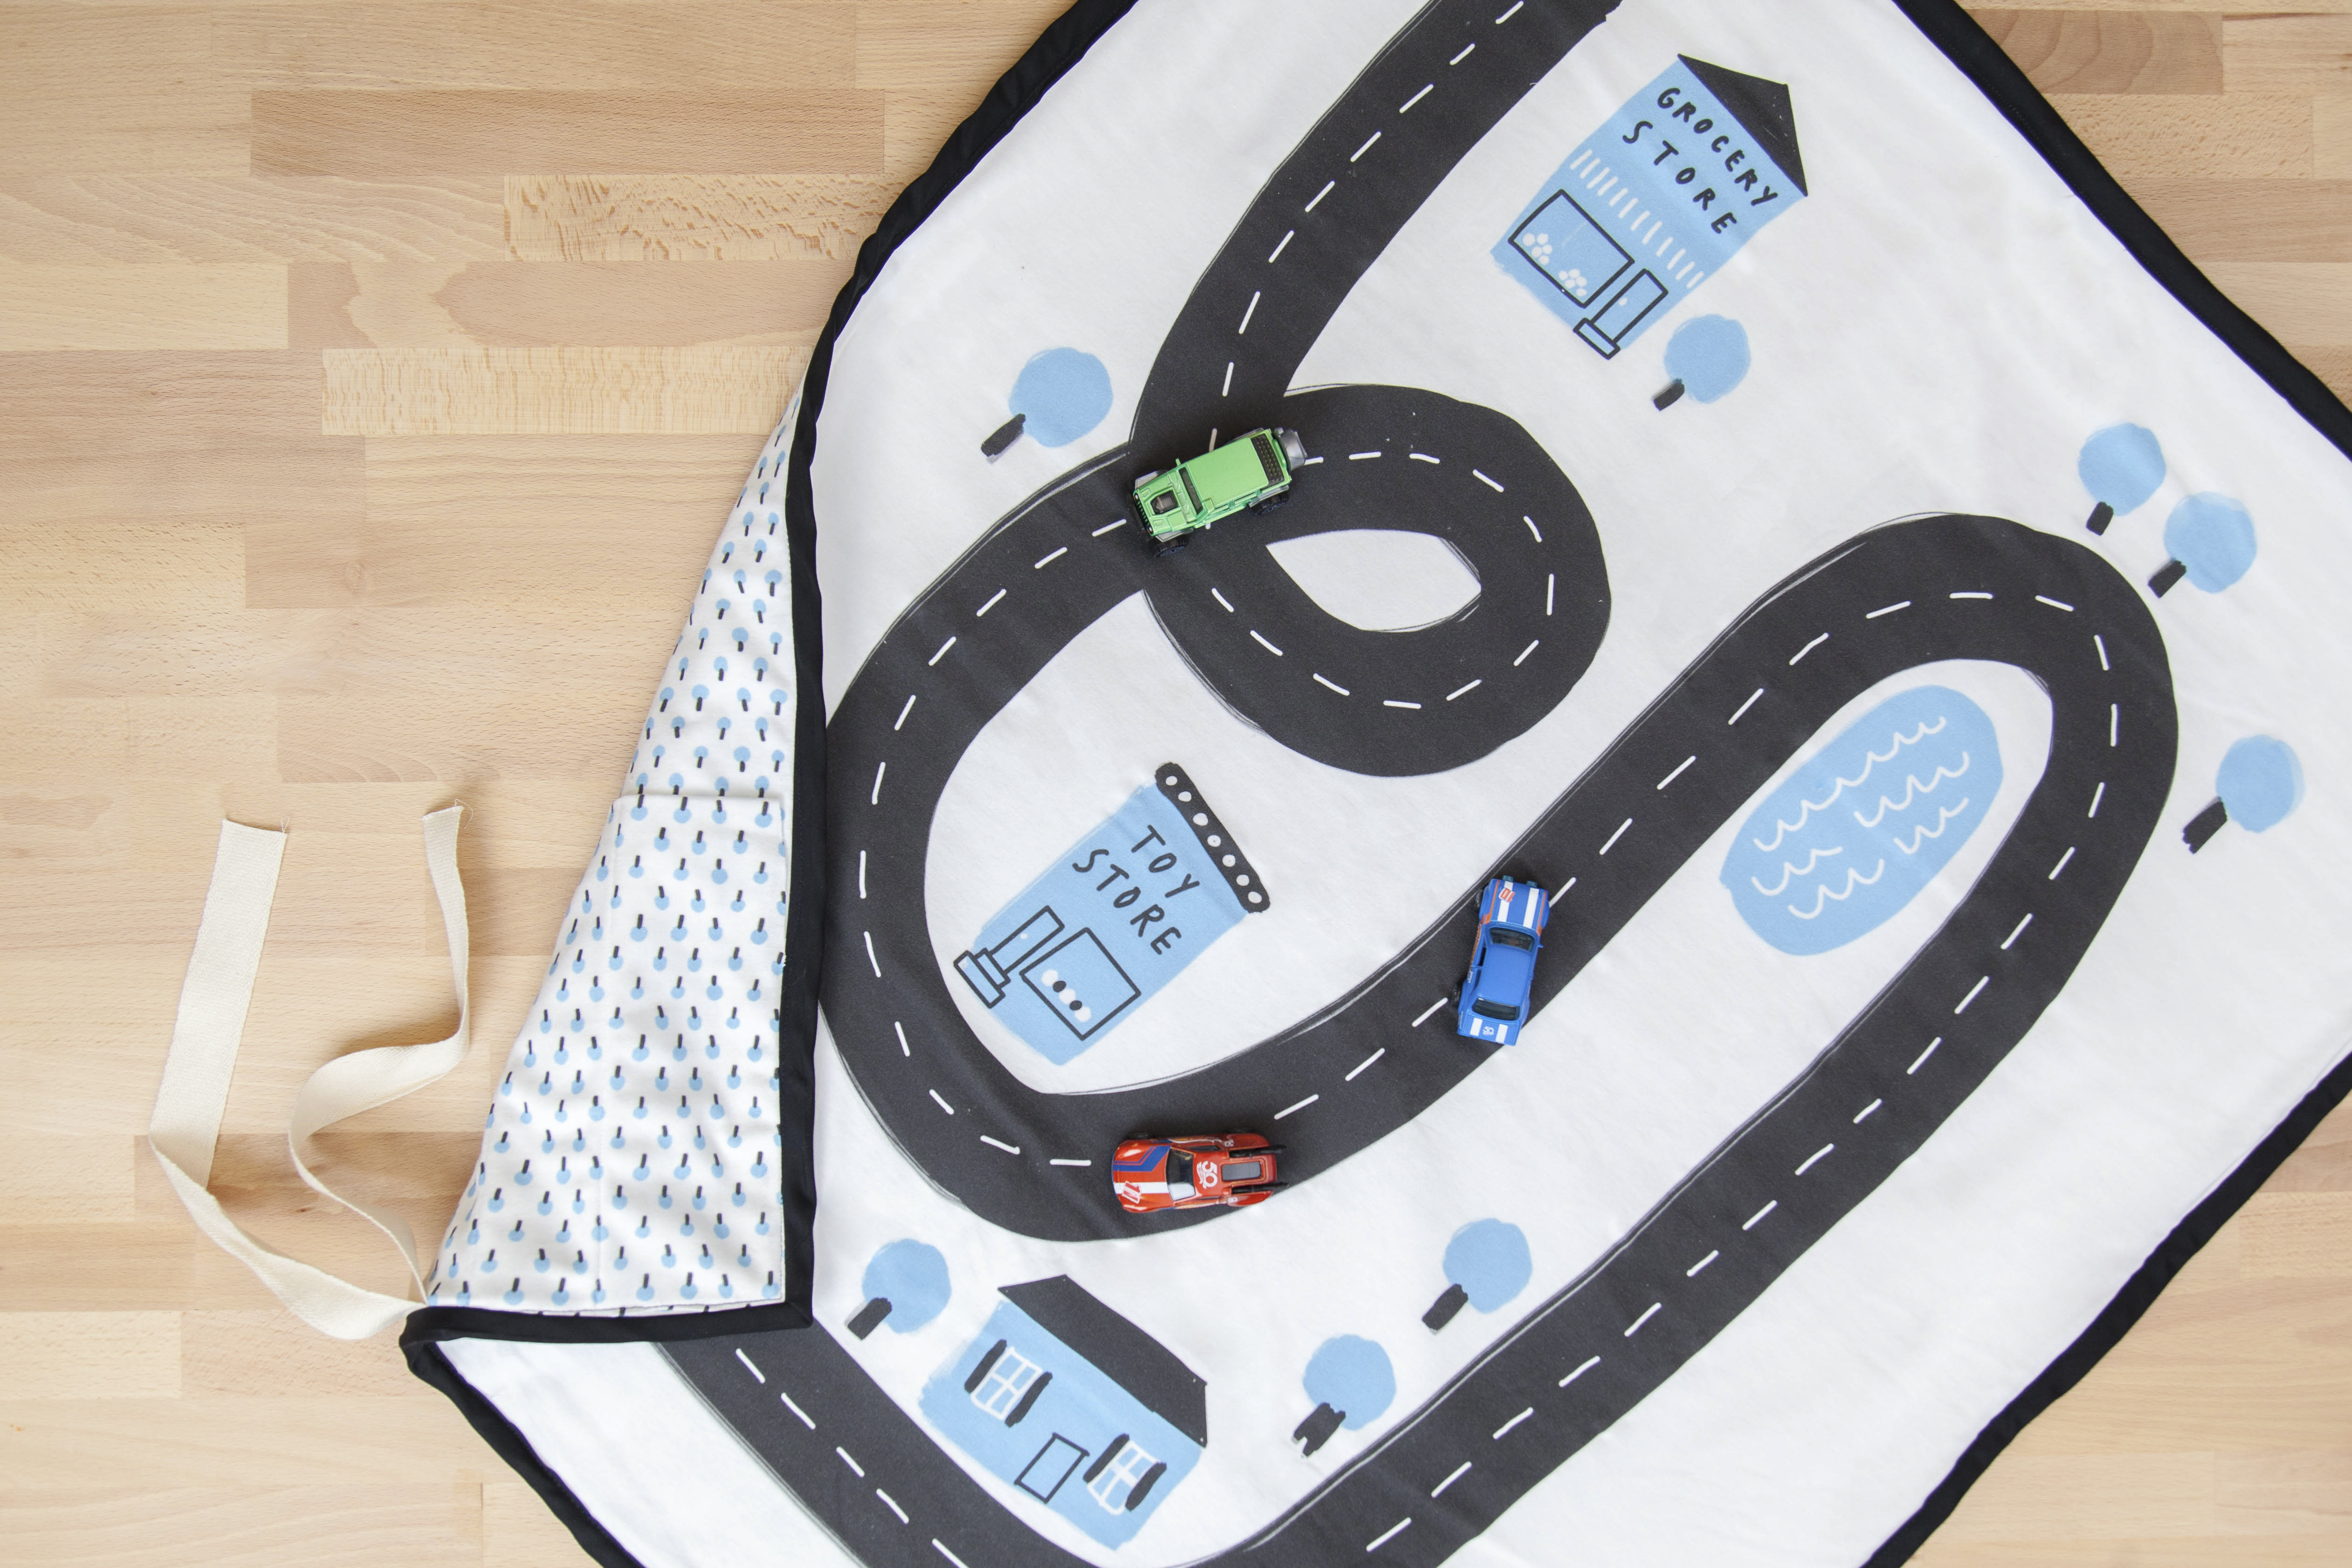
Using a million colors is fun, especially for kids’ stuff, but sometimes your eyes need a break. For this travel playmat, featured in The Spoonflower Quick-Sew Project Book by Anda Corrie, we worked in a limited palette and created something more minimal (perfect for a nursery that has a specific color scheme). The best part? Getting the look is easy! This is a simple project to sew since you’re really just making an enormous potholder and it only requires 1 yard plus an optional fat quarter of fabric. Don’t miss the video tutorial for the complete step-by-step directions.
Part 1: Create Your Fill-A-Yard™ Project
Want to know why we’re really loving this project? Using Fill-A-Yard™, you can get two designs for the price of one! After curating your playmat collection, create your Fill-A-Yard vertical split yard project on Organic Cotton Knit. We’ve rounded up some playmat designs from the Marketplace to get you started.
Pro tip: Spot a playmat in the Marketplace that isn’t quite the right size for the vertical Fill-A-Yard template? You can send a message directly to the designer to request a custom scale change! Once on their shop page, select the Contact button on the left hand side.


These design combos are playmat ready!


How To Make an Easy Travel Playmat
Playmat Materials
- 1 yard of Organic Cotton Knit
- For this project we used the Fill-A-Yard™ vertical split yard template featuring Anda’s DIY playmat designs
- 1 fat quarter of Organic Cotton Knit in a coordinating print for the pocket (optional)
- 4 yards of 1″ double-fold bias tape
- 28″ by 36″ piece of fusible quilt batting
- 4′ of 1″ cotton twill tape
- Sewing machine
- Rotary blade or fabric scissors
- Pins
- Ruler

1. Cut Out Your Fabric Pieces
Cut the yard of fabric into two equal 28” x 36” rectangles, one of the mat design and one for the backing. Cut the batting to exactly the same size as the fabric pieces. For the optional pocket, cut the fat quarter into a 28” x 10” rectangle and cut the cotton twill tape into four 12” lengths. Use a triangle ruler and rotary cutter to make sure it is straight.


2. Attach the Fusible Batting
Sandwich the batting between the two 28” x 36” rectangles with right sides out, pin and iron to the fabric following the manufacturer’s instructions. See what we meant when we said earlier this is just a giant potholder? The fusible batting keeps everything in place and makes quilting unnecessary. You could, if desired, hand or machine quilt at this point. Otherwise, move on to the next step.

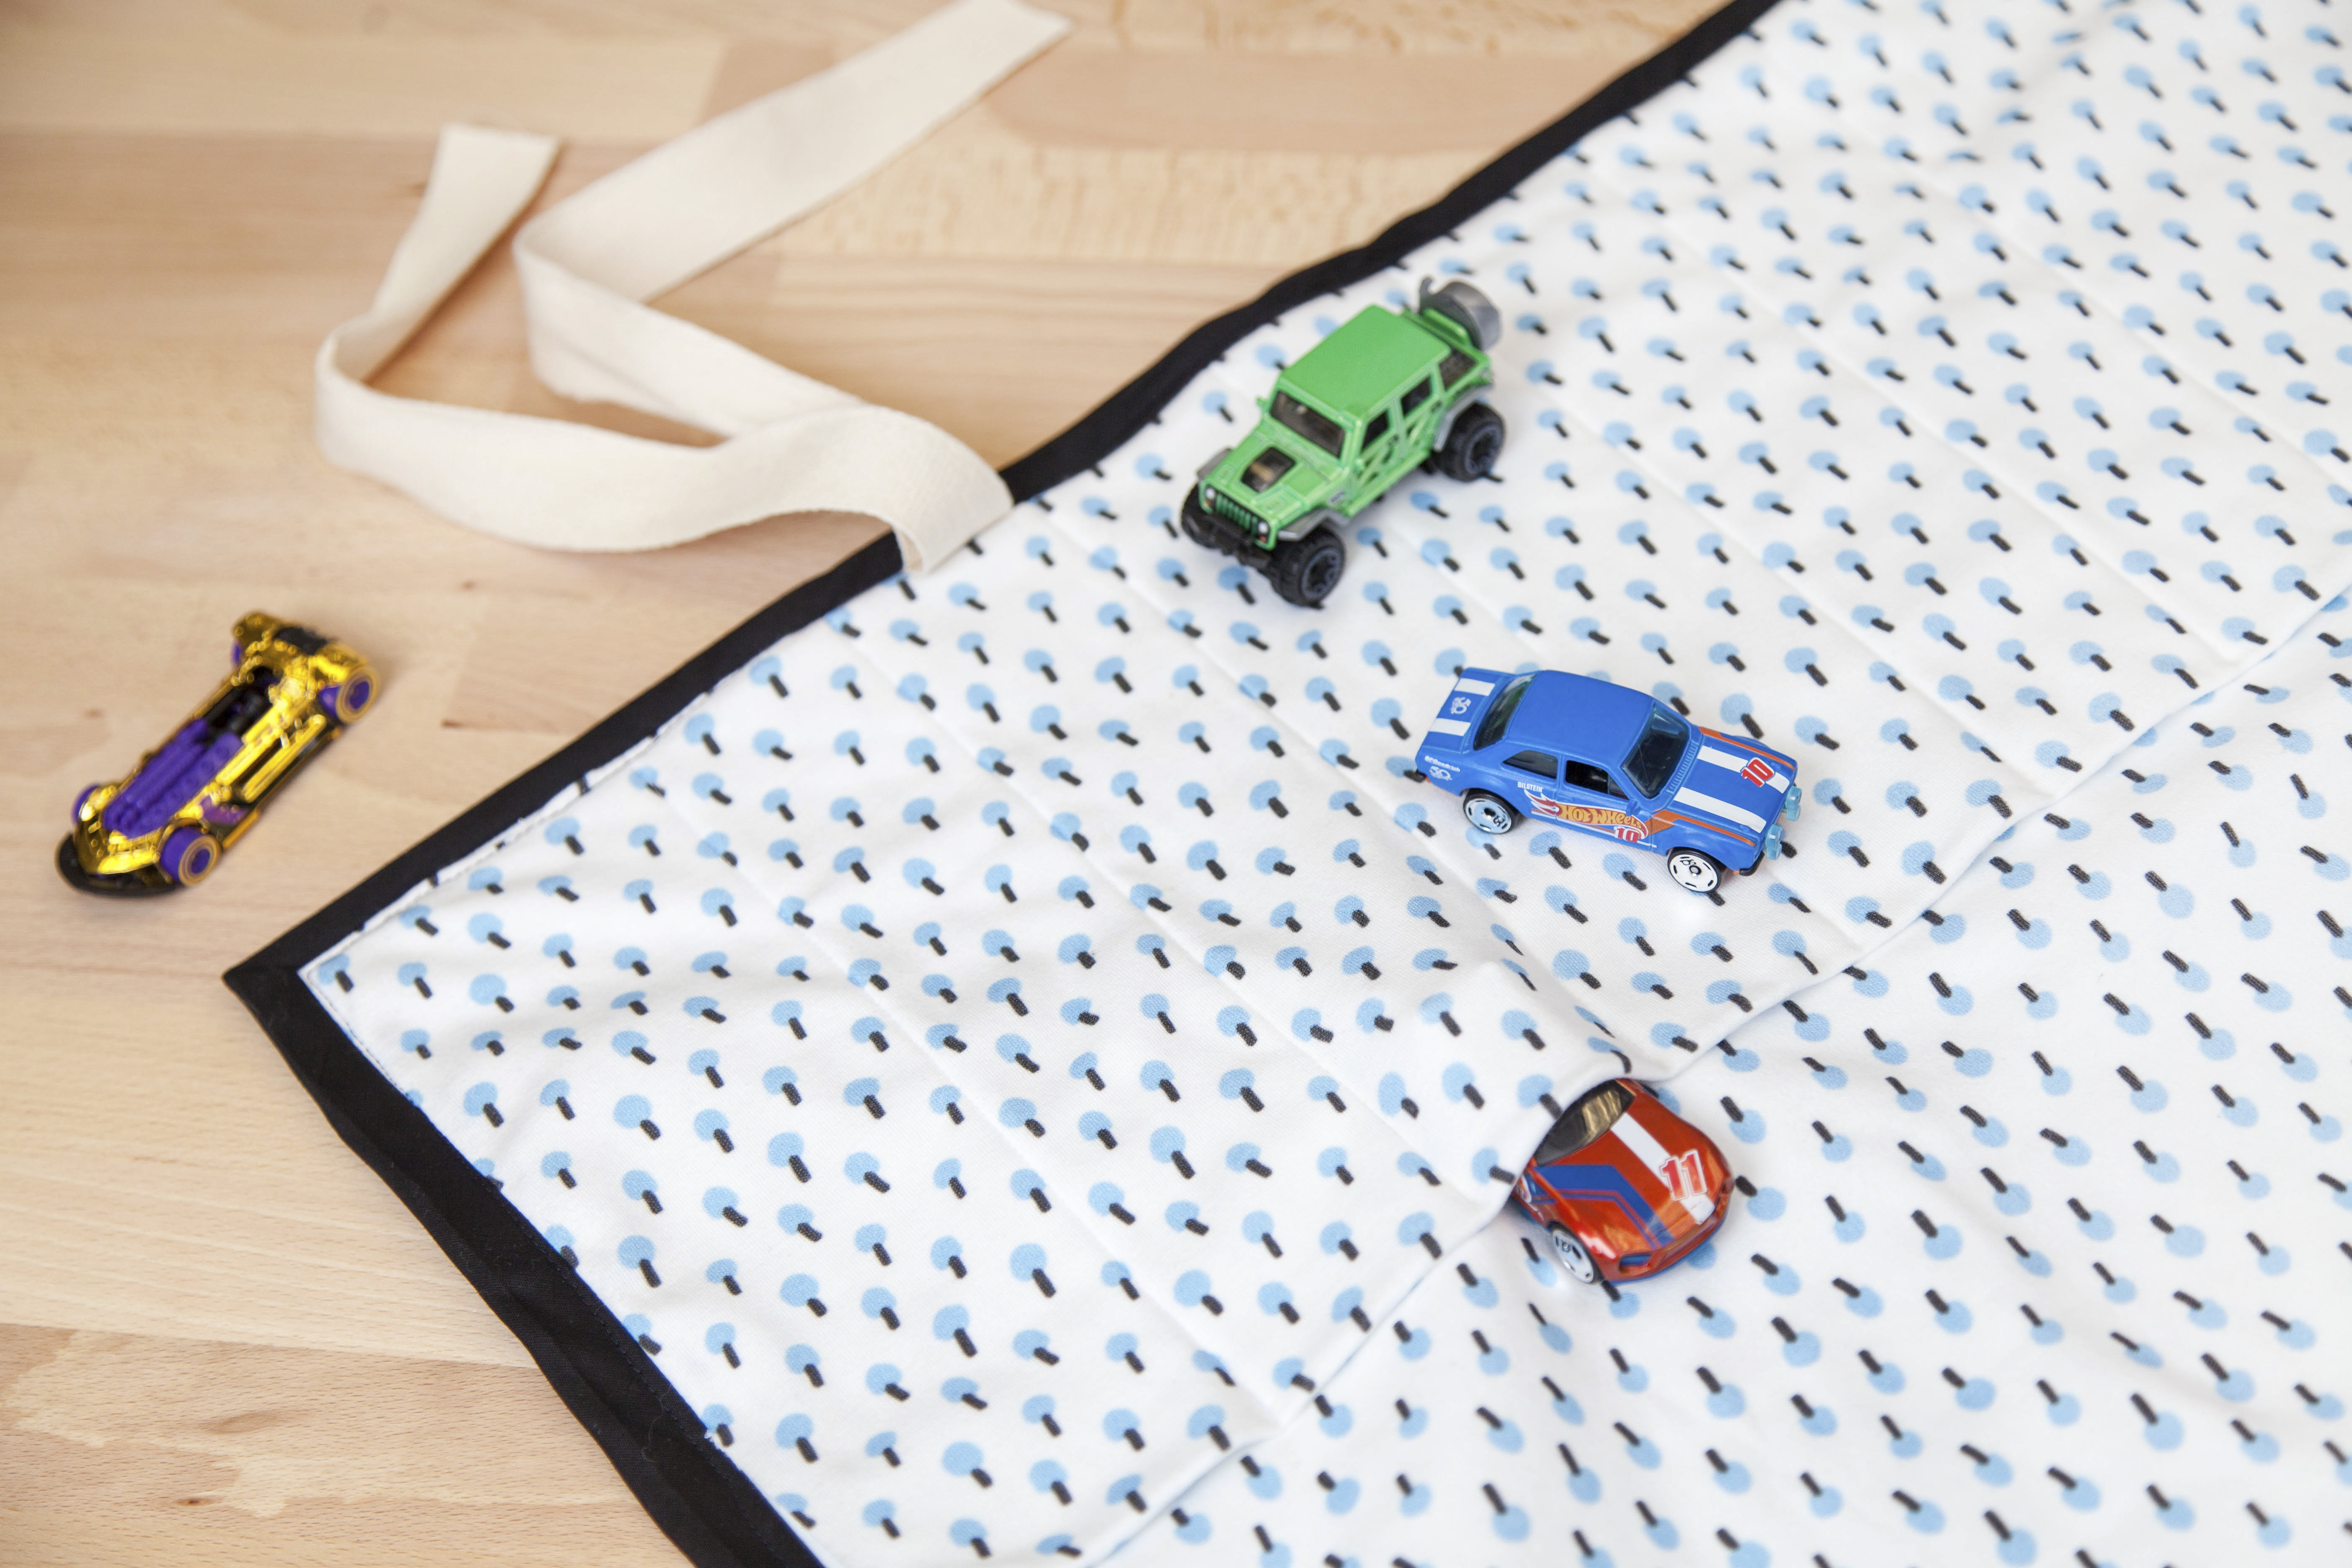
3. Create the Pocket
If you do not want to add a pocket to your playmat, skip ahead to step 5.
Take the pocket fabric and fold it in half lengthwise (wrong sides facing) and press. Pin the raw seams lined up to the bottom 28” side of the mat backing fabric and baste ⅛” from the edges. Measure 3” from one side of the pocket and mark a straight line from the top of the pocket to the bottom. Mark the pocket at 2” intervals until you reach the other side (the last mark will be 3” from the edge). Topstitch these lines to create 10 mini pockets.
Pro tip: Adjust the space between the pockets based on the size of the toys you’ll be storing!


4. Attach the Ties
Pin the ends of two of the cotton twill tape lengths to the top raw edge of the backing fabric (the side opposite the pocket) 6” from one corner. Pin the other two pieces 6” from the opposite top corner. Stitch into place. These will be the ties to keep the playmat closed when rolled up for traveling.
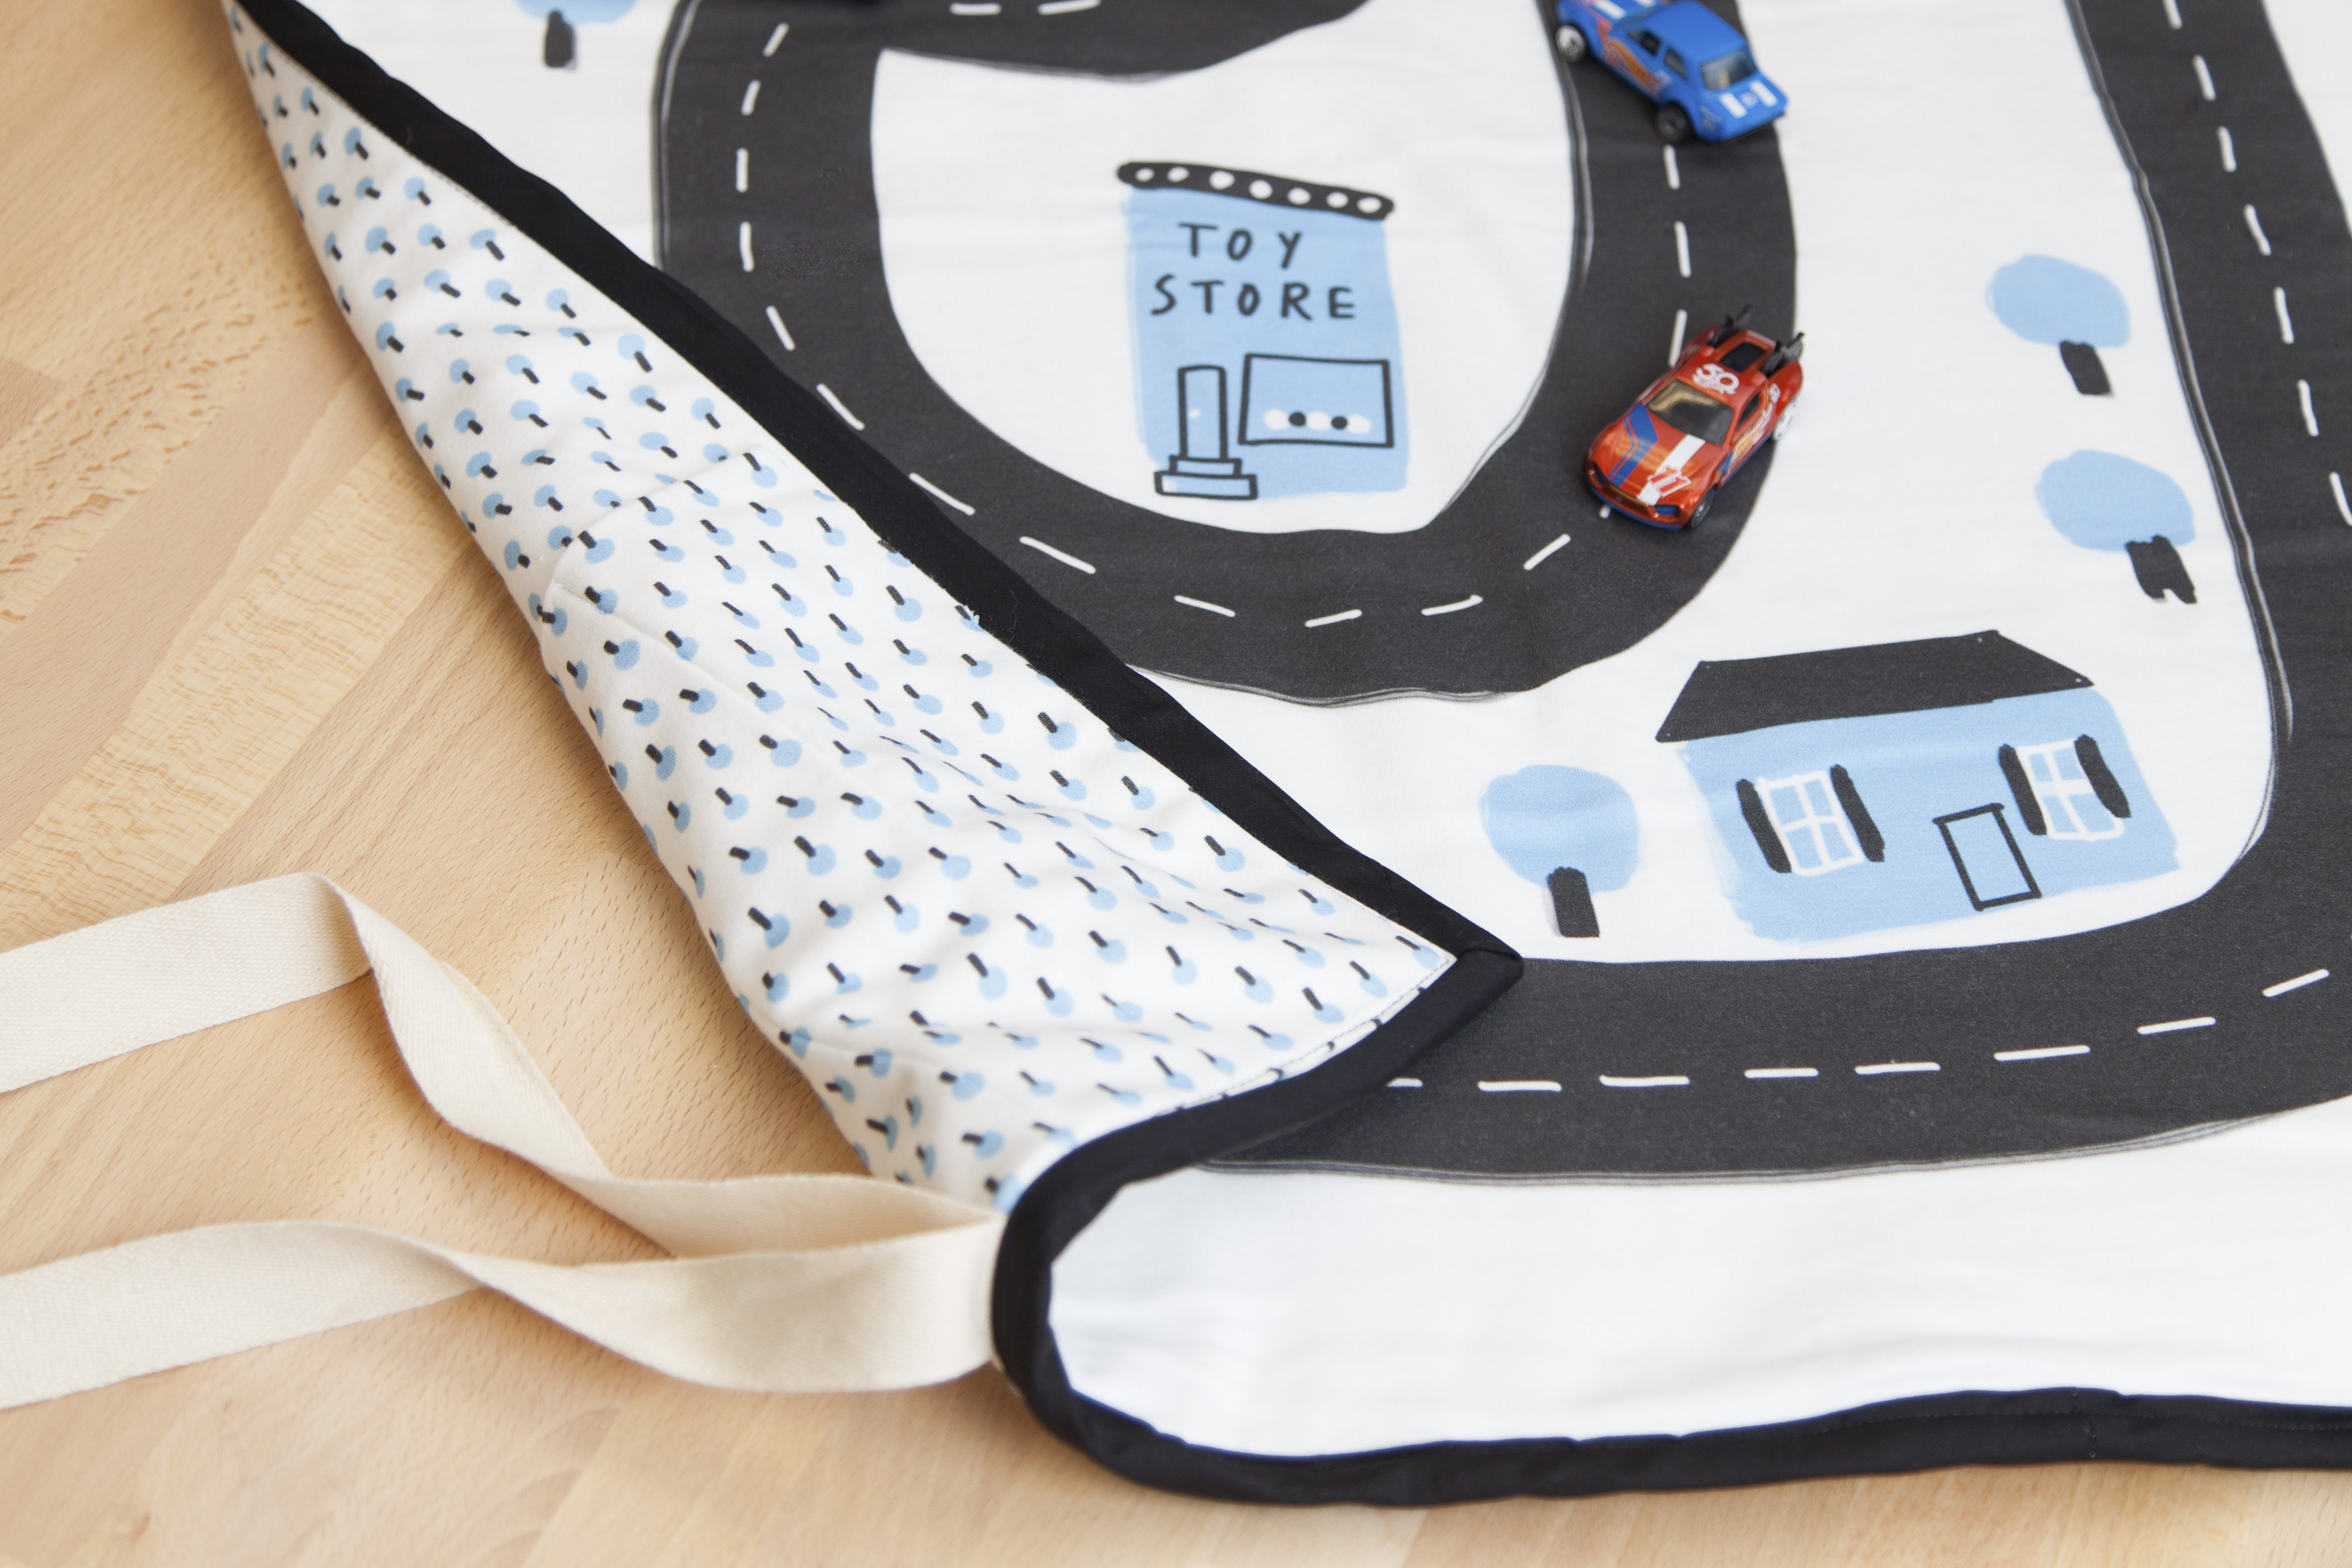
5. Attach the Bias Tape
Open up the bias tape and pin the raw edge to the seam on the back of your mat. Straight stitch, stopping ⅛” from each corner to pivot and miter the corner.
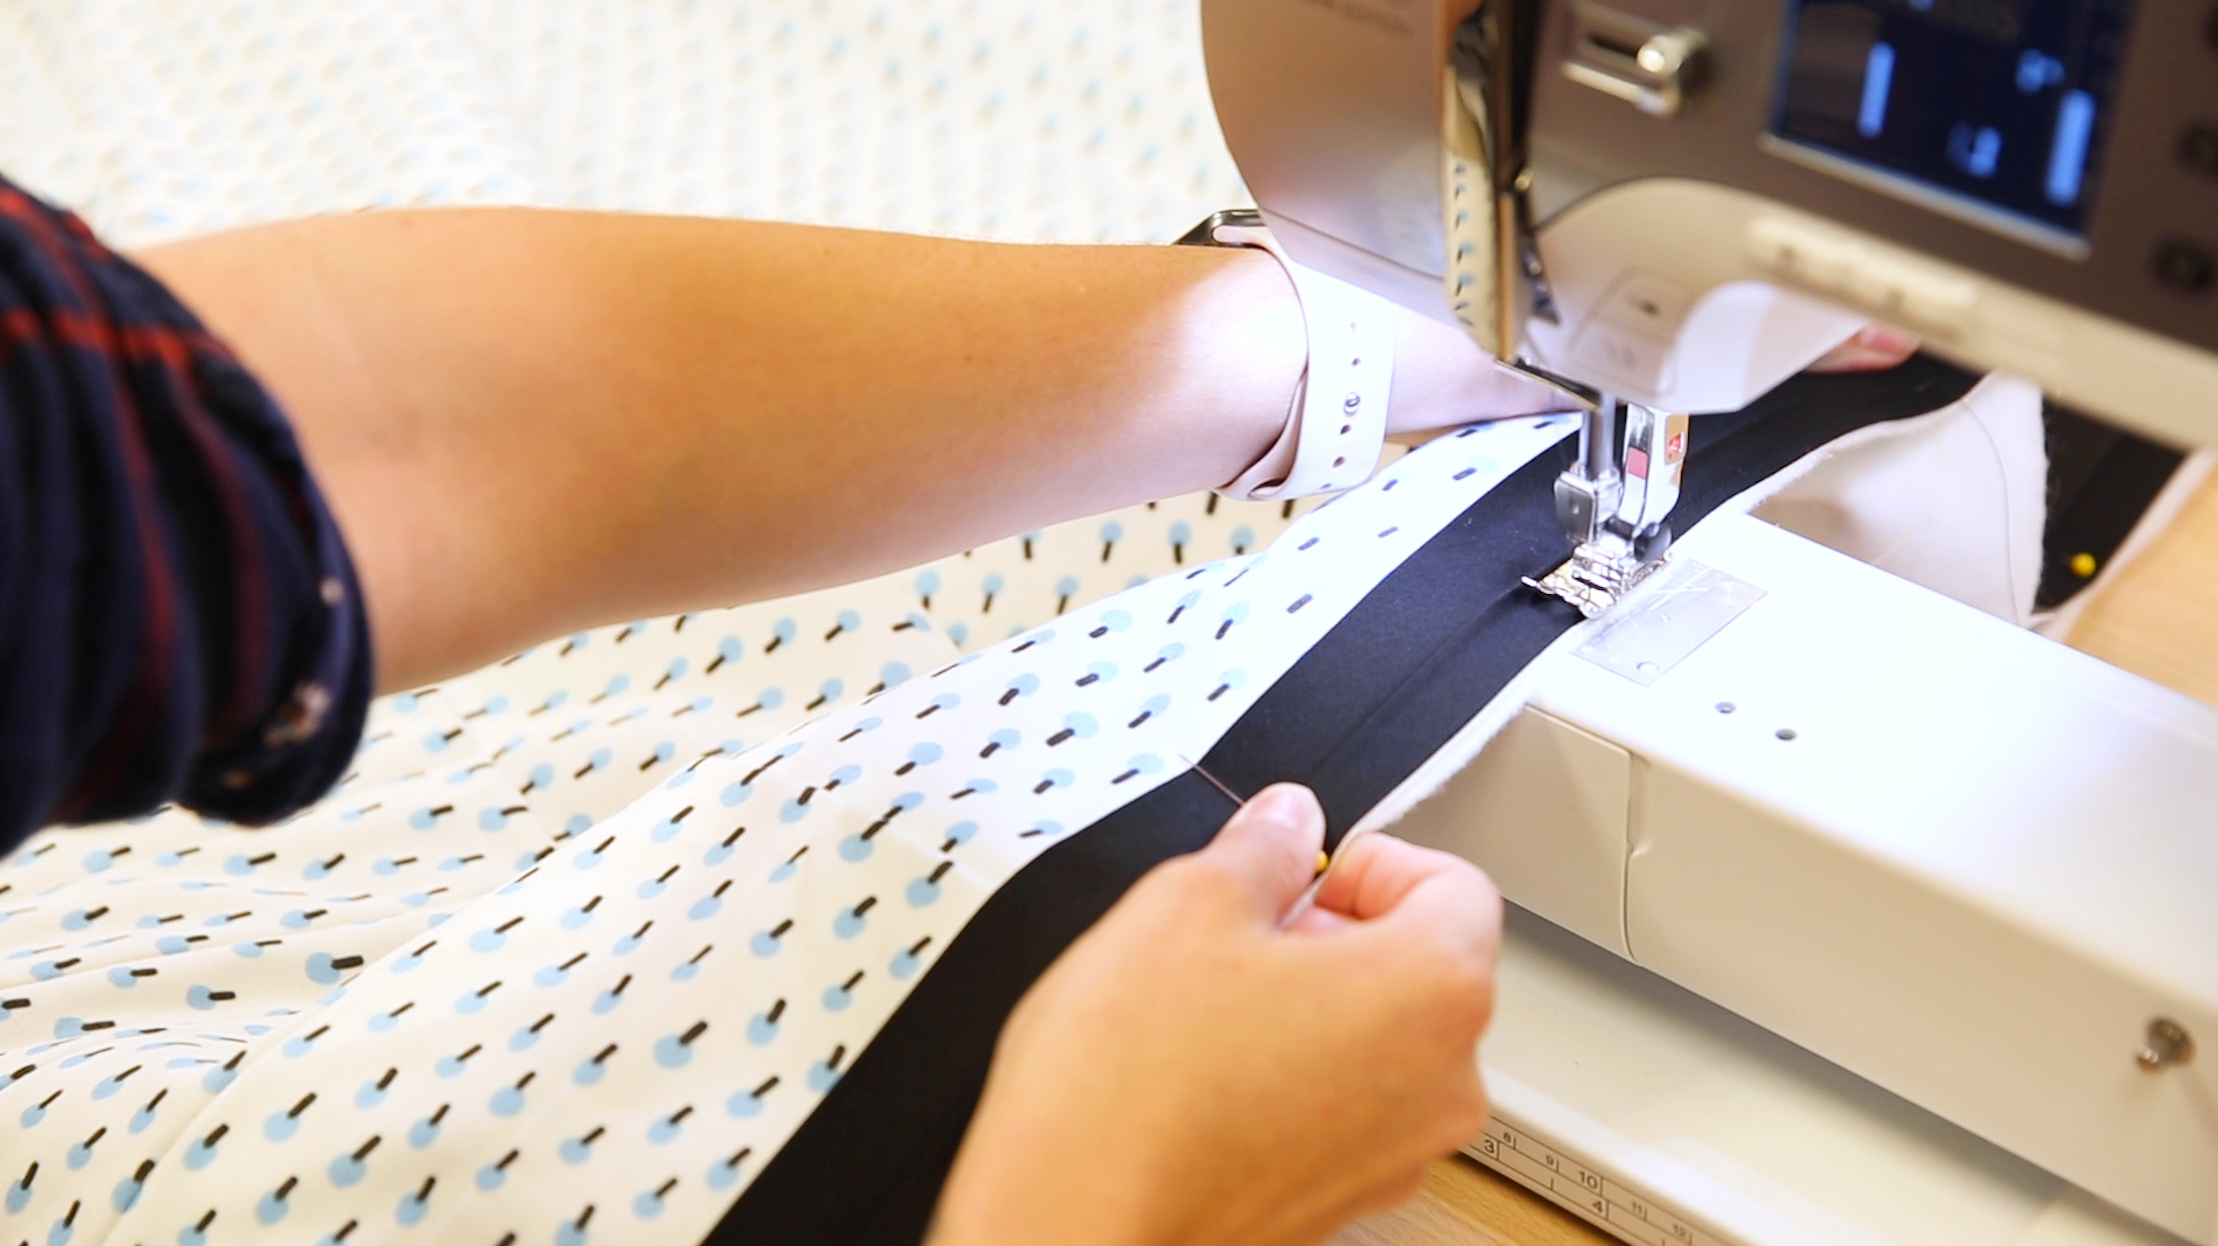
Fold your bias tape to the right to make a 90º angle. Use your finger to press it. Then, fold your tape straight out to the left and line up with the raw edge of the next side. Starting ⅗” from corner, resume sewing, backstitch, and then sew along this edge.
When you get back to the beginning, overlap the bias tape 1”. Fold the tape around the edges of the mat to the front, make sure the bias tape is folded under, neatly press, and pin in place. Topstitch ¼” from the edge around the mat.


Get to know Anda Corrie, author of The Spoonflower Quick-Sew Project Book!


I’m curious about the measurement in step 1, should it be two equal rectangles that are 21″ x 36″ instead of 28″ x 36″? When I figure out the yard size and then cutting it in half, I’m wondering if the size should be slightly smaller. Thanks!
Hi Anika,
Thanks so much for your question. The Organic Cotton Knit used for this project is 56″ wide so a half yard (the size of each rectangle) will be 28″ wide. I hope that helps, but if you have any more questions don’t hesitate to ask!
Best Regards,
-Meredith F.
Spoonflower