


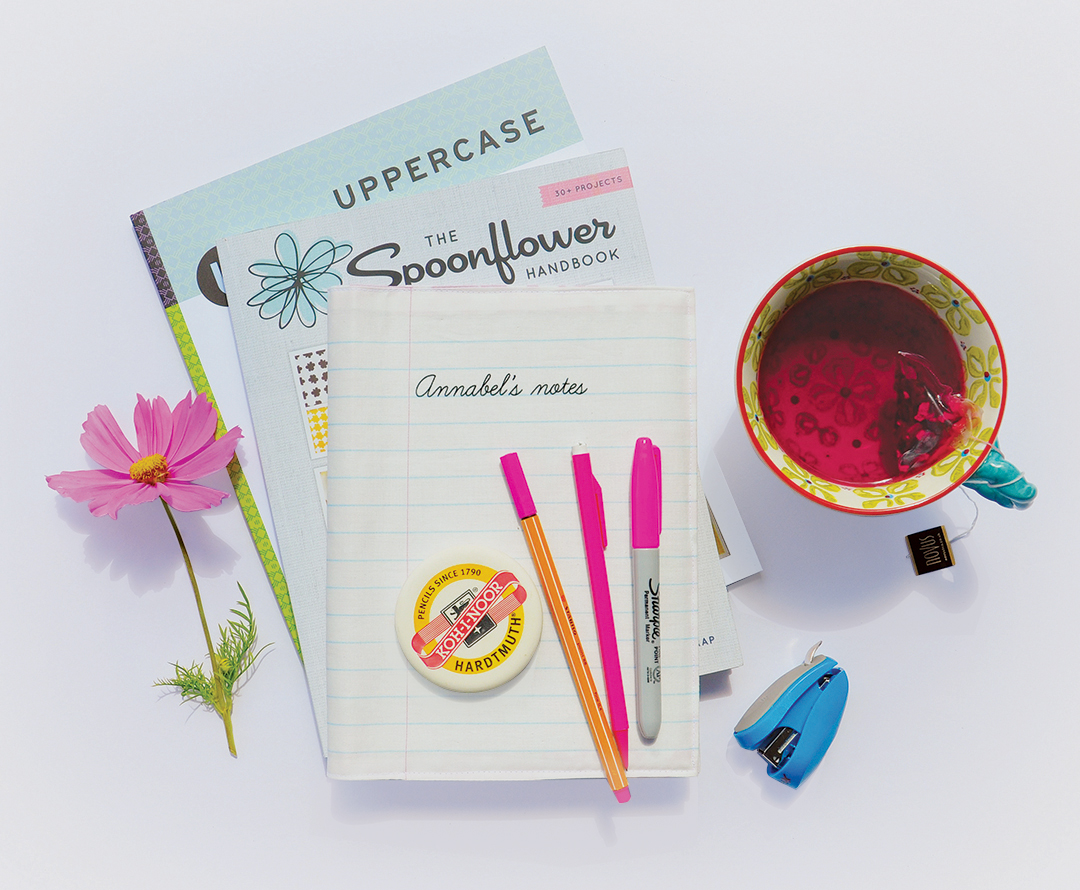
Brand new school supplies are one of life’s great joys. The smell of a fresh pack of pencils, the feeling of tearing the plastic off a stack of pristine notebook paper. Ahhh. Can we repeat 3rd grade, please? Designer and maker extraordinaire Ceri Staziker stops by the blog today to show us how to make custom, personalized notebook covers so your kid can feel like the coolest in the room on day one. Read on for the quick and simple how-to.
Ceri: This is an easy tutorial for sewing a notebook cover. It works with any fabric, and is a great opportunity for personalization by using Spoonflower to print your own design. This particular design is very easy to set up as it is simply a series of ruled lines, imitating notepaper!
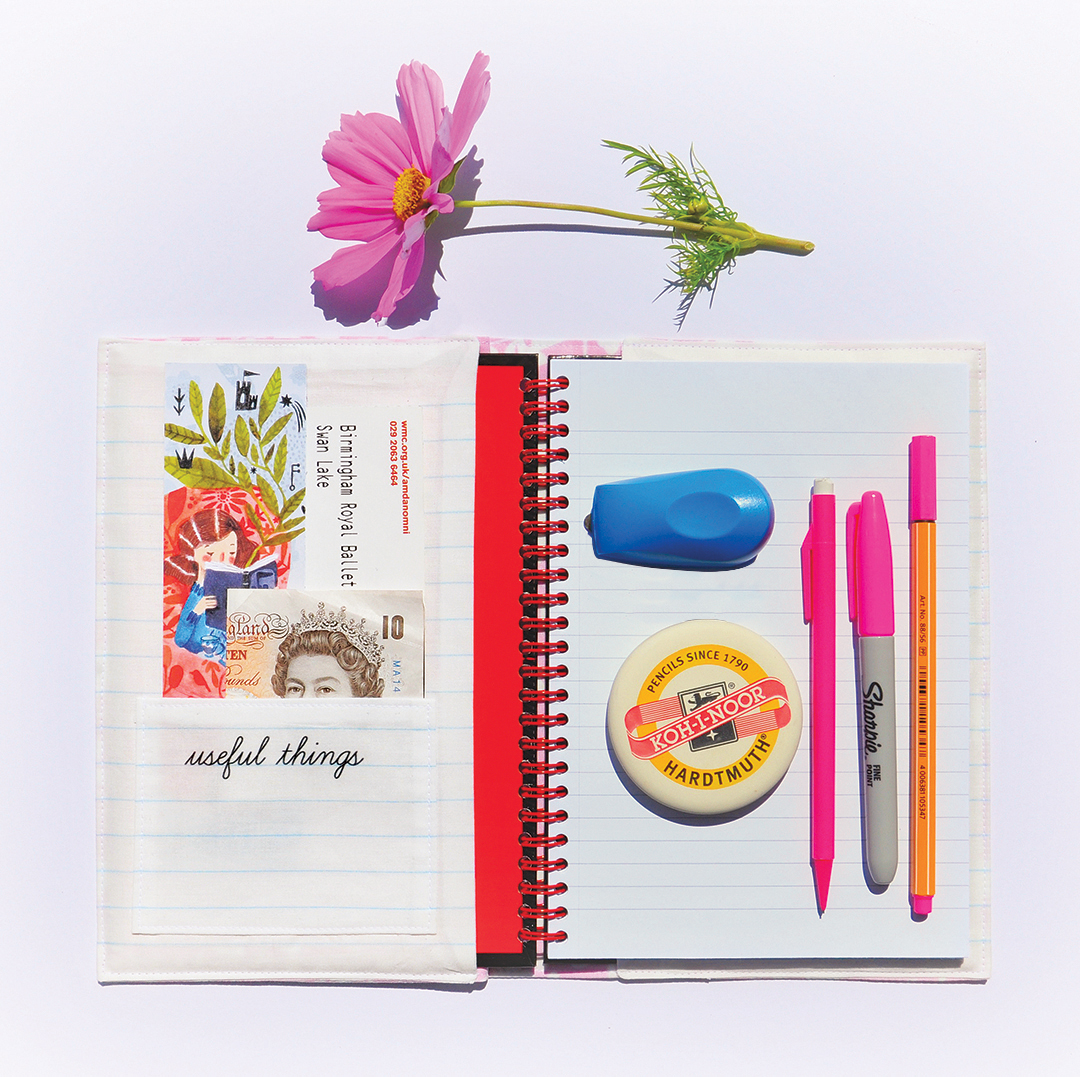
The covers make great gifts and were originally conceived as end-of-year teacher gifts. They are reusable, and machine washable.
You will need:
- A hard-back notebook (spiral bound works best).
- Half a yard of fabric — you may need more or less depending on the size of the notebook. I was able to print covers for two A5 notebooks on a yard of Petal Signature Cotton®
- Iron-on (fusible) interfacing — enough for two pockets.
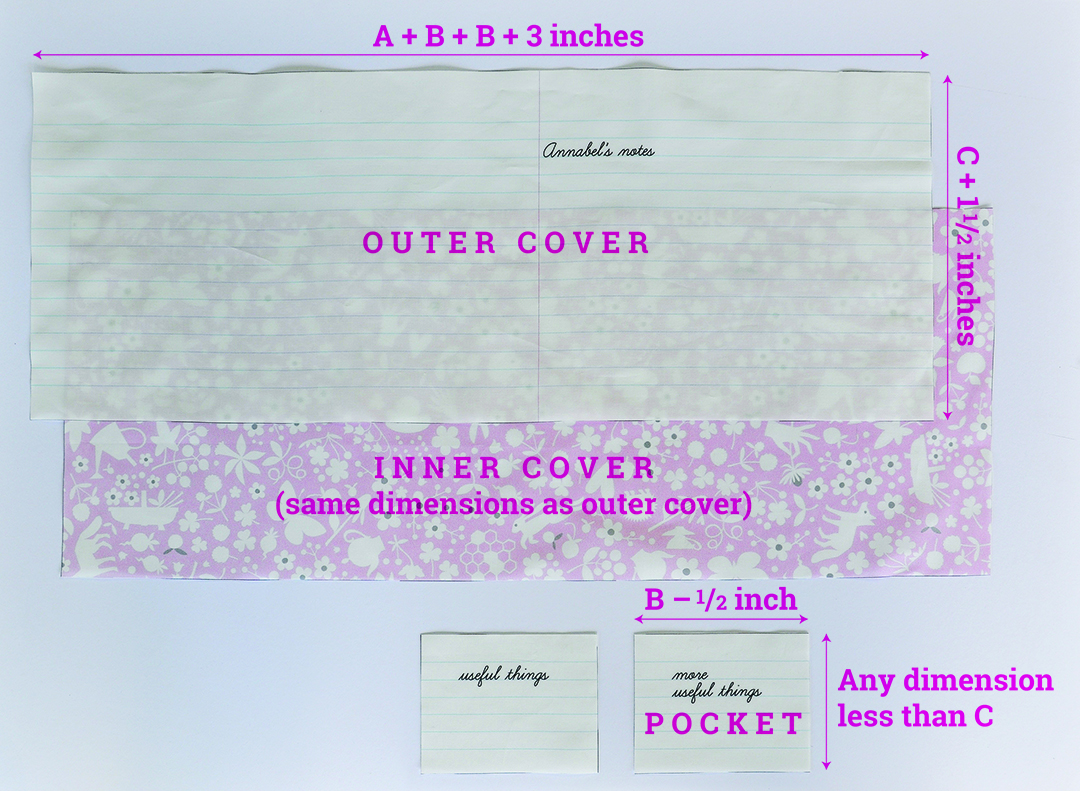
How to calculate the dimensions of your pattern pieces:
- Measure the width of your opened notebook (A). Decide on the desired width of your inner flaps (B).
- A plus B plus B plus 3″ = fabric width for outer and inner covers.
- Measure the height of your notebook (C). C + 1.5 inches = fabric height for outer and inner covers.
- B minus 1/2 inch = width of pocket fabric (height of pocket can be anything you want as long as its less than C).

How to sew your notebook cover:
4. Cut out an OUTER COVER, an INNER COVER and two POCKETS.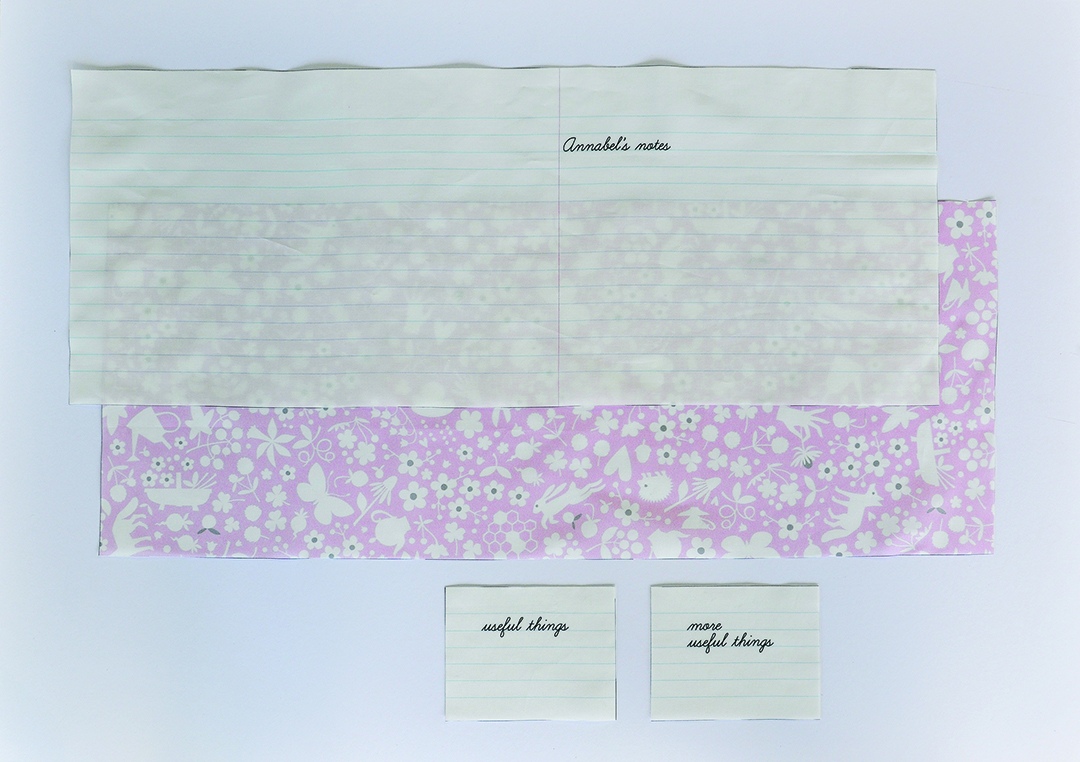 5. Iron on the interfacing to the wrong side of both POCKETS. This will make them sturdier and will stop the raw edges inside the pockets from fraying.
6. Fold over 1/4 inch hems on all edges of the pockets and press. Machine sew along the top edge of each pocket. Press again.
7. Pin the pockets onto the right side of the OUTER COVER. Position the pockets 1 inch away from the side edges (see image below).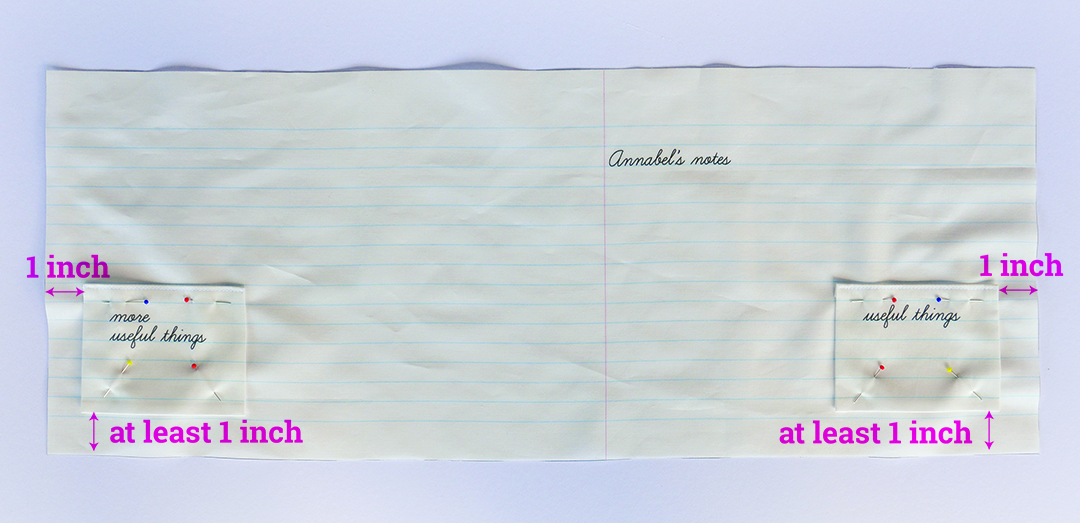
8. Machine sew, close to the edges along three sides, leaving the top open to form the pocket. 
9. Placing right sides together, pin the OUTER COVER to the INNER COVER.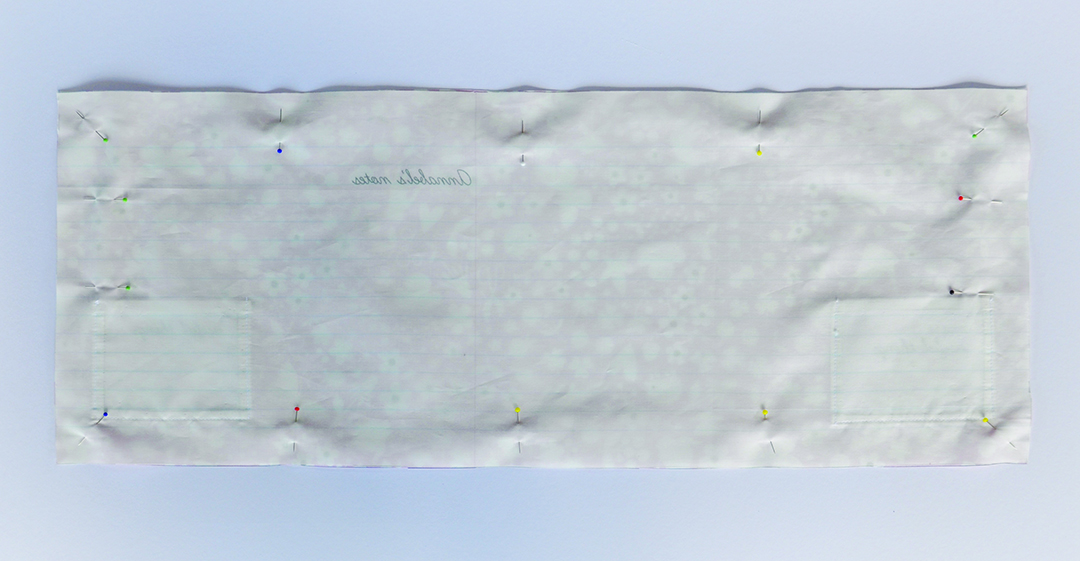
10. Machine sew along all four edges (seam allowance 1/2 inch), leaving a gap of about 4 inches for turning. Clip the corners.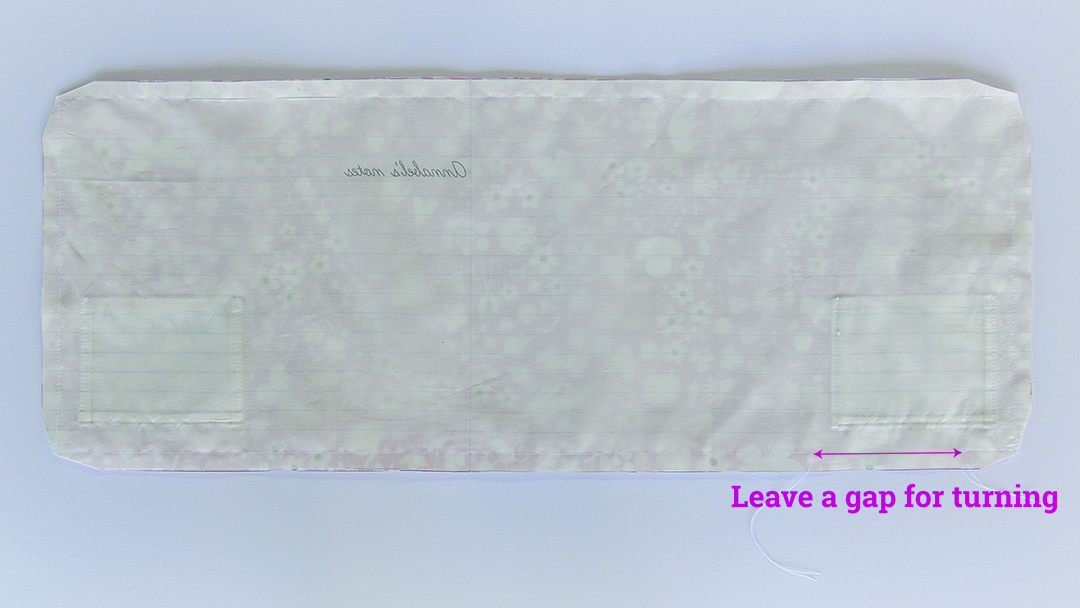
11. Press seams open and turn the covers the right way around and press. There is NO NEED to sew up the open gap.
12. Fold in the covers to create two flaps. The overall width should now be 2 inches wider than your open notebook. Pin in place.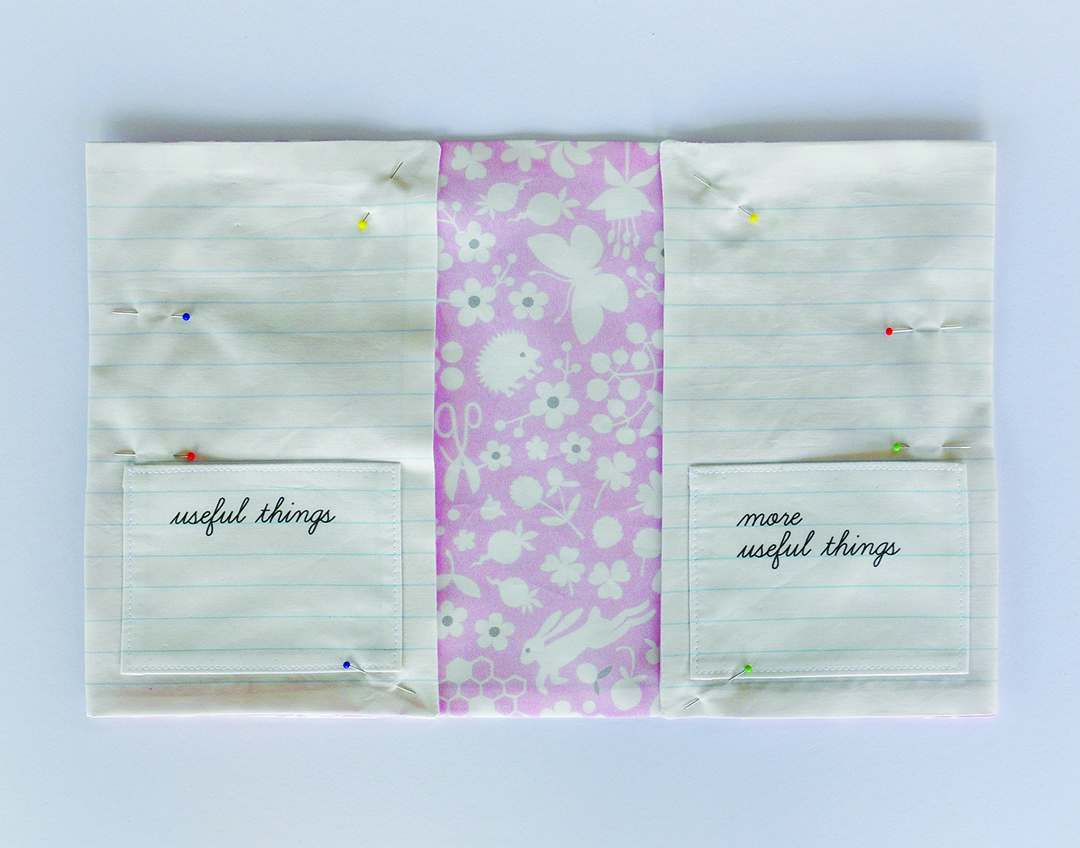
13. Machine topstitch along all edges. The open gap will be automatically sewn closed. Press.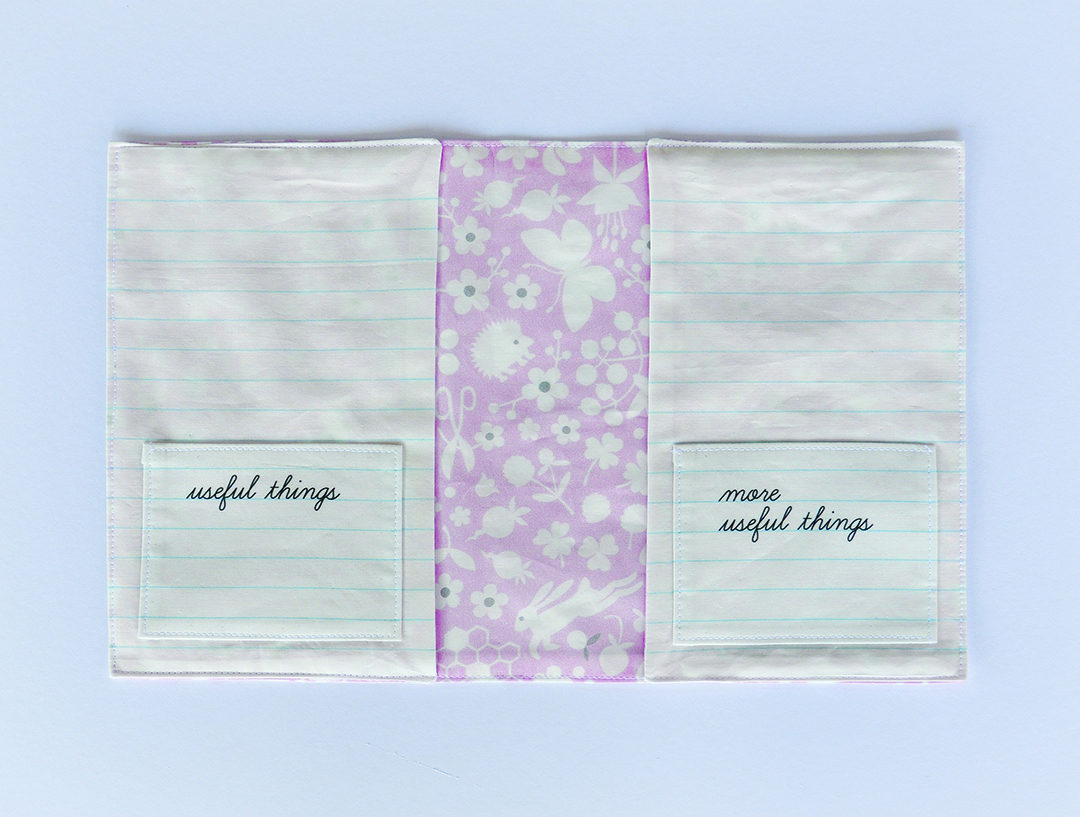
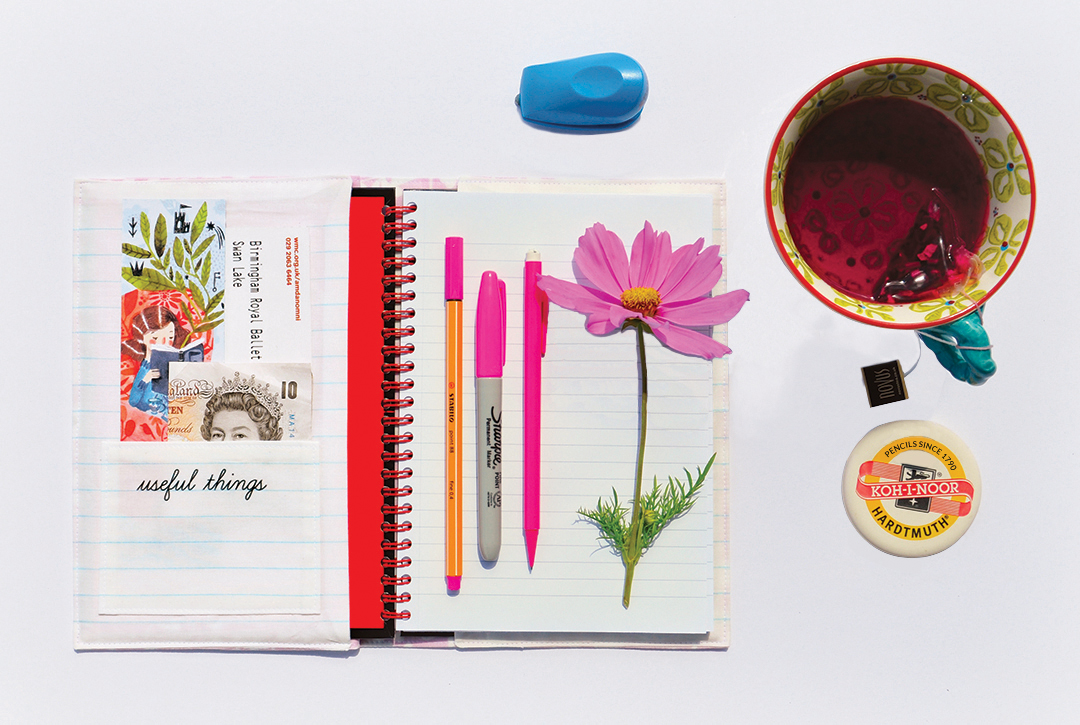
14. Insert the notebook covers into the flaps. You’re finished! For more back-to-school projects, check out our Pinterest board full of DIY’s and other quick projects.
Need more DIY projects? Check out our Back to School DIYs roundup for 41 awesome projects to get your creativity flowing!
About our Guest Author


Ceri Staziker is a freelance graphic designer, working from home in an old cottage in the countryside on the outskirts of Cardiff (the capital city of Wales). She loves to photograph her morning walks and sewing projects which she documents on Instagram (@cerigwen). Nothing gives her more pleasure than working with fabrics she has designed herself.


This is a great tutorial! I have a soft-cover journal I’d love to do this for – do you have any recommendations on what I could change/add to these materials to make the cover rigid? Thanks!!
Hi Hannah,
We’re so glad you enjoyed this tutorial! While we haven’t tested it out, we think sandwiching a small piece of cardboard (slightly smaller than the cover) between the journal covers and fabric should do the trick.
[…] Een kaft van textiel, leuk! [Bron] […]
[…] Personalized notebook covers | Ceri Staziker […]
So cool! I am inspired. Thank you for sharing!
Thank you Lucie!
Thank you. What a clever idea………..love that fact that’s is washable and reusable.
Notebooks can get grubby so I think the washability is essential. 🙂
Thank you. I have been .ooking for some instructions to make a cover like this.
Hope you find the instruction useful Sheena.
This is great, Ceri! Thanks for sharing!
You’re welcome Marcyne.
Love this Ceri, the photos, the instructions and all the incredible details, all perfect!
Thank you Tina x
Great tutorial, Ceri! Thanks!
Thank you Michelle!