


Do you have some jersey fabric scraps that are waiting for the perfect upcycled project? You’re in luck! This tutorial will show you how to create an environmentally friendly tawashi sponge from your old cotton jersey leftovers. Originally from Japan, these dish-scrubbing sponges are the perfect solution to give scraps or even a pair of old socks a second life. Not only are the steps fast and easy, but you can wash and reuse the sponge over and over again!
How to Make Your Own Tawashi Sponge from Fabric Scraps
Materials:
- A small wooden board measuring 8 x 8″ (20 x 20 cm) and at least 3/4″ (2 cm) thick
- Hammer
- 20 flat head nails, roughly 1-1.5″ (2.5-4 cm) long
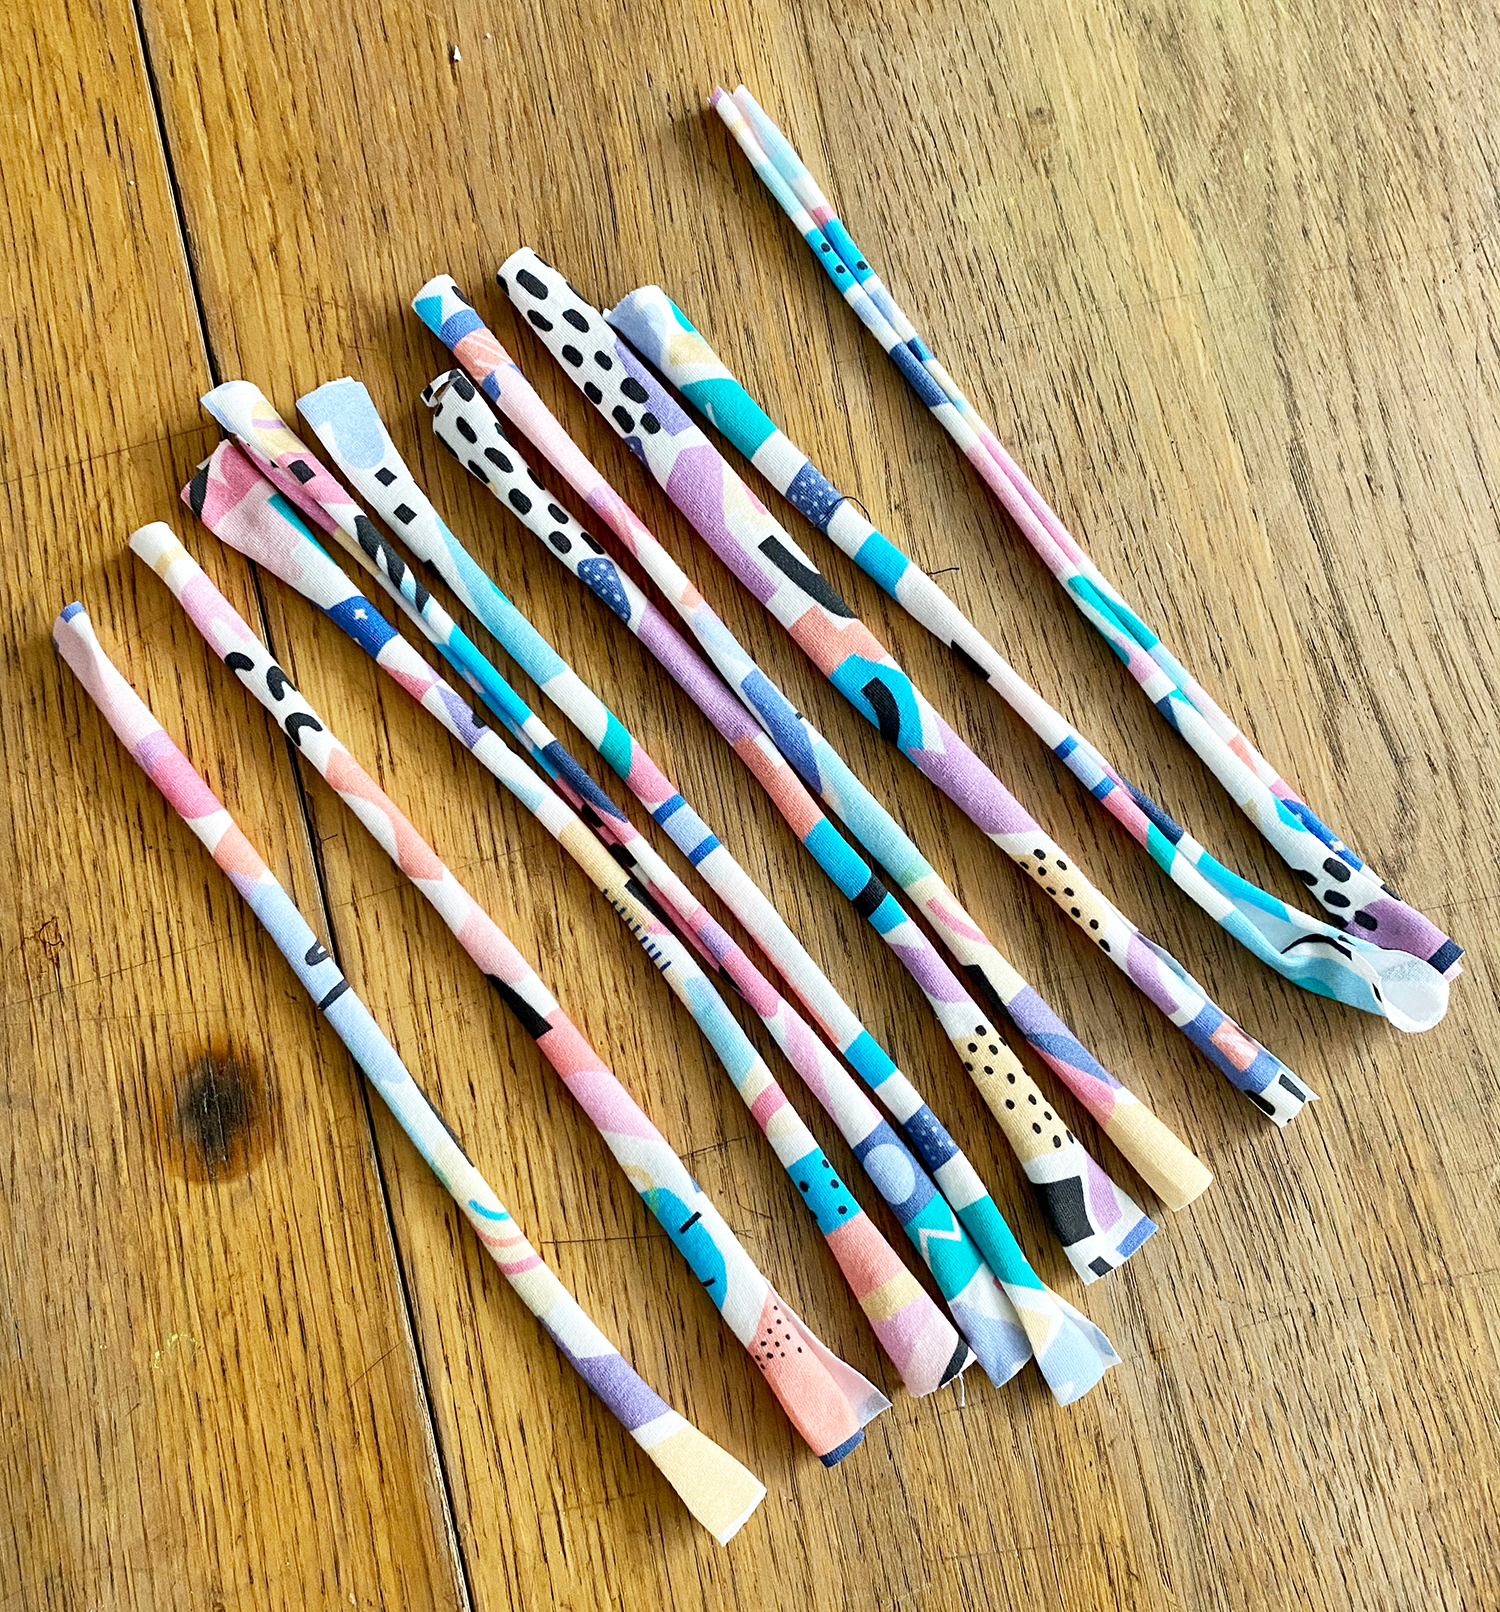
- Scraps of fabric (cotton jersey is recommended, but old socks and T-shirts are also suitable)
- Ruler
- Pencil
- Scissors

Featured designs: 80s Inspired Geometric Pattern by kennasatodesigns and Palm leaf by sunny_afternoon
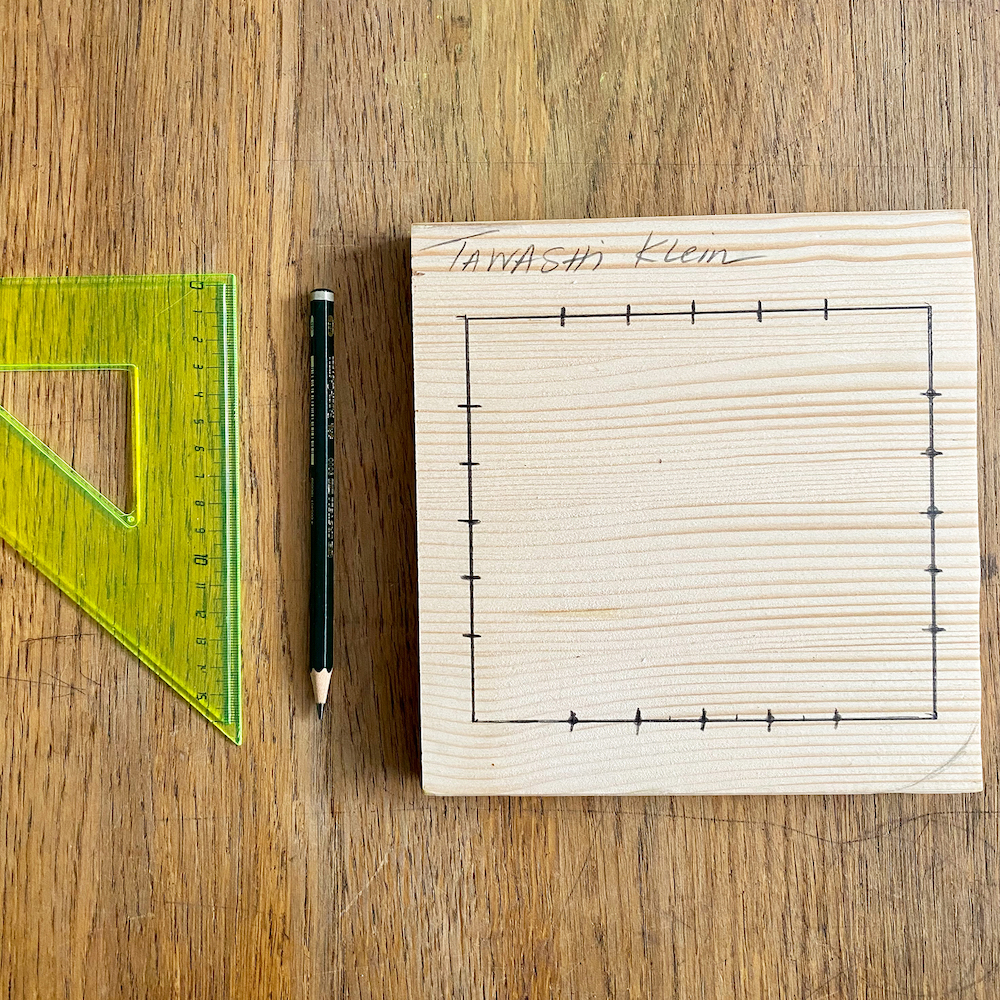
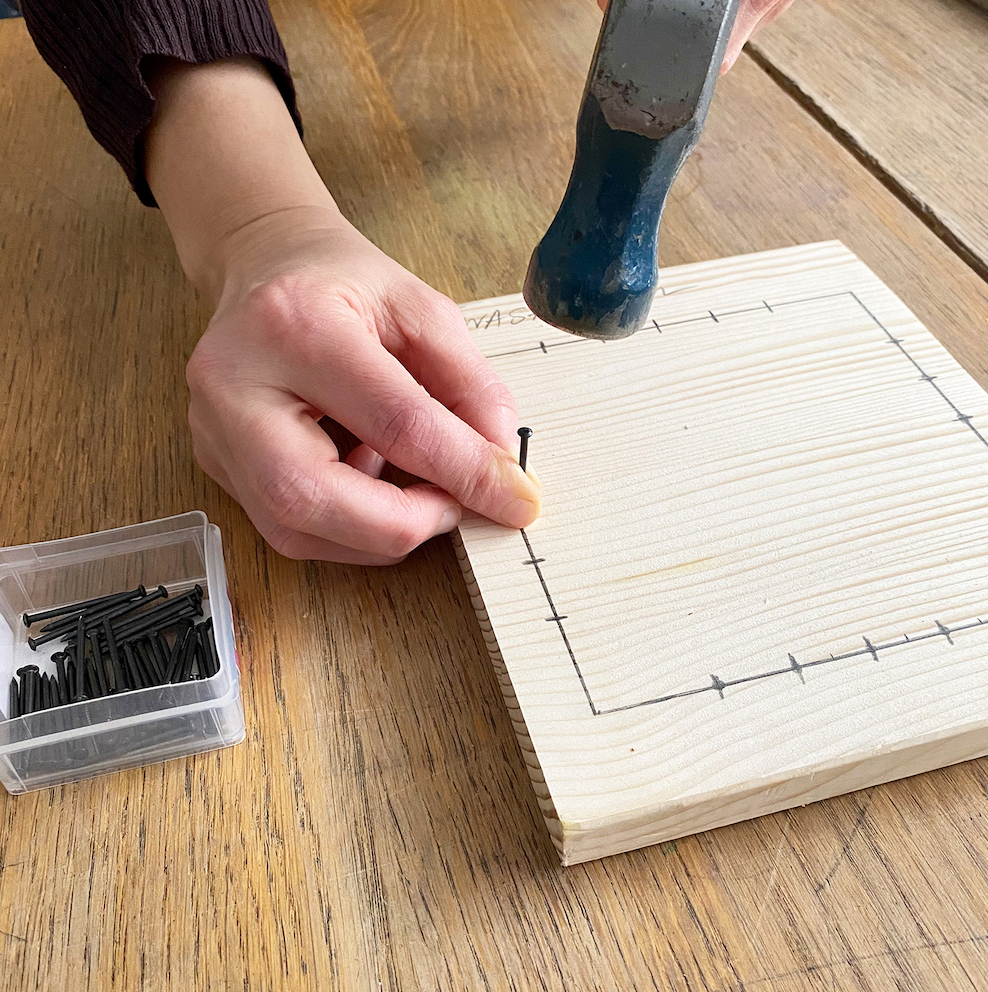
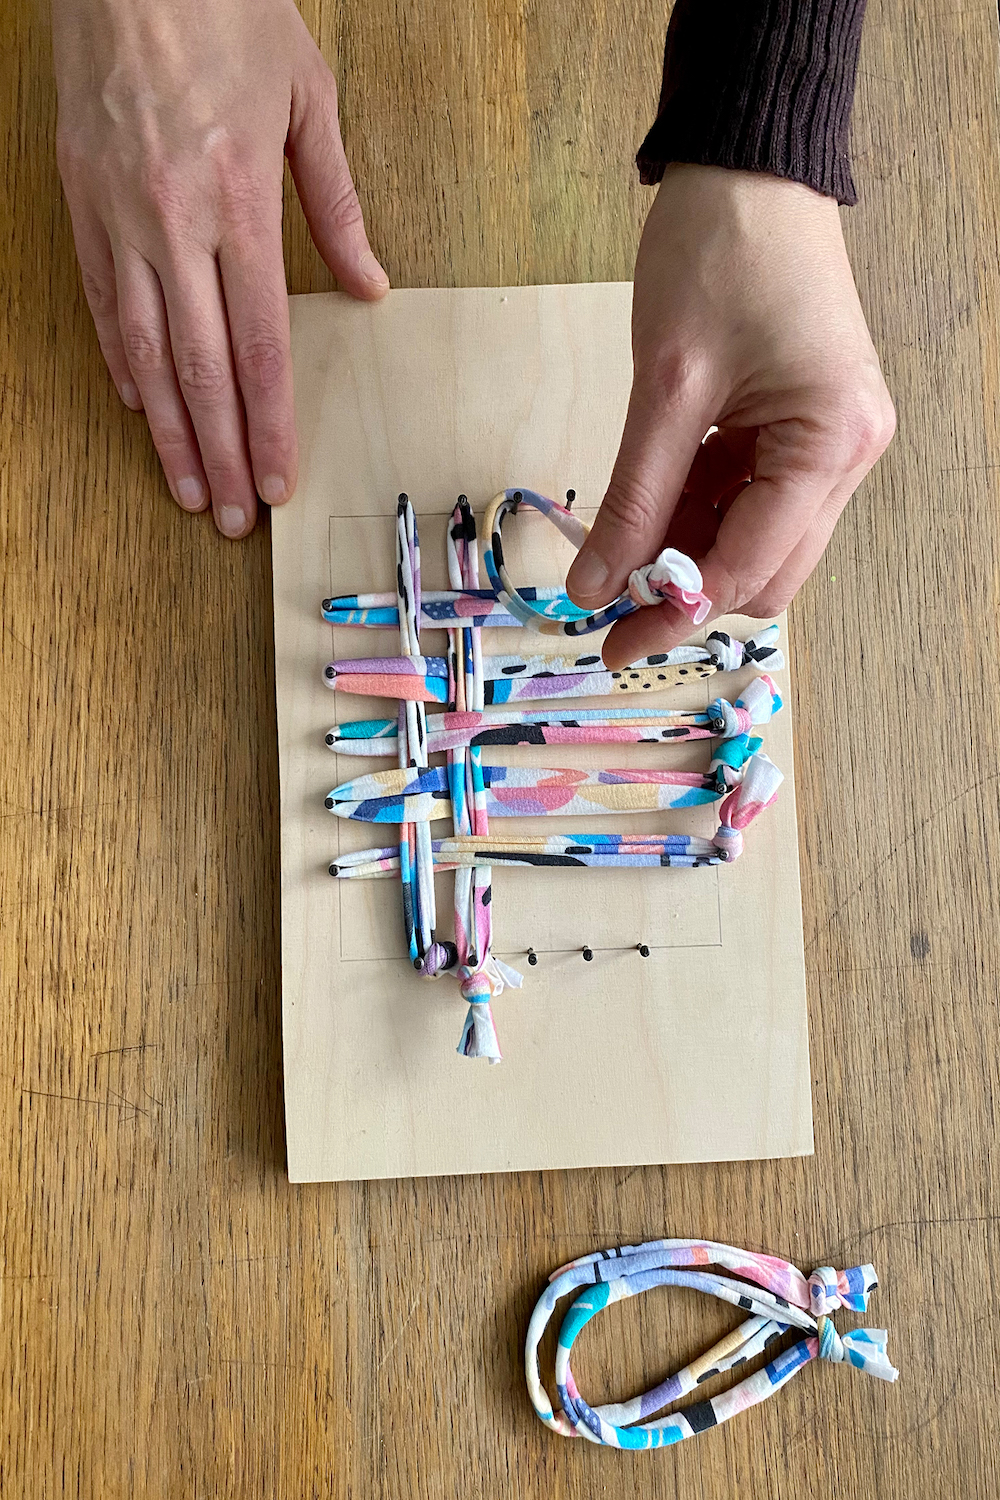
1. Prepare the Tawashi Loom
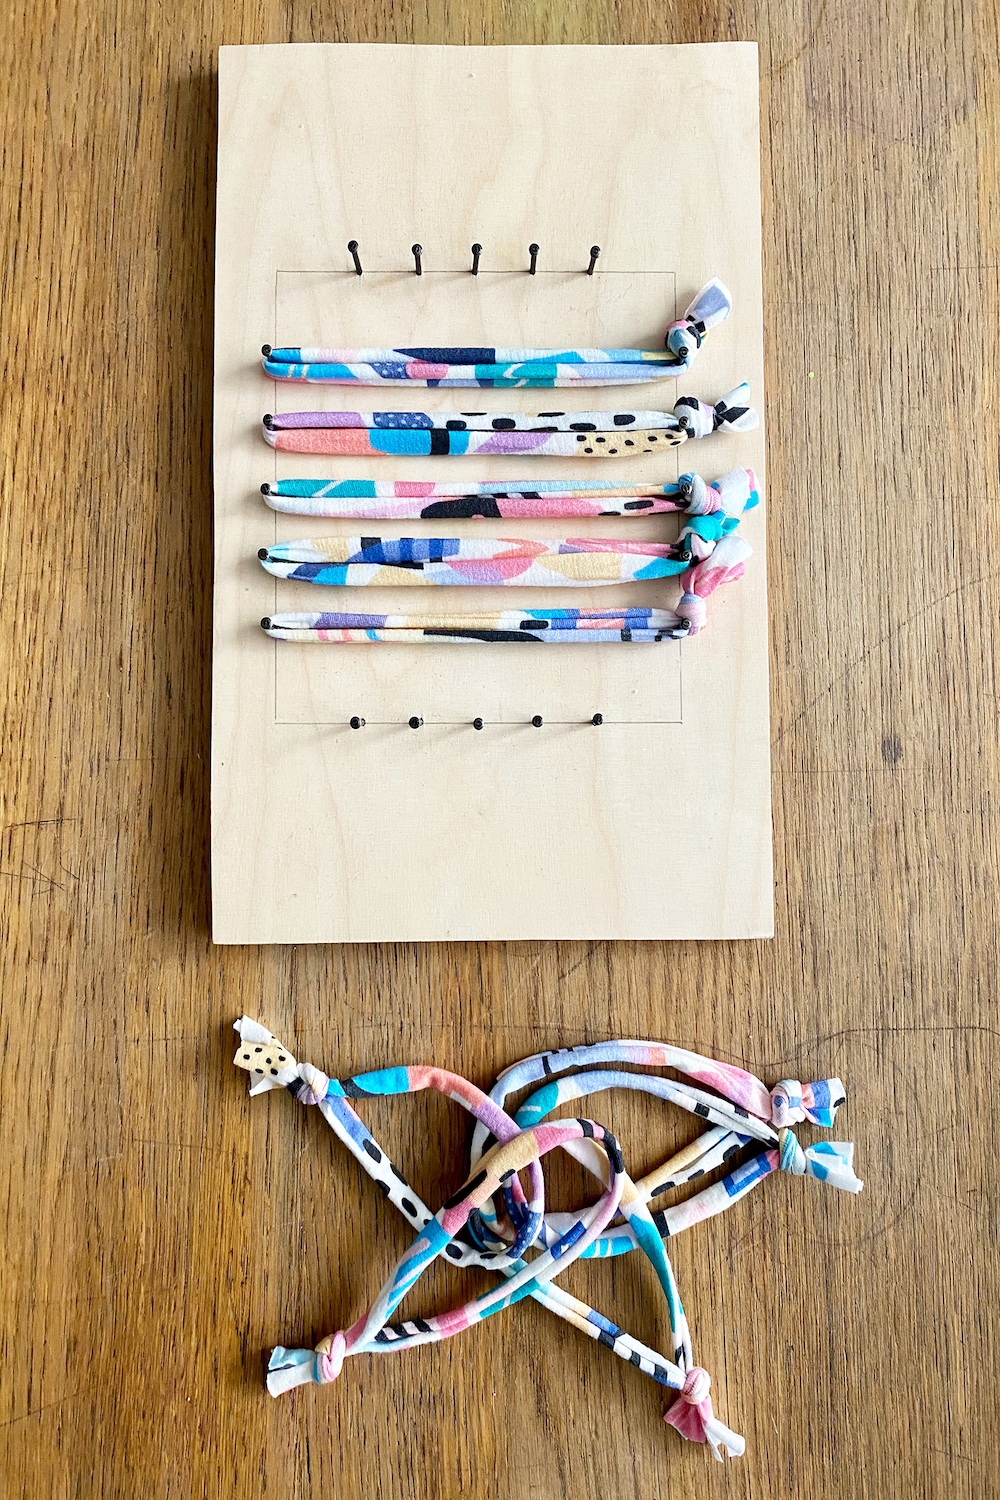
Measure a square about 5.5″ (14 cm) on your board and mark it with a pencil. Mark five points on each edge of the square every 4/5″ (2 cm), leaving the corners free. Hammer a nail into each marked point 1/2″ (1 cm) deep. Now your tawashi frame is ready!
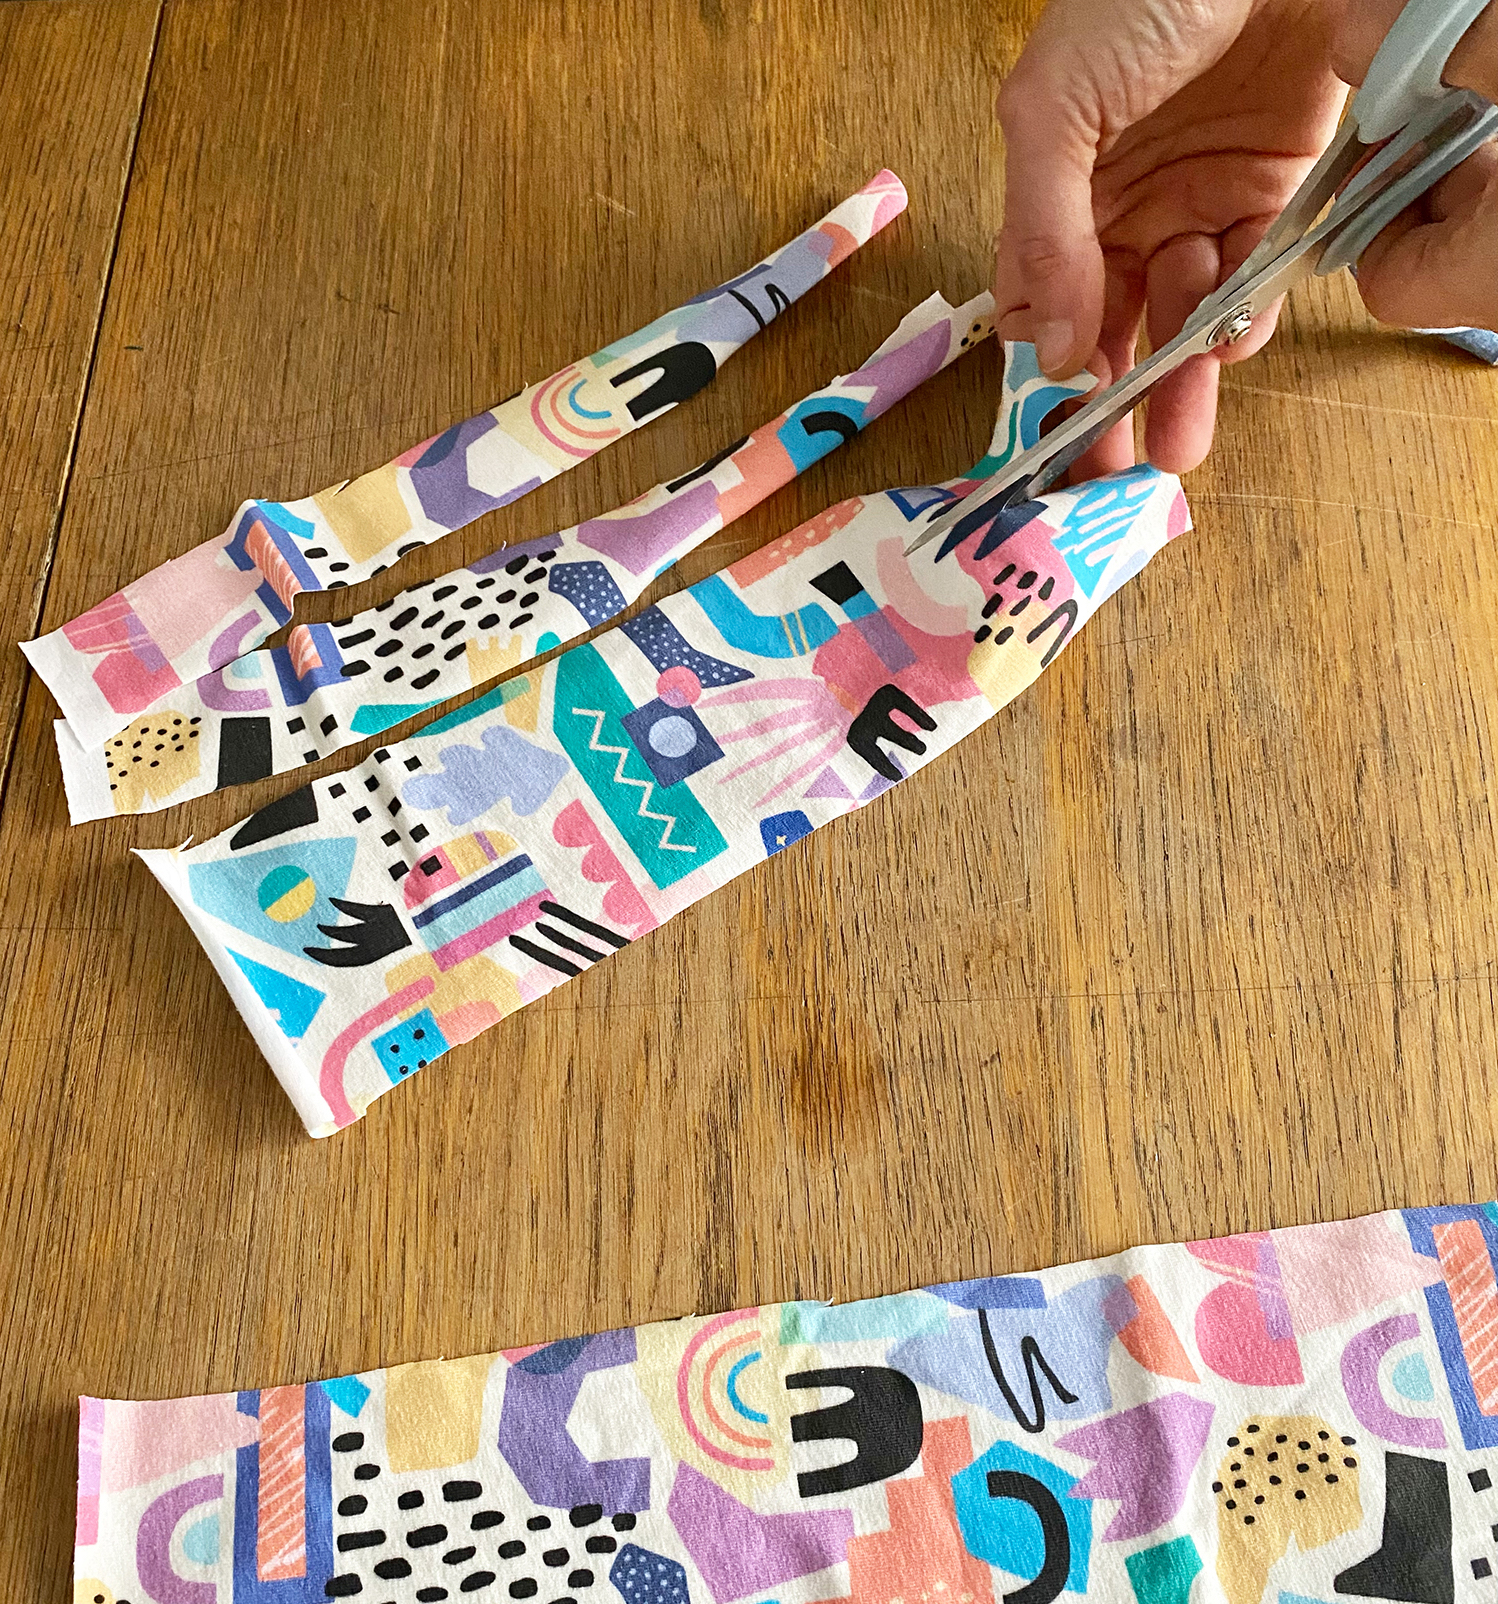
2: Prepare Your Fabric Strips
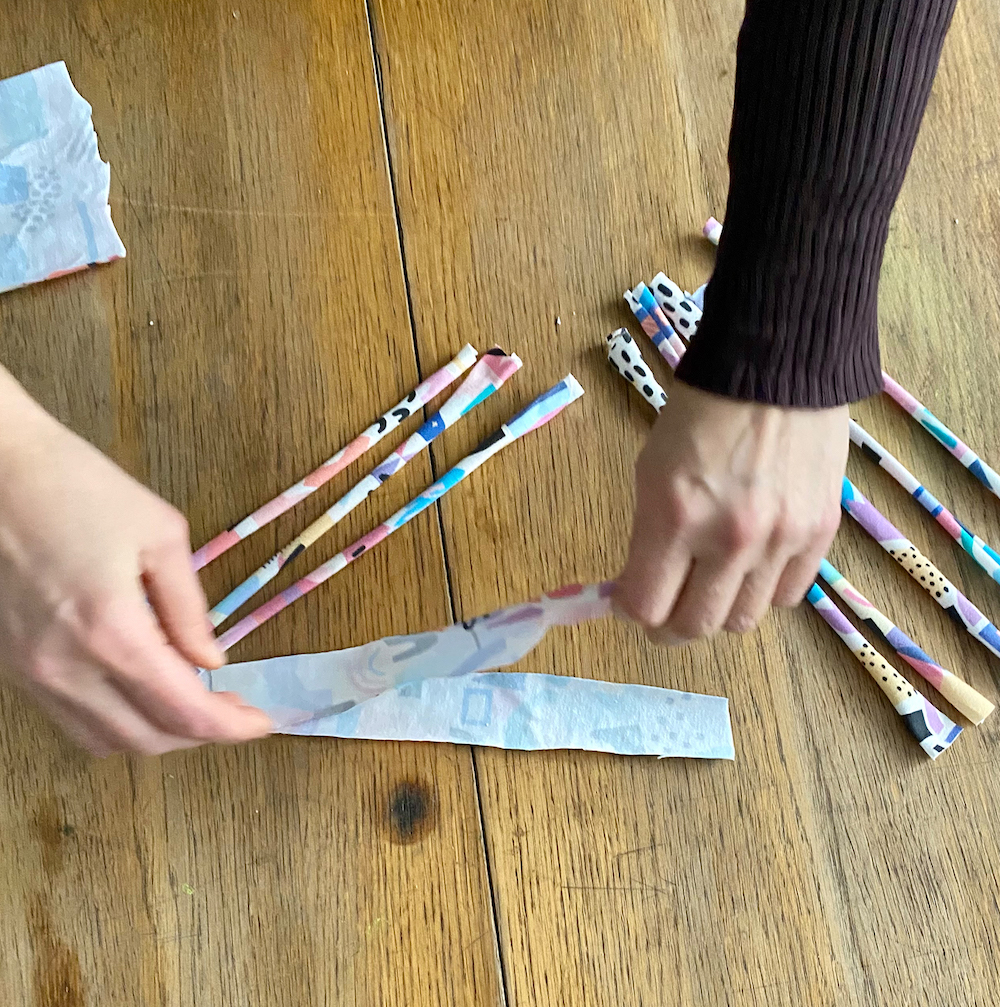
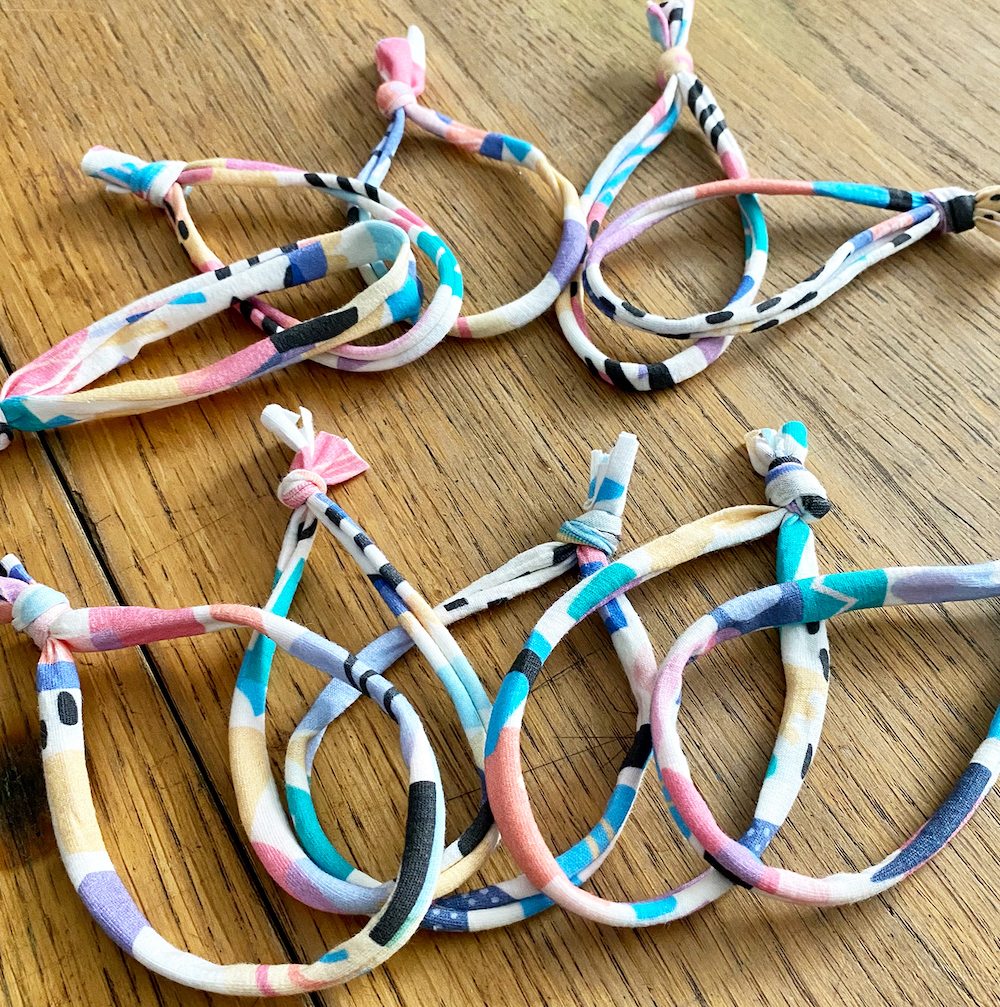
Cut your fabric into strips about 1″ (2.5 cm) wide and 12.5″ (32 cm) long. Then pull the ends of your jersey tight to curl it up a little, and knot the two ends together to form a ring. Repeat until you have 10 rings.
3: Weave The Fabric Rings
Stretch the first five rings onto your frame by pulling one end over a nail, then the other end over the opposite nail. These rings of fabric should be tight! If they seem a little loose, just untie the knots and retie tighter for a better fit.
Now add in the next five rings to the leftover nails in a weaving motion, alternating between pulling under and over the already placed rings.
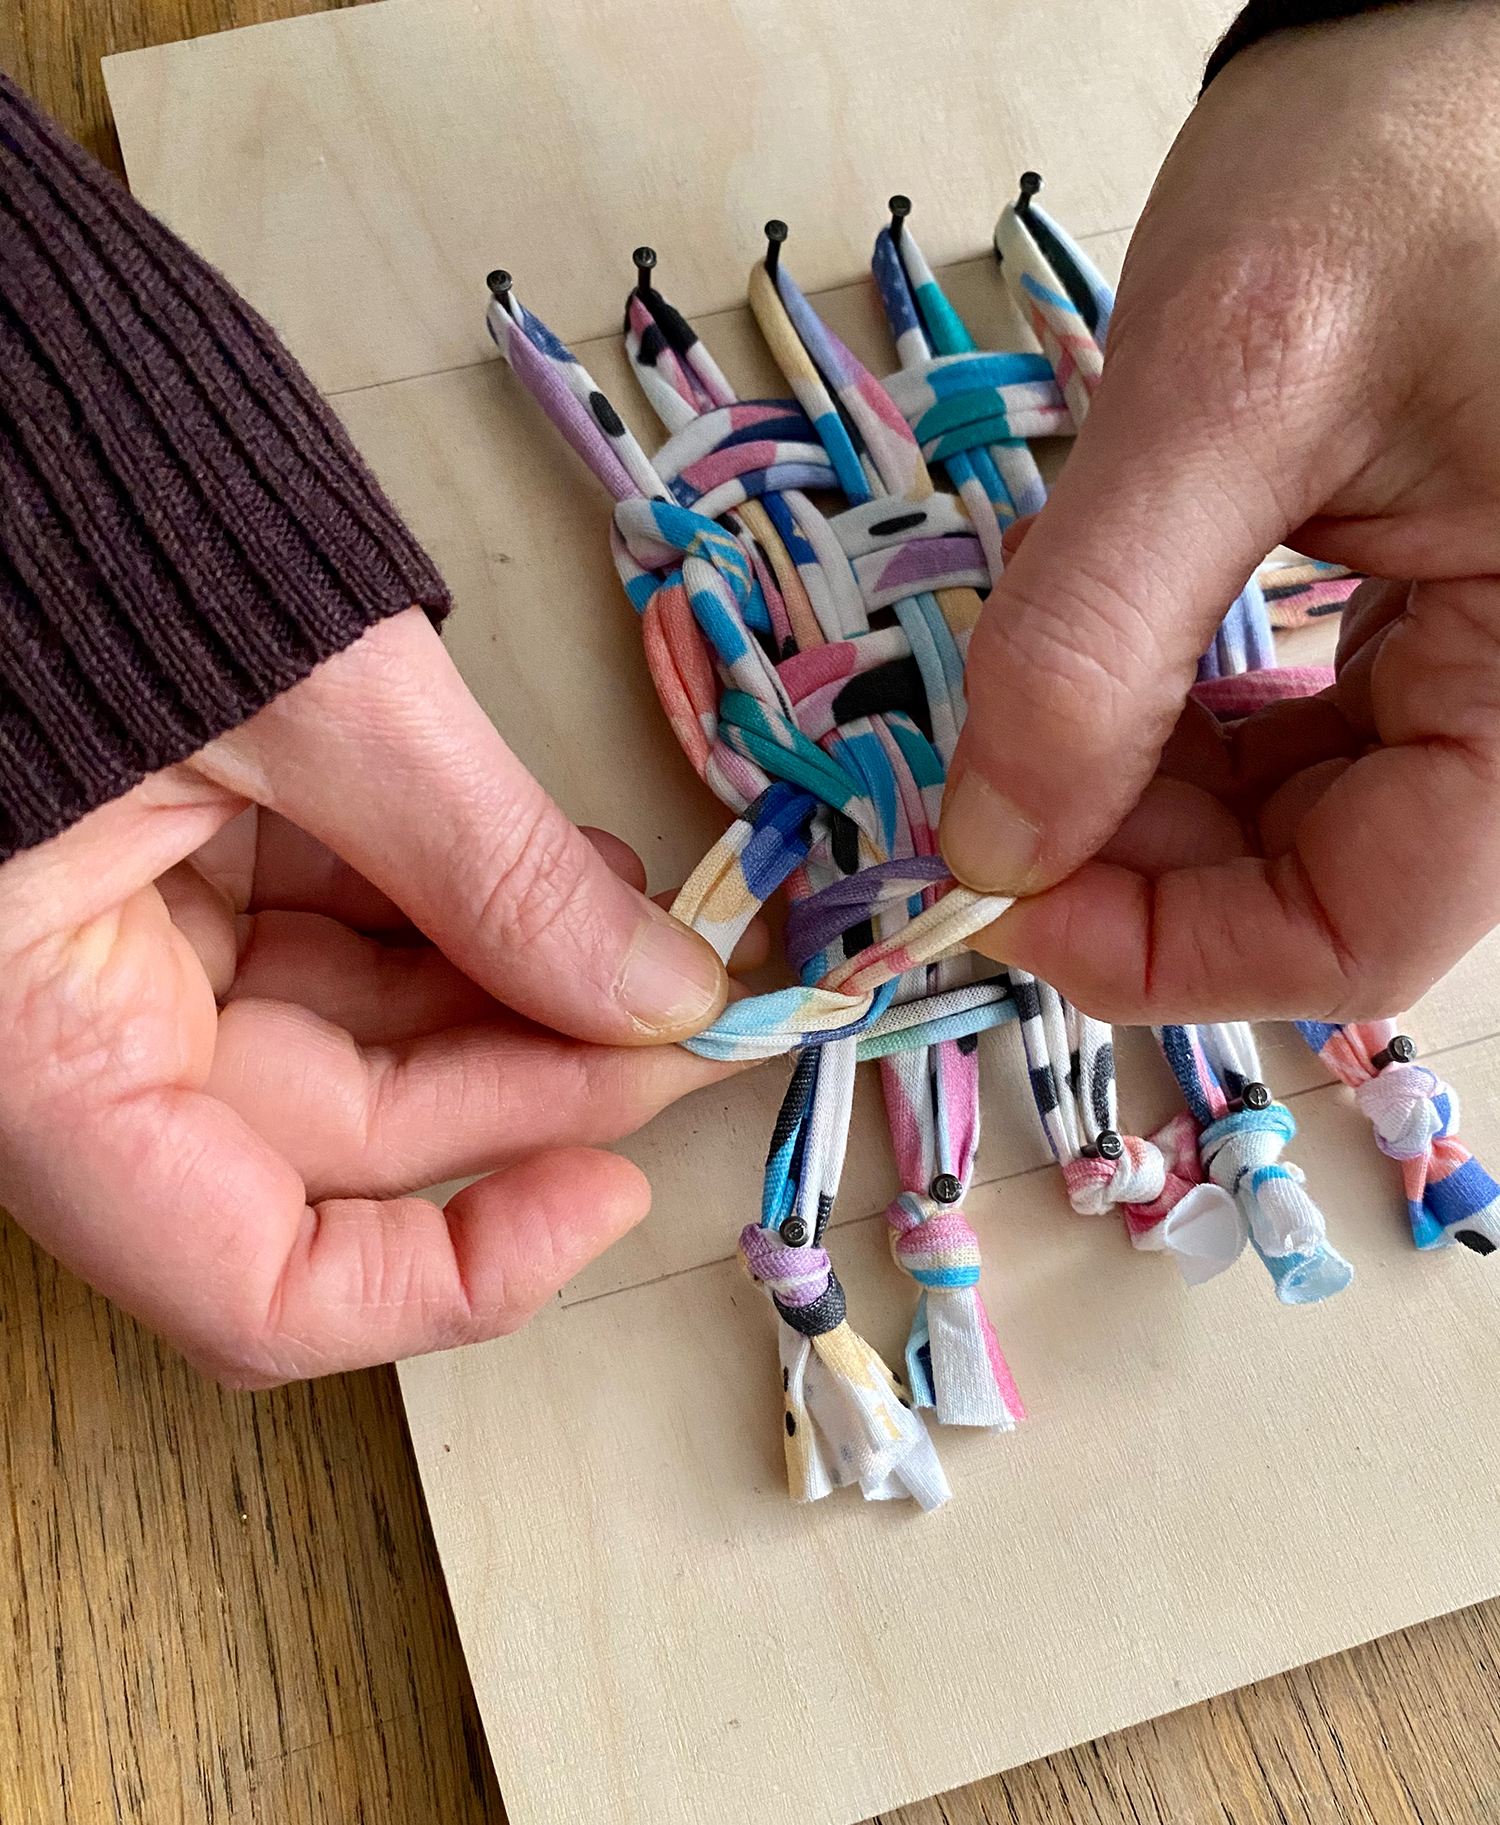
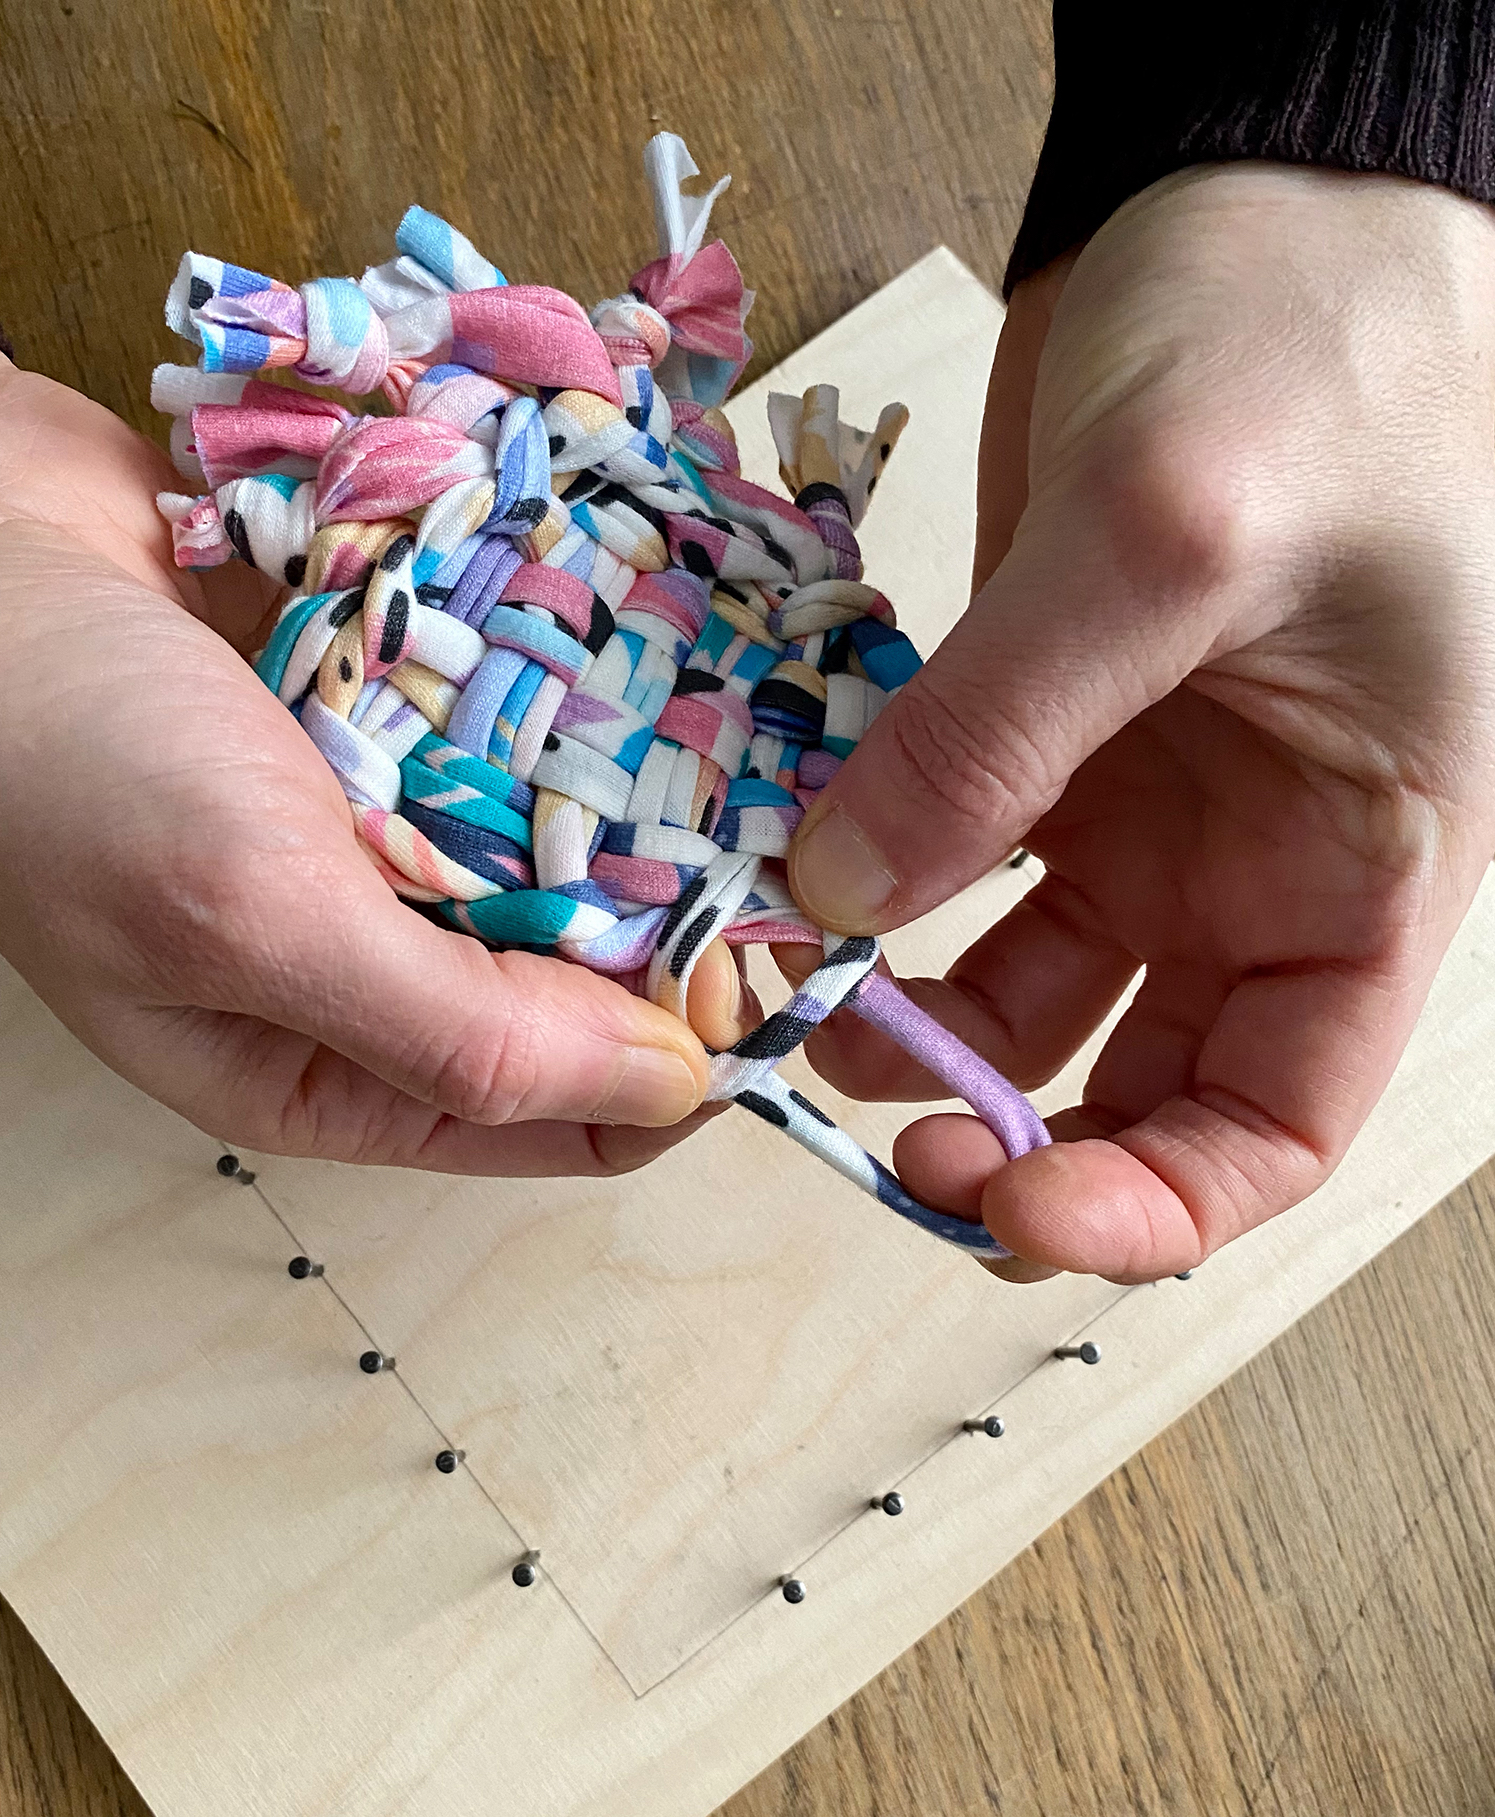
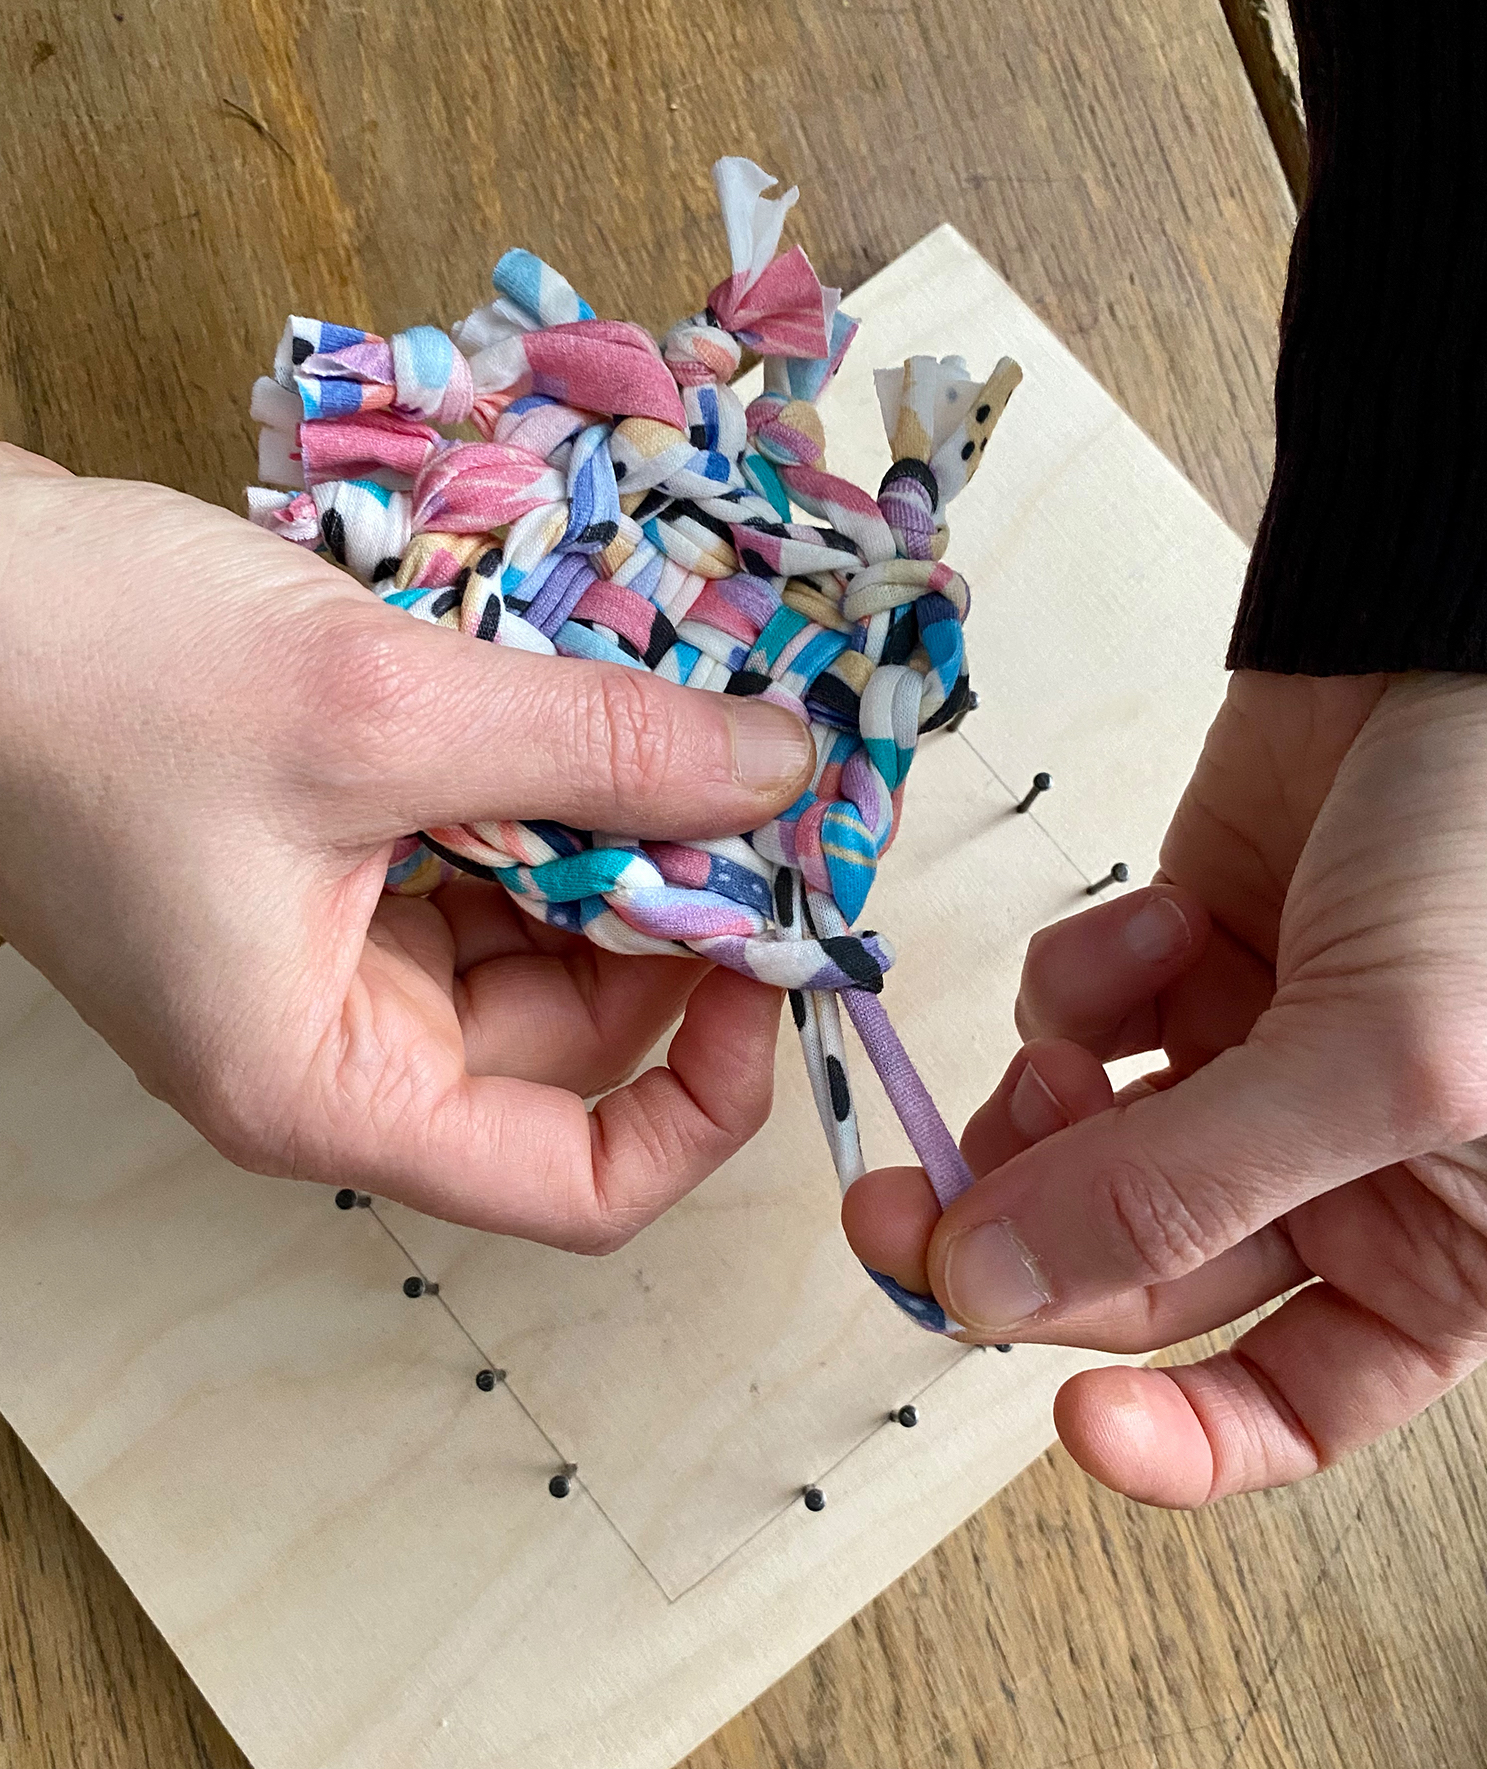
4: Finish the Edges
Starting in one corner, pull one end of a fabric ring from a nail and pull it through the end of the ring over it. Work your way up the row and around the entire sponge until only one loop is exposed. Pull this loop through a different exposed loop so that your sponge doesn’t come undone (and this way you can hang it anywhere!).

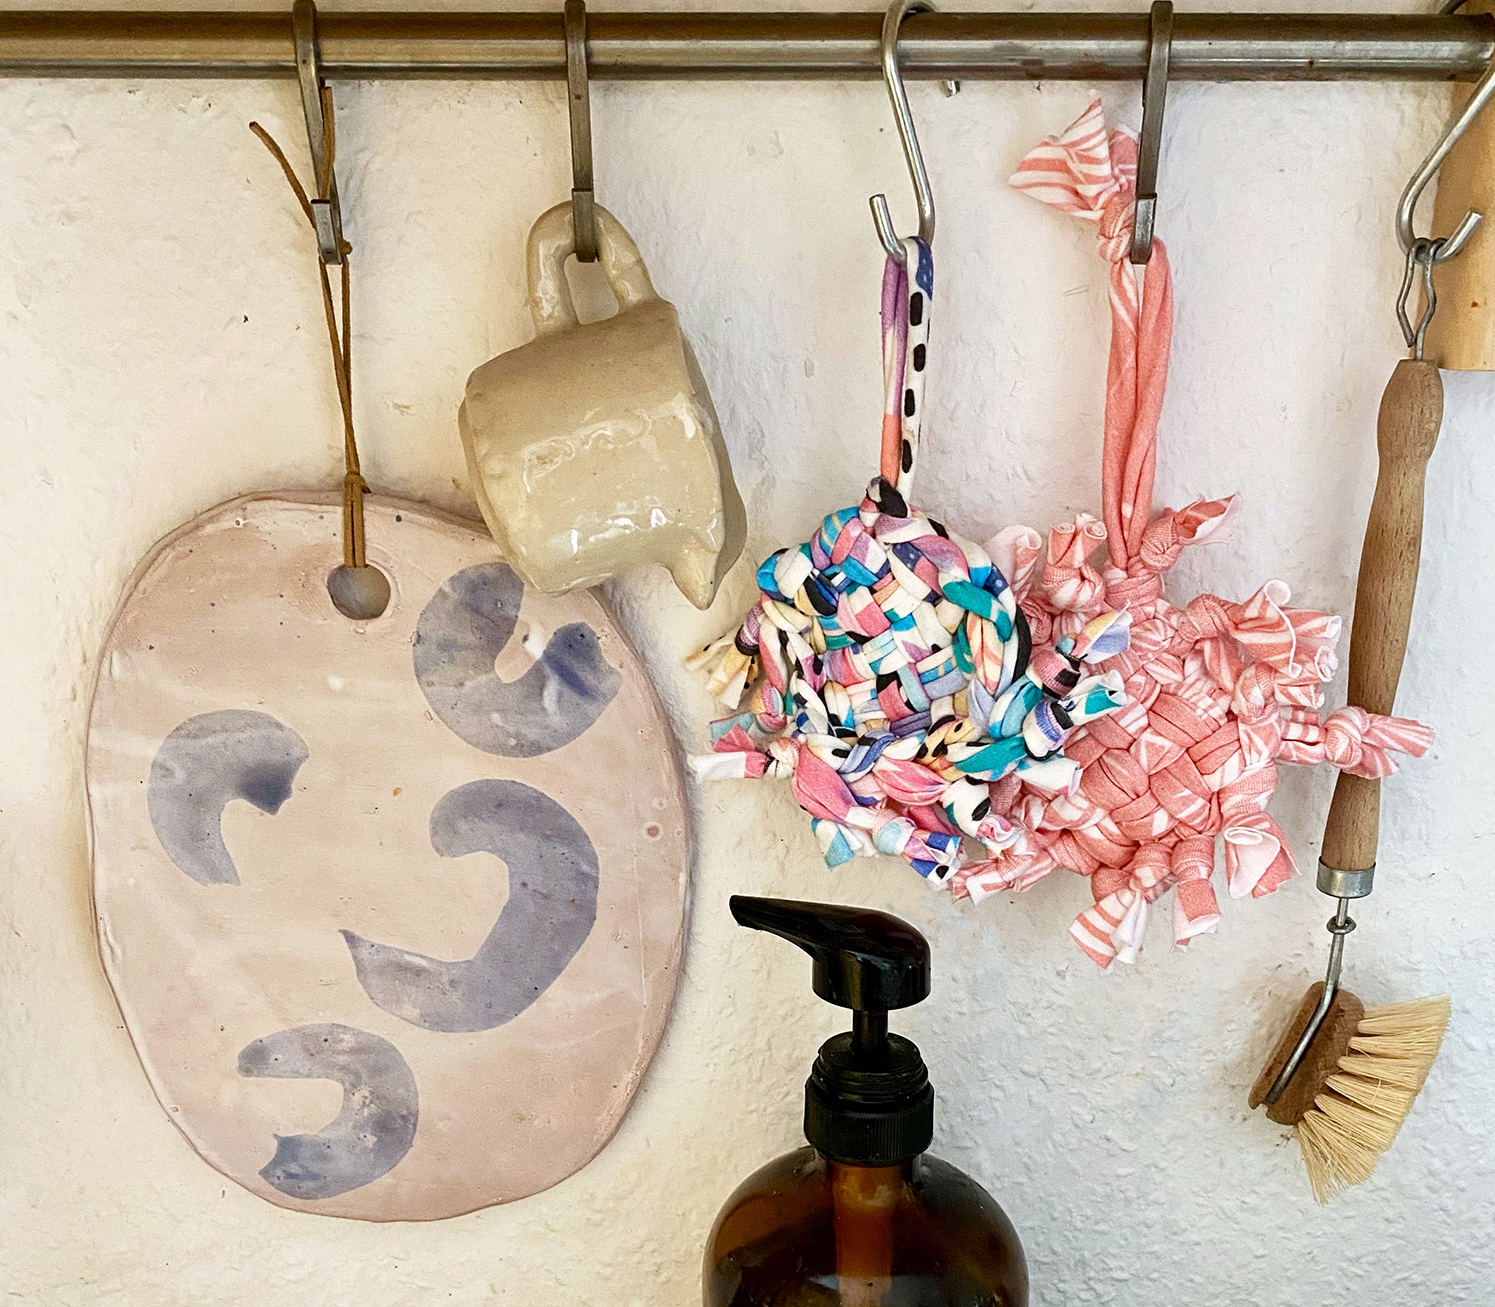
Now your tawashi sponge is ready! These are ideal for cleaning, washing dishes and even removing makeup. Don’t forget to tag your creations on Instagram with #spoonflower— we’d love to see them!

About The Author
Julie from Berlin-based nonprofit organization Trial and Error is interested in all creative post-capitalist solutions like upcycling, urban gardening, ecofeminism, and much more!


This sounds a lot like potholder loop weaving (that’s at least a 50 year old craft in the US.). If you want to try this technique out without building your own loom, you can search for potholder loom or loop weaving loom for an inexpensive plastic one (it may not last long, but for a few dollars it would give you a chance to decide if you like the technique enough to want to build your own loom.) Premade knit fabric loops are also available, but you can certainly make your own to use up scraps, once you figure out the size needed for your loom.
My thoughts exactly! ???? ???? ~NAC~