


In North America alone, close to 20 billion sanitary napkins, tampons and applicators are sent to landfills every year. Here at Spoonflower, we spend a lot of time thinking about how we can use our skill and talent as sewists to make small changes towards more sustainable living that have the potential to make a big impact. Many of us have vowed to cut back on our paper towel use, opted for fabric produce bags instead of plastic ones, and wrapped up our leftovers with DIY reusable food wraps, but what about period products?
Spoonflower Ambassador Rumana opened up recently on Instagram about her experience switching from disposable products to menstrual cups and period pants. As soon as we read it, we knew we had to get her on our blog to share more about how sewists can make their own period underwear, which is traditionally a pretty expensive item to purchase in retail. She took on the task of sourcing the best materials and finding the smartest methods to create your own that not only provide practical, reliable protection, but look stylish, too.
Keep reading to see how you can turn any underwear pattern into reusable period underwear featuring Cotton Spandex Jersey and our Fill-A-Yard® tool.
Rumana: Like a lot of people, I’ve tried to make changes in my day-to-day life that are more environmentally friendly. One of the biggest (and probably the best) changes I’ve made was changing to reusable period products.
Not only have I drastically reduced my waste during that time of the month, but I’ve also found it so much more practical than the traditional pads or tampons. Now, this didn’t come without a bit of trial and error and I’ve written some blog posts about my experiences of specific products. For me, I found the perfect combination was the menstrual cup and period pants. I use the period pants for lighter days/night-time or just as a “backup” to the cup (instead of a liner). I found these so much more comfortable than reusable sanitary pads.
But the biggest holdback for reusable period underwear is that they can be pretty expensive and let’s be honest, a bit boring in style! Depending on how heavy your periods are (and how you plan to use the pants) you might need a whole week’s worth or more. This is where being able to sew helps. Luckily, period underpants are actually not that hard to make yourself!
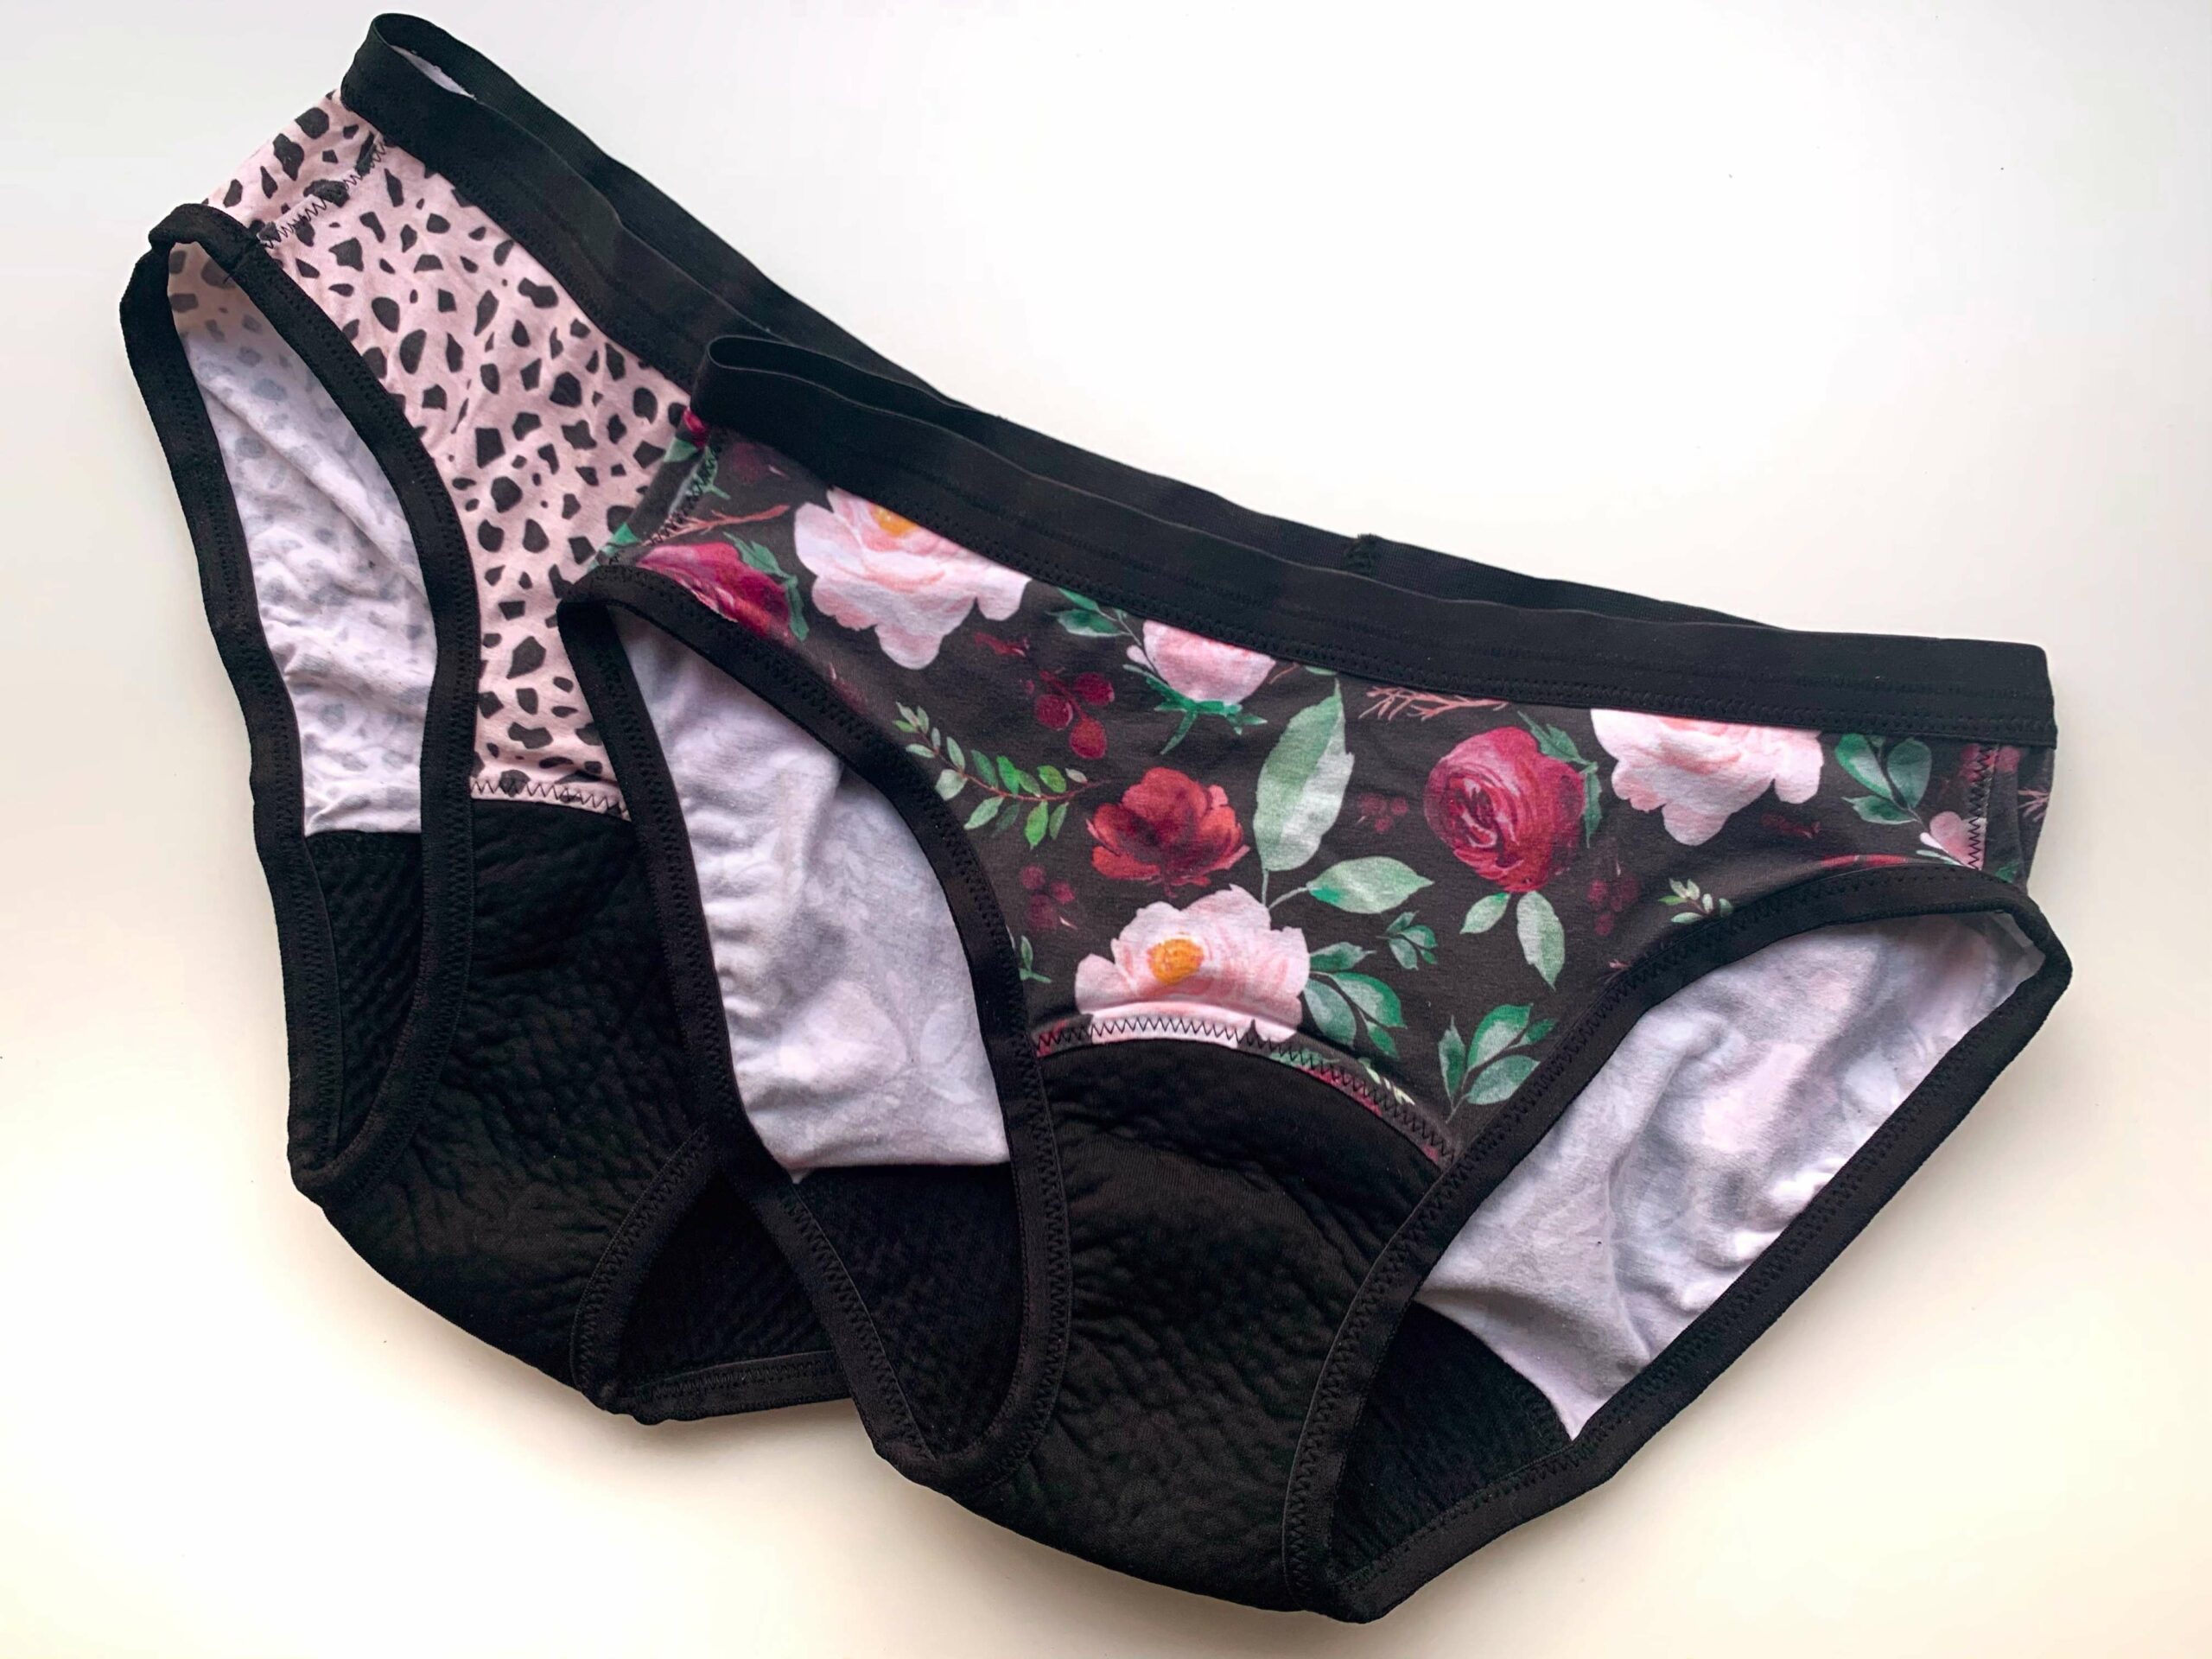
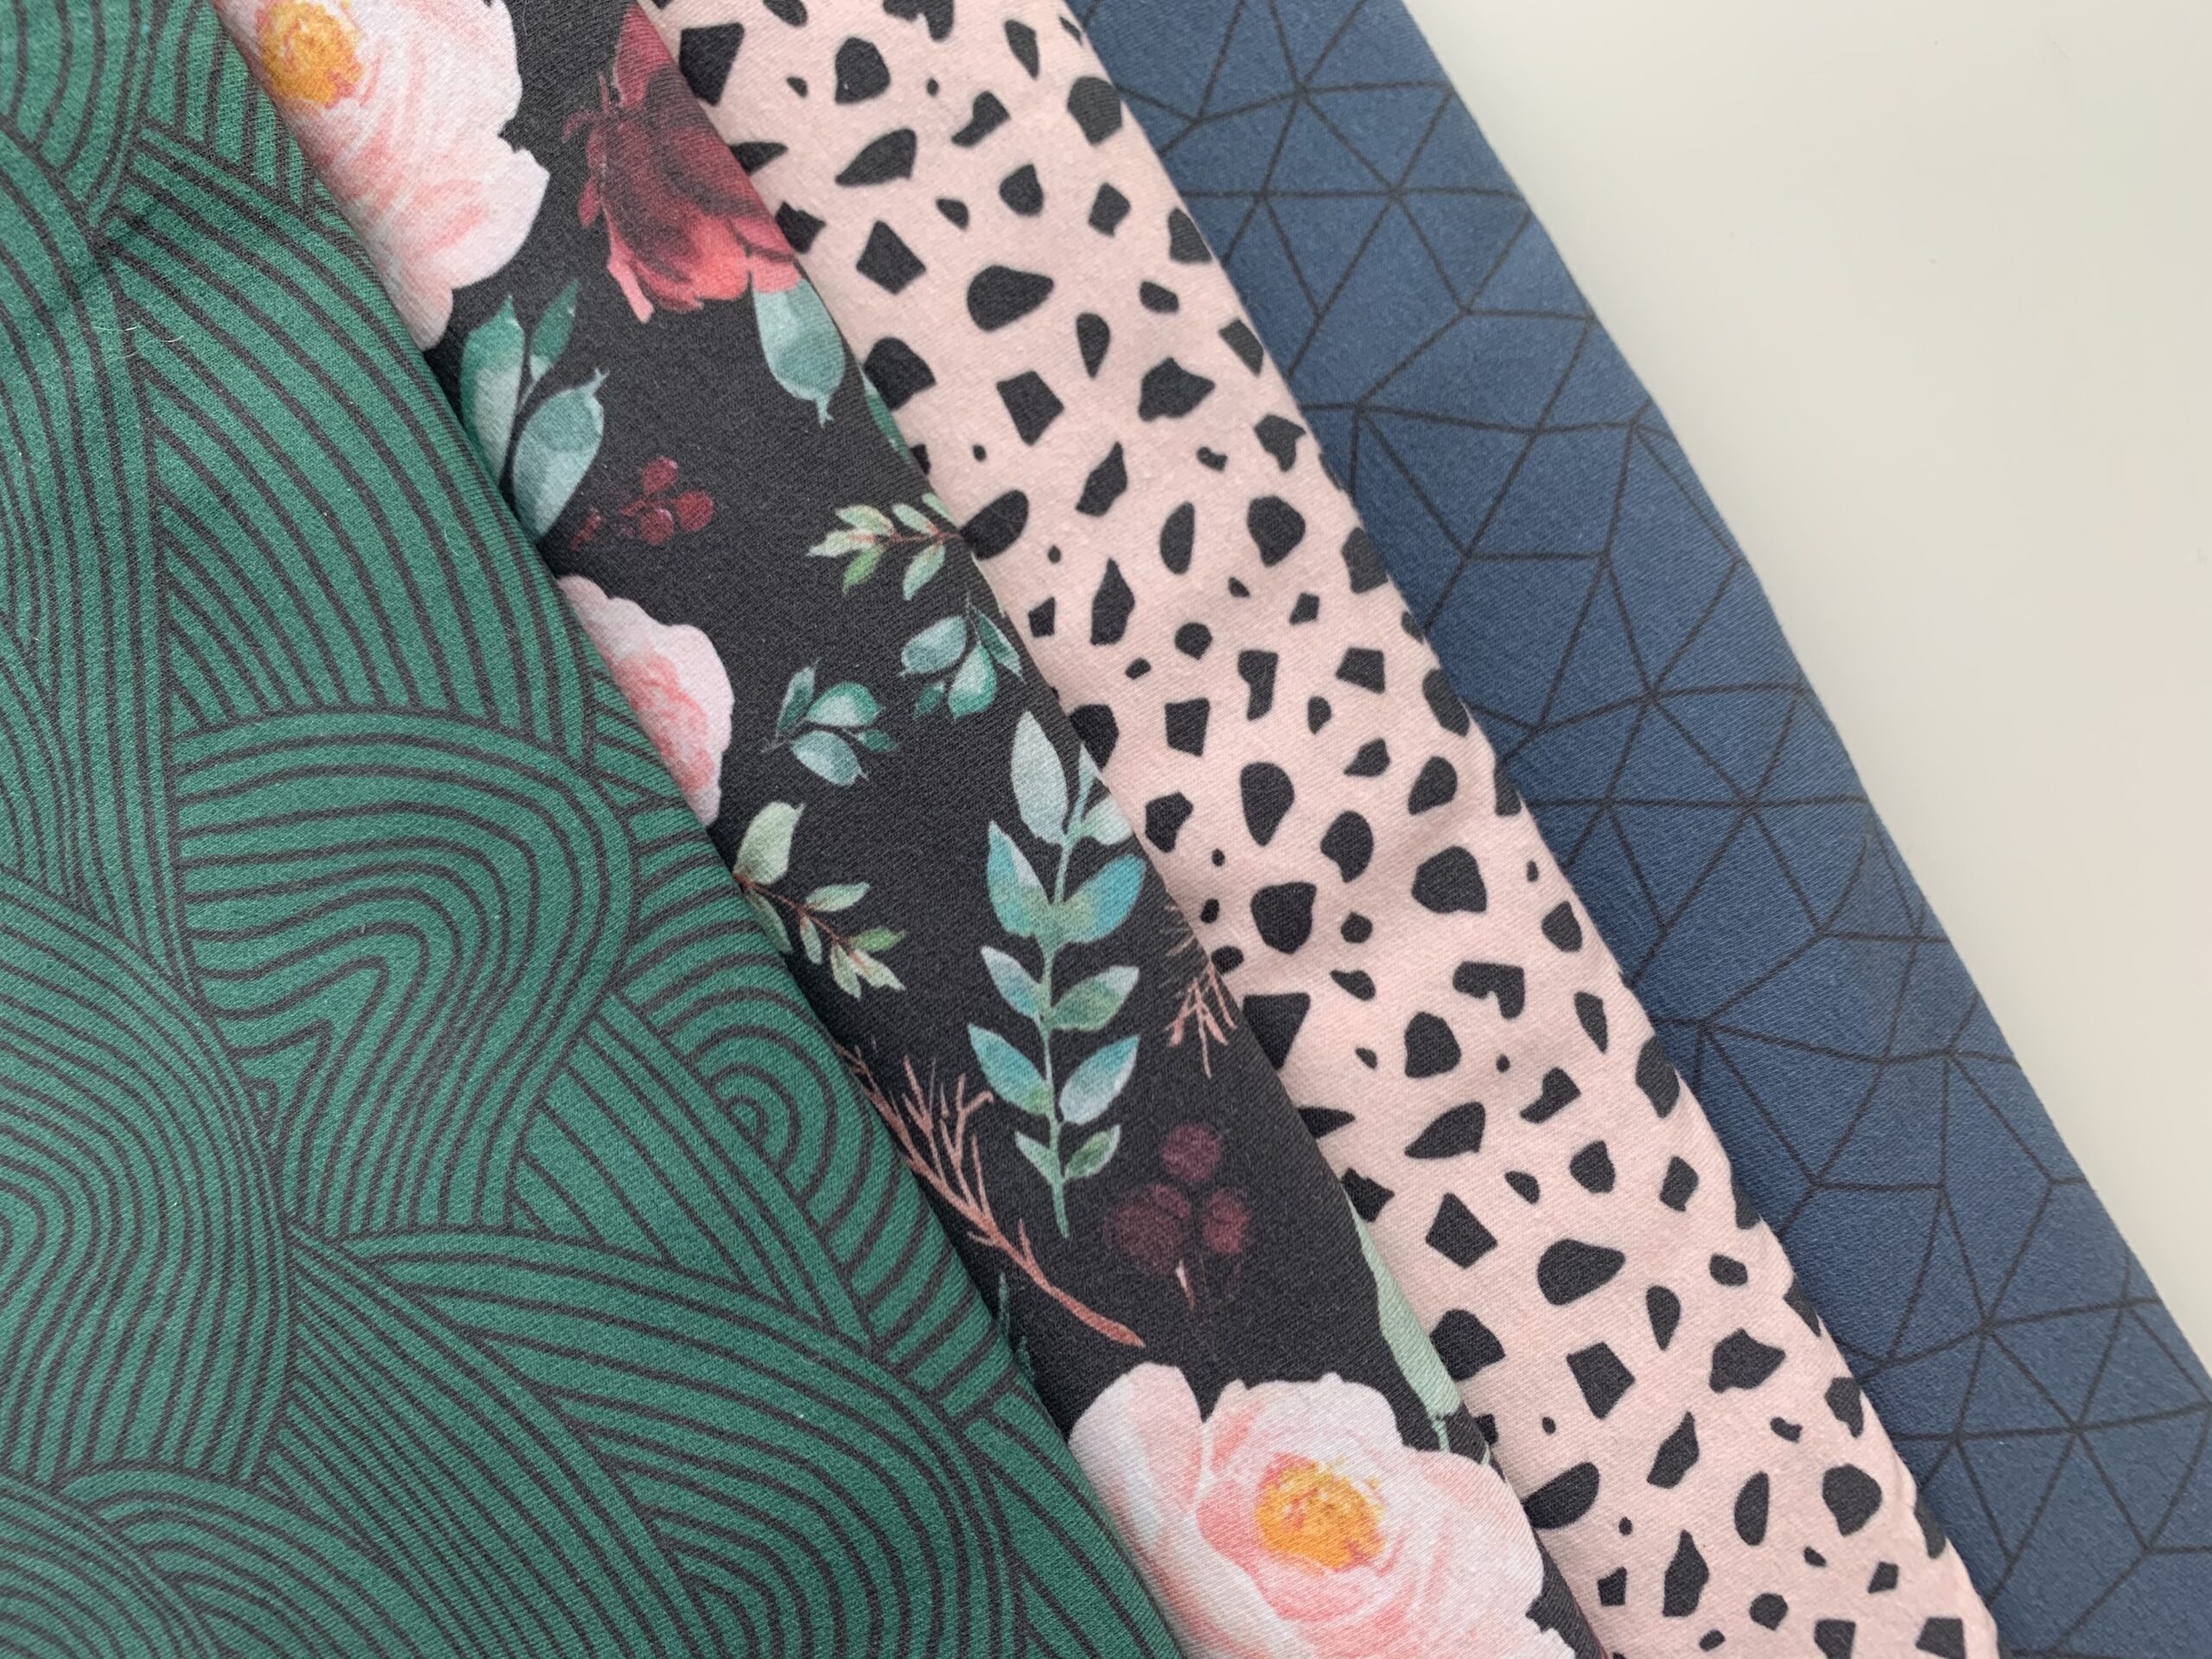
I used some lovely prints from Spoonflower (in Cotton Spandex Jersey) to bring a little more fun and personality to my period wear. I love them so much, I’m planning to make a whole set for me to use! I used the Fill-A-Yard horizontal split yard template to get two prints per yard.
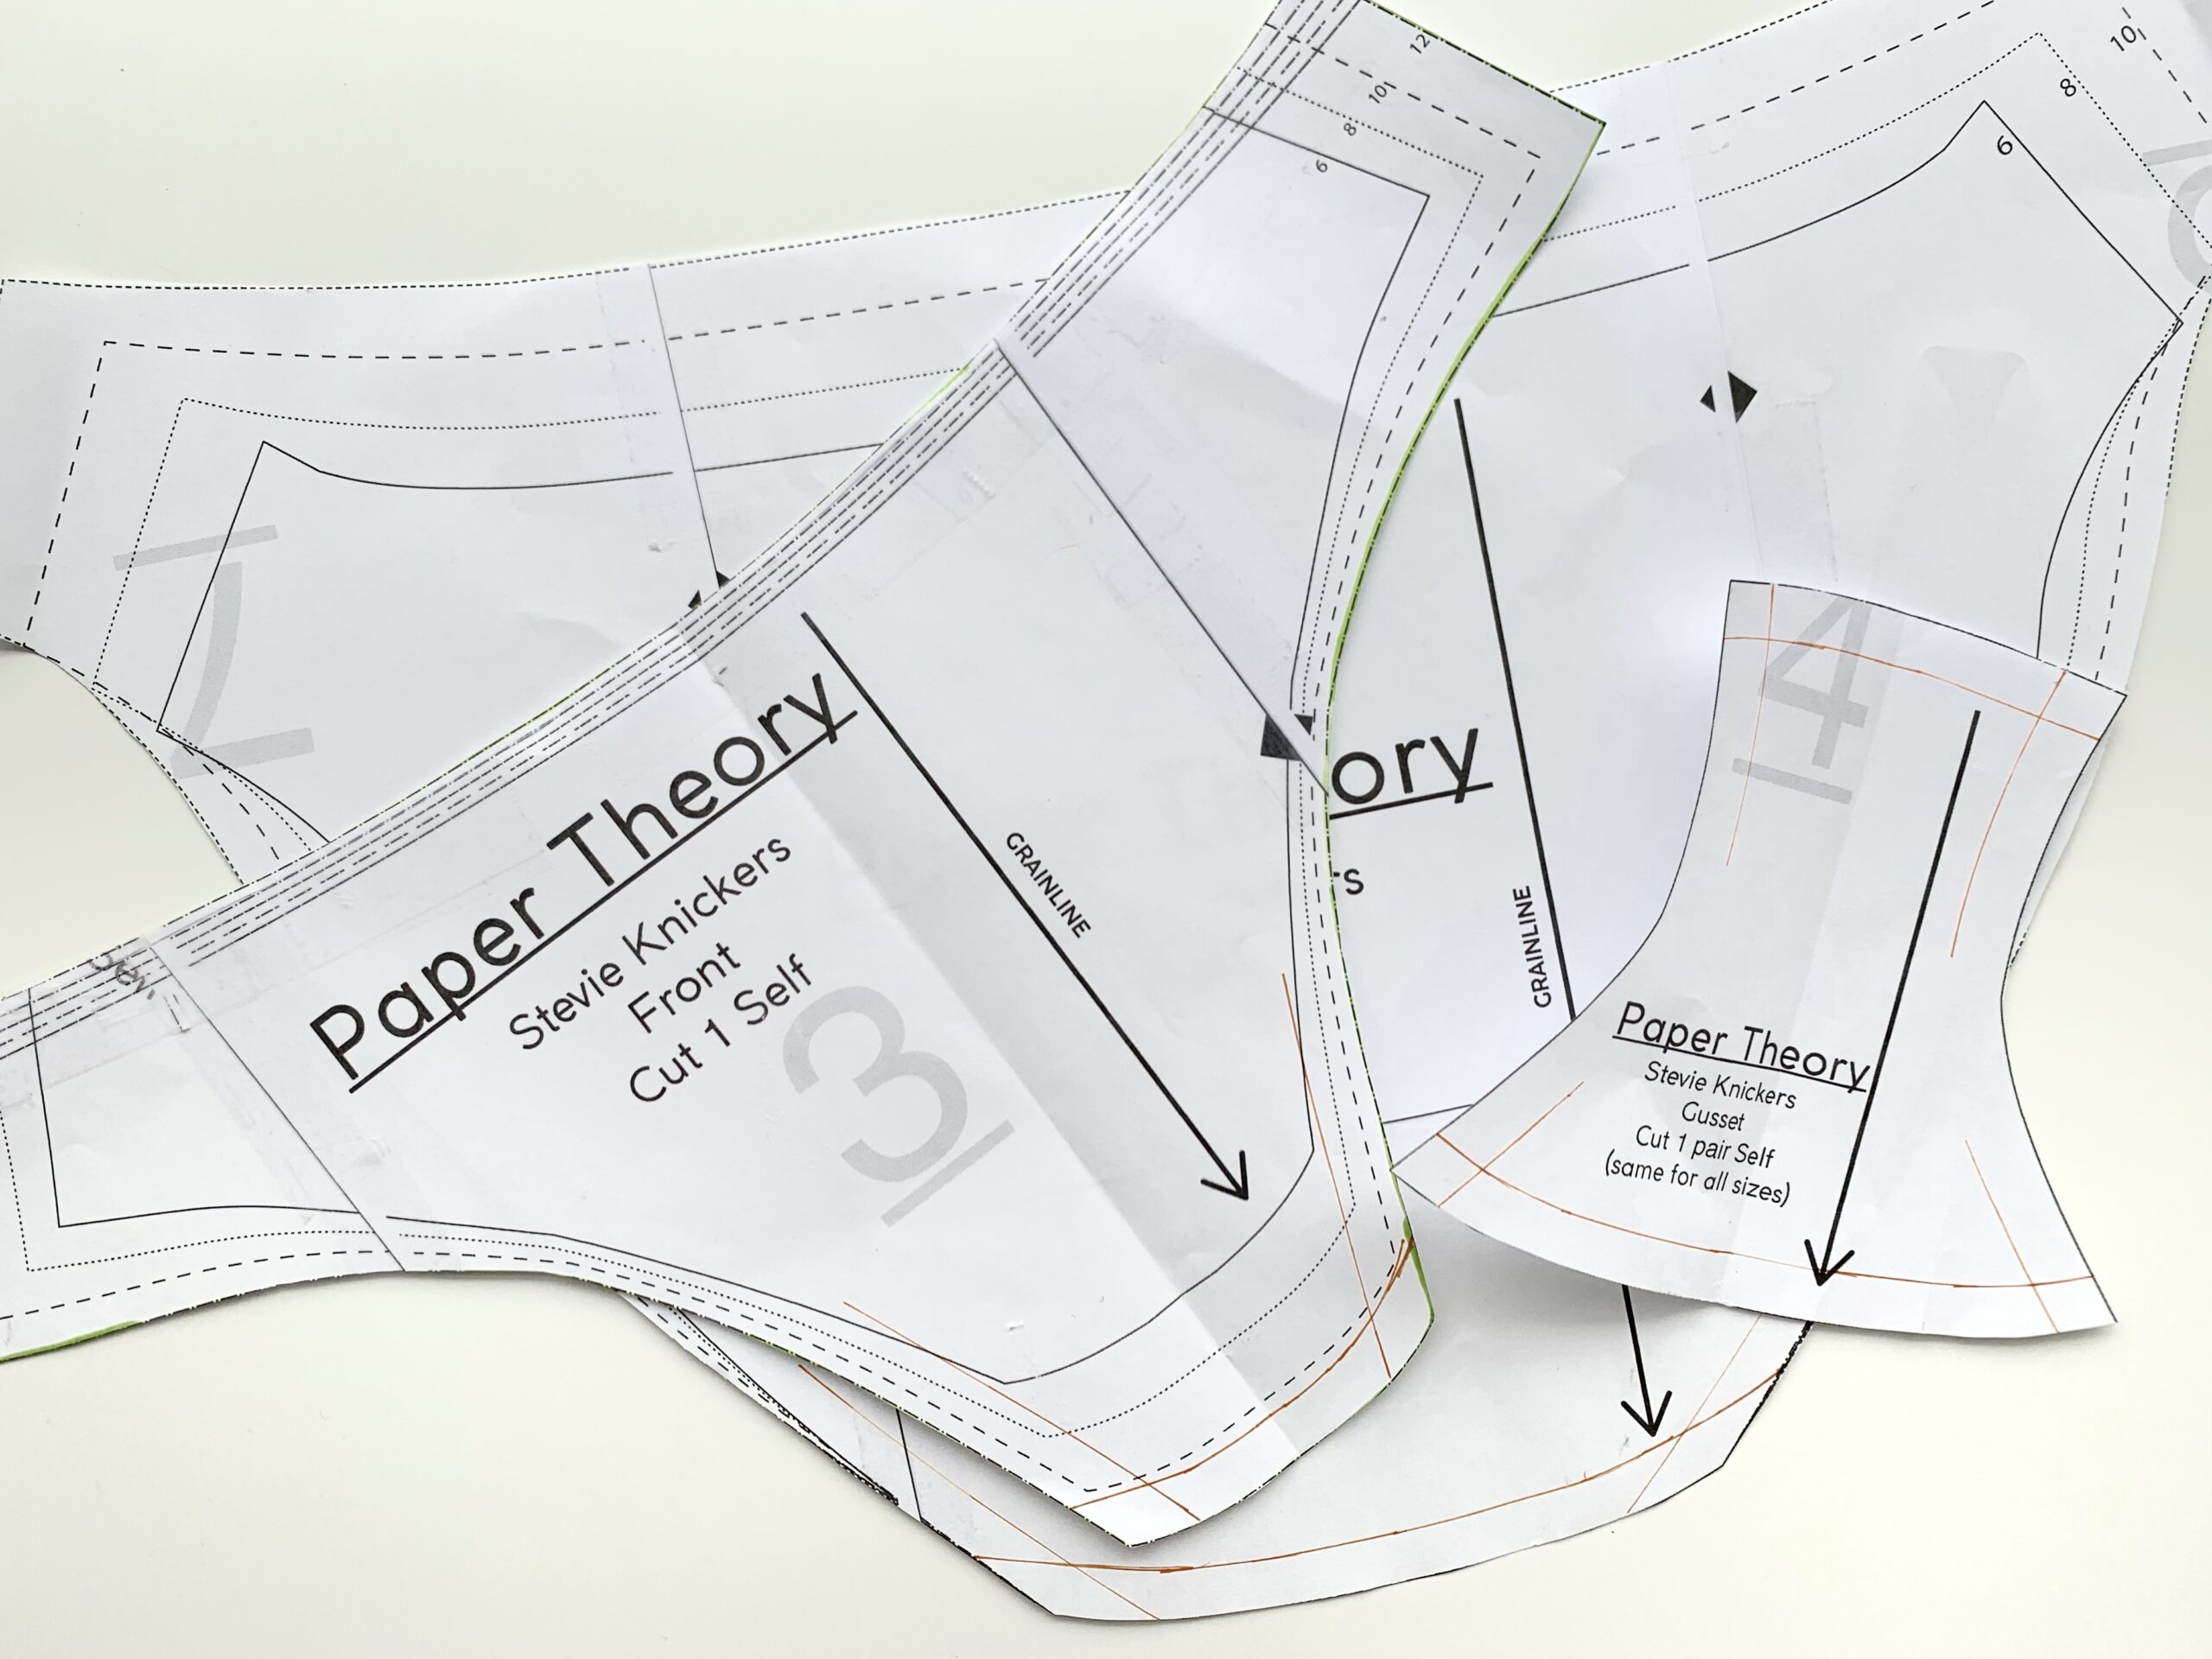
Today I’m going to show you how to hack any underwear sewing pattern to make your own period wear. All you need is a sewing pattern for underwear (I’m using the free Stevie Knickers pattern from Paper Theory) and some specialist materials for the gusset.
How To Make Your Own Reusable Period Underwear
Materials
There are lots of materials out there that can be used for period underwear. The three main elements for the gusset, the piece that sits at the bottom, are:
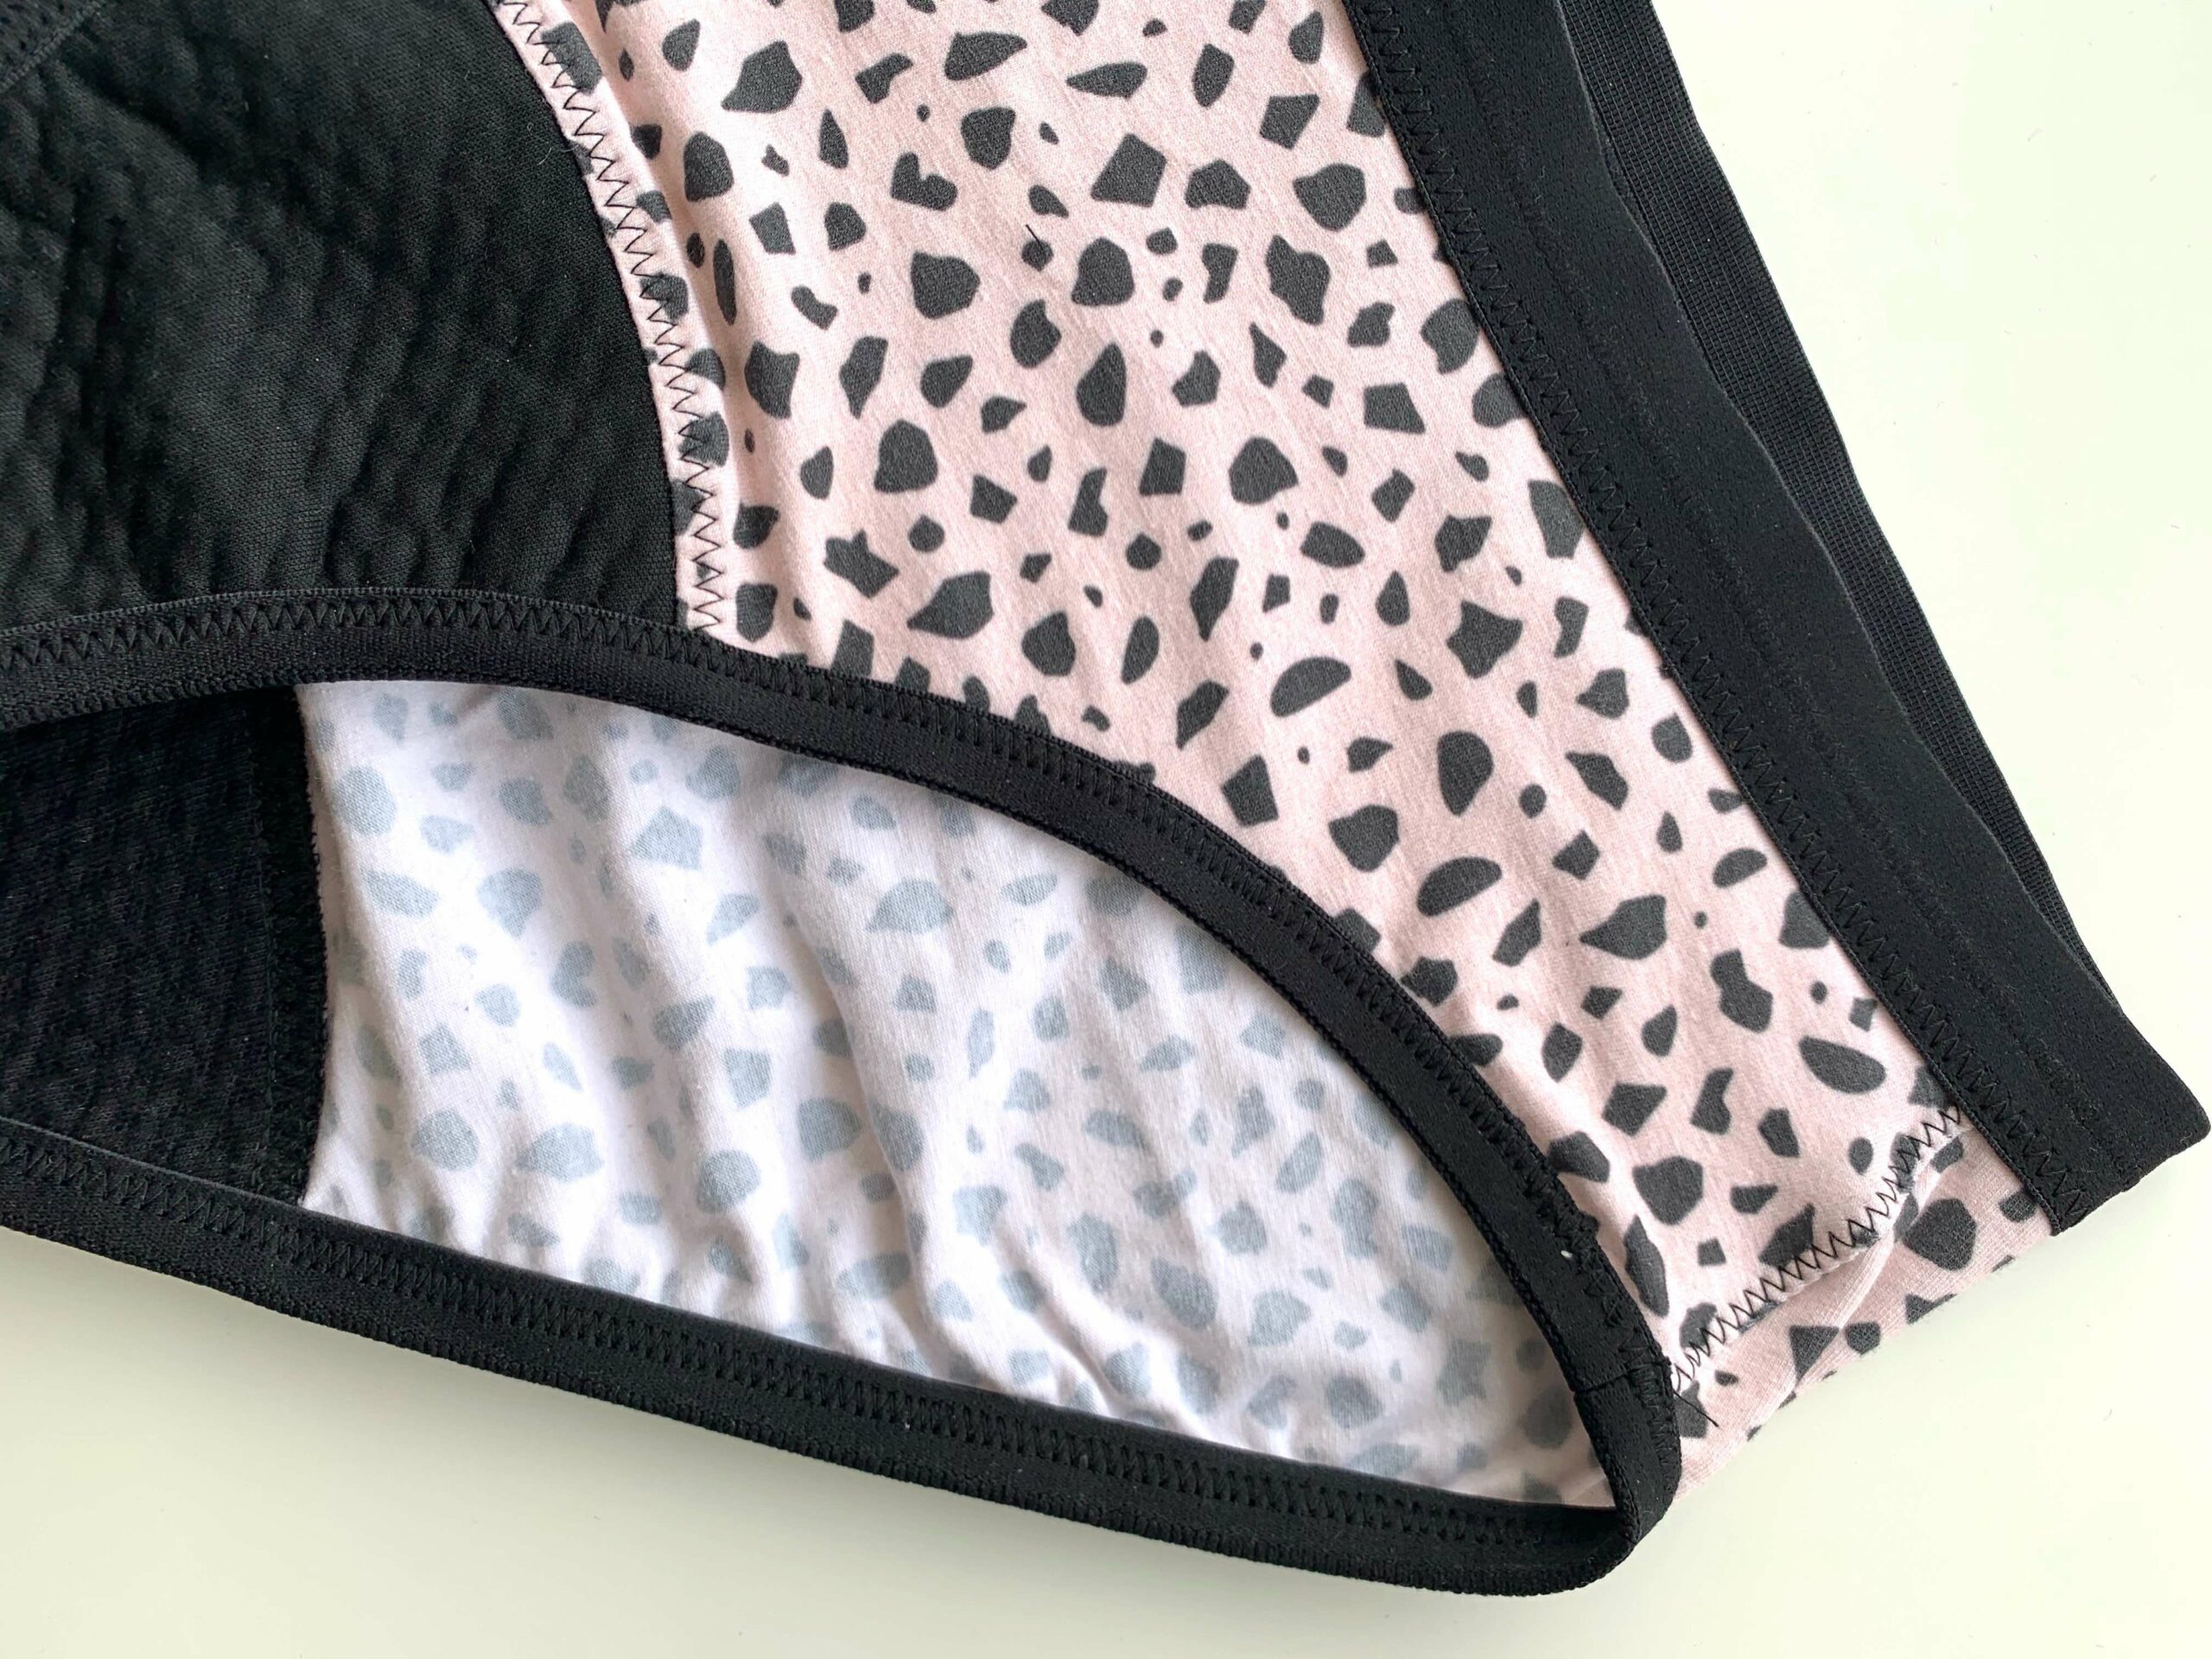
- Top layer: This goes against the skin, so it’s best to go for a cotton jersey material. You’ll also want to choose a darker color for this so you don’t get obvious stains.
- Inner layer: The business layer! There are lots of different options for this and it depends on how absorbent you need it to be. Some people opt for natural fibers e.g. layers of quilted bamboo jersey/wadding. Or you can go for something like Zorb, a specialist fabric made to absorb lots of liquid, and quickly! This is often used in reusable nappies for babies.
- Outer layer: This is the waterproof layer that will sit on the outside against your clothes, which is why you need it to be waterproof! Again, there’s lots of options for these, but most are polyurethane (PUL) covered.
Now, that’s a lot of layers, and it’s completely up to you what you use, but I wanted something that wasn’t too bulky to wear under my clothes and also fuss free to sew up.
I went with the Zorb 4D Organic cotton dimple fabric which has all three of those layers already built in (great for lazy sewing!). The fabric is thick (as you’d expect) so be sure to test your machine with it—I found my serger was happy to stitch through it but did not want to be cut with the blade.
Anyway, enough about fabrics and onto the pattern hacking!
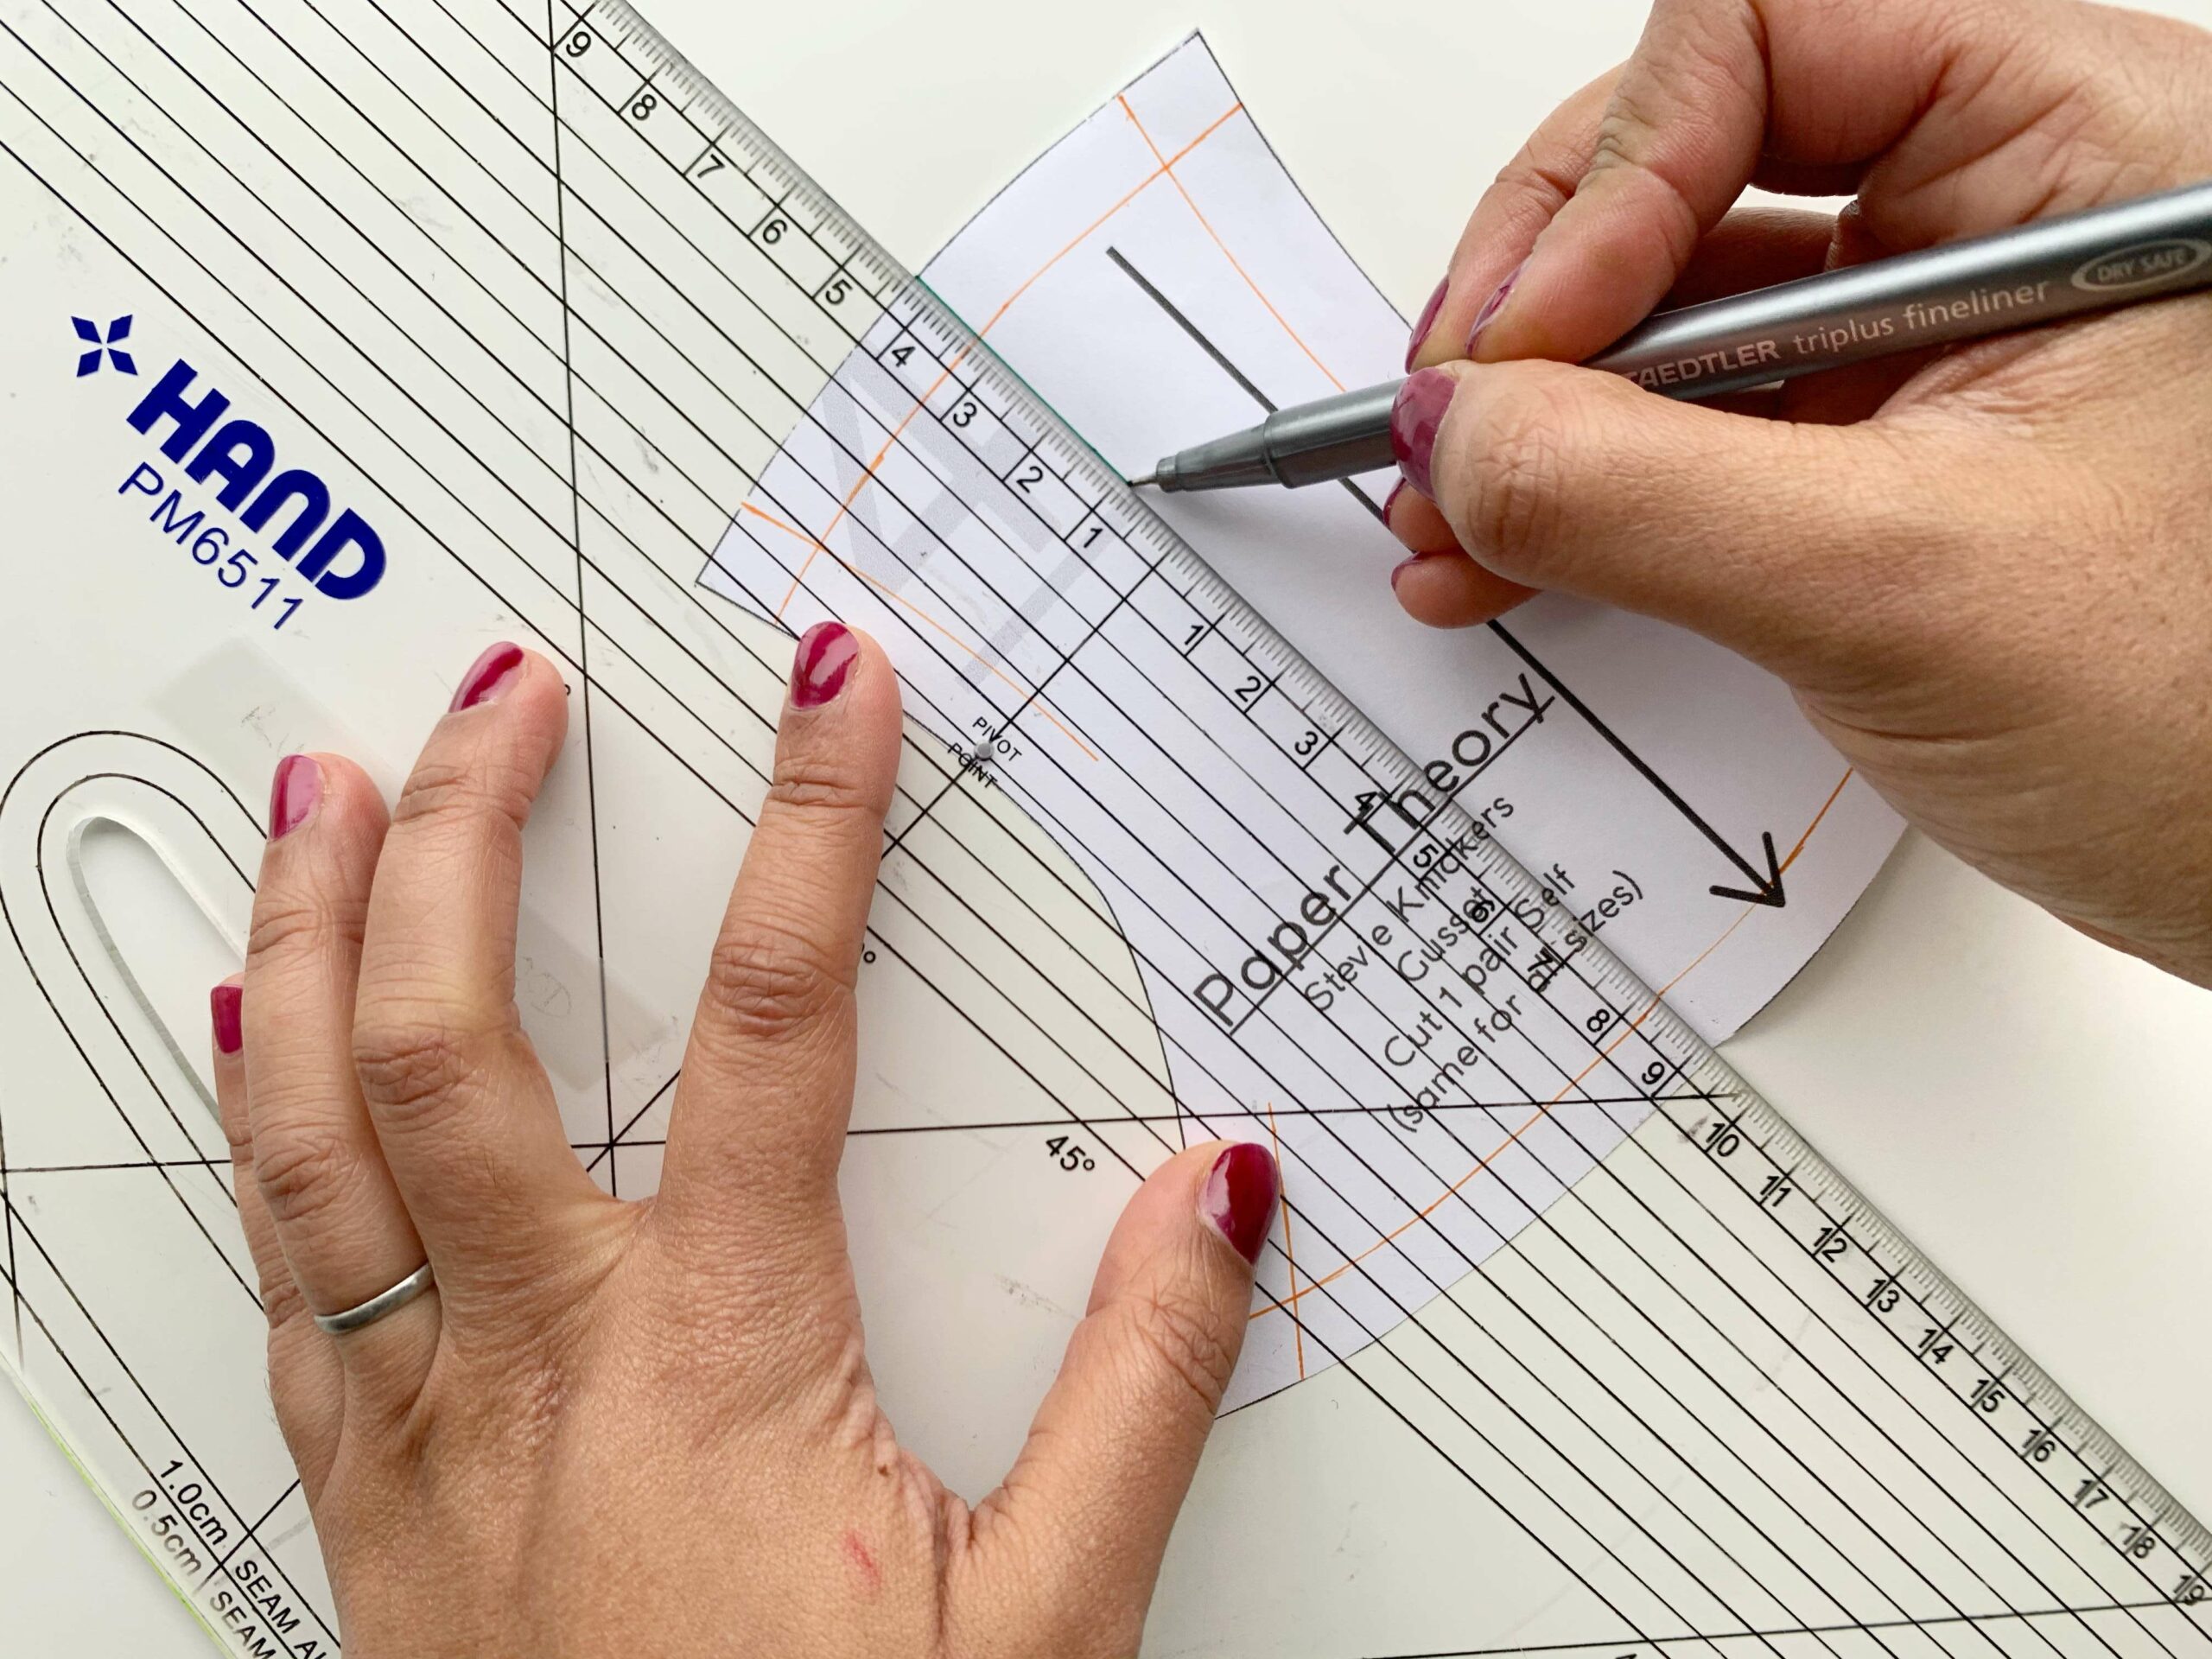
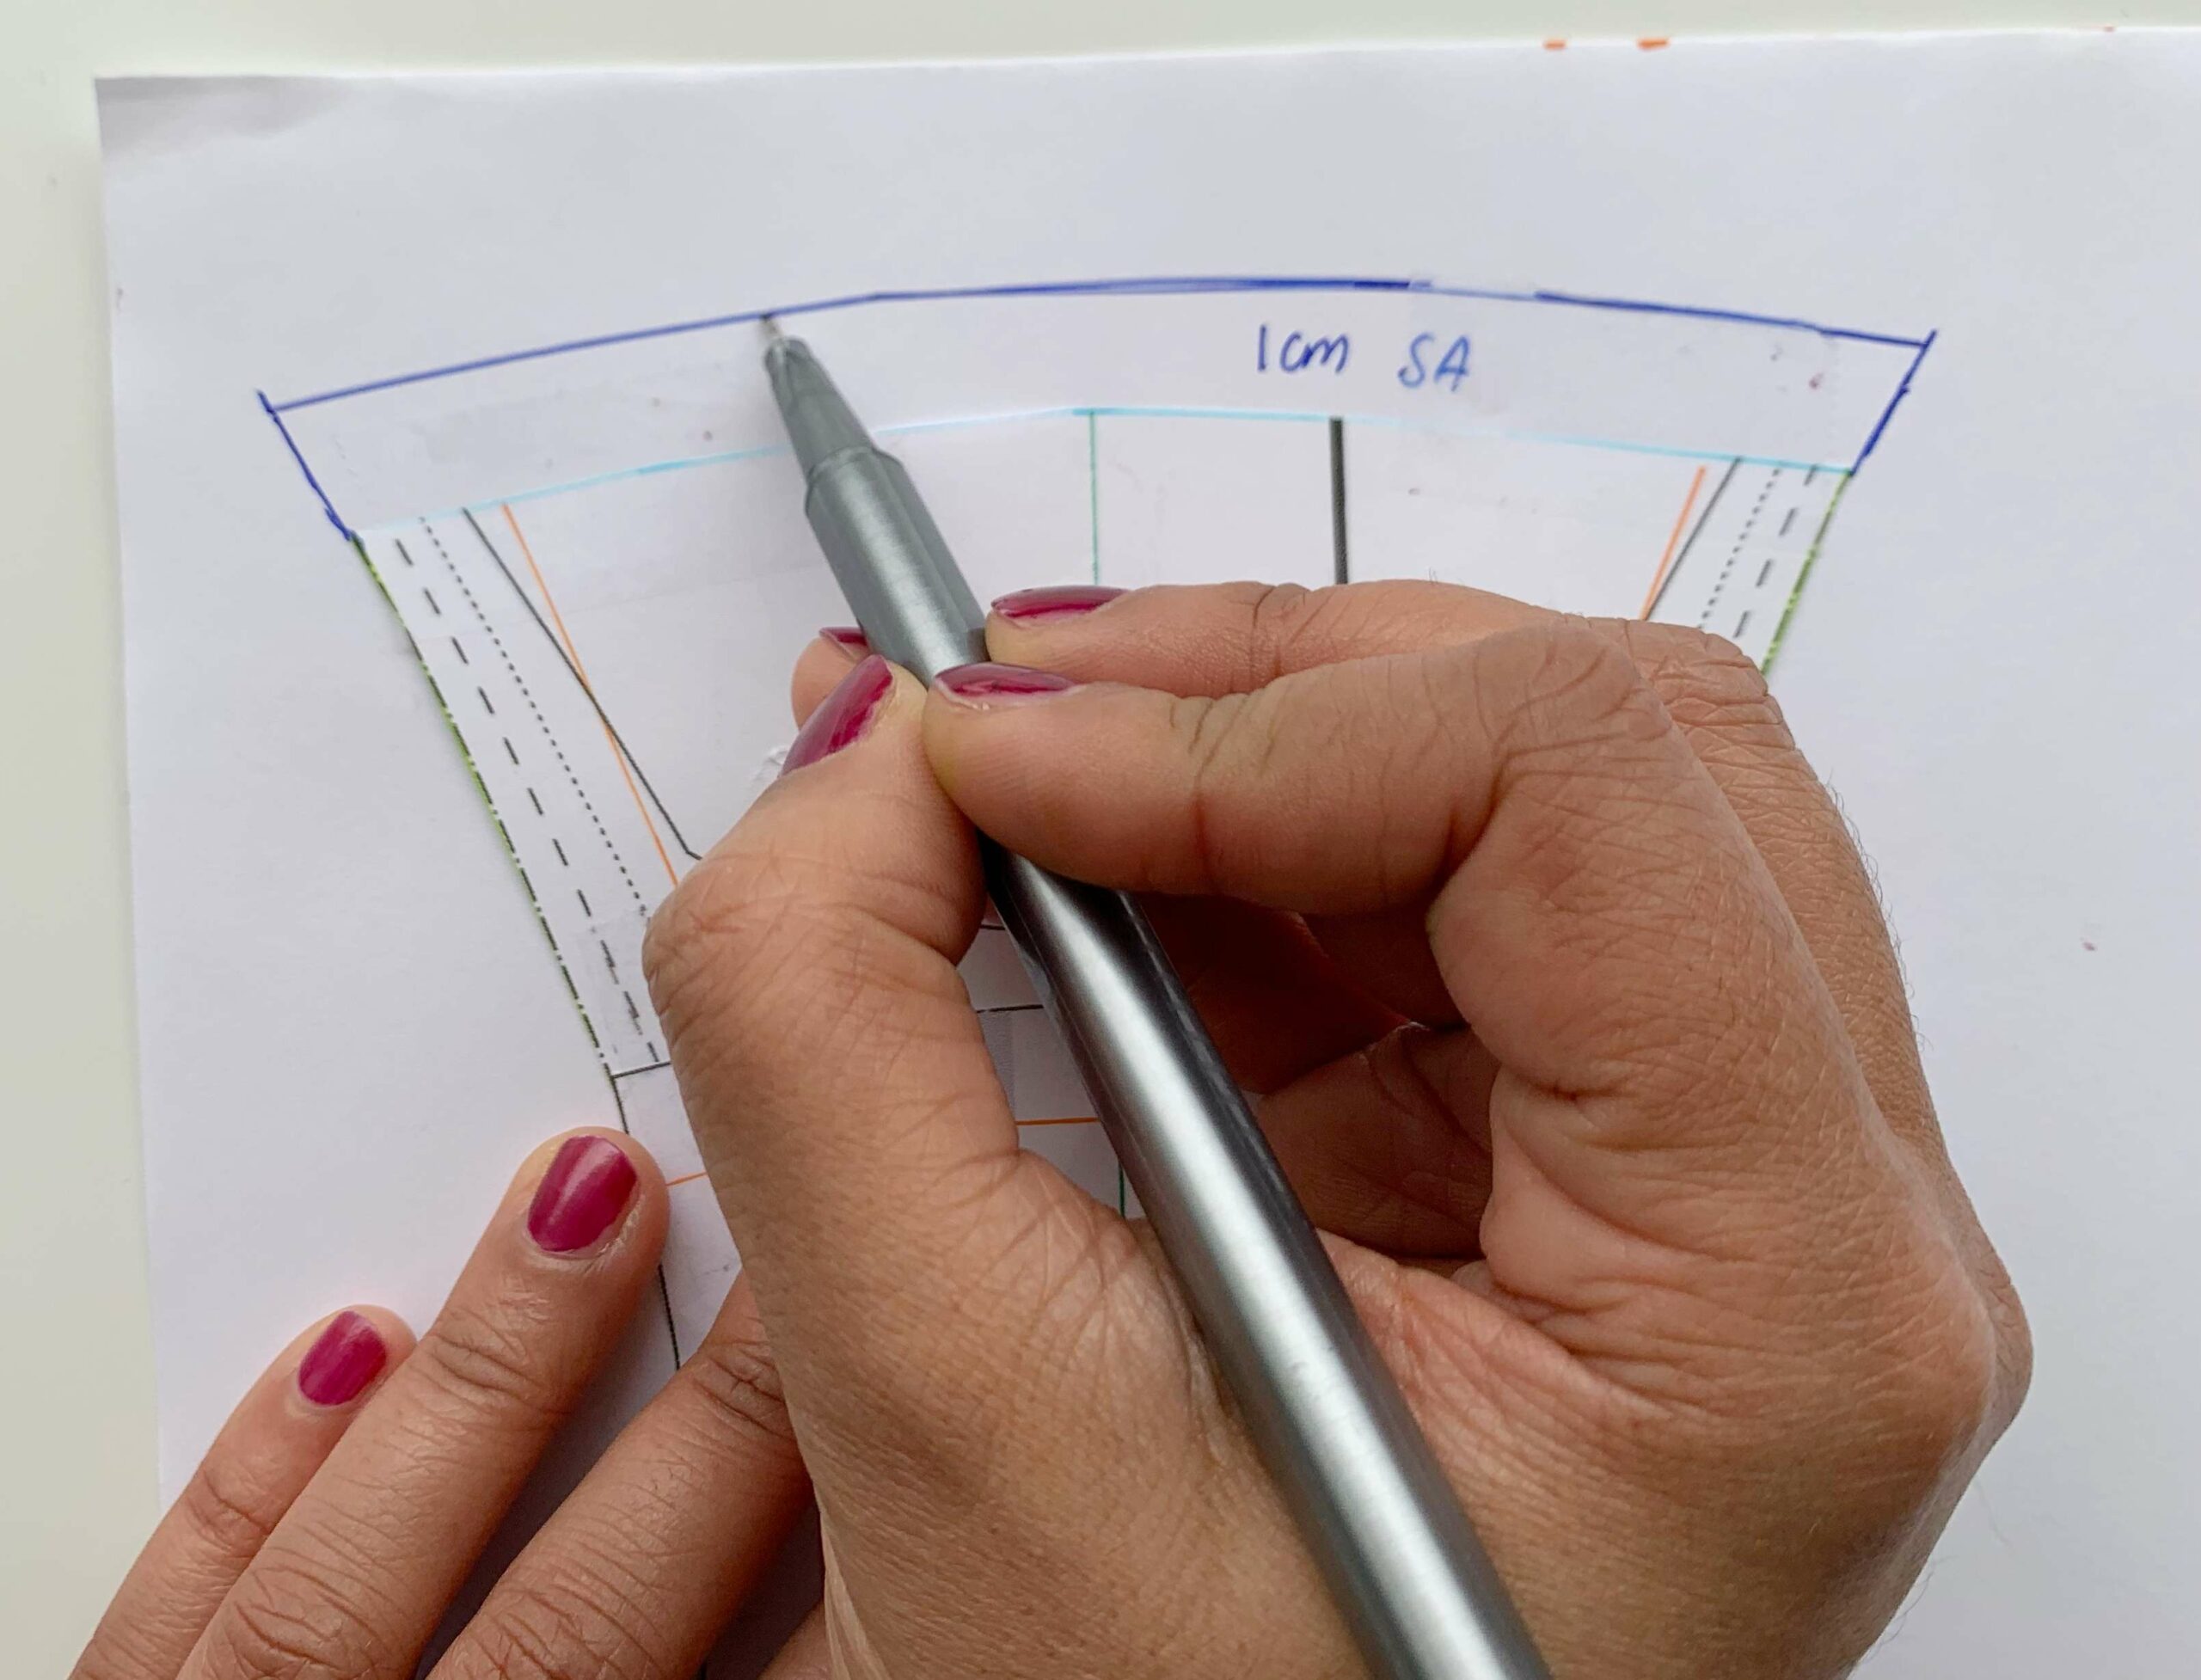
1. Mark the Stitch Lines
Take your pattern pieces and mark out the seam allowance for the stitch line, the line where the fabric will be stitched together. For this pattern I’m sewing 1/2″ (1 cm) from the edge. I also folded the pattern in half to find the center of the pattern pieces and marked this to help me line things up in the next step.

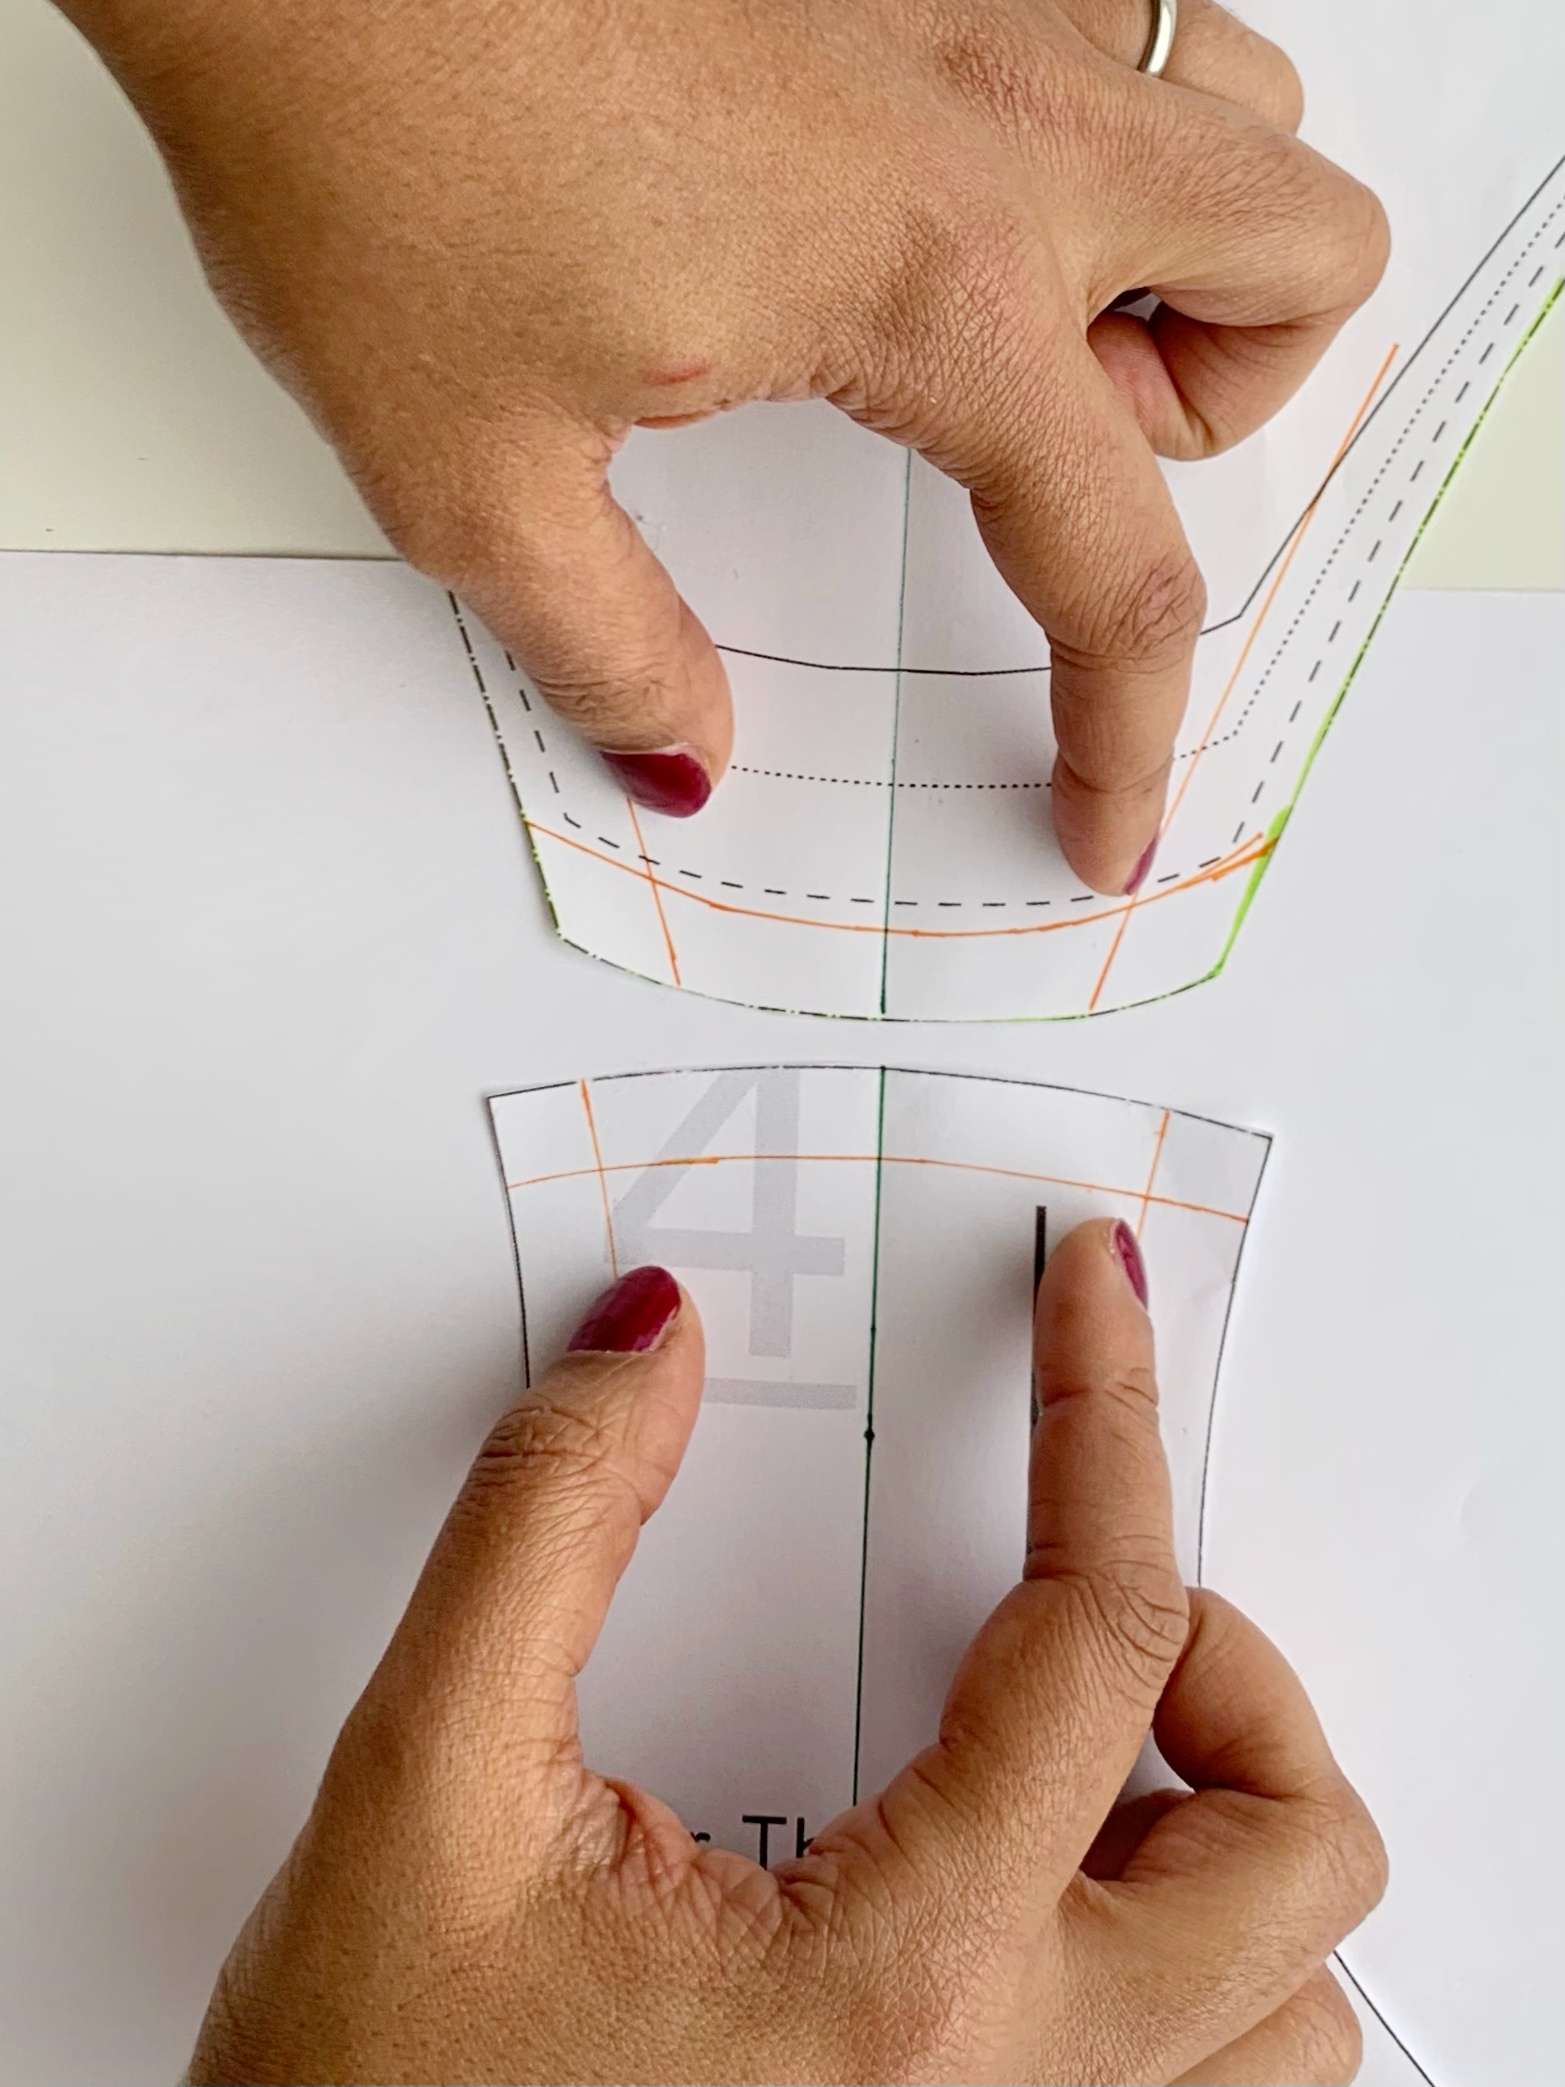
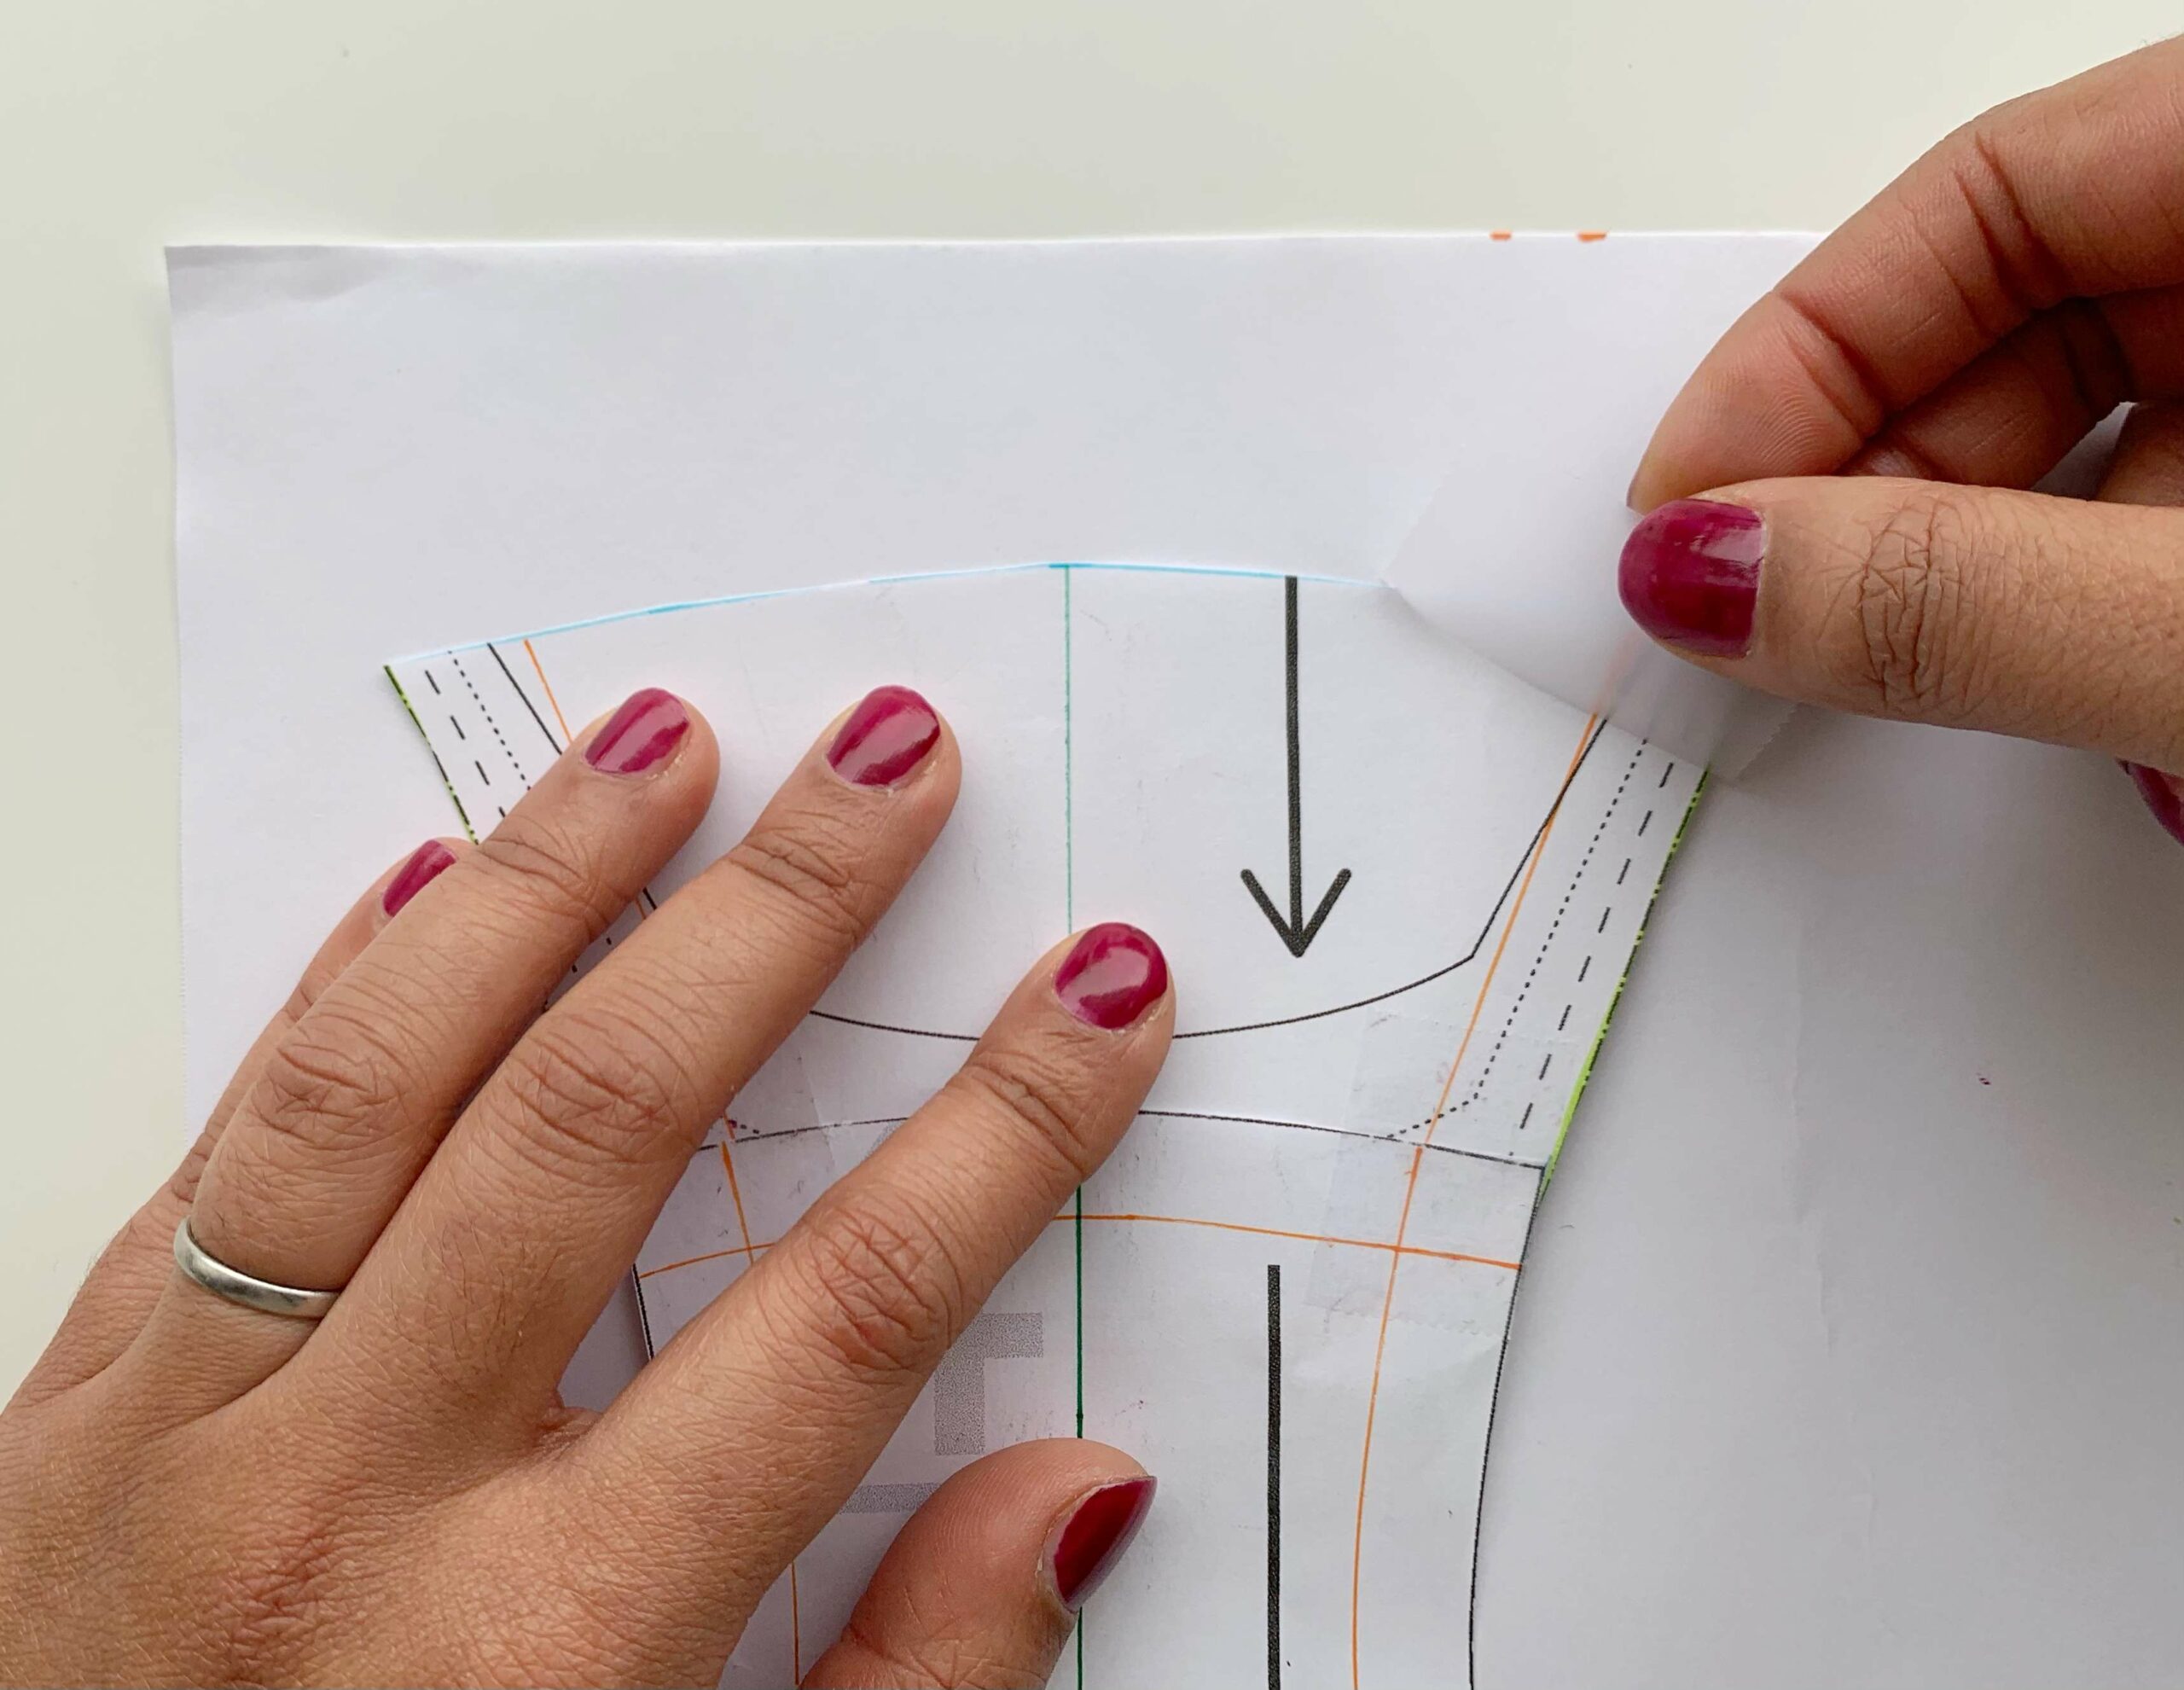
2. Tape the Pattern
Match your pattern front to the front of the gusset along the stitch lines, then tape the pattern piece down. Repeat for the back piece so you have one giant pant pattern piece!
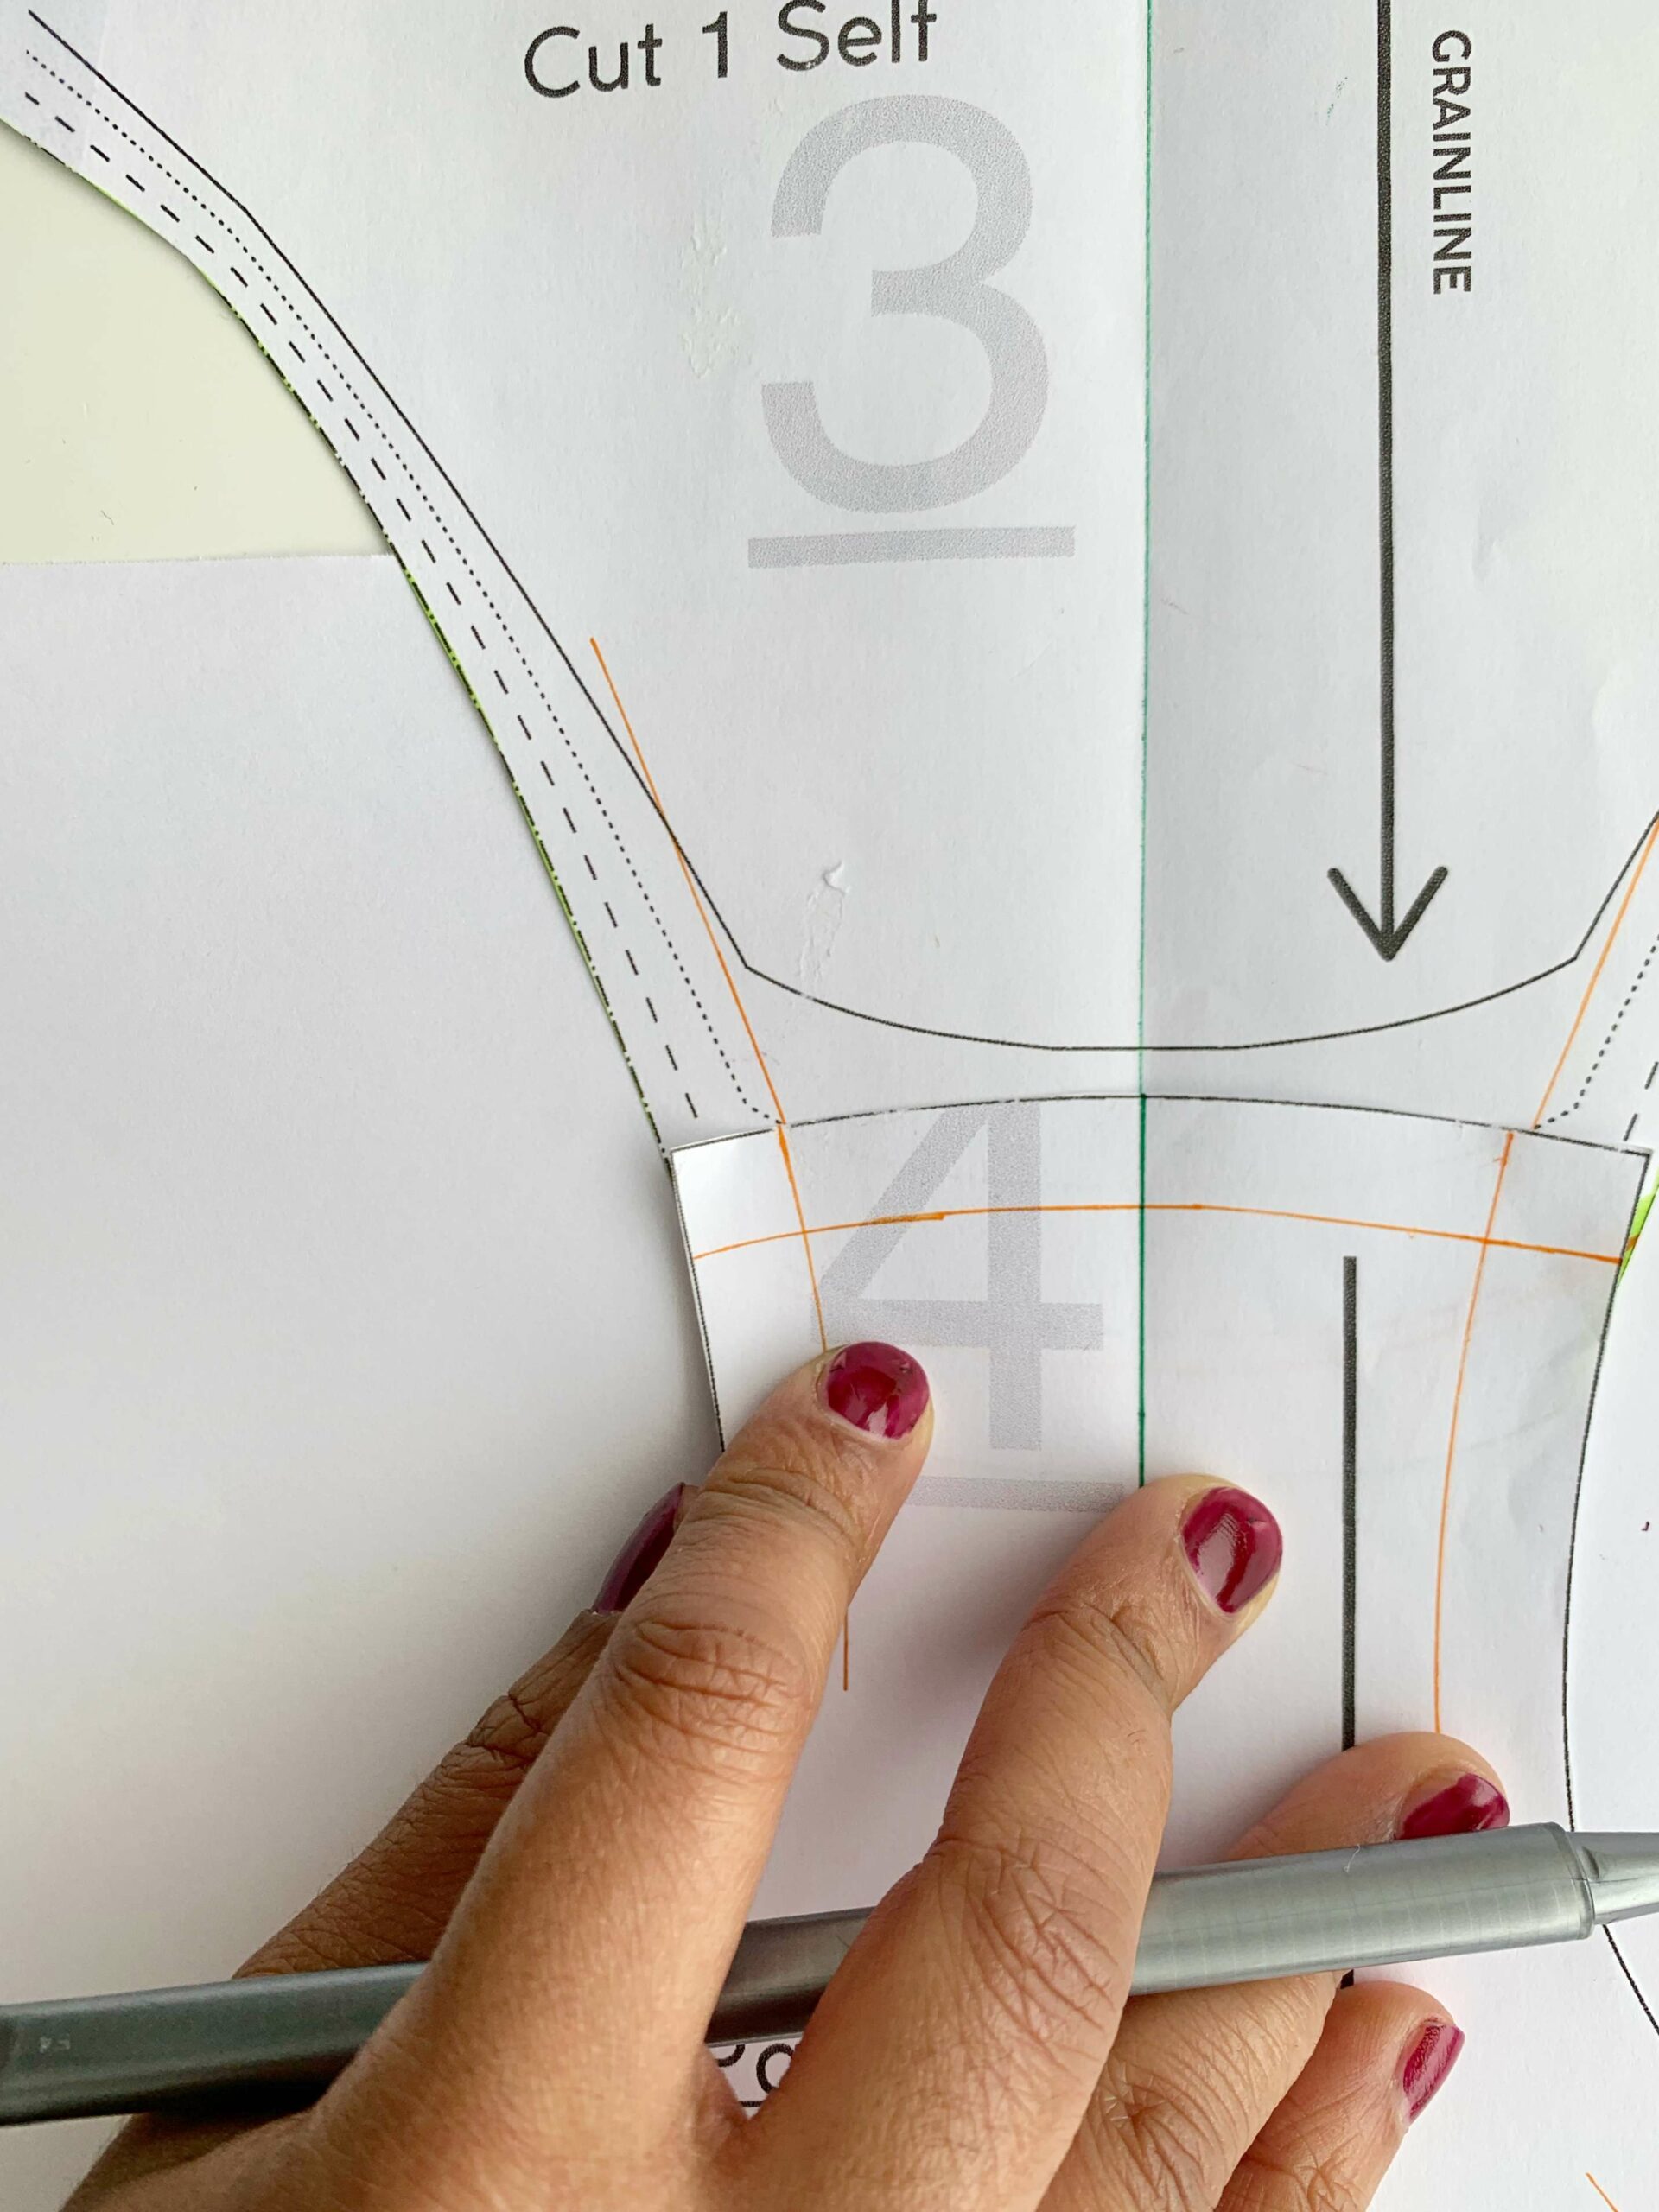
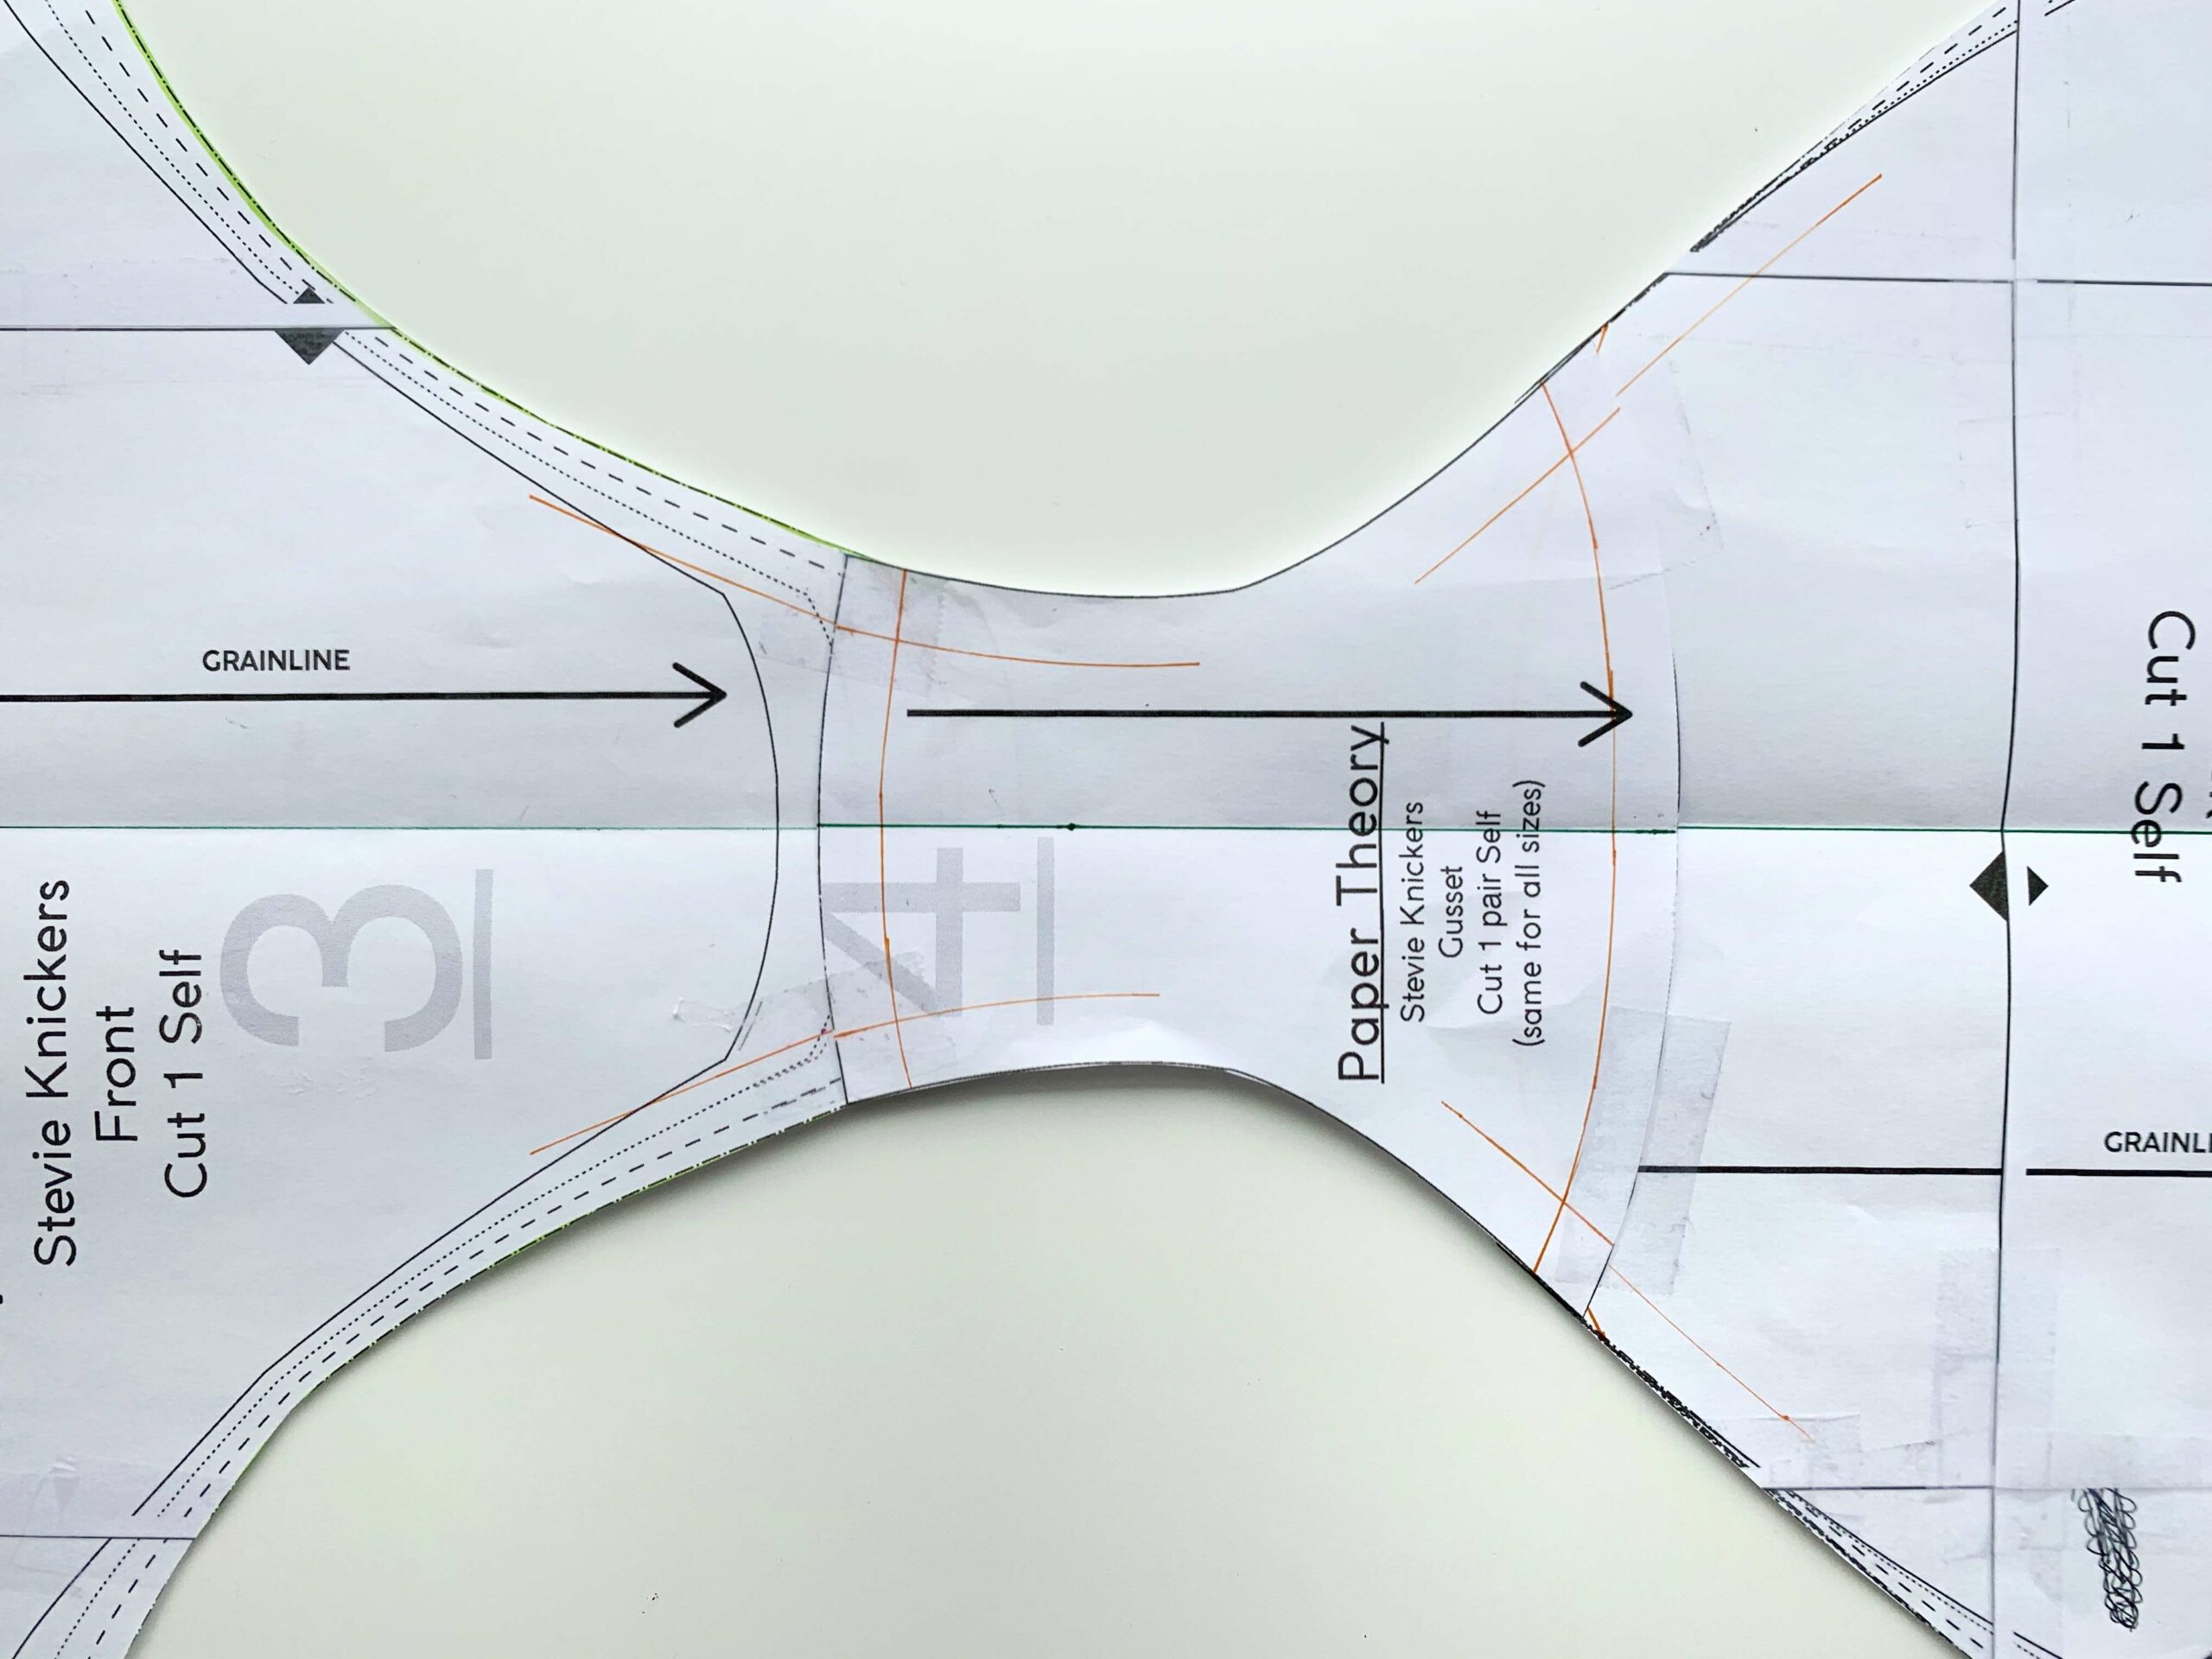
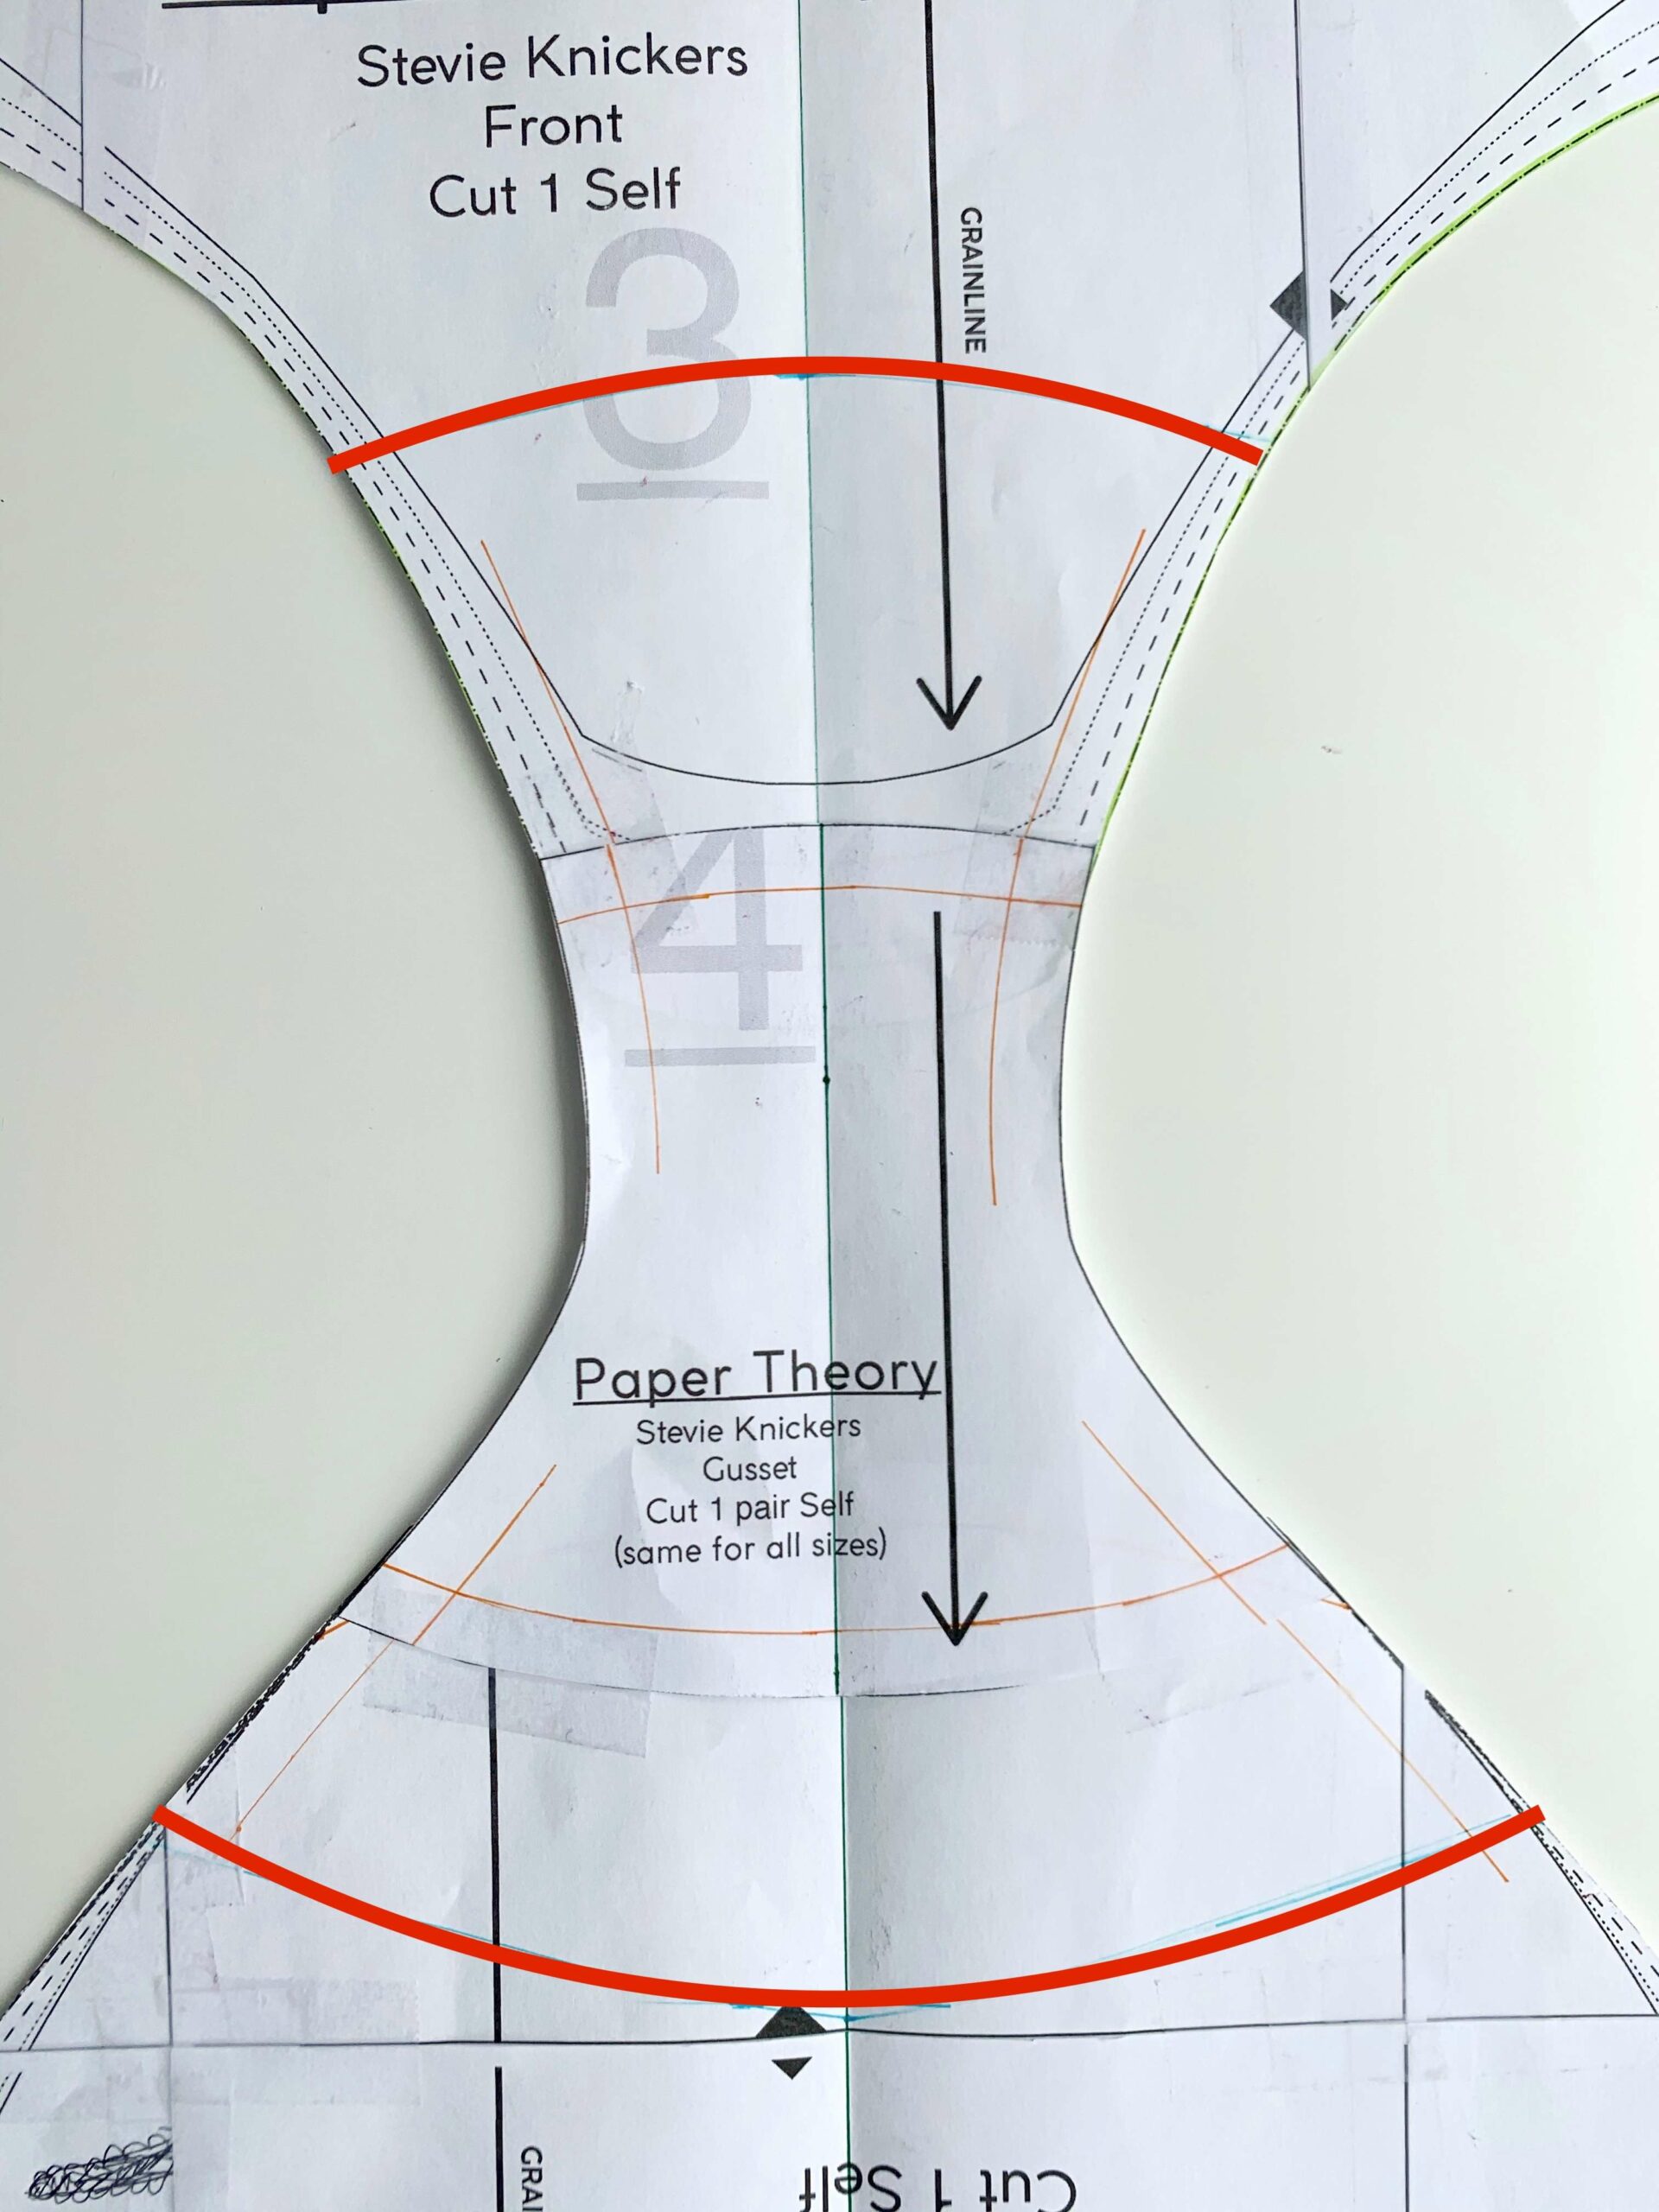
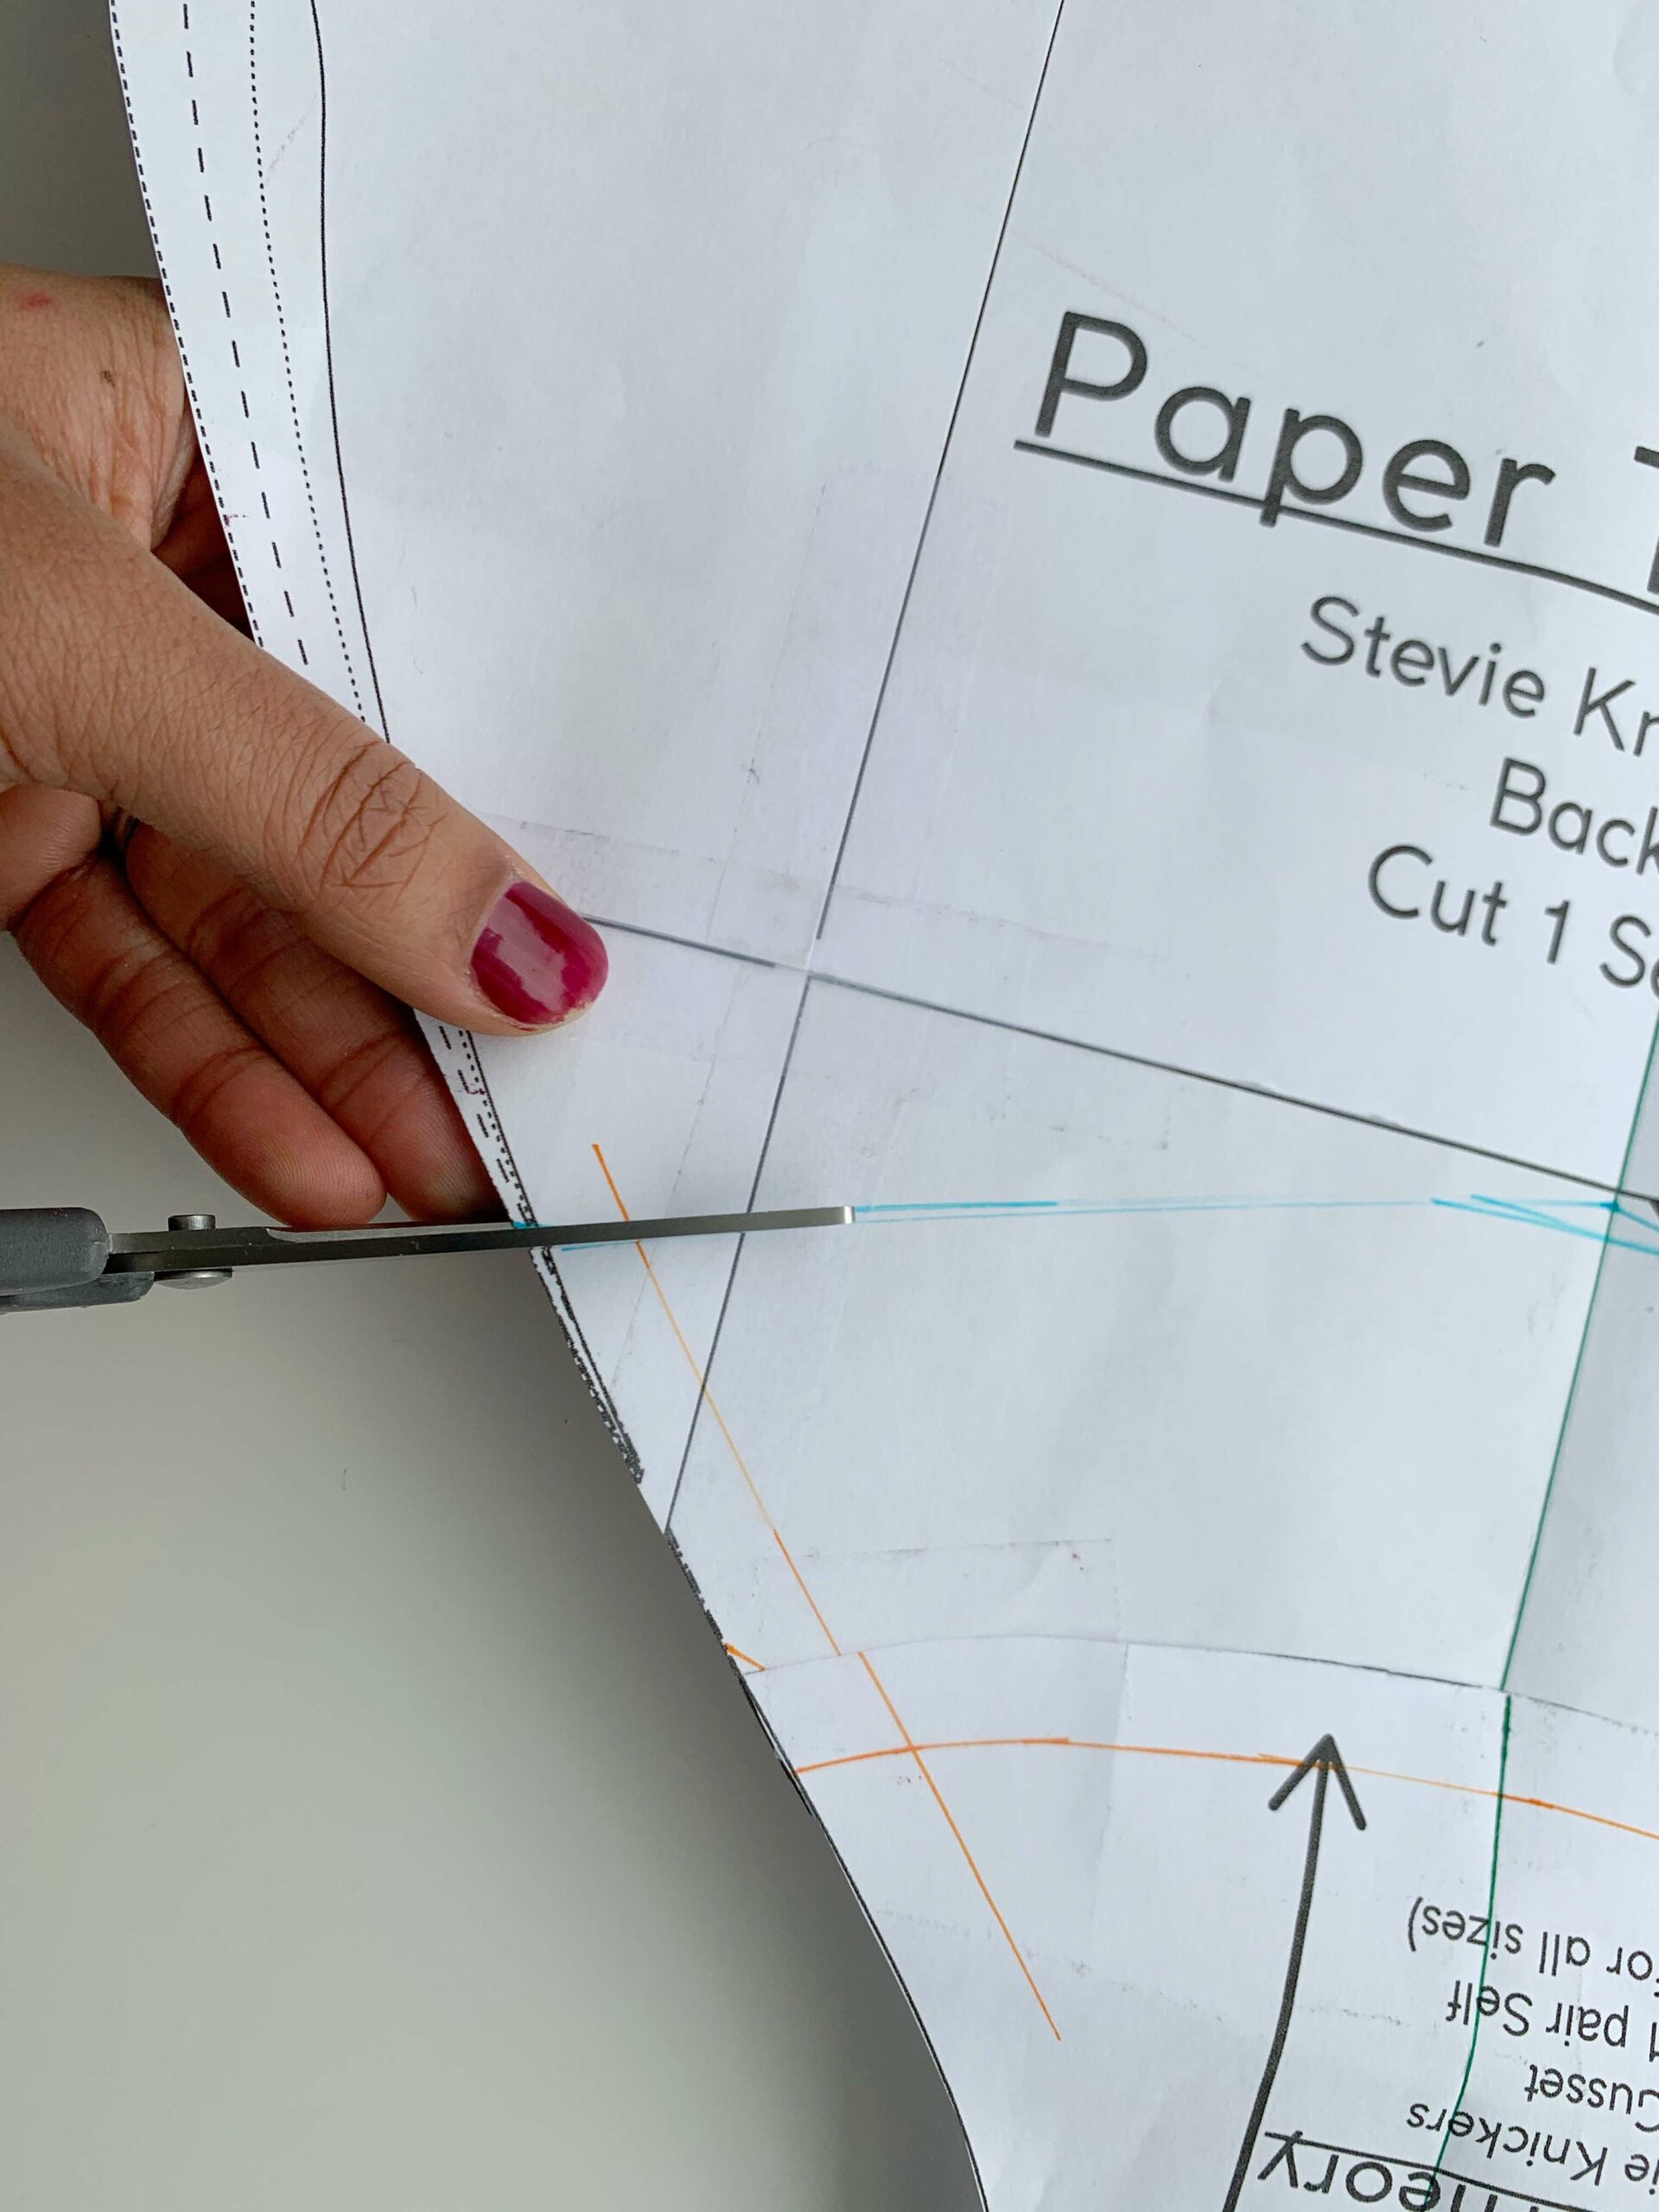
3. Draft a Custom Gusset Piece
Now mark your new gusset lines (shown in red below). With period pants you want to have good coverage on the front and back— this might vary on preference, your own individual anatomy, and how you plan to use it (e.g. if you want to wear it at night you might want more coverage across the back). Most people suggest adding between 1-2.5″ (3-6 cm) extra. Draw new curves for your extended gusset piece. Cut along these lines to make your new pattern.
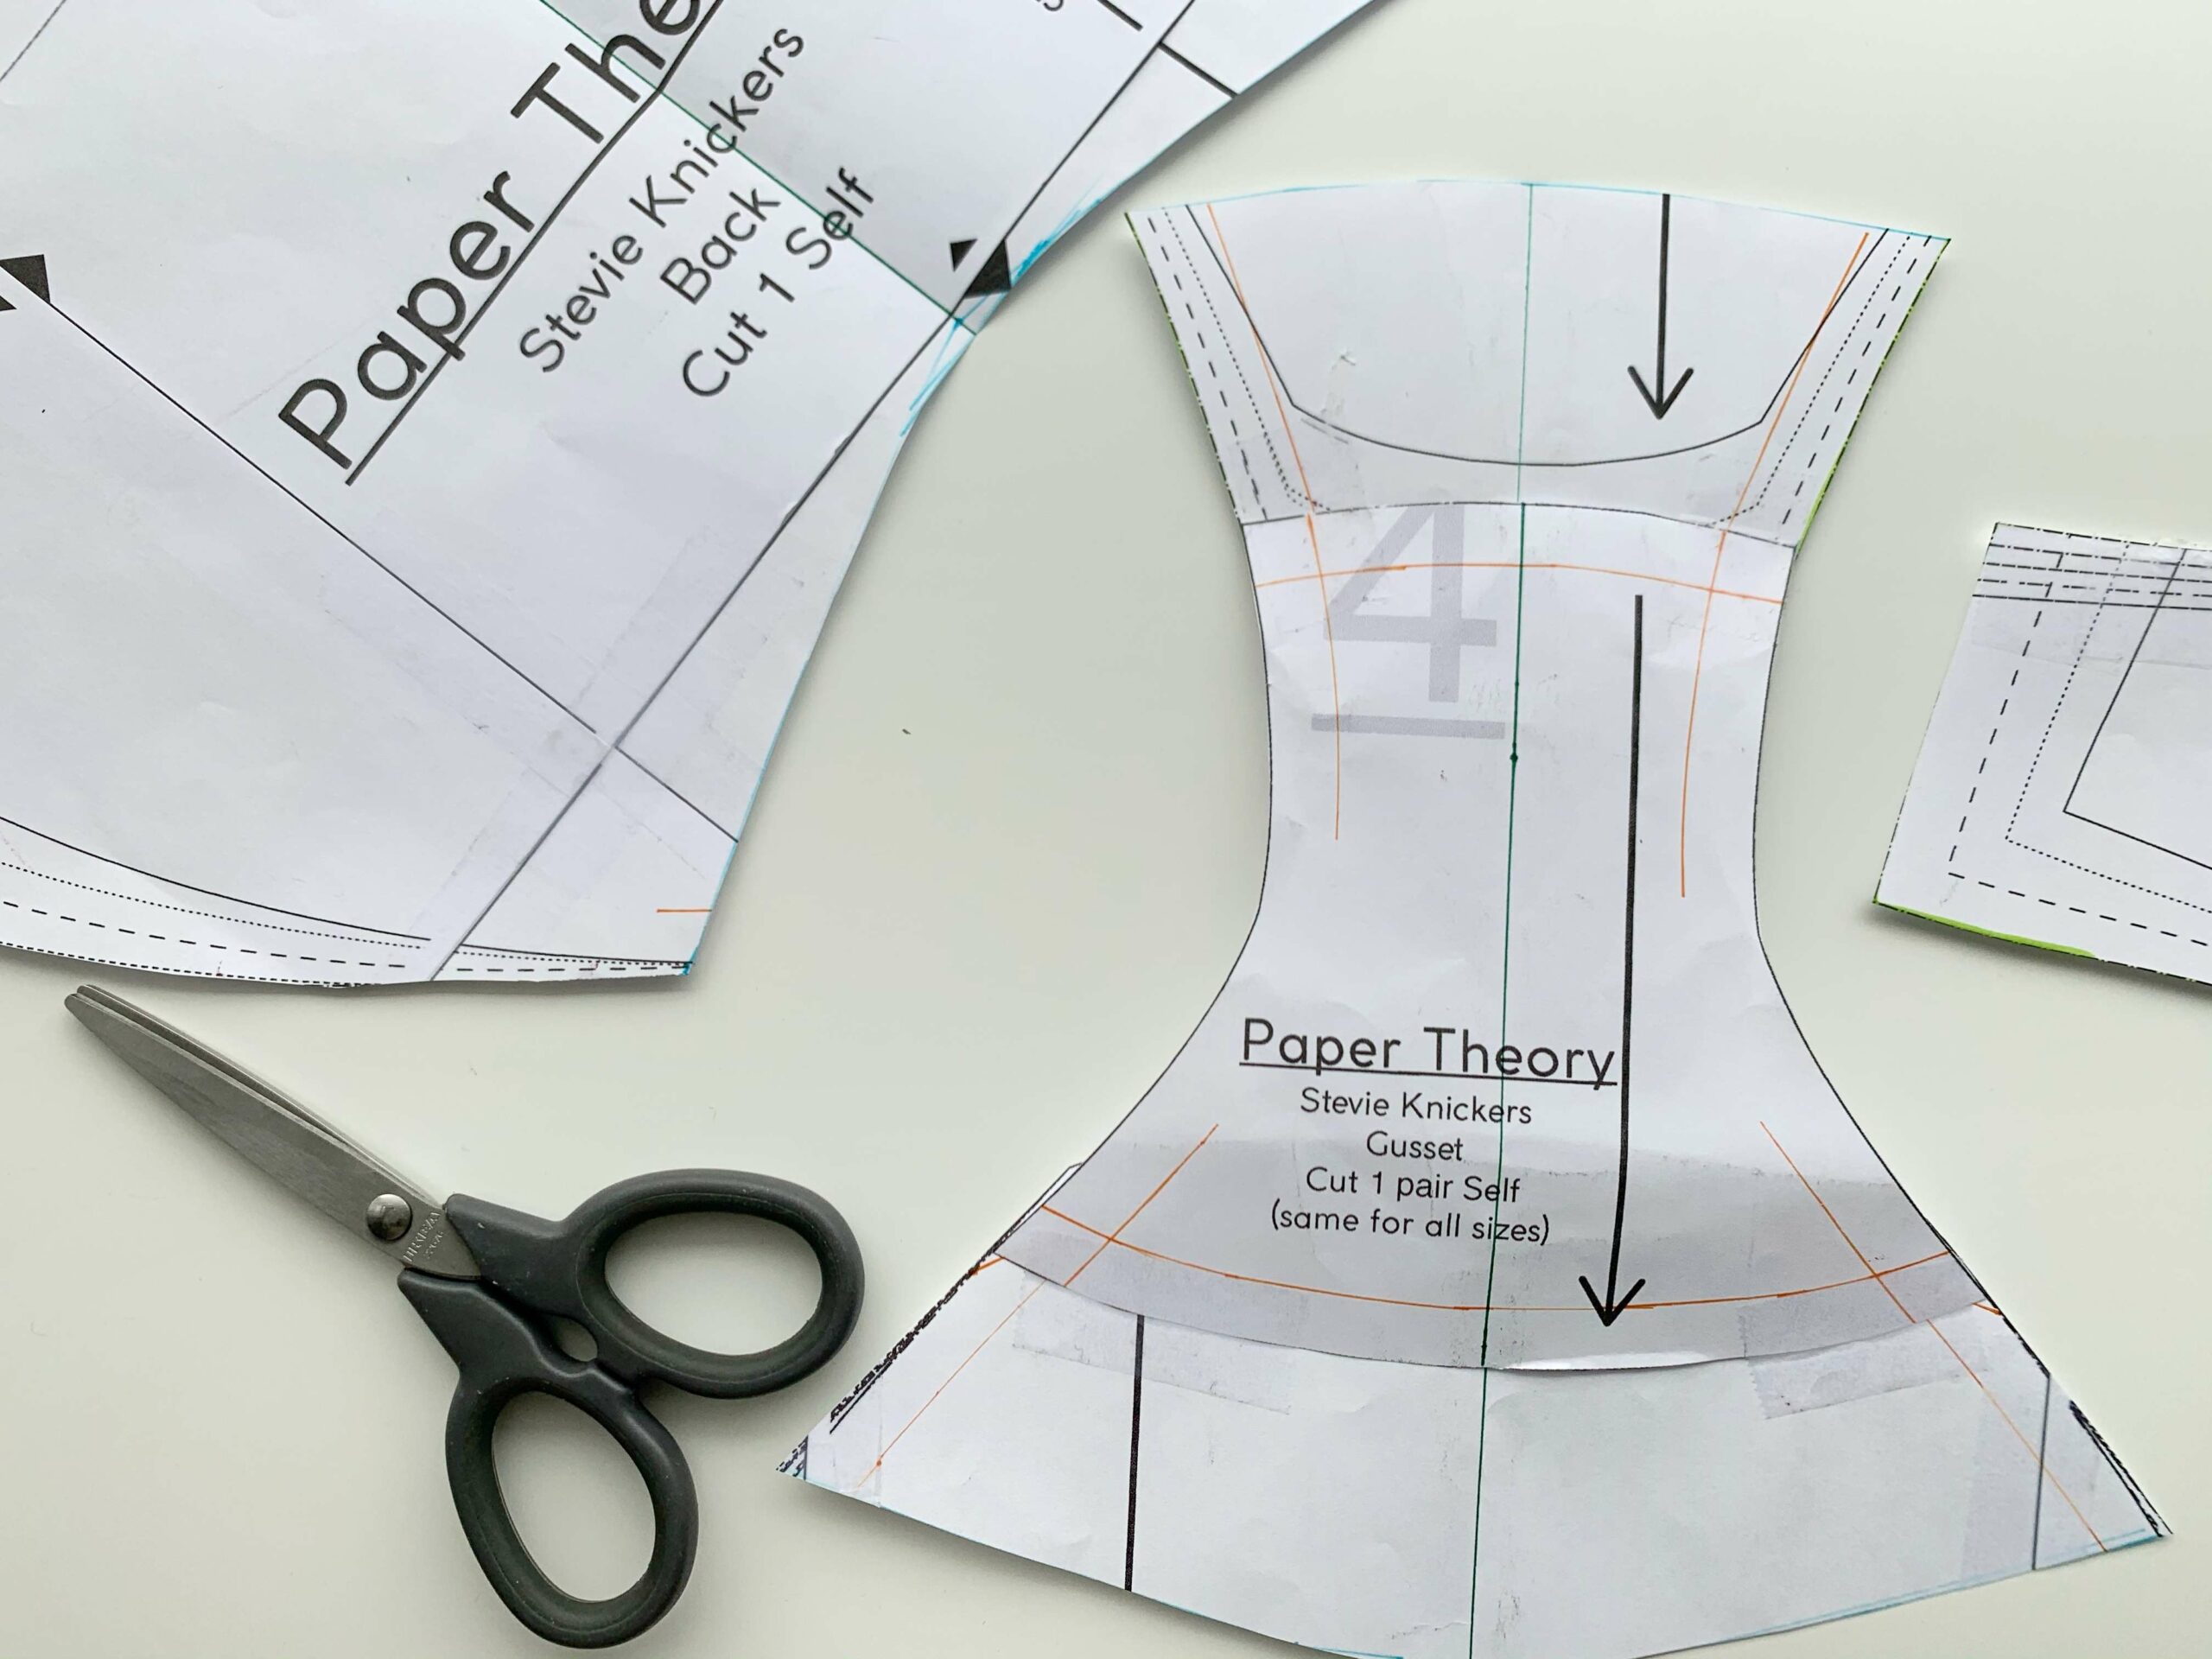
4. Add Seam Allowance
Tape your new pattern pieces to some scrap paper and add back the 1/2″ (1 cm) seam allowance. You’ll need to do this for the front and back pieces as well (only the gusset piece is shown here).
5. Cut Your Fabric Pieces
Cut your pattern pieces out of the fabric. If you’re using different fabrics for all the layers of the gusset then make sure you cut the gusset out in each of these. Since I’m using the Zorb 4D fabric, I only had to cut this out once.
You can then follow the sewing instructions that your pattern provides, with a little help from my tips below for gusset construction.
Tips for Sewing Reusable Period Underwear
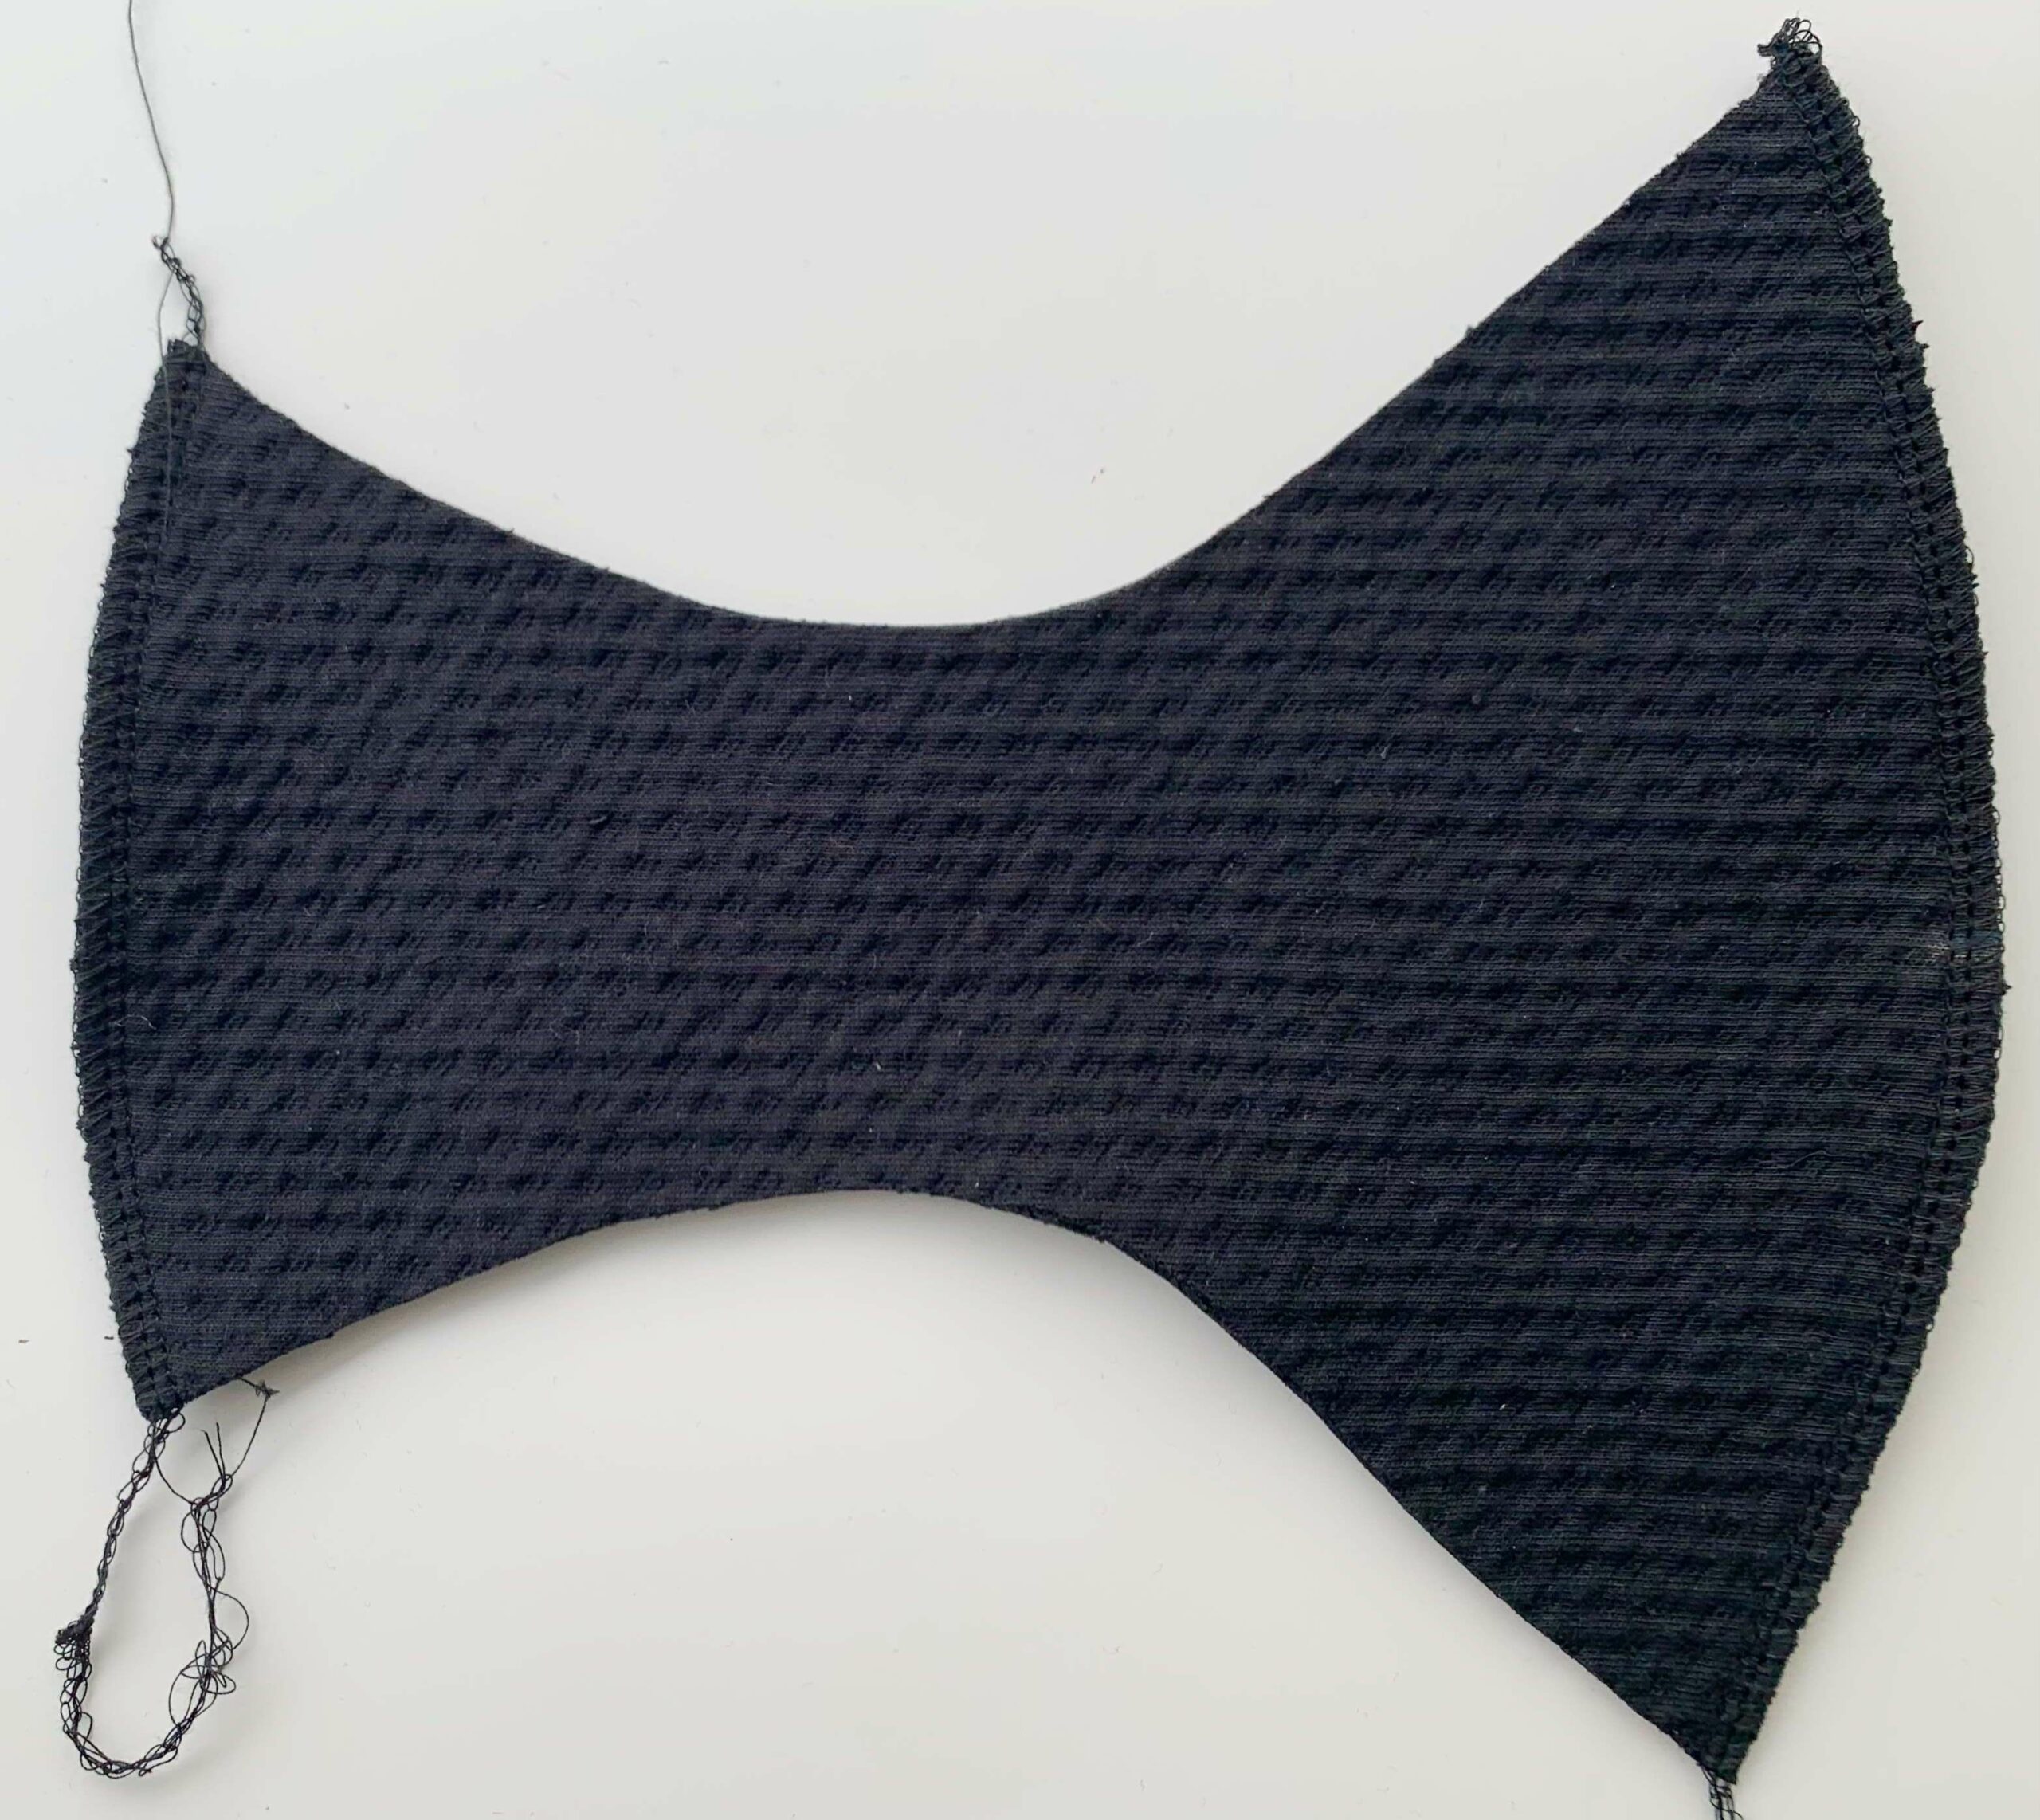
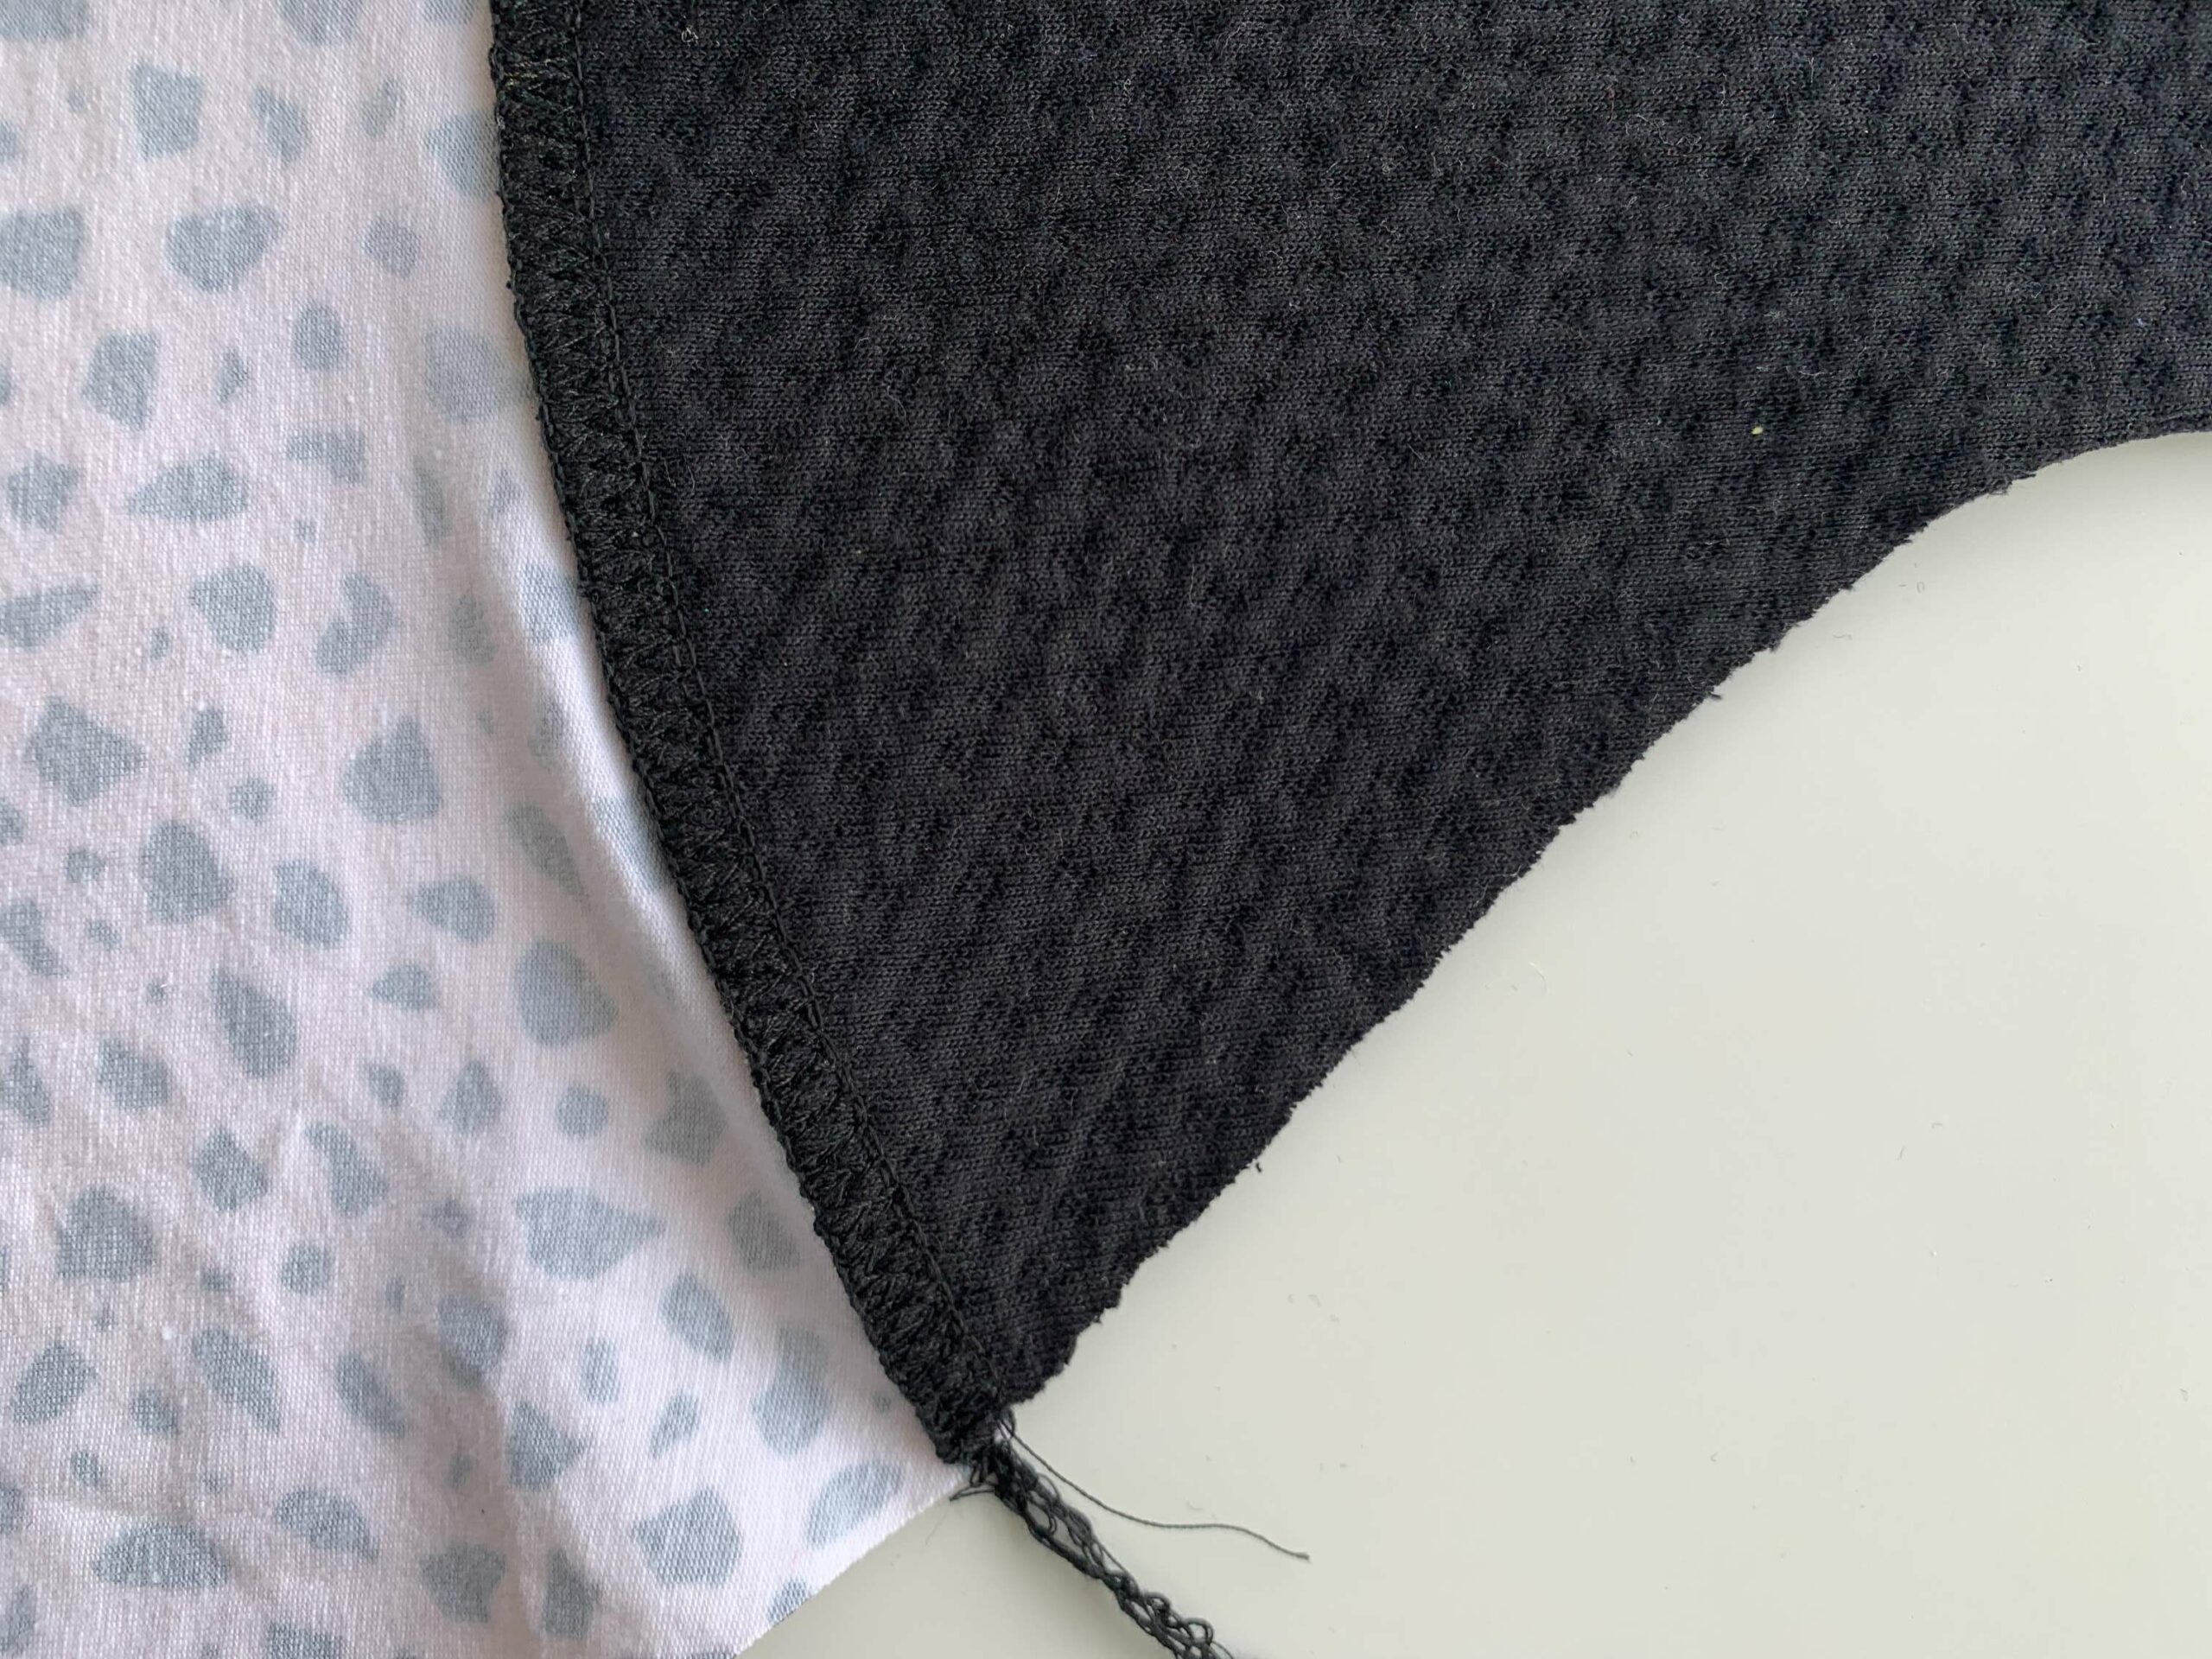
1. Finish the Gusset Edges
Overlock/serge the edges of the gusset before you construct the underwear, this will help to flatten all those layers and make it easier to sew through. I also found it stopped my Zorb fabric from shedding everywhere!
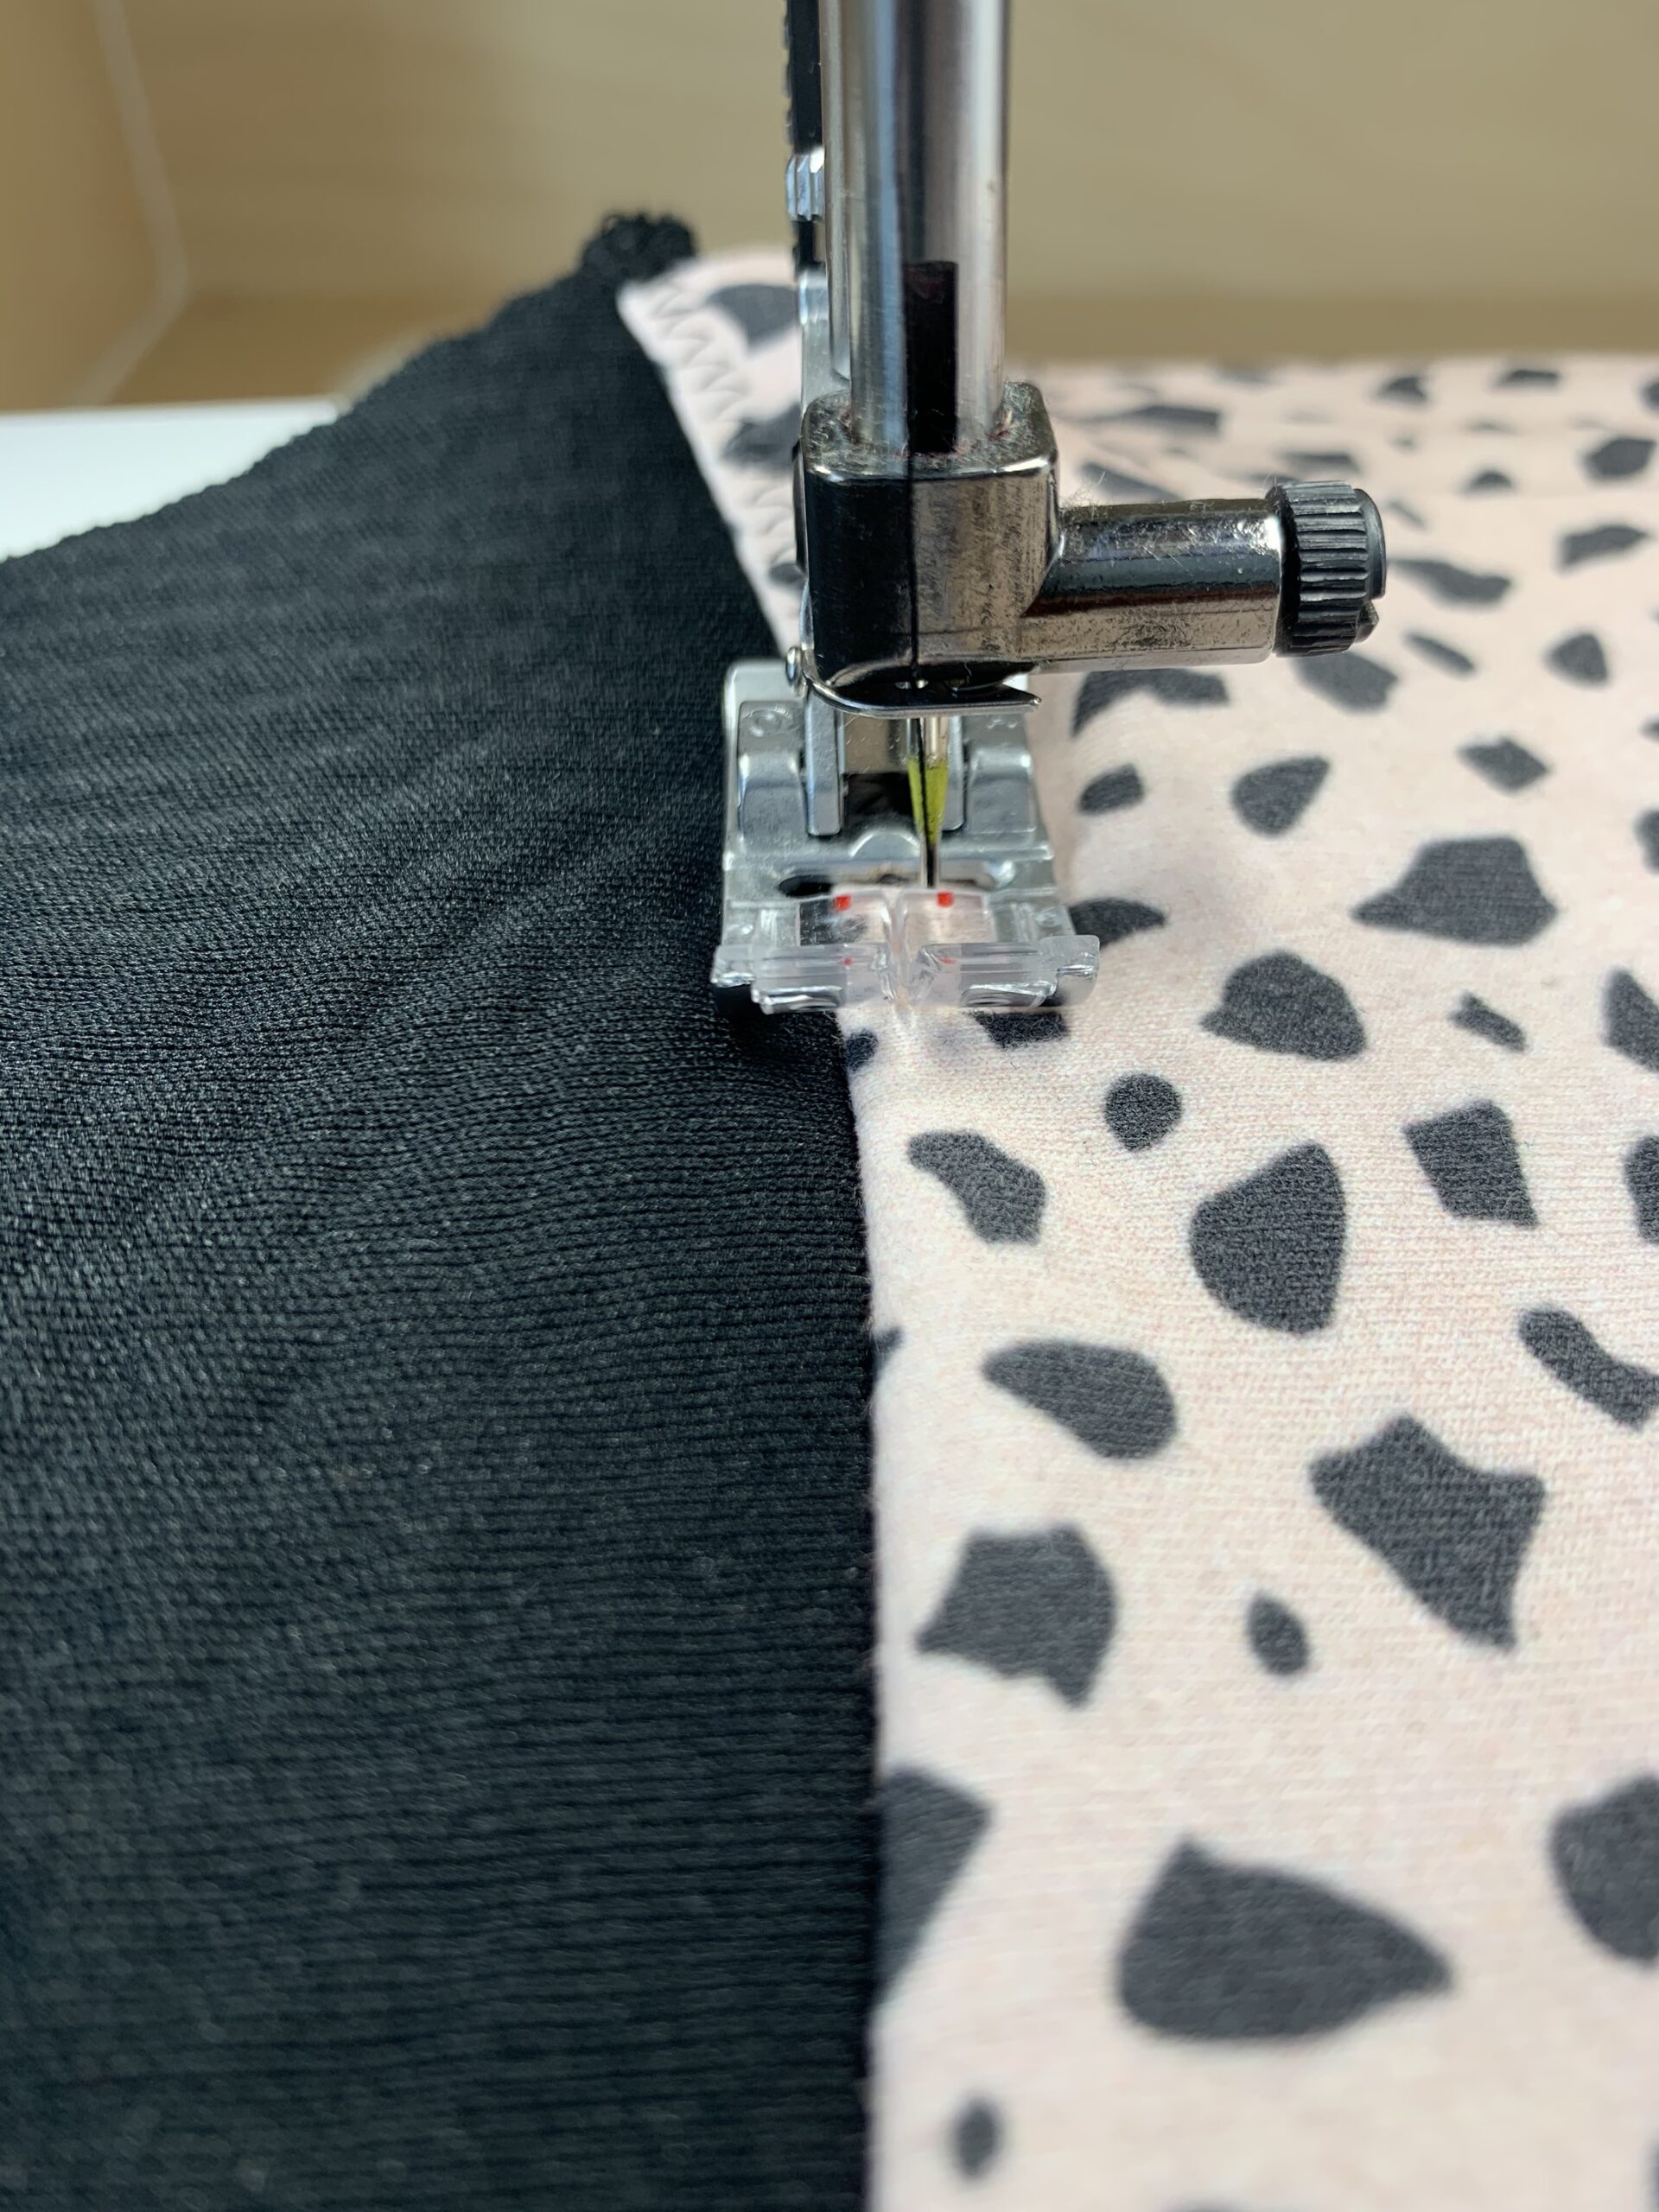
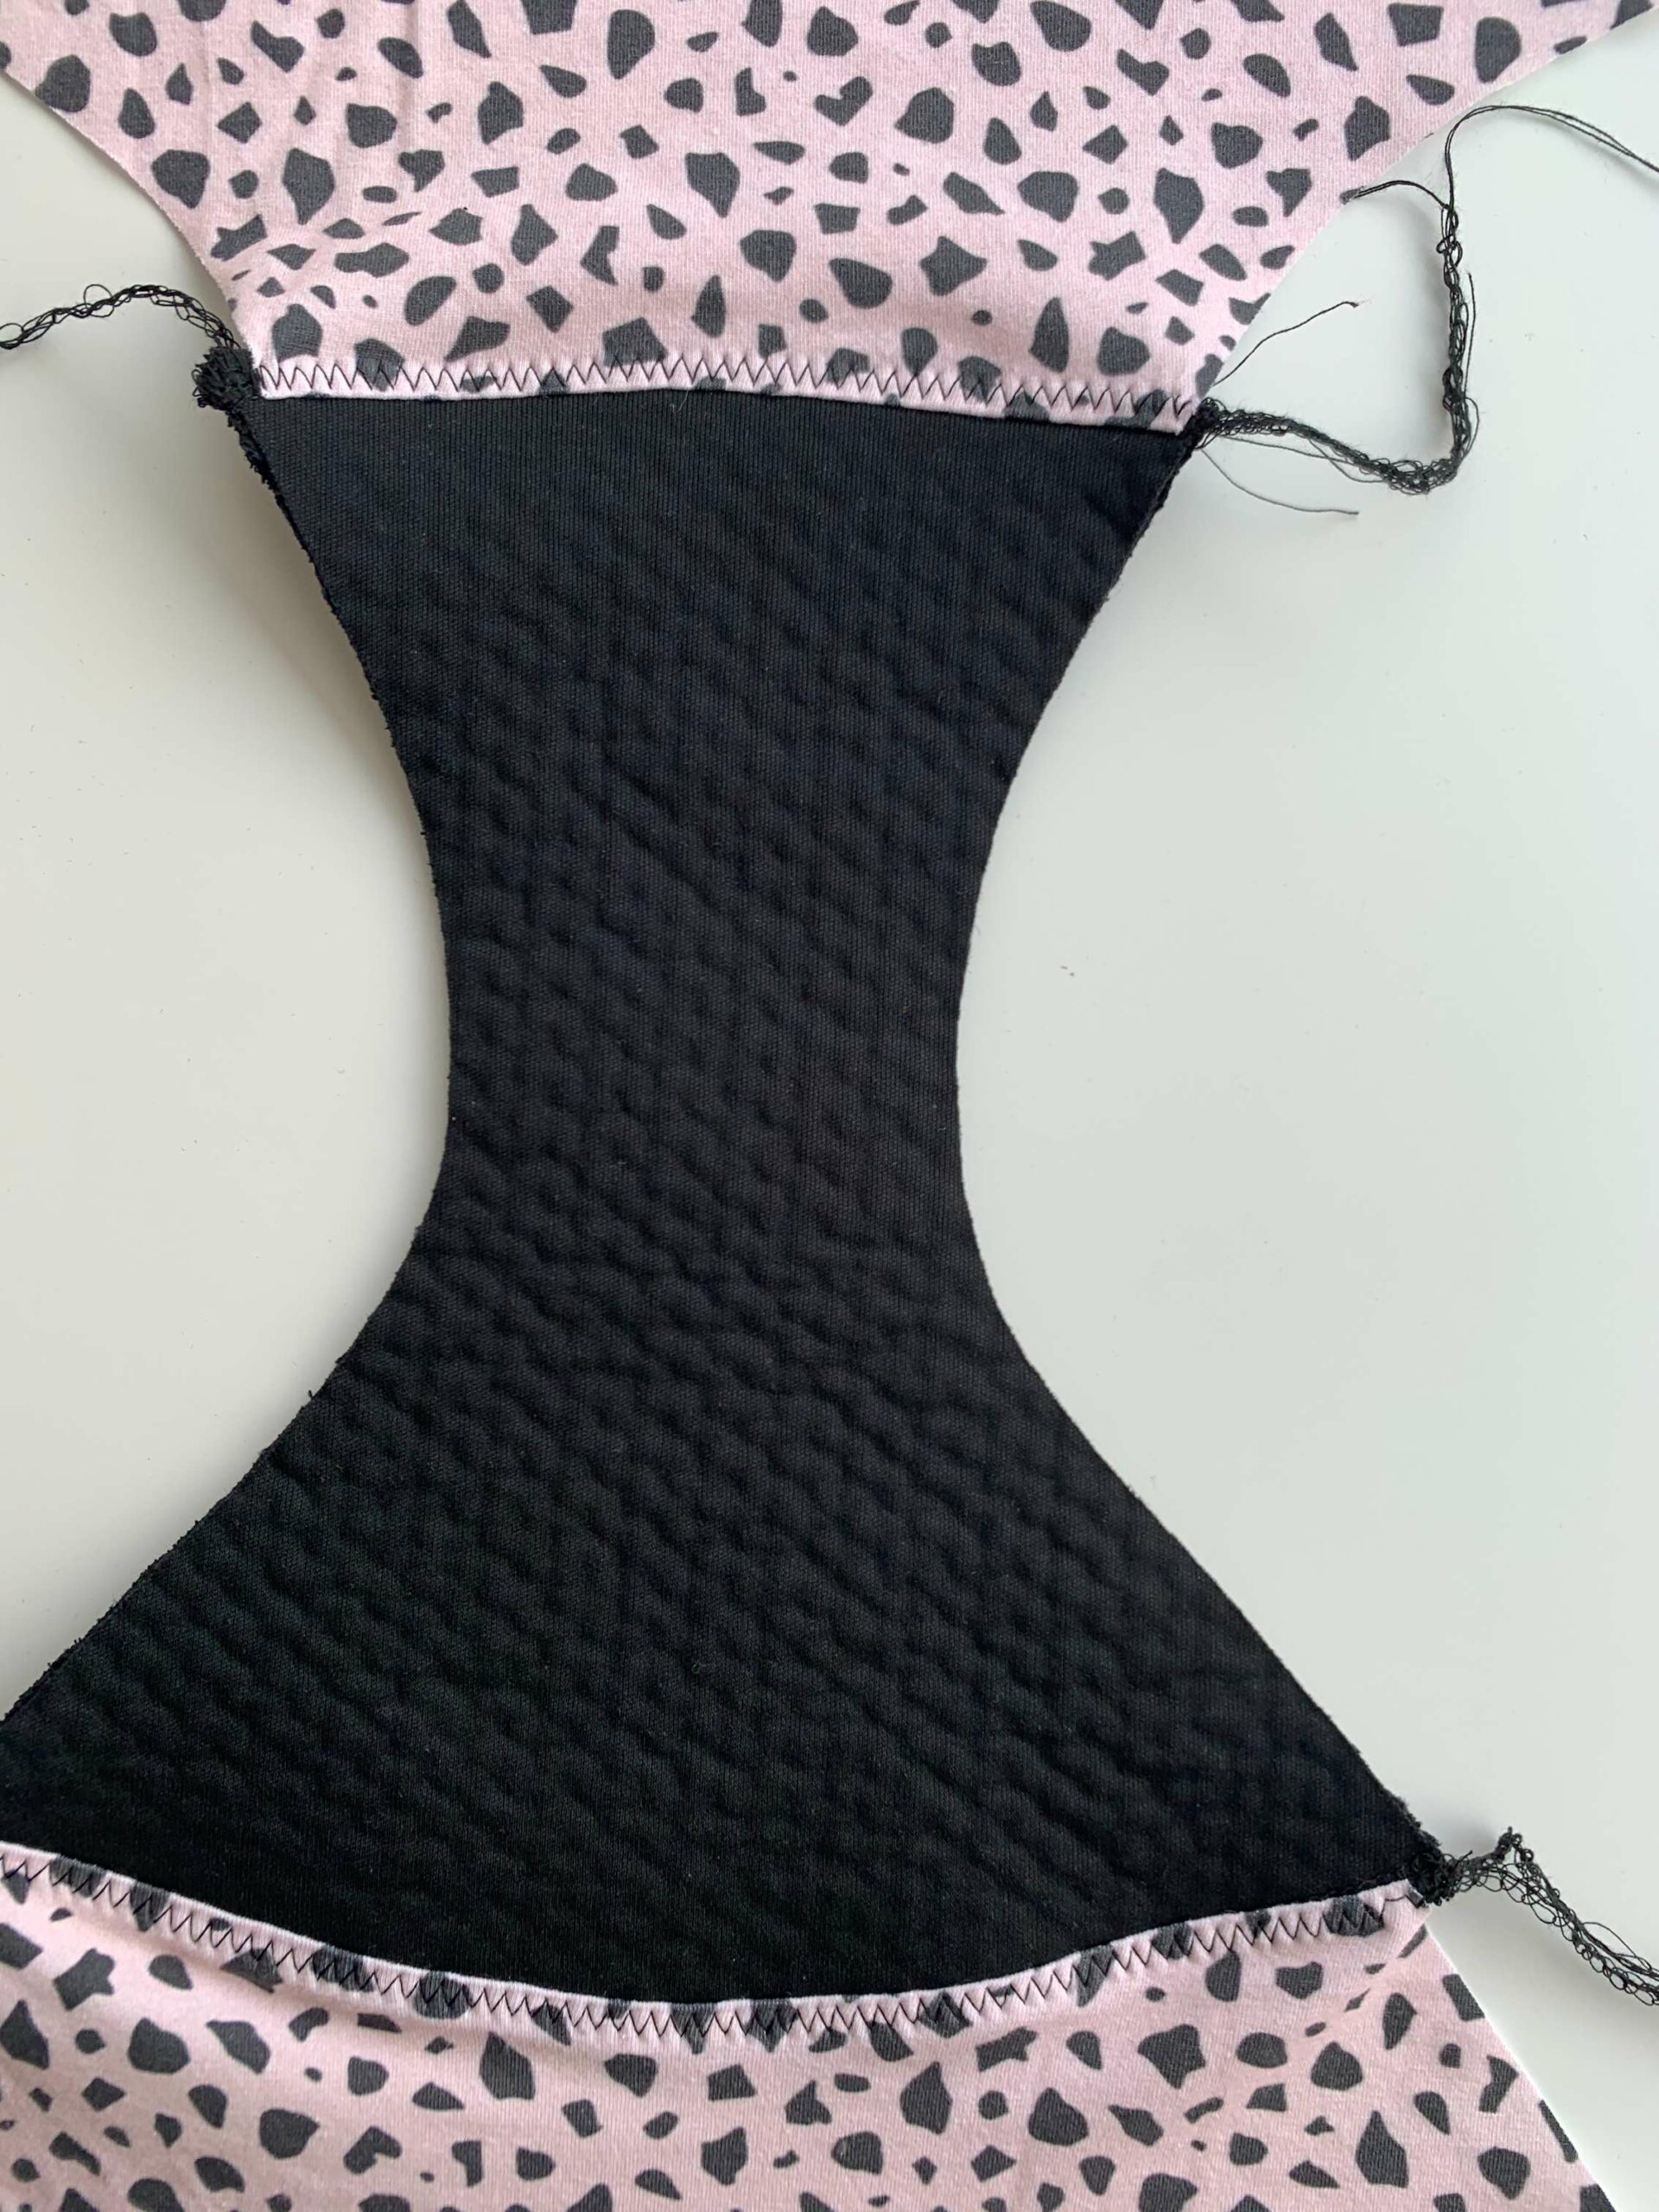
2. Sew with Right Sides Together
If you’re finding your gusset seams are getting bulky, you might want to skip out on the “burrito” style most underwear patterns recommend. This is where you sandwich the gusset and other pieces together to hide the seams. However, that works best when there isn’t many layers to work with. Instead, sew the gusset as you would for normal sewing, right sides together. Then topstitch the seam towards the front and back pieces, and flatten the seam out of the way (I actually took inspiration from looking at how my ready-to-wear period underwear are sewn!).
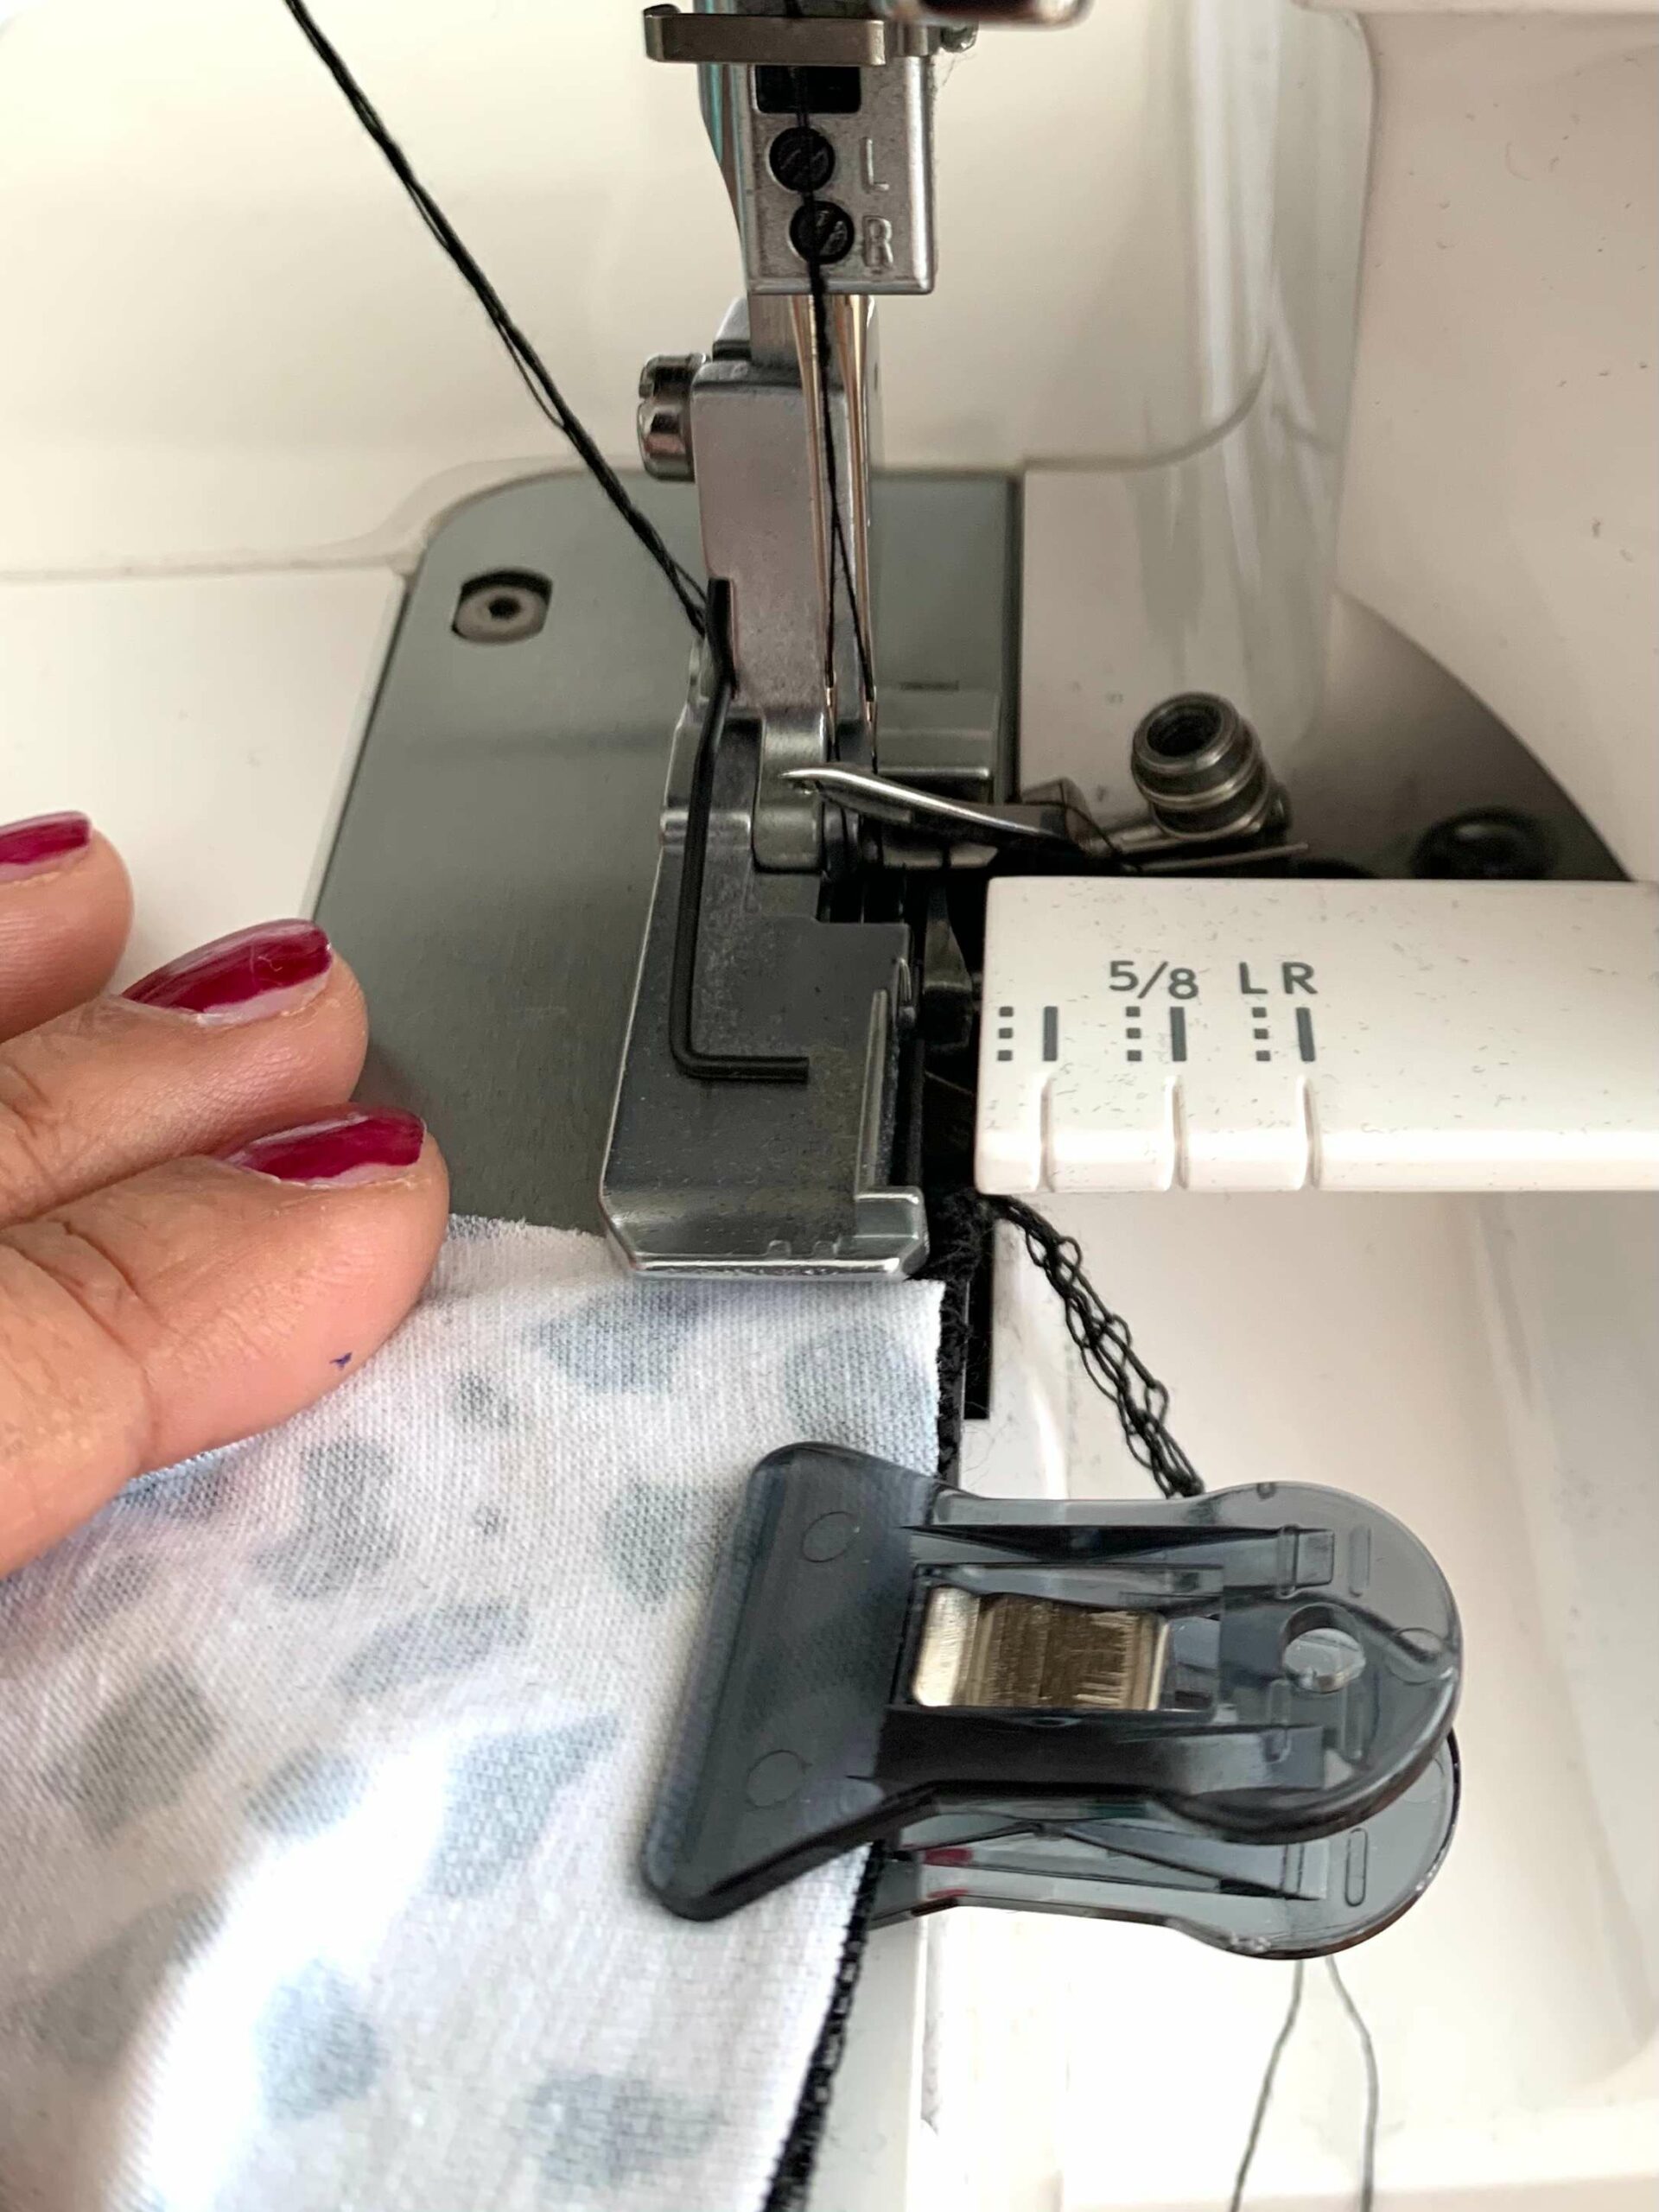
3. Avoid Pins
Don’t use pins when holding your gusset in place—you don’t want to make tiny holes in the waterproof layer! Use quilting clips instead (you can find these at any sewing supplies store). If you’re using fold-over-elastic (FOE) for the binding of the legs, you might want to use a slightly wider type for these as you’ll need the extra width to bind the thicker gusset.
Now that you’ve learned Rumana’s tips and tricks for making your own period underwear, take a deeper dive on how to choose the right elastic for your undergarments with Meghann Halfmoon of Halfmoon Atelier.

Meet Rumana
Rumana is a doctor from London who uses sewing & crafts to unwind and destress after a long day. She shares her passion for crafting through her Instagram and blog, The Little Pomegranate, and is also a campaigner for increased diversity within the sewing and craft communities.


Thank you for this insightful post on reusable period underwear! It’s incredibly empowering to see sustainable alternatives gaining traction in menstrual care. Not only do these products offer a eco-friendly solution, but they also prioritize comfort and convenience. I appreciate how the article goes into detailed on how we can DIY it. As someone passionate about reducing waste, I’m excited to incorporate these into my routine and contribute to a greener future. Keep up the great work in promoting sustainable menstruation!
Thanks Zalikha!
And yes! Rumana did a fantastic job on this post, making it an accessible and easy DIY that’s also customizable to your own design likes too! 🙂
Best,
Betsy
Spoonflower
Hello,
Will making these period panties help with incontinence as well or would I need a different type of material for that?
I’m tired of wearing disposables and I would like something that I feel may be healthier for my skin and to be able to cut down on UTIs.
Thanks for your help and have a good day.
Hi Donna!
And great question!
While this post doesn’t cover that specific use case, I took a look where else this might be discussed and found this discussion thread, which has some great insight on this topic: https://sewing.patternreview.com/SewingDiscussions/topic/121390.
Best,
Betsy
Spoonflower
Hi,
Thank you for a great blog. I’m in South Africa and would like to start a project to make period underware to enable girls, who cannot afford period products, to stay in school. I would like to know the type of sowing machine needed to to the stitching? I think I should be able to source the materials needed.
Hi Deidre!
Thanks sounds like a lovely project.
The pattern Rumana uses in this post is a free pattern from Paper Theory, the Stevie Knickers. I looked up information about the pattern on the Paper Theory website* and here’s what they recommend in the post regarding sewing machines: “You can make a pair of knickers with any regular sewing machine that has a zig zag or stretch stitch on it. If you have an overlocker, you can use this to stitch your side seams but it’s not essential. Commercially produced knickers are made with a coverstitch machine. Few people have these machines at home – but If you are lucky enough to have one these it will be even quicker!” (text from the link below).
Hope that helps!
Best,
Betsy
Spoonflower
* The post I was reading is here: https://papertheorypatterns.com/pages/how-to-sew-knickers.
Hi Claire,
I don’t know if it would work, but you could possibly edge your undies with self made bias binding made out the absorbent fabric, so the bias/elastic edge also absorbs moisture? I haven’t used the V-Zorb fabric yet. so Im not sure of that would even work?!
Ooh! Great idea, Hannah, thanks for sharing it with us!
Best,
Betsy
Spoonflower
Hi there. I’ve used the zorb 4d to line my regular undies as I have stress incontinence.
It works right up to the point of the elastic. And then it leaks, not a huge amount but enough to dampen the clothes which is Frustrating!
Can you or any of your lovely readers offer any advice please.
X
First, thank you so much for sharing with us. I came across your period panties in my email on yesterday and immediately placed an order for my supplies to get started by next week at the latest. I am so ready I have a question. Are the period panties to be worn in addition to pads or are they to be used alone?
Hi Danielle,
We’re so glad to hear you enjoyed Rumana’s tutorial! What you use can be different from person to person, but Rumana mentions that she found the perfect combination for her was a menstrual cup along with the period underwear. She’s written more about her experience switching to reusable period prodcuts on her blog here.
Take care,
Amy
This is great! Thanks! I\’m going to send this tutorial around to everyone I know!
… and to stop wearing (and buying and tossing) daily panty liners, I traced a favorite panty liner to make a paper pattern. I cut one pattern out of PUL and one out of an old cotton t-shirt. With the t-shirt-liner on top of the PUL-liner, I zig-zagged these inside all of my every-day undies.
I am very eager to make and try this. I have been using cloth pads for a little more than a year now and I will never go back to store bought pads.
Two questions. One what is the foot your useing on your machine in the avoid pins picture? Is there a overlock foot you can get or something? I don’t have a surger and no funds for one. Some day. Two, along this same line of thought. Any chance on a reusable pull up pattern? We are potty training and I don’t like the store bought ones we bought. Just padding. No barrier. I have pull on plastic covers and they don’t seem to work at all. Both on and she’s soaked.
Hi Miranda,
In the avoid pins photo a serger/overlock machine is being used, but you can definitely purchase an overlock foot (also called an “overcast” foot) to use with a normal sewing machine for similar results. We found some on Amazon, but any sewing supplies store should carry it too. And great idea for a reusable pull up pattern, we will consider it for a future tutorial!
Best,
Anna
Spoonflower
Have you considered the charity, Days For Girls, that provides a snap-in gusset piece with several washable pads that fit in the gusset, for girls who can not afford period protection. Donations can be made in cash, fabric for sewists, and/or sewing the gusset and pads. These girls would normally have to stay home from school during their period if not for this fabric/sewing based charity that gives girls more days in school.
Hi Trisha, Thank you for making us aware of this nonprofit. I am linking to Days For Girls’ website here for any sewists interested in helping out!
Best,
Amy
Spoonflower
Thanks for this great tutorial! I’m not sure if period pantys are right for me, but I’m definitely starting to think about reusable panty liners, as I use liners in addition to tampons for extra protection. So thanks for the ideas on materials to use!
I love this DIY! I have been looking into period panties, but this is such a more beautiful option. I just need to practice my sewing skills more. ????