


")
Need an easy way to use up those fabric scraps? Making a quilt using free-pieced strips is a great way to bust through your scrap bins. Quilter and blogger Nicole Neblett of Mama Love Quilts is teaching a series of modern quilting workshops this fall in the Greenhouse, our classroom and community space here in Durham, North Carolina and she’ll be sharing tutorials from her classes here on the blog for those of you who can’t visit us here at Spoonflower HQ. From her first class in the series, use this improvisational piecing technique to create a modern quilt that is all your own style!


Finished block size: 12” x 12”
Materials:
- Scraps of print and solid fabrics. Our example features designs from Holli Zollinger’s Farmhouse Collection. It’s difficult to say how much fabric you will need. The amount depends on the size of your strips. The narrower your strips, the more of them you will need. Likewise, the wider your strips, the less fabric you’ll need. To make my block, I used 11 strips ranging from 1” to 2 ½” in width.
- ¼ yard of background fabric in a neutral color like white, cream, grey
- needle and thread or sewing machine
Cutting instructions:
- Cut strips of print and/or solid fabric between 3” and 8” in length and 1” and 2 ½” in width.
- Cut background fabric to fit the strip as you sew. In general, you’ll use pieces that are between 3” and 8” in length and between 1 ½” and 3” in width.
Assembling a block:
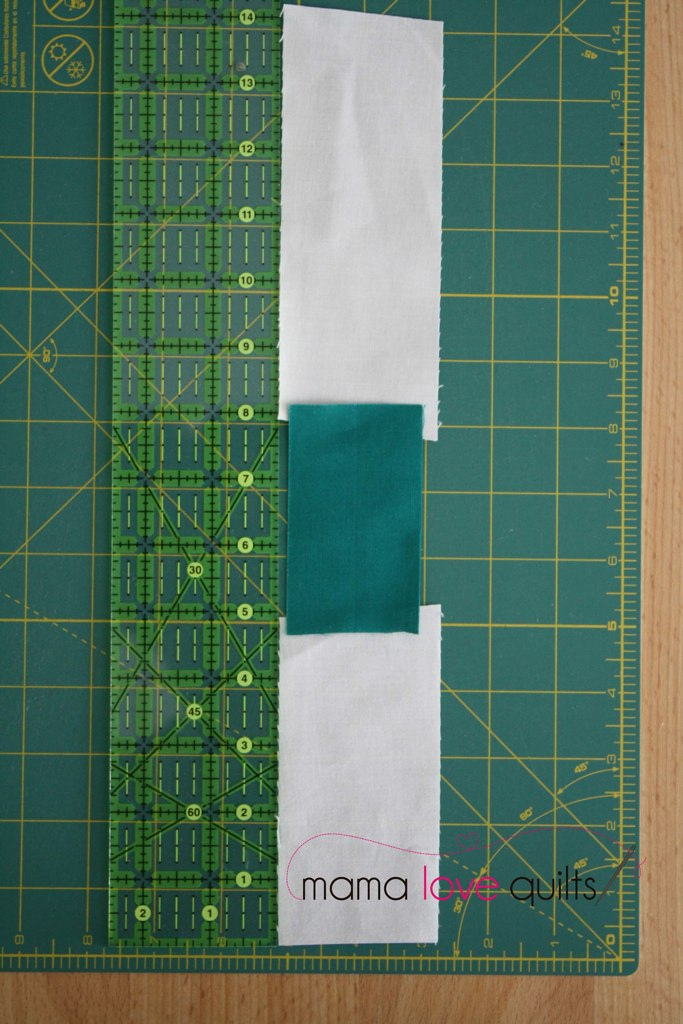
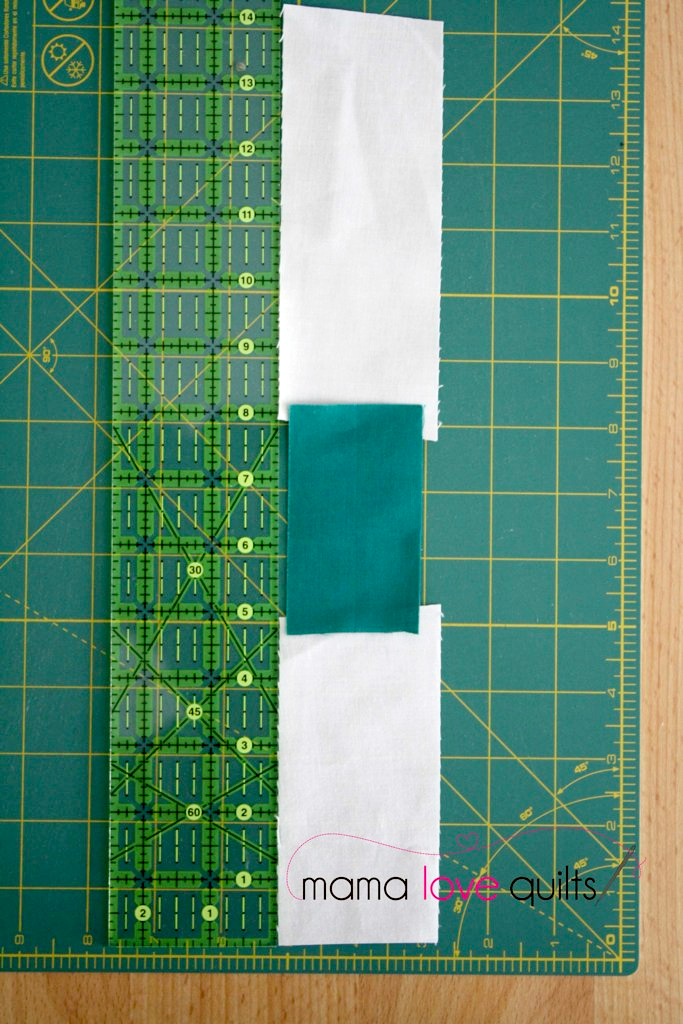
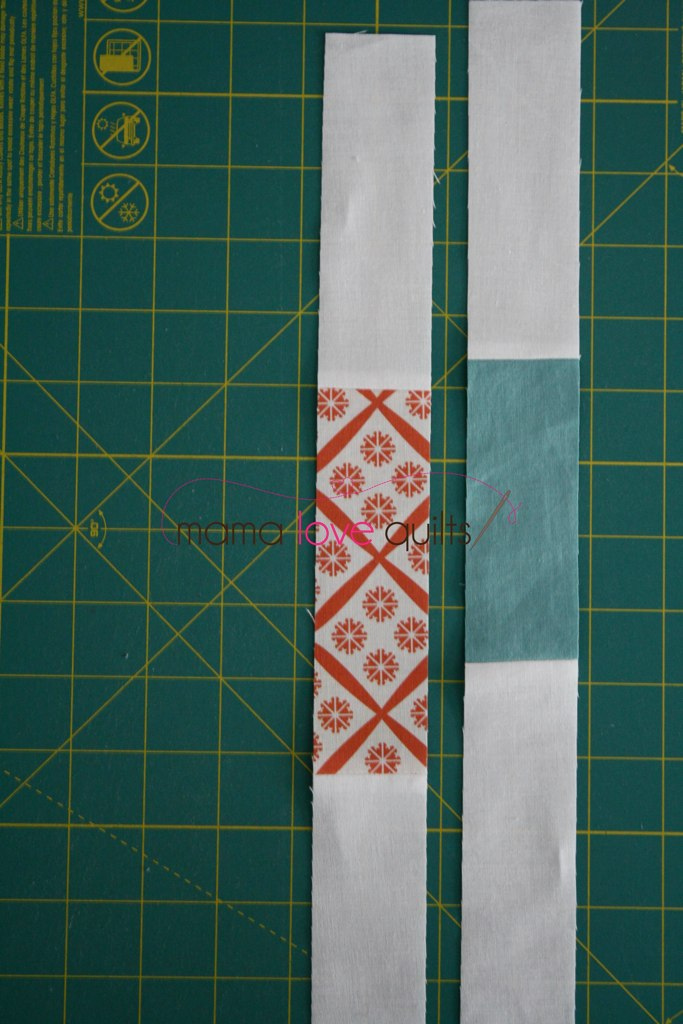
- Choose a strip of print or solid fabric and two pieces of background fabric. Lay pieces alongside a ruler as shown to make sure the pieced strip will be at least 14” long. Overlap edges by ¼” to account for the seam allowance.

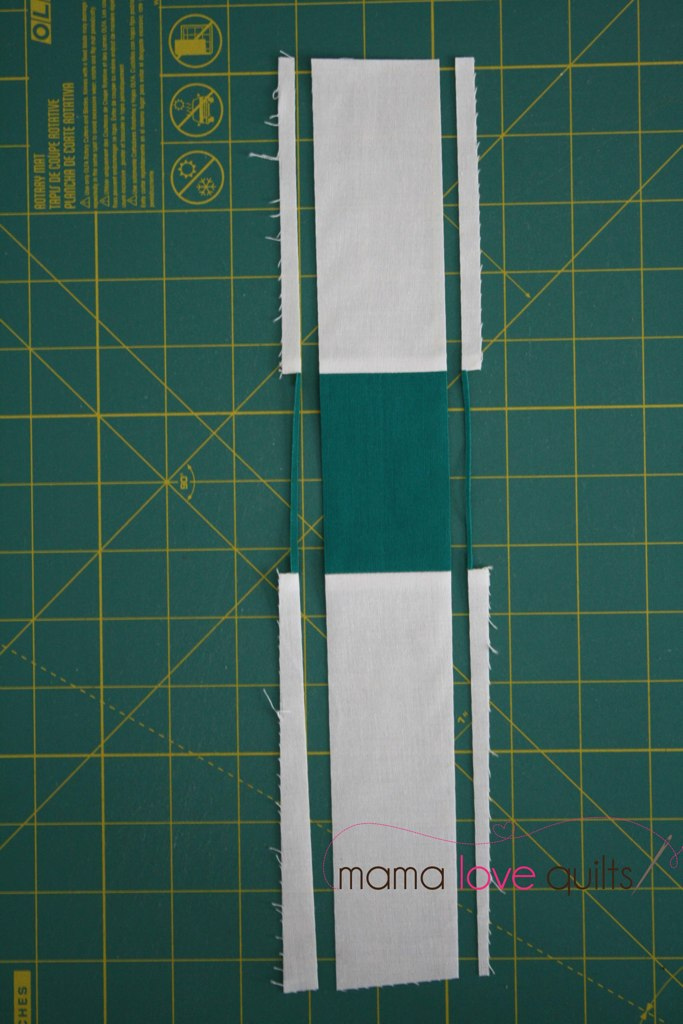
2. Sew a background piece to the top and bottom of a strip so that the pieced strip is a total of least 14” in length.


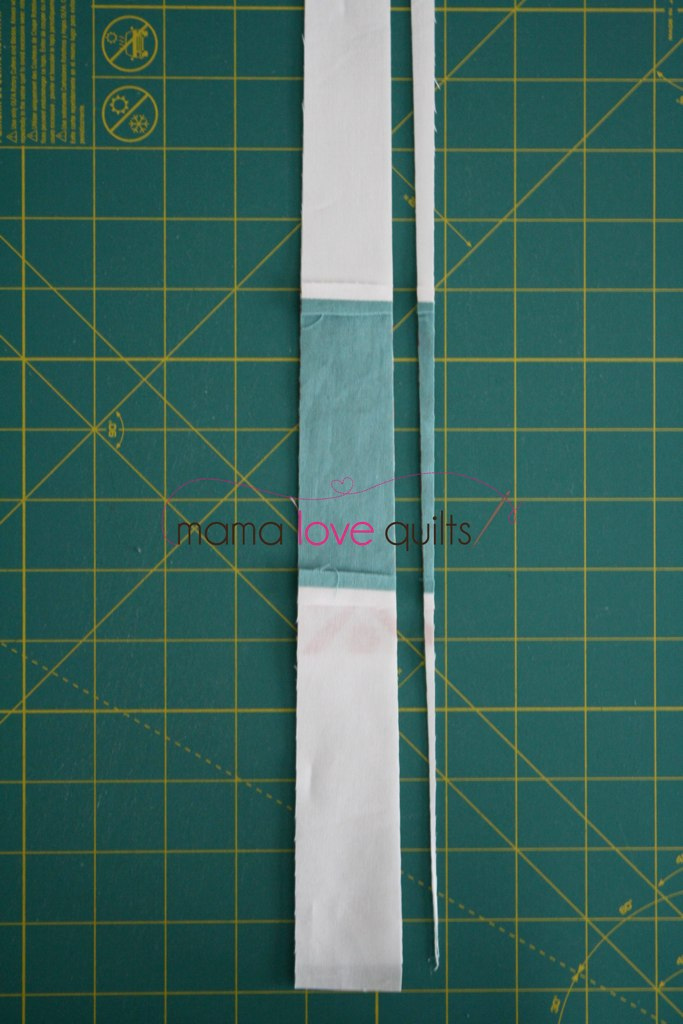
3. Press seams open and trim so that the edges of the strip are straight.

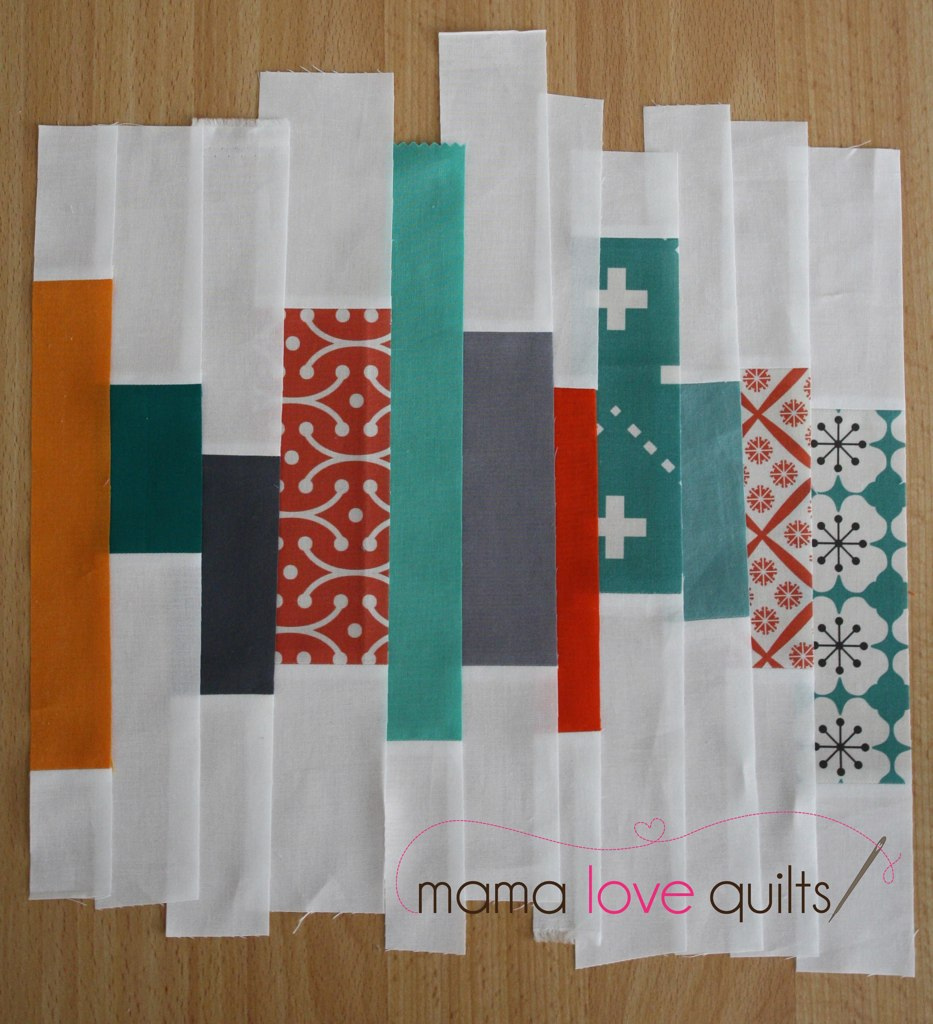
4. Repeat steps 1 – 3 with the remaining strips until you have enough strips to make a block that is at least 13” wide. Remember to consider the seam allowances when estimating the width of the block.
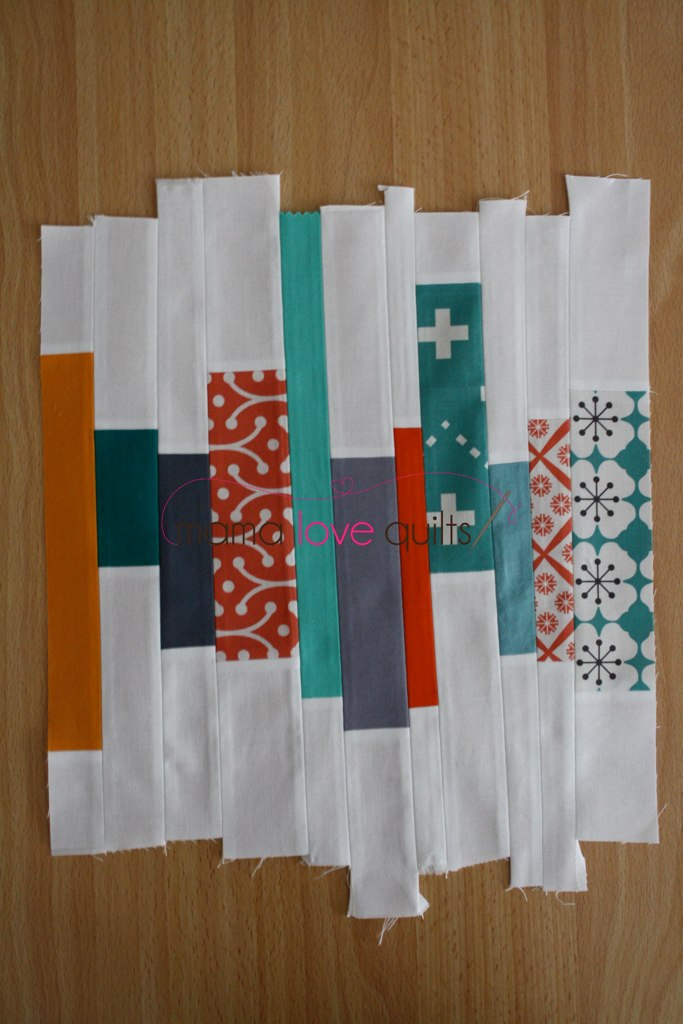
Lay out the strips as desired. Be sure to overlap the strips to account for the seam allowance. Measure the width to make sure that the block will finish at least 13” wide. Add more strips if needed.

If you want to add a little interest to your block, try trimming a few of your strips on an angle. To piece two strips at an angle, start with two straight strips.

Lay them right sides together. Trim along the edge at an angle.

Sew the two strips together. Press seams open.

Sew all strips together.

Trim block to 12 ½” x 12 ½”.


Repeat the block assembly steps to make as many blocks as you’d like for your modern quilt.
If you make this block or a quilt from this tutorial, feel free to upload a photo to the Mama Love Quilts Flickr group. I’d love to see what you stitch up!
Happy free-piecing! – Nicole
Finished with your quilt top? Try designing your very own custom quilt label. It’s easy!


I absolutely love this idea. I took it s few steps further and made a quilt from pieces from my father’s shirts. Thank you so much for the idea.
Just love this tutorial. I used the technique to make a beautiful runner for my dining table.
i like it
thanks
really good
Do you have a tutorial on what do to after these steps? I have a bunch of squares but not sure what to do next.
You can see how to finish a quilt with this tutorial or this one!
Thanks you really helping us
from italy 🙂
I think I’ll try this, but I had a quilt given to me some years ago where the seams were pressed open. It puts a lot of stress on the thread and I had to repair almost every seam. So the rule to press seams to one side actually has a reason.
Hi Helen,
Thanks for the helpful tip!
thank you for sharing post.
very good!
Do you have a tutorial on what do to after these steps? I have a bunch of squares but not sure what to do next.
Lindsay, instead of doing a binding around block, I would join the blocks with a 1 1/2 or 2 inch sashing between the blocks and rows. Perhaps use a black, white for gray fabric for the sashing/binding.
J’ai fais un coussin avec cette méthode, assez facile et ça rend très bien.