


I have never really been the kind of person who collects trinkets, hoards keepsakes or has many treasured family heirlooms tucked away in the attic, but now that I have children of my own, I am increasingly aware of the importance of keeping items that will one day tell our family’s story. Our family history is no more, or less, remarkable than that of the next, but it is unique in its detail and its narrative is a gift for future generations to treasure.
That said, I am not naturally predisposed to keeping things that do not serve a practical purpose so I’m trying to think of ways to preserve the memories of events and people without cluttering up my house with boxes that are never opened or with figurines that sit on a shelf and gather dust.
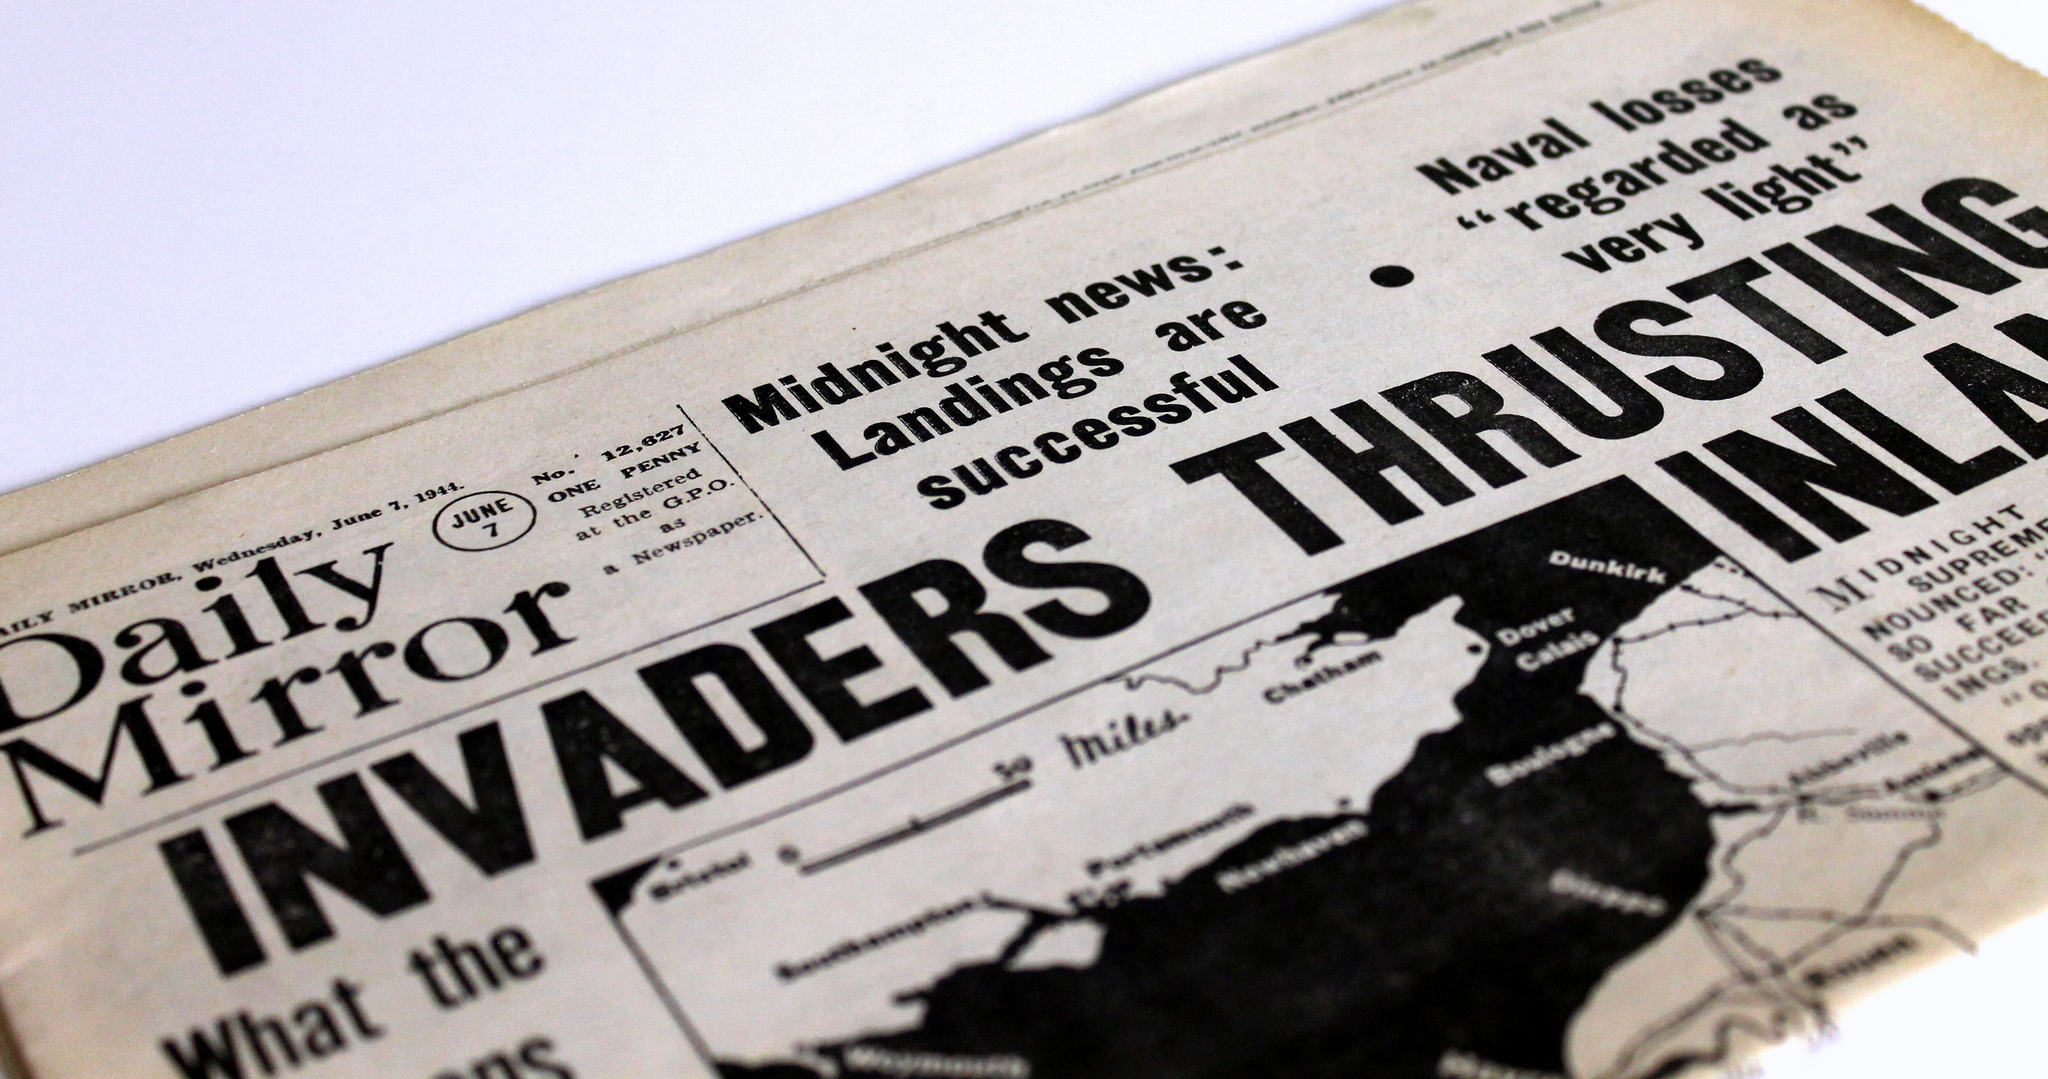
When my mum told me she was in possession of a newspaper published on the day she was born I was immediately inspired to think of ways to release it from its captive state at the bottom of a dusty drawer and to bring the printed material to life once more. After all, what good are treasures or keepsakes if we don’t stop to reflect upon them once in awhile?
My mum was born in England in June 1944, the day after the Normandy Landings when the allied troops invaded northern France, resulting in the decisive allied victory that marked the beginning of the end of the Second World War. The newspaper is only 8 pages long (presumably because of the shortages at the time) but despite this, I felt there was a wealth of material: adverts, news columns, satirical cartoons, movie theater announcements, letters, crosswords…
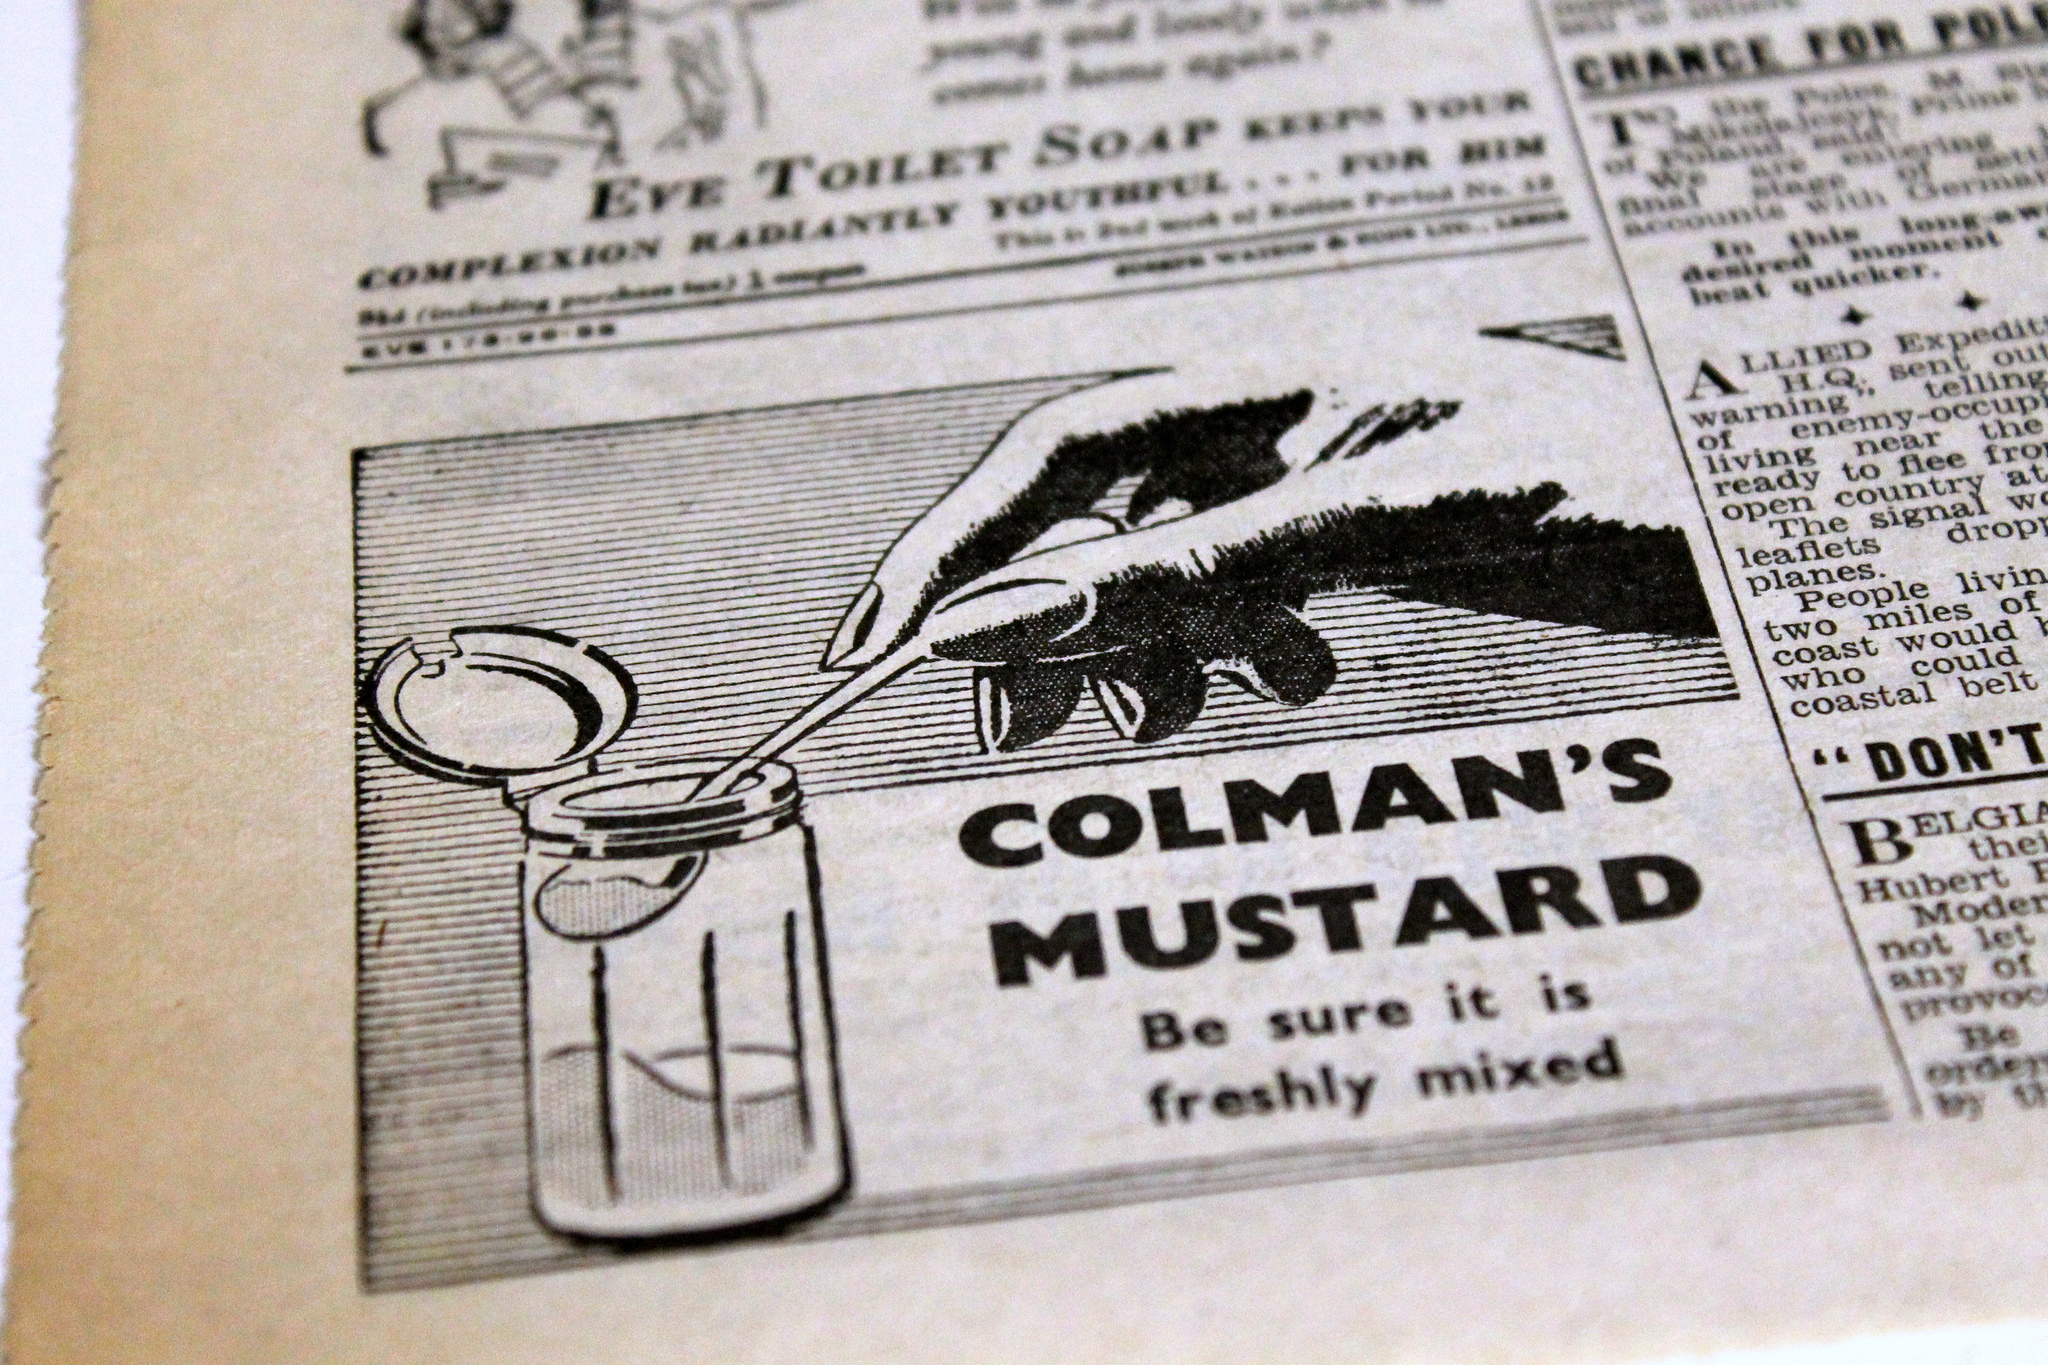
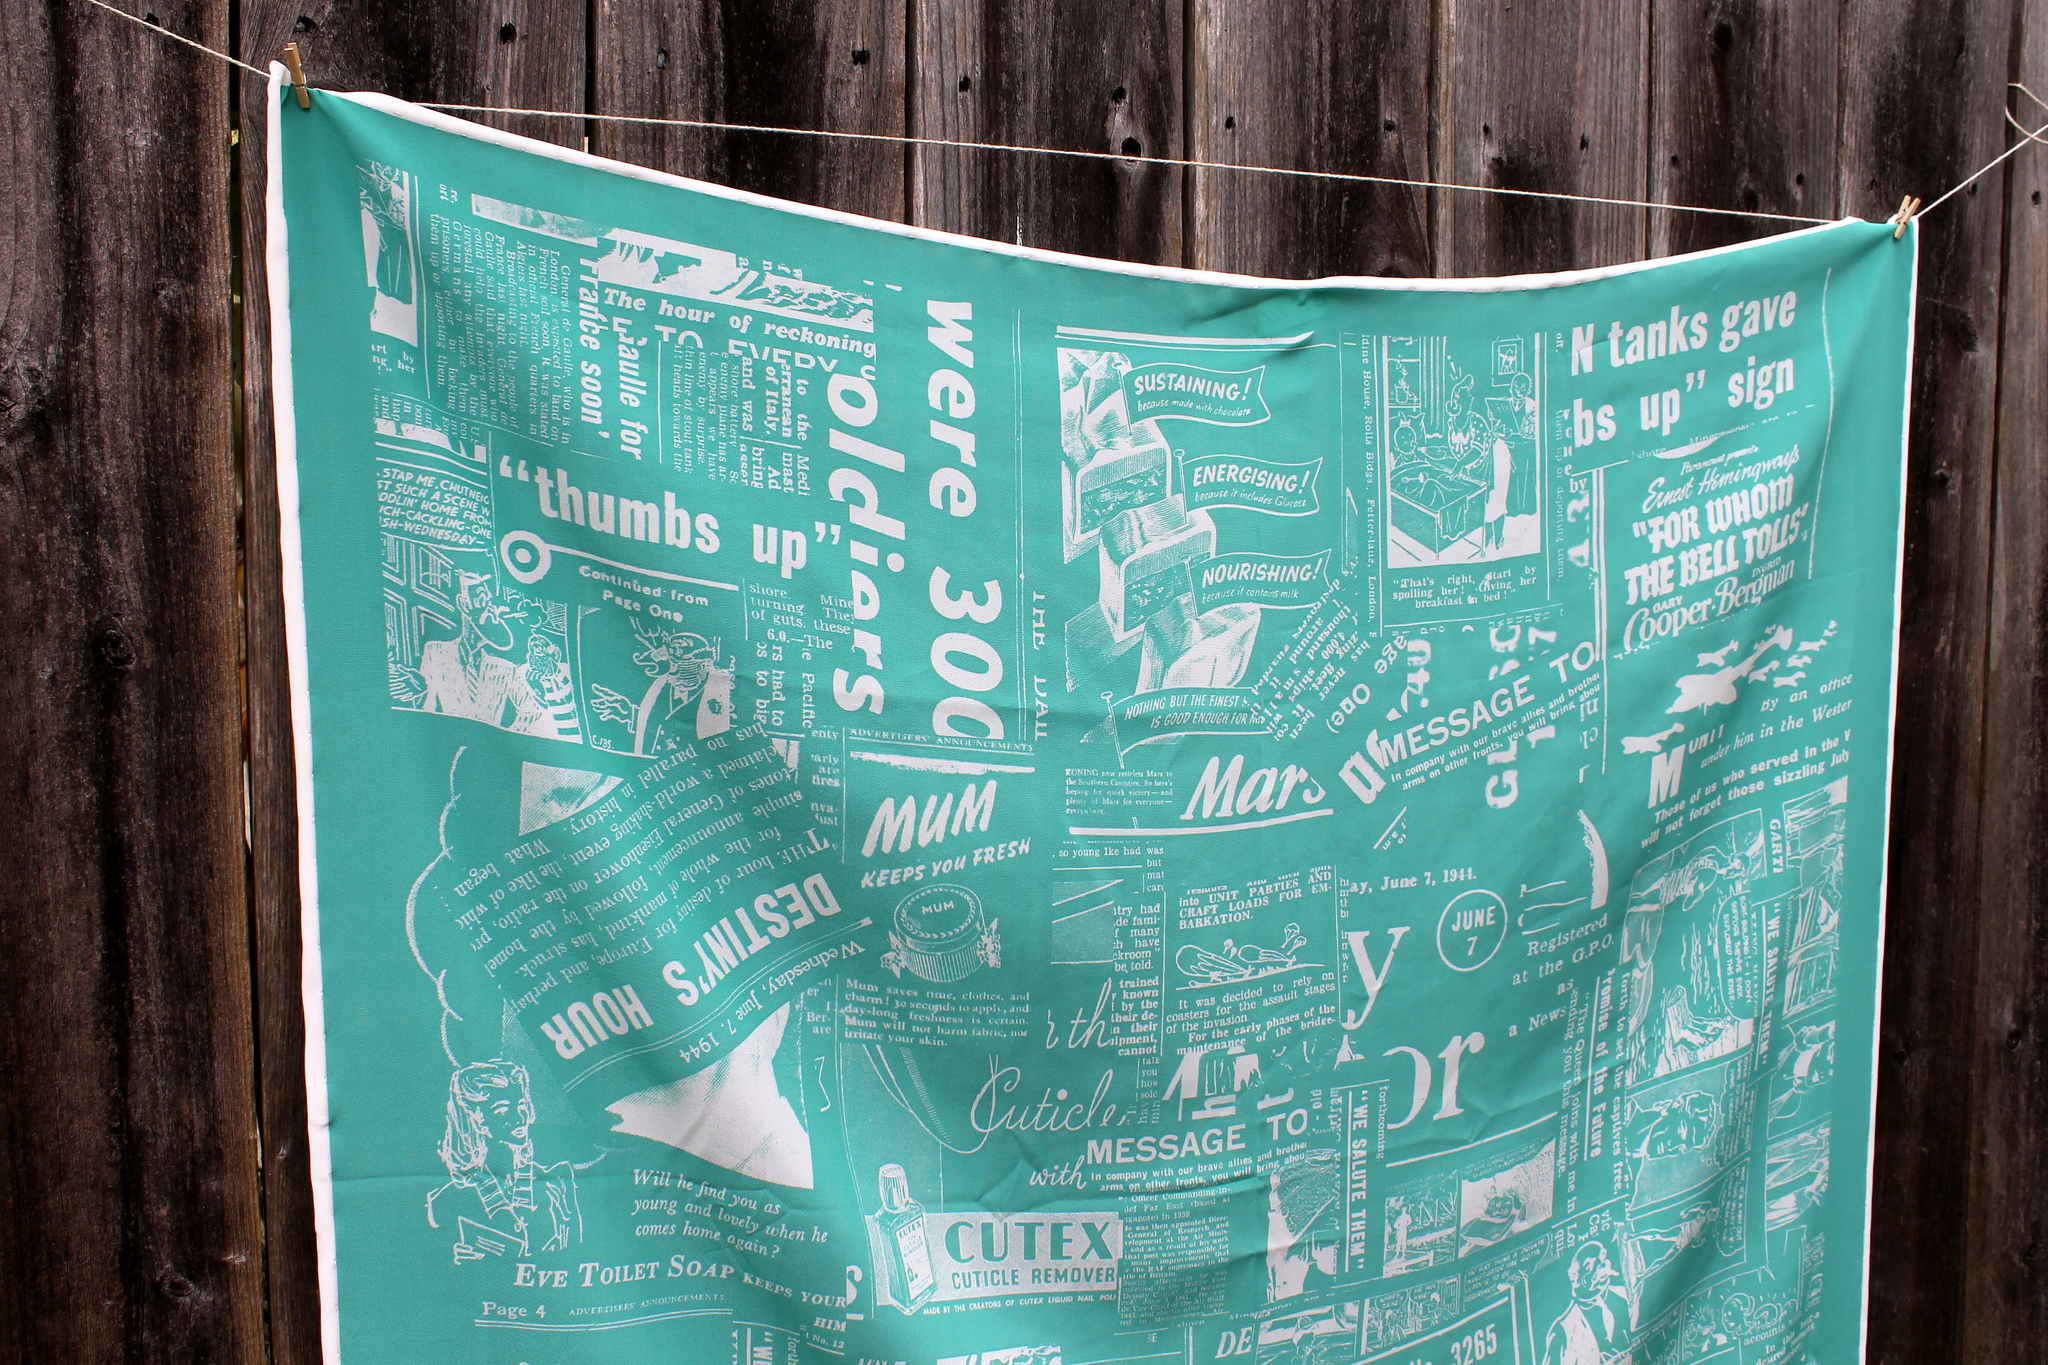
I decided to take photos of different parts of the paper that caught my eye and although there was no ignoring the obvious war reports and political references, I found I was drawn to aspects of the paper that highlighted regular humanity during wartime. For example, there was an advert for soap which asked the readers to consider, ‘Will he find you as young and lovely when he comes home again?” I also took photos of the date printed on the paper (my mum’s birthday!)

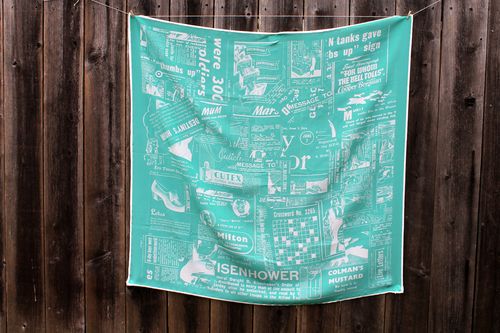
With roughly 100 photos of different parts of the newspaper, I transferred them onto my computer and used Picasa to create a collage of my favorite images. In the collage option in Picasa, you are able to set a custom size so I put in 36” x 36” as I intended on making a silk scarf of these dimensions printed on to one yard of Spoonflower’s beautiful silk crepe de chine.
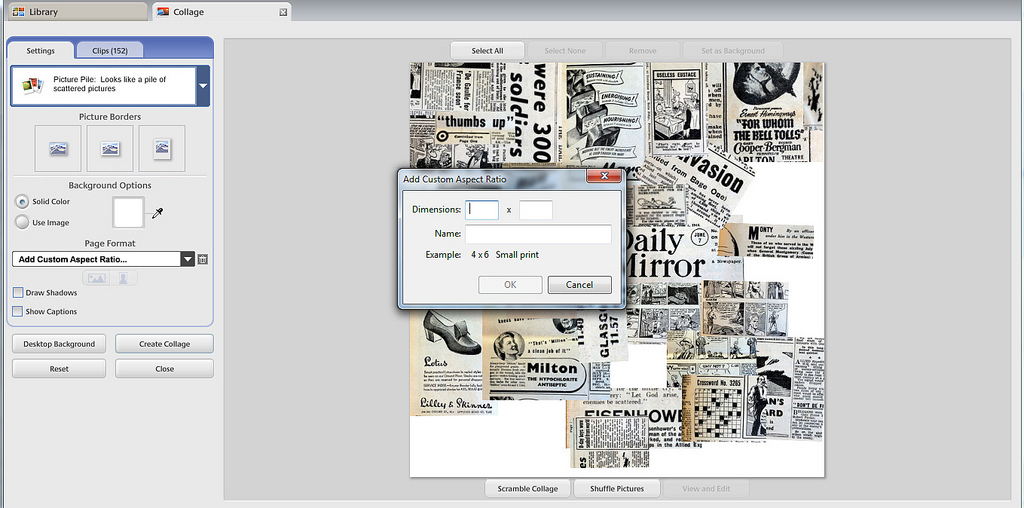
I then positioned and repositioned the photos I had taken until I was happy with the design. At this point the colors were still their original yellowing newspaper with black text, but using Picasa’s Duo-Tone option under the image processing tab, I was able to select two colors for my print.
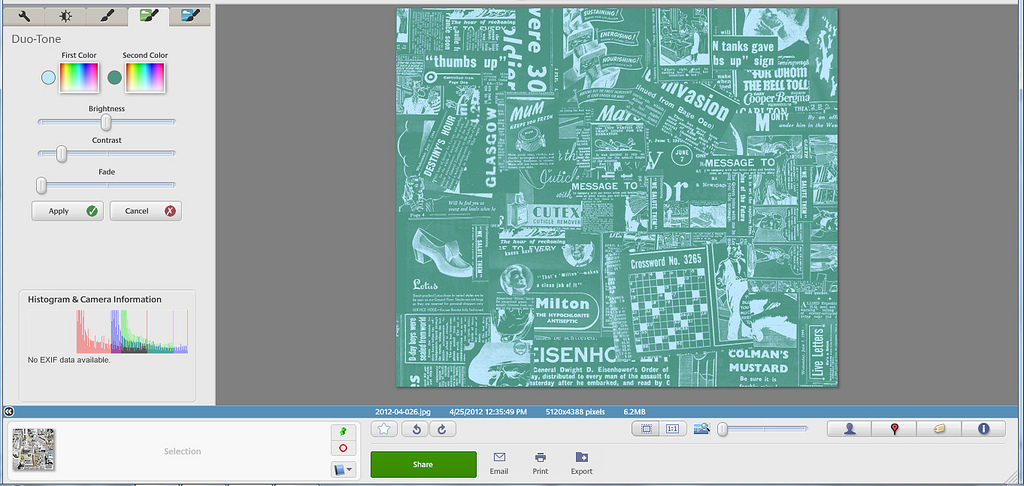
Though I tried a few test swatches before printing my yardage, all the color options I chose were within shades of my mum’s favorite colors, to make this scarf really personal for her.

When I received my yardage, I trimmed the edges and sewed a hand rolled hem around all four sides to complete the scarf.

This is beautiful fabric with such a special print that I know the scarf will become a family heirloom. And whilst the original newspaper may soon be returned to the bottom of the drawer and forgotten once more, the scarf will be worn and enjoyed, and will help tell part of our story for generations to come.
About Our Guest Blogger
 Hi! I’m Emma, and as well as working on the Fiskars Design Team, I blog over at hellobeautifulblog.blogspot.com/
I’m an obsessive sewer, often leaping into projects with more enthusiasm than talent, more bravado than skill and more good luck than anything else. This technique has worked well for me so far and more often than not, I make things I love, even if they’re not absolutely perfect. And though I’m no expert, I have a passion for fabric, color and design. I know what I like and what I like makes me smile.


I’ve just joined Spoonflower and am in love with this idea! My cottage is filled with my mother’s needlework and now I can design scarves, towels and more from her beautiful designs. Thank you so much.
For more ideas on family/personalized scarves and plaids take a look at http://www.lhistoirecestmoi.com a design team I came across really beautiful designs, at least I think so.
Thanks for sharing this innovative idea and beautiful post ,this is full of creativity and really wonderful. i will definitely going to try it.
wow really great post and great idea.Its very innovative and full of creativity.thanks for sharing this beautiful post and idea.
Very clever idea and beautiful product! Thanks for sharing 🙂 – Alex
So… I’m a fashion dunce. Can someone show me how you’d wear such a beautiful scarf? I would *love* to make something like this!
What a fantastic idea! Thanks for sharing the steps to achieving the stunning result 😀
This is absolutely beautiful and what a great idea.
Designs are uploaded to the Spoonflower website here : http://www.spoonflower.com/designs/new
They print your design onto a fabric of your choice and send it to you!
Hi Donna, the white border is actually just the sides of silk the design is printed on. I just trimmed around the scarf with about 1.5″ of the white remaining, then kept some of the white visible when hemming. You could totally print this kind of thing onto Spoonflowers cotton/linen canvas. You can find more info about the fabrics Spoonflower offers here: http://www.spoonflower.com/help#shop_help
This is a wonderful idea! Thanks for sharing.
Spoonflower will take the uploaded image and print it!
Love this. I did something similar with an old recipe in my grandmother’s handwriting: turned it into a tea towel for my mom for Mother’s Day.
Where did you have your design printed? How did you get the white border? This is an awesome idea!! I’m wondering if this could be transferred to canvas and hung as a work of art (for a man), instead of a scarf.
Amazing! Where did you send your design to be printed?
Thank you for sharing this wonderful idea and tutorial on how you created a very special keepsake. As I have some scarves with hand-rolled edges coming undone and also may undertake this project, I’d love an addendum showing how to do the rolled edges!
Wow, this is just brilliant! Thank you for sharing!