


Are you someone who loves the chance to get outdoors when the weather’s nice and get cozy at the same time? Well, you’re in luck! These Recycled Canvas pillows are perfect for adding a pop of style to your balcony, porch or patio. Join Spoonflower Ambassador and German blogger Antonia Pröls from Goldschool DIY as she shows you step by step how to make your own.

both by littlearrowdecor
Antonia: As we continue to spend a lot of time at home, it might be great to consider setting up your own balcony or terrace, somewhere you can enjoy the fresh air, rays of sun and chirping birds. Since we can’t go to big events or invite lots of friends over, we have all the more time to make our own four walls beautiful. Often it is enough to simply repaint existing furniture, recover upholstery or redecorate something to feel really good.
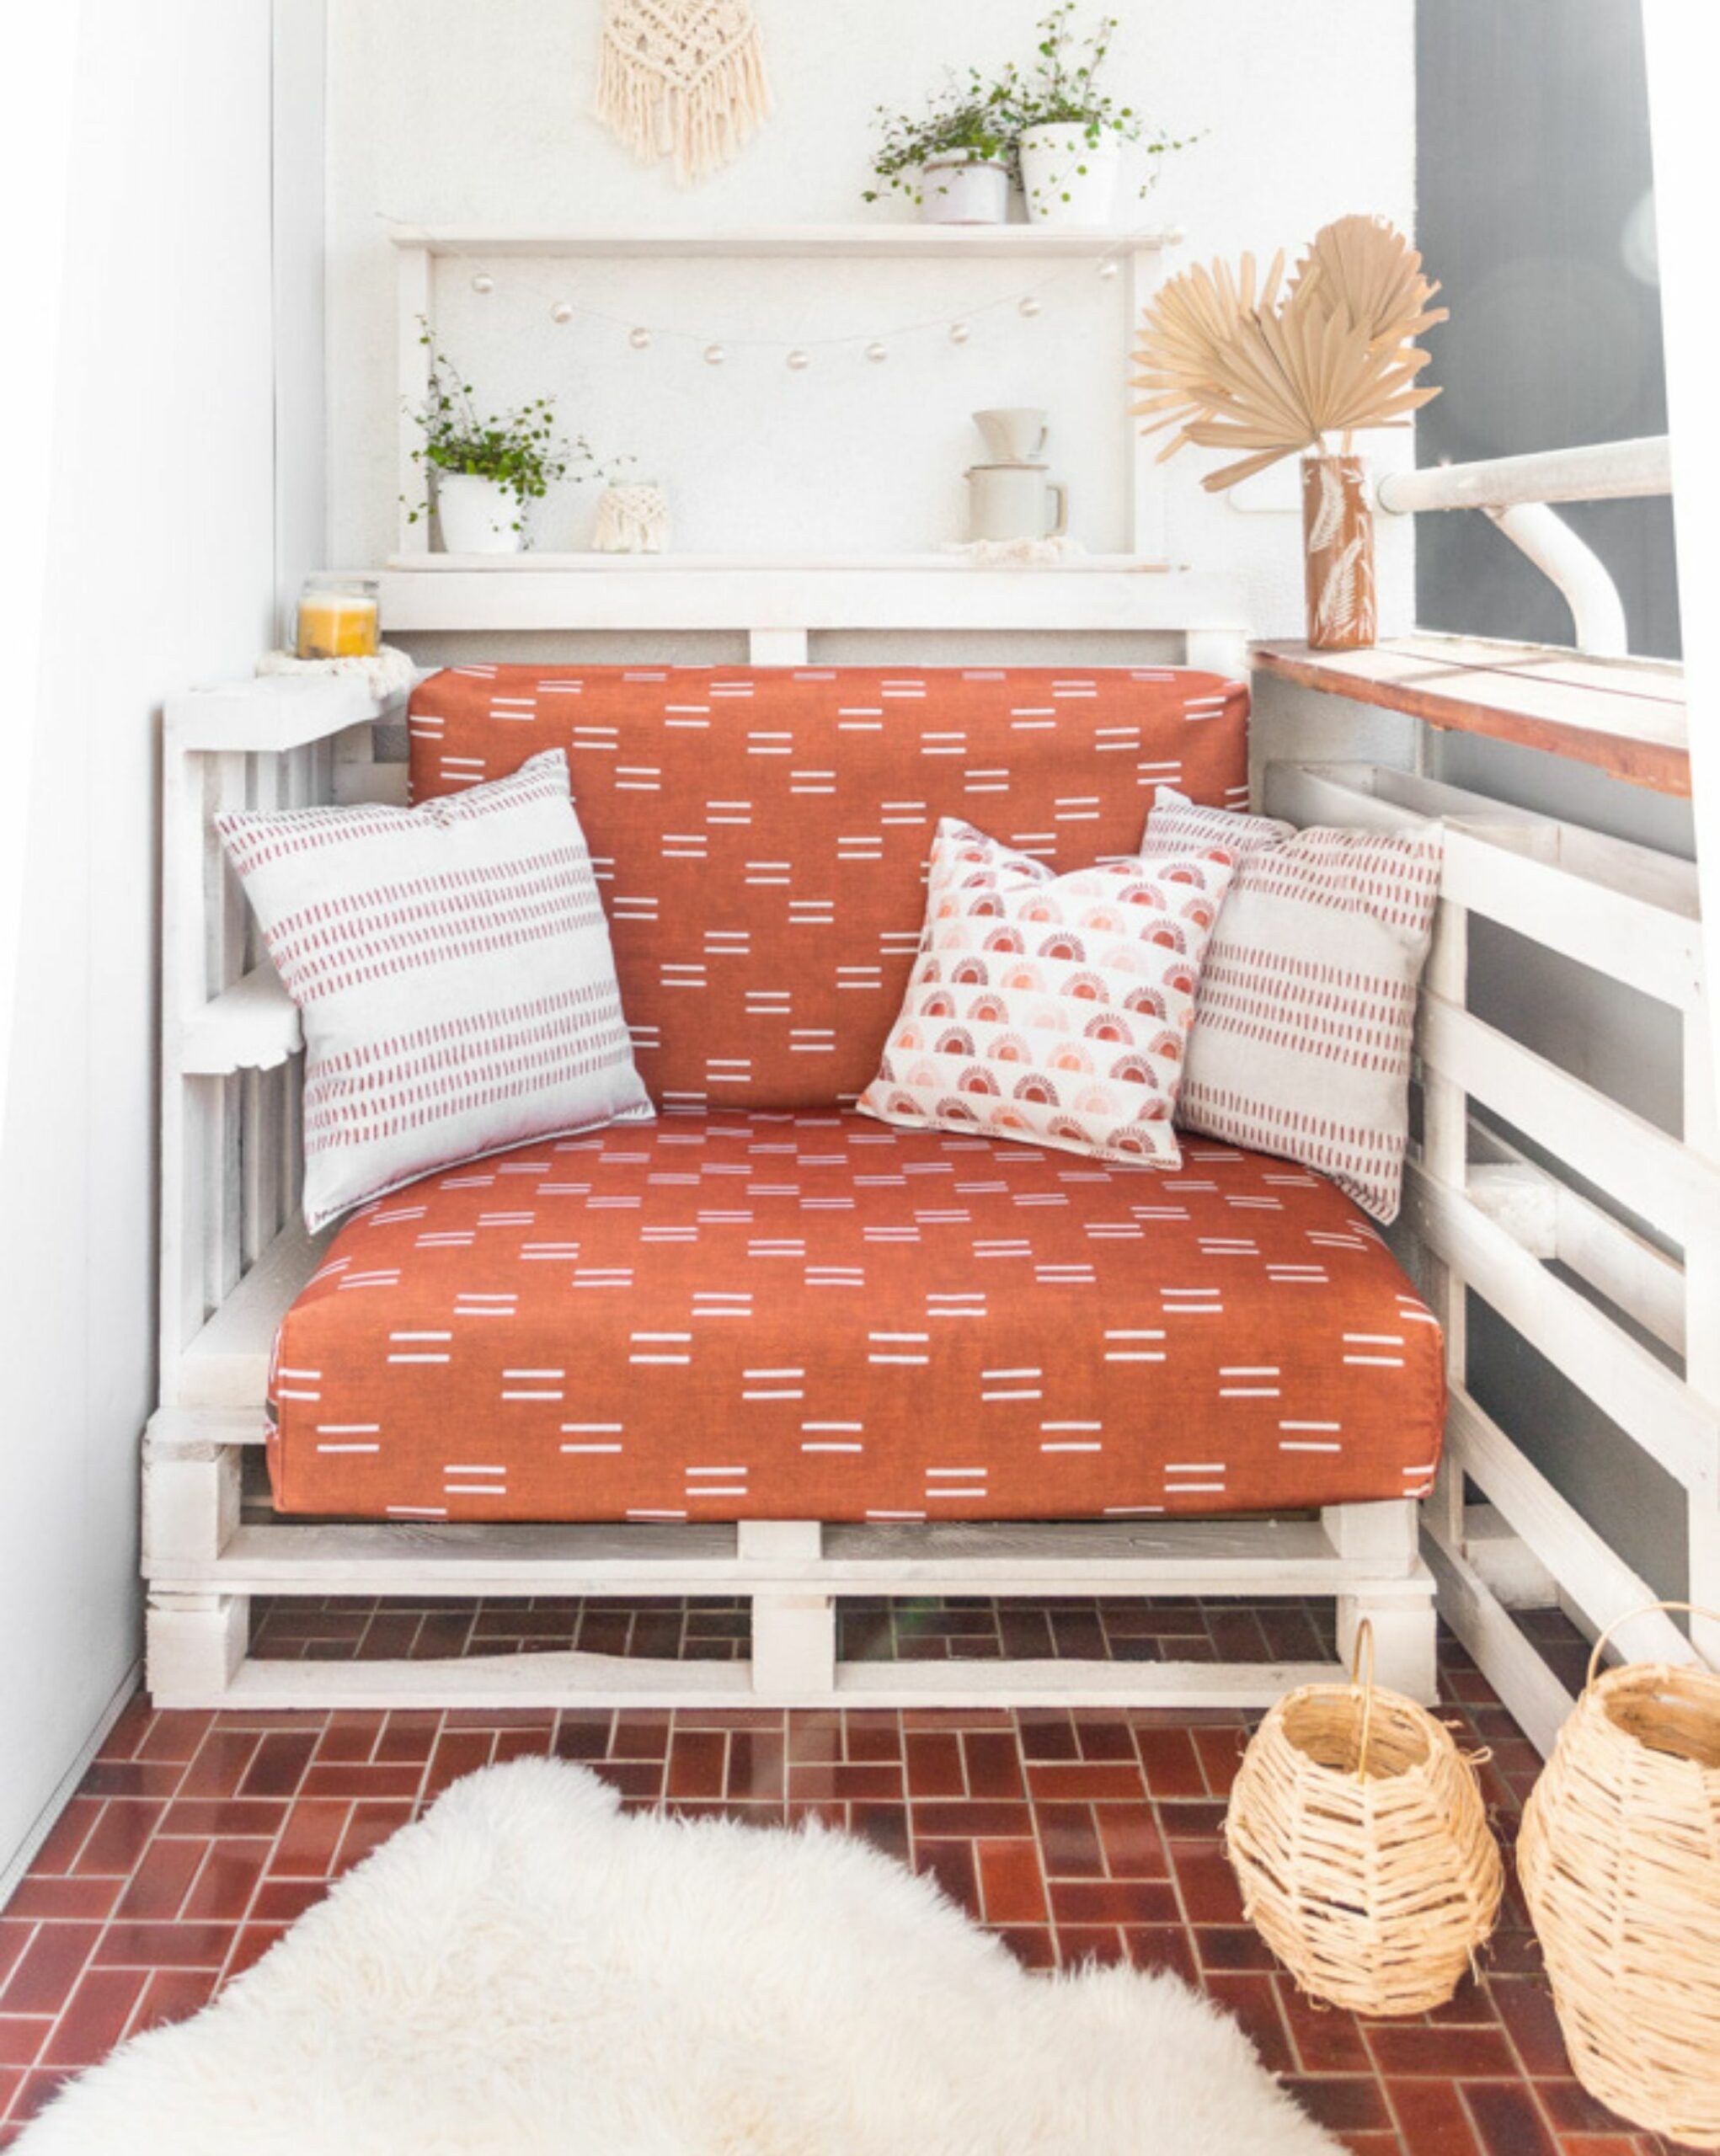
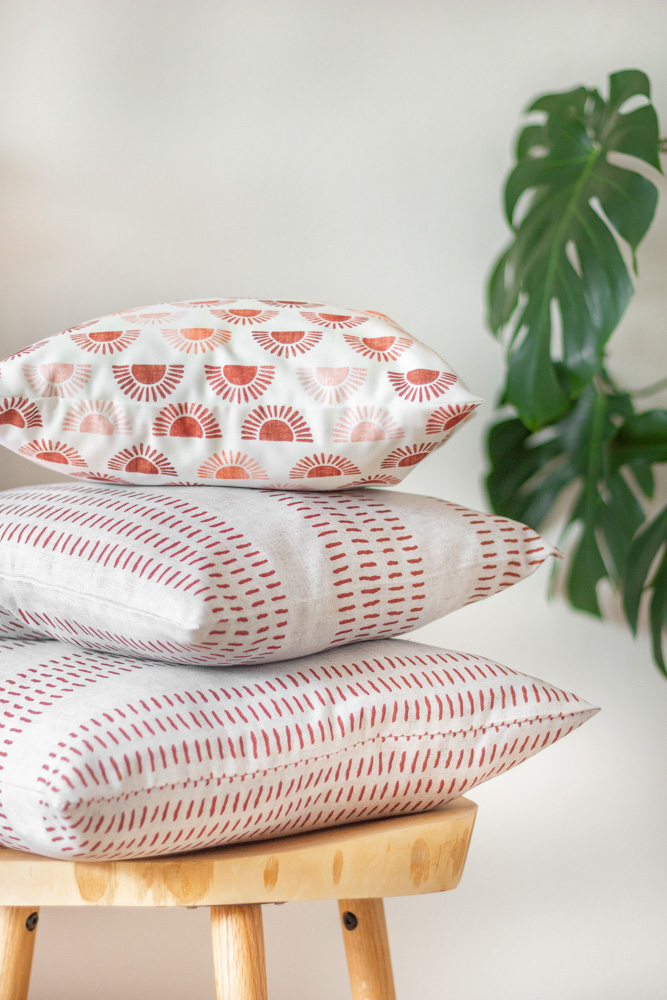
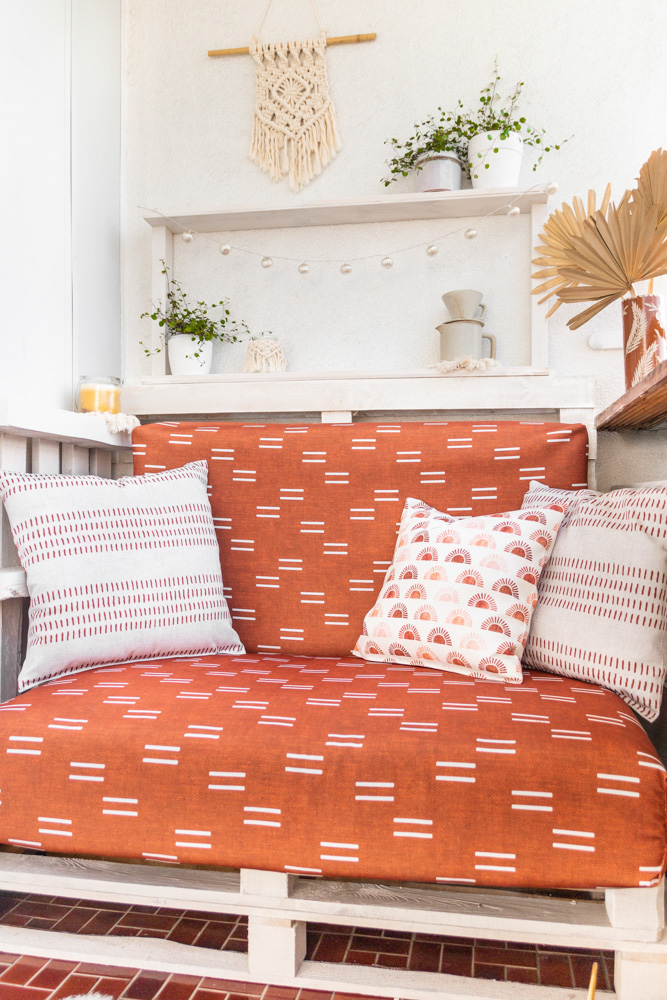
Personally, I was dissatisfied with the red-tiled floor on my own balcony for a long time, but my makeover proves that the floor can look good if you integrate it with the rest of space! I painted the previously brown wooden chair base with white wood varnish and decorated in a neutral color with some plants. The littlearrowdecor prints I chose for the pillowcases harmonize perfectly with the red floor. This seating area gives me an absolutely wonderful feeling—it’s my new favorite place on the balcony!

In this tutorial, I’ll show you how you can make both small decorative pillows and large seat cushions with Spoonflower’s new Recycled Canvas fabric. This Recycled Canvas is tightly woven, hard-wearing, and weather-resistant, meaning that it’s ideal for the outdoors. The best part is that it is made from 50% REPREVE® recycled polyester. Each yard or meter is made from 10 recycled bottles!
Recommended Care Tip
Materials
Fabric and Pillow Supplies
For the three small pillows that measure 3/4″ x 20″ x 20″ (2 x 50 cm x 50 cm) and 1/3″ x 15.5″ x 15.5″ (1 x 40 cm x 40 cm), you’ll need:
- Around 1.5 yards (1.4 meters) of Recycled Canvas
- 3 zippers, around 12″ (30 cm) long
- 3 pillow inserts to fit the dimensions above
For the two large seat cushions that measure around 1-1/3 yards (1.20 m) wide, 24″ (60 cm) long and 6″ (15 cm) tall:
- About 3-1/2 yards (3 meters) of Recycled Canvas
- 2 zippers, 1.5 yard (1.5 meters) each
- 2 large cushion inserts to fit the dimensions above
Need Pillows in Alternate Dimensions?
Additional Supplies
- Fabric scissors or a rotary cutter
- Cutting mat
- Ruler or tape measure
- Sewing clips or pins
- Iron
- Matching color yarn
- Sewing machine (an additional overlock machine is an advantage, but not absolutely necessary)
Don’t Have a Serger?

and Double Dash – Orange, all by littlearrowdecor
Steps to Make Your Own Outdoor Pillows and Seat Cushions
1. Decide what size pillow to make.
While Step 2 and Step 3 are the same for both small and large pillows, the tutorial splits into two different options after that.
If you’d like to make the smaller throw pillows, with a zipper enclosure and no darts, scroll down to the How to Make Small Pillows section.
If you’d like to make the larger seat cushions, with a zipper enclosure and darts, skip down to the How to Make Larger Seat Cushions section.
2. Cut the fabric.
- If you have your pillow inserts (for both size pillows): Measure your insert’s length and width and add 3/4″ (2 cm) to each—this will add a total of 1.5″ (4 cm) to the insert’s length and width. Now cut the fabric to these measurements with a rotary cutter or fabric scissors using the following equation:
[Length of the pillow insert + 1.5″ (4 cm)] x [(width of the pillow insert x 2) + 1.5″ (4 cm)]
- If you don’t have inserts for the small throw pillows: You can use standard dimensions of 20 x 20″ (50 x 50 cm) as a guide. With those dimensions in mind for the finished product, cut a fabric piece of 21.5 x 41″ (54 x 104 cm) to fit around it. As the larger seat cushions tend to have less standard sizing, you might want to wait until you have your inserts and use the equation directly above.
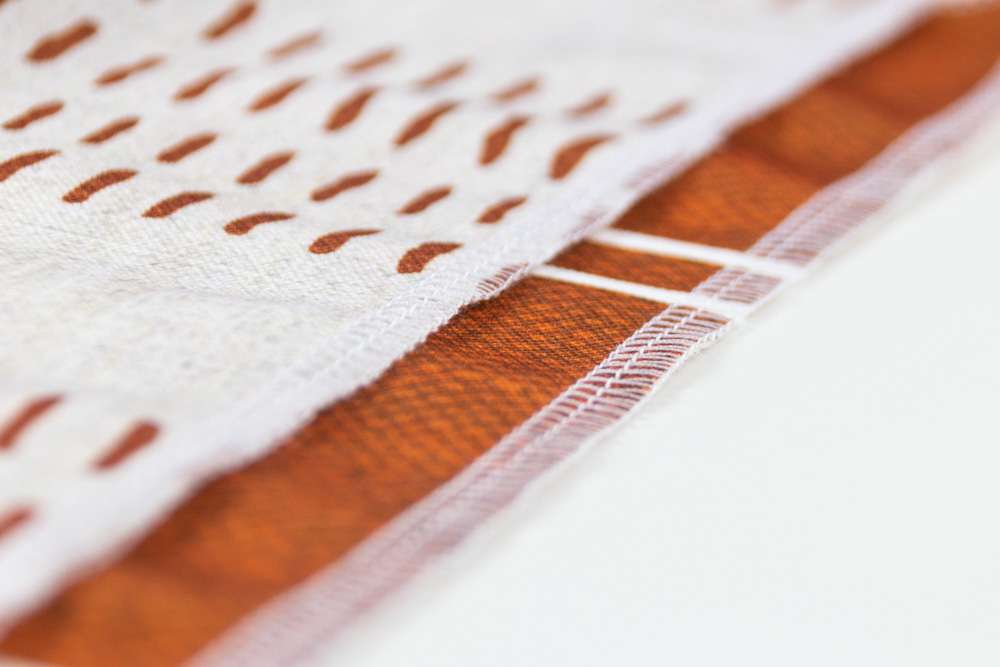
3. Overcast the fabric edges.
Overcast stitch the edges of each pattern piece with an overlock or with either a zig zag stitch or an overcasting stitch on your sewing machine.
How to Sew Small Throw Pillows
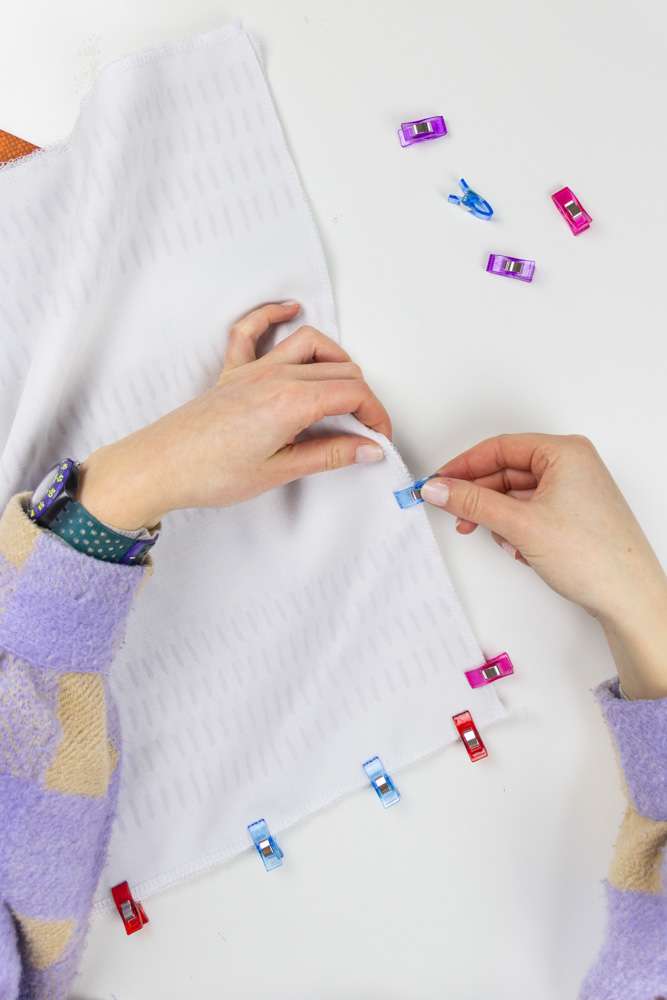
1. Fold the fabric in half and pin.
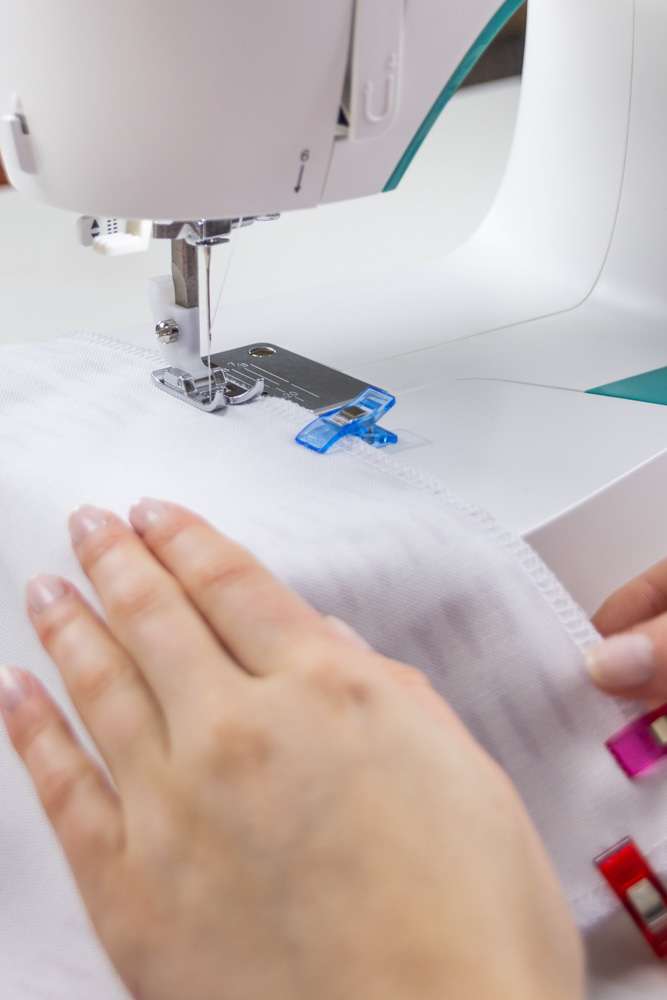
Fold the fabric in the middle with right sides together and pin or clip two of the open sides together. Make sure that the pattern runs in the right direction, the open side should be the bottom of the pillow. Sew (with a straight stitch) the two sides that have just been put together with a seam allowance of 1/2″ (1 cm).
2. Insert the zipper.
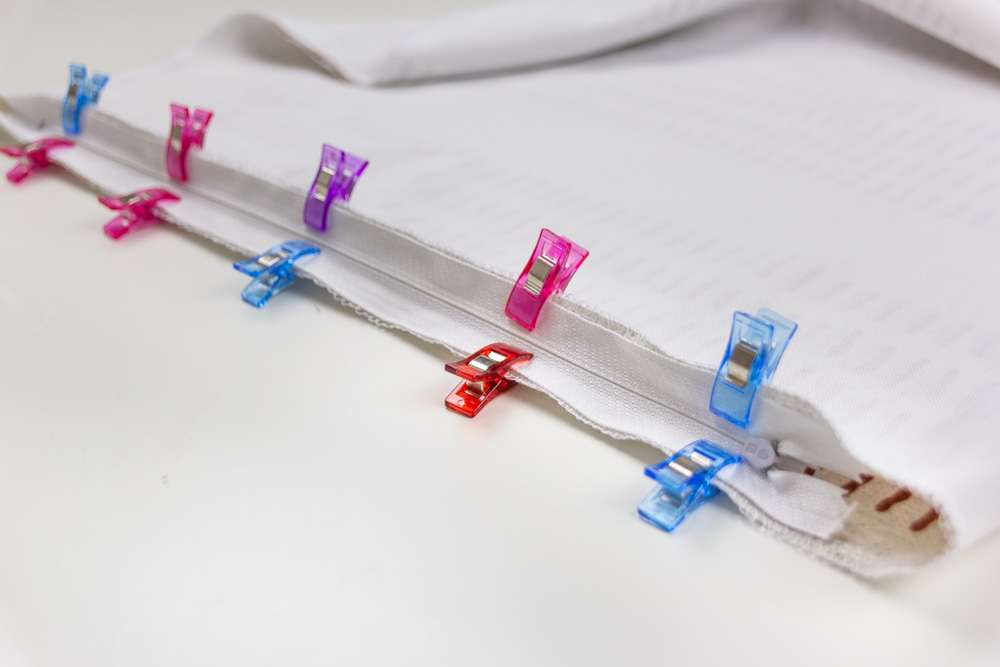
Next, place the zipper in the middle of the opening of the fabric cover and pin or clip it on both sides, right sides together on the fabric edges.
Sew the zipper tight on both sides with a straight stitch. The fabric will remain open at each end of the zipper.

3. Stitch down the other sides of the zipper.
Open the zipper, iron the overlock (or zig zag) seam apart and turn the cushion cover inside out. Iron again over the three edges that do not have the zipper.
Fold the edge with the zipper inward so that a few millimeters of fabric protrude over the open zipper. Iron over these two edges and secure them with sewing clips.
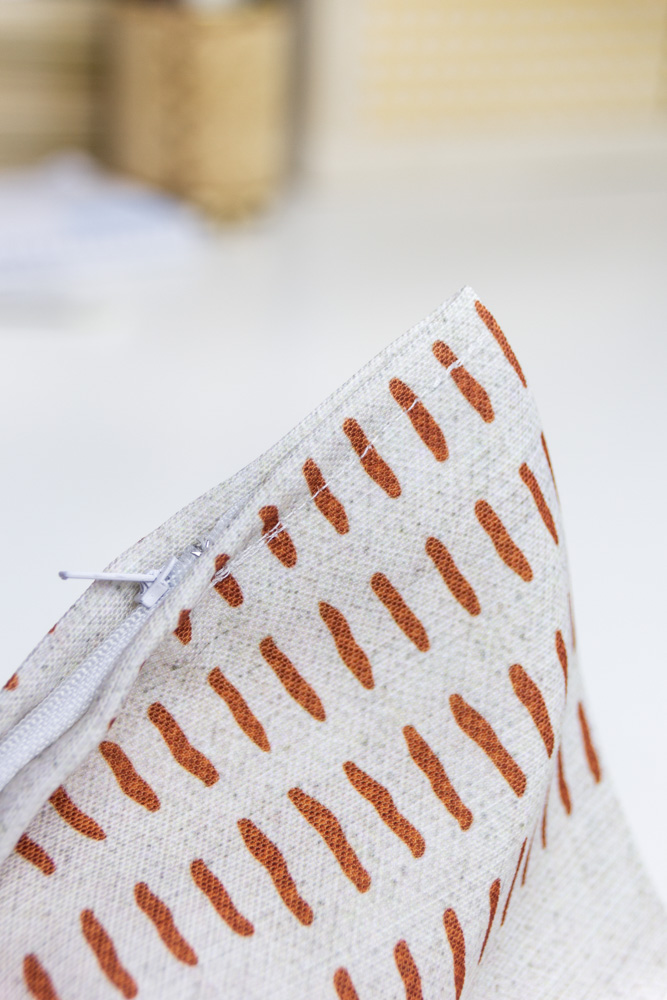
Now sew the zipper on the inside 1/2″ (1 cm) from the edge on both sides.

4. Close up the open seams of each corner.
Sew the two open parts together at the corners to the right and left of the zipper with a distance of 1/2″ (1 cm) from the edge, so that this seam merges into the one sewn in the previous step. Now you can sew as many pillows as you want!
How to Sew Larger Seat Cushions
1. Figure out where to attach the zipper.
For the larger seat cushions, first consider where you can best attach the zipper. Since the Recycled Canvas is relatively stiff, I decided to run the zipper over a corner, starting on a narrow side. If your material is more flexible, you could sew the zipper on the long side as well.
2. Pin the fabric, mark and sew.
Pin or clip the fabric right sides together and mark the places where the zipper will start and stop.
Peel off the remaining edges and sew them together with a seam allowance of 1/2″ (1 cm). Next, iron open the seams and all other edges of the fabric by 1/2″ (1 cm) inwards.
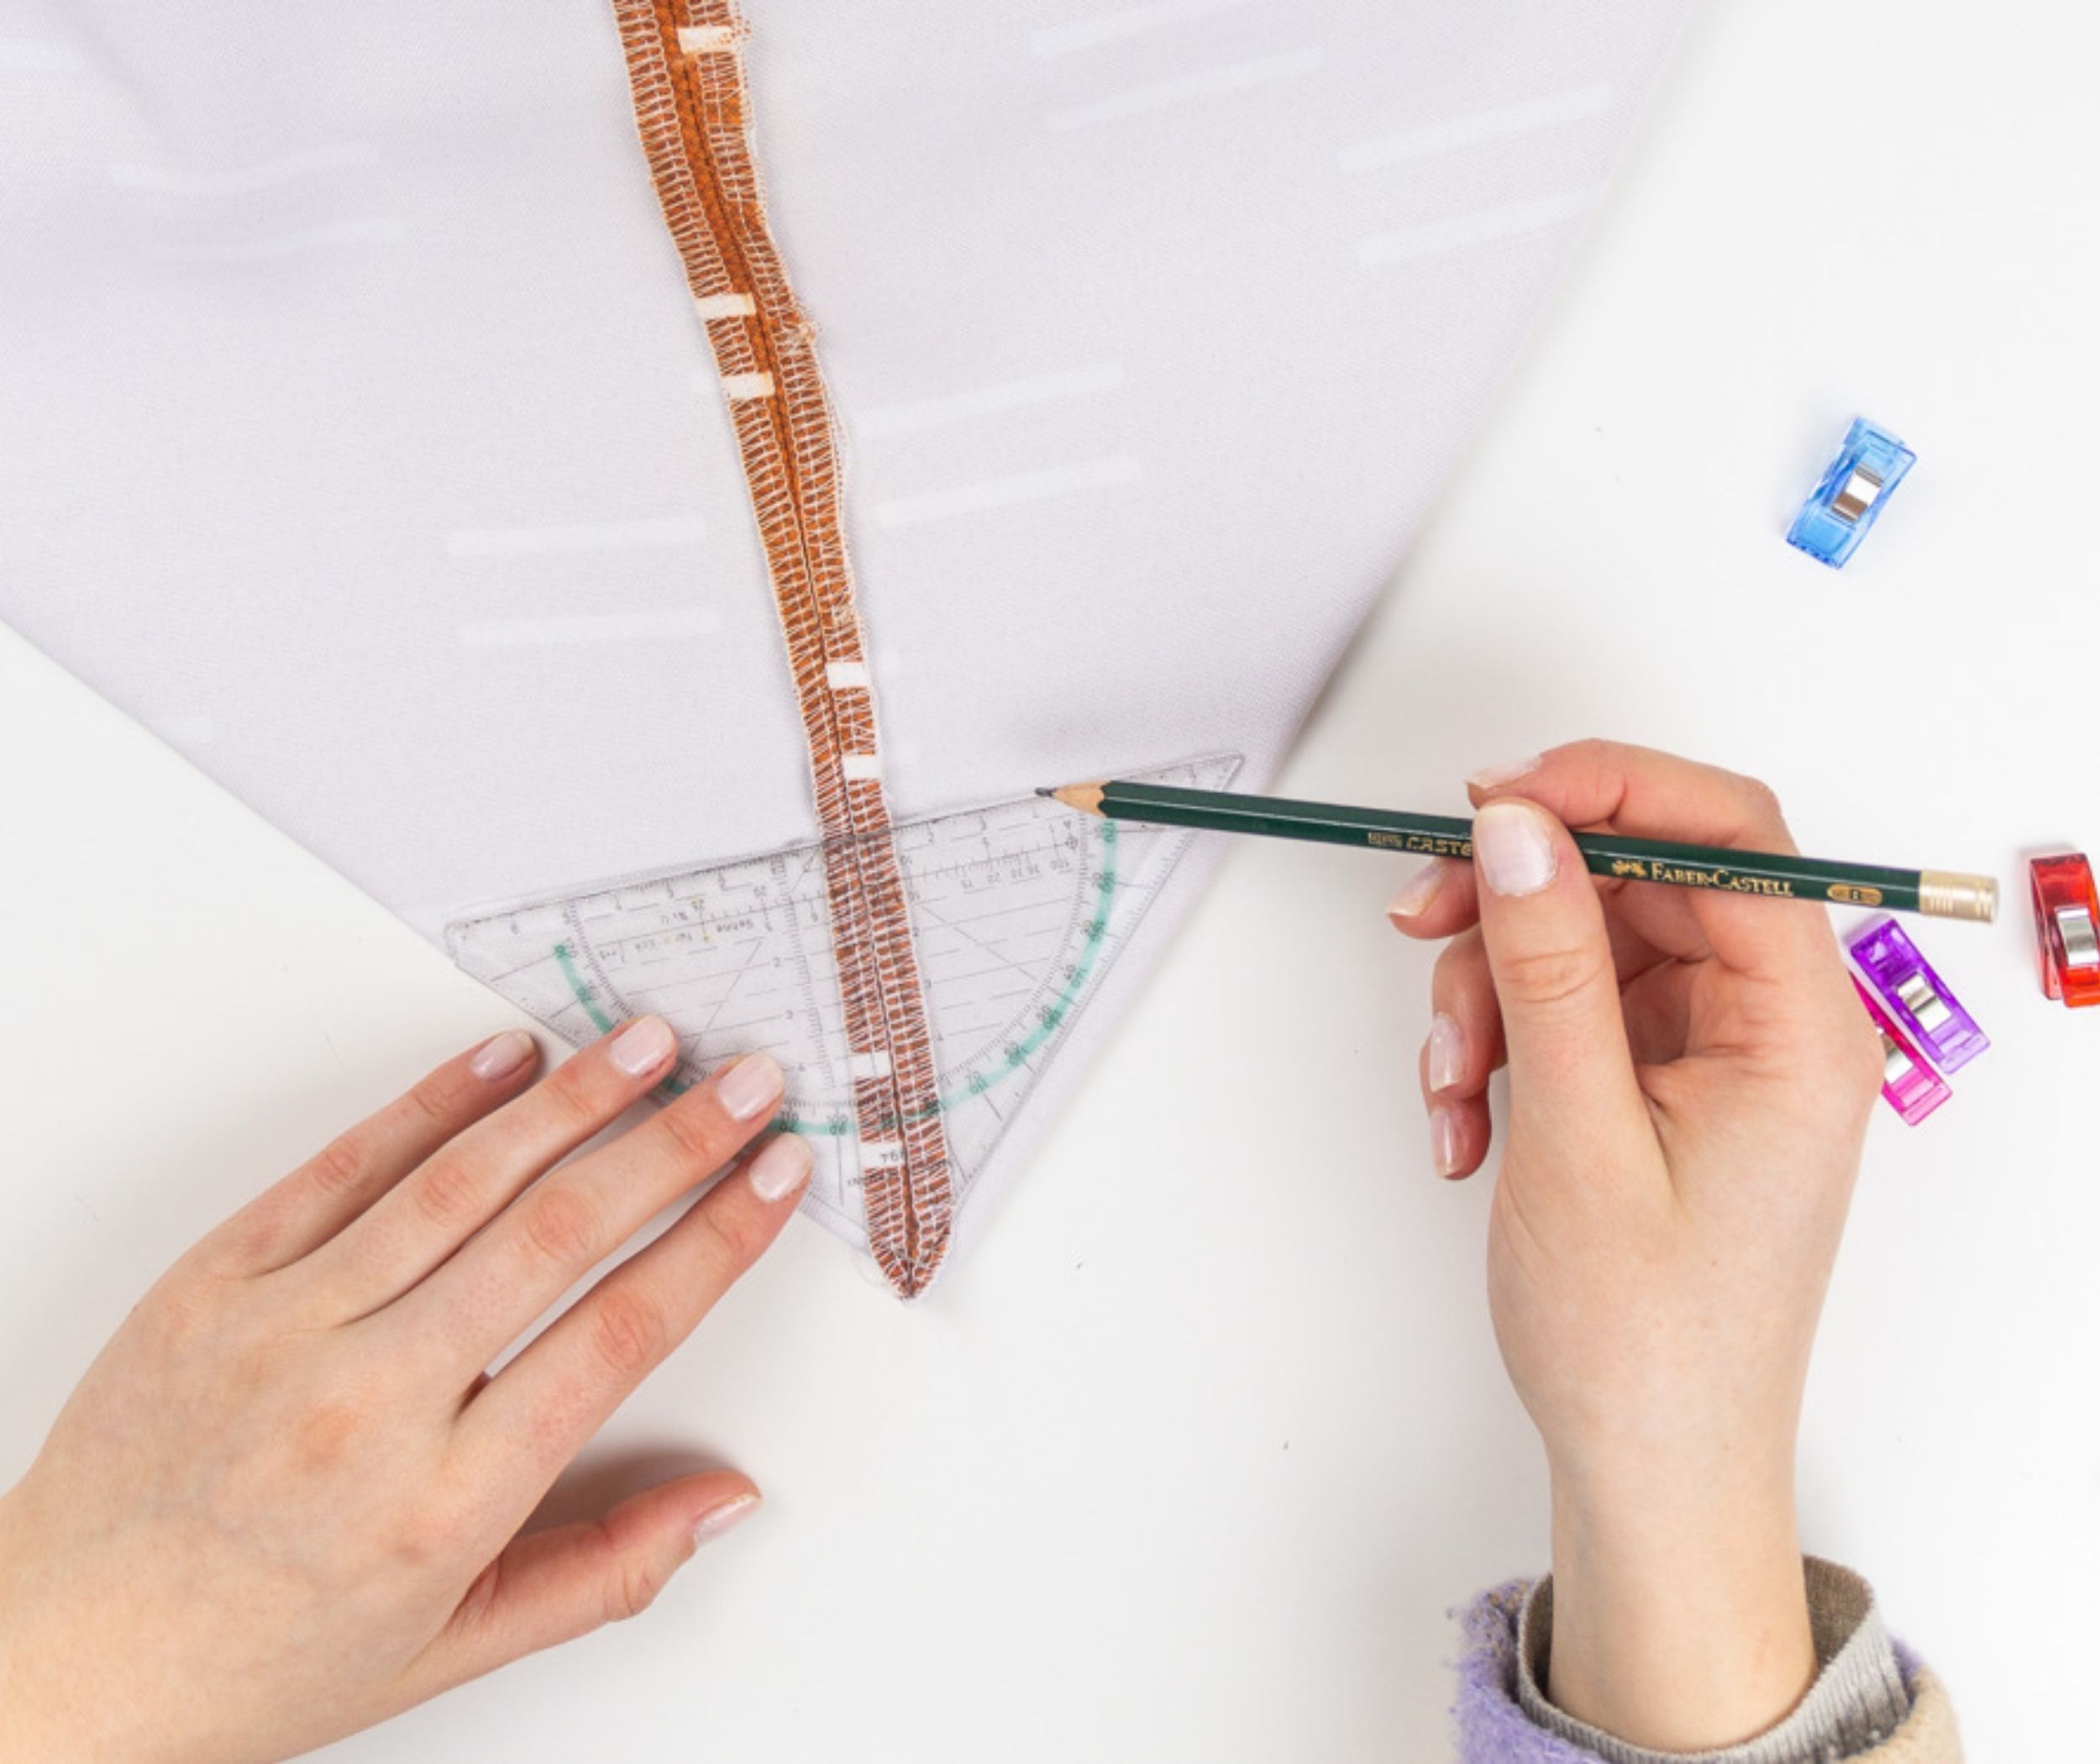
3. Decide if you’ll need to sew darts.
If your cushion insert, like mine, also has angular edges and a taller height, you’ll have to set darts at the corners of the cover before you sew in the zipper.
4. If needed, sew the darts.
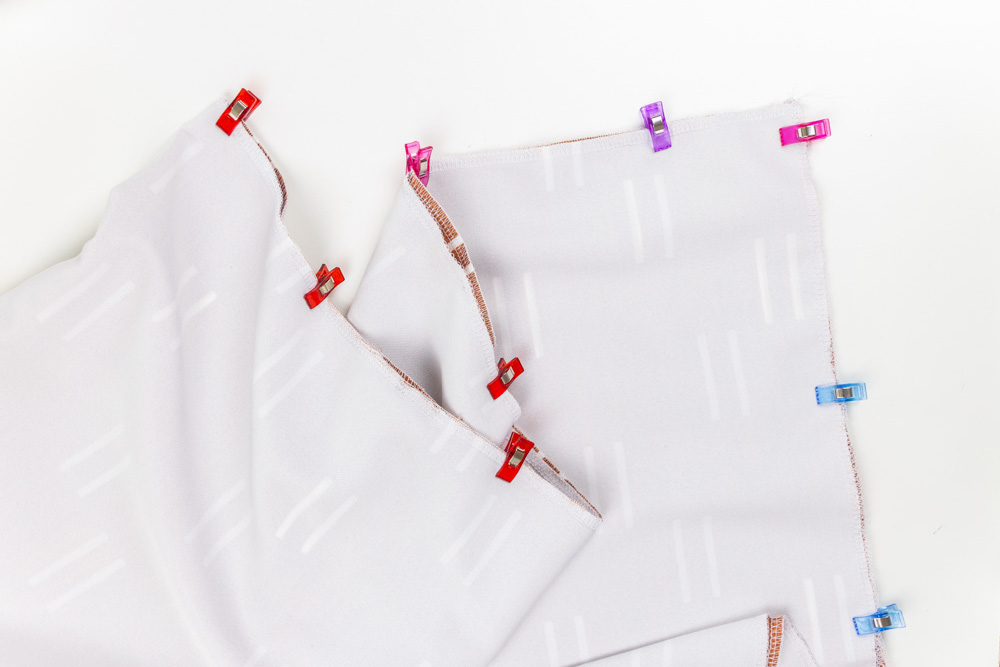
To sew darts, measure the height of your insert and mark this measurement from the corners in on all corners of the fabric, with the seams in the middle.
If you, like me, still have open corners, it helps to pin the fabric together and then mark the corners.
Now sew the darts down by stitching along the marked line with a straight stitch. At the corners that are not yet sewn together, sew on the line from both sides to the middle, but do not sew the two sides together. Make sure that the ironed-in edge is turned inwards and sew it into place.
If you want, you can cut off the protruding corners behind the dart and overcast it with the overlock.

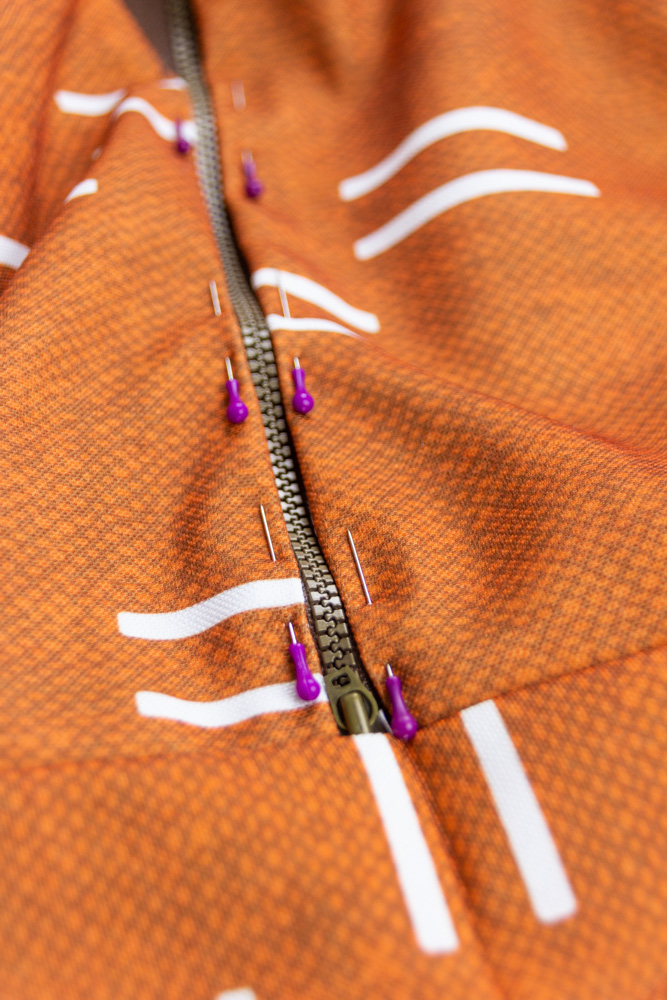
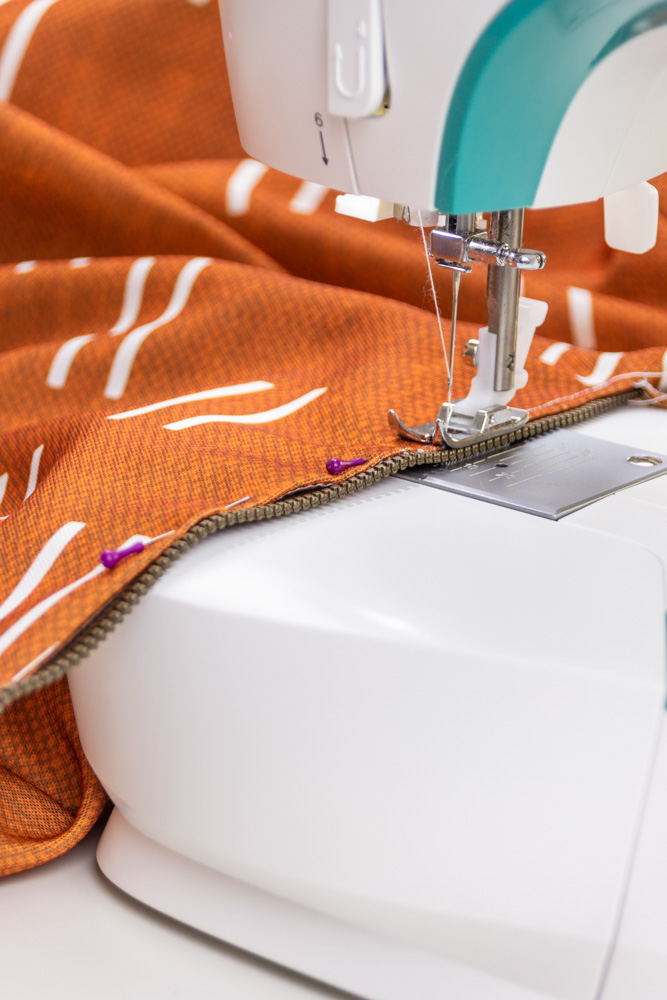
5. Insert the zipper.
Flip the upholstery cover inside out and sew in the zipper. You can easily hide the end of the zipper in the sewn corner. From here, zip the fabric on both sides, and fold the edges of the fabric in by 1/2″ (1 cm). This saves us the step of first sewing the whole thing together from the left and then stitching it again from the right. Open the zipper and topstitch it all around.
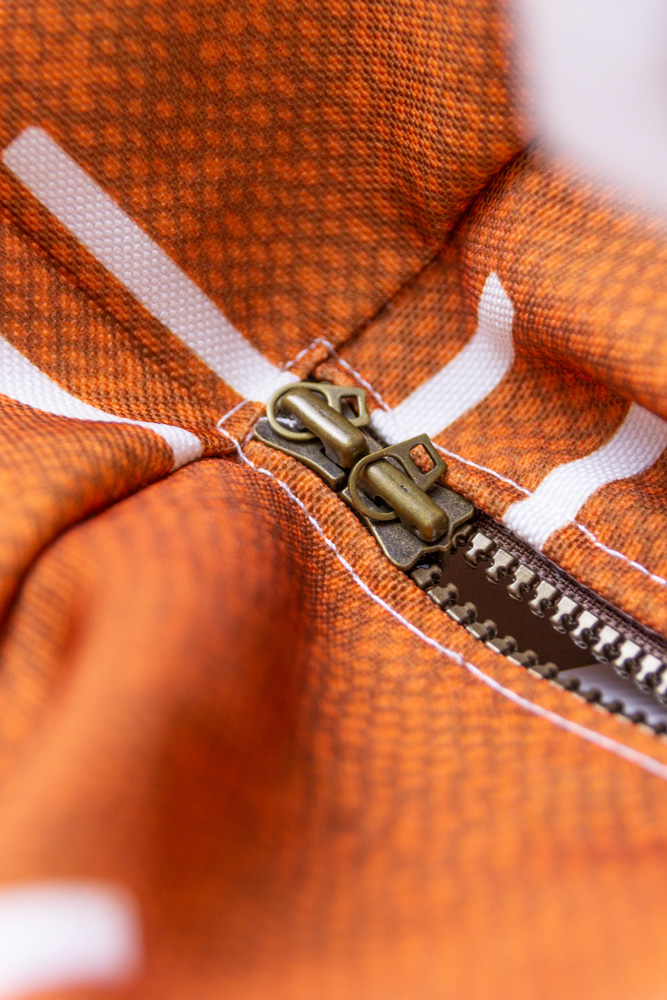
6. Now your large cushion covers are ready!
These were quite a challenge for me because there was so much fabric to work with, but it was an easy project to finish. And I’m overjoyed with the new look of my balcony! The Recycled Canvas feels great and really shines. Additionally, the color of the upholstery goes perfectly with my red tile floor and I like the boho vibes that emanate. With the addition of a few plants, a macramé curtain, a string of lights and candles, I’ll definitely be spending a lot of time there this spring and summer.

Make sure to tag your creations with #spoonflower so the world can admire your work!
REPREVE® is a registered trademark of Unifi, Inc. in the US and other regions.
Want to Learn How to Style Your Throw Pillows?
Get 5 These Throw Pillow Styling Tips
Meet Antonia
Antonia is a German DIY blogger and content creator on Goldschool DIY. On her blog, you will find numerous creative instructions for DIY projects. Some of Antonia’s many talents are sewing, embroidering, hand lettering, and making her own natural cosmetics. In her DIYs, it is particularly important to her to upcycle old things instead of always buying new ones—that’s why her motto is “make gold from old!”
REPREVE® is a registered trademark of Unifi, Inc. in the US and other regions.


HI,
Looks good. Do you have any information on how well the colors withstand the sun? How long till they bleach out?
Thanks
Kind regards
Ruth
Hi Ruth, Thanks for your interest! Fading from the sun is definitely something that is at risk when working with water-based pigment-dyed inks. The intensity of the sun, amount of exposure, and other environmental factors will all affect how quickly the color of your fabric can be altered. Generally, the best performance is expected in some shade.
Customers have also reported success with using our Recycled Canvas fabric for furniture and use products such as Trek7 Ray Bloc UV Fabric Protector Spray on their own accord. Please keep in mind, however, that we have not formally tested our fabrics’ compatibility with this product. If you’re considering using a product like this on any of our fabrics, we would encourage you to order a test swatch prior to committing to a larger order. Ordering a sample will allow you to feel the full weight of the fabric and to test how it works under different conditions. This way you can be sure as to whether it will be suitable for your project. I hope that helps, but please let us know if you have any further questions!
Best,
Amy
Spoonflower