


Material List:
Here’s what you’ll need for this project:
- (3) 4 x 6” rectangles of your chosen fabric (we’re using Lightweight Cotton Twill)
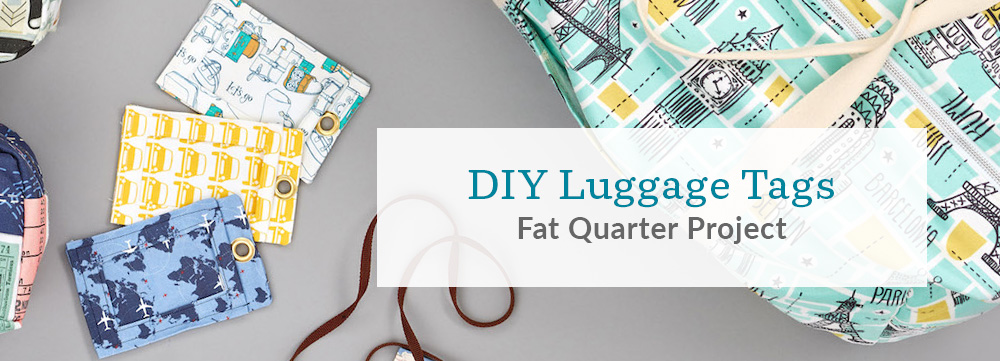
- We’re using Flight Path by cblaine222
- (1) 3 ½ x 5 ½” rectangle of fusible interfacing
- (1) 3 x 5” rectangle of clear material or vinyl (optional)
- Thread
- Pencil
- Fabric scissors
- Regular scissors (if using vinyl)
- Sewing machine
- Grommet and grommet punch
1. Cut out your pattern pieces.

Cut out all pattern pieces from your fabric of choice (and clear material if using).

You should have three pieces of your main fabric measuring 4 x 6” and one piece measuring 3 ½ x 5 ½ ”.
2. Create the front of the luggage tag.

To make the front of your luggage tag, fuse your piece of interfacing to the wrong side of one fabric rectangle.

Take the interfaced fabric and draw a box 1″ from the bottom of tag measuring 2 x 3 ½” on the interfaced side.

Draw a line matching opposite corners of your box, creating an “X” on the inside of your box. (This will eventually be your name window).

Starting from the center, cut the frame open following the “X” you drew on the inside of the box up to (but not through!) the outline. Once cut, press the triangles toward the wrong side of the fabric creating an open frame.

Press the top edge of your tag front toward the wrong side by ½”. Press all other edges toward the wrong side by ¼”.
Optional: If installing a clear material into the front window, place your piece of clear material on the wrong side of the tag front, sandwiching the top of the clear material in the top ½” fold you just created. Stitch along the top of the tag front with a ¼” top stitch. Make sure to sew through all layers of the fabric and clear material.

Topstitch around the frame opening with a ¼” seam allowance. Set aside.
3. Create the back of the luggage tag.

To make the back of your luggage tag, match up your two remaining fabric rectangles with right sides together. Pin in place and stitch with a ¼” seam allowance, leaving a 1-2” gap at the bottom of the tag.

Clip excess fabric from all corners at an angle and flip the tag right side out.

Fold and press the tag nice and flat, making sure to press the gap edges towards the inside of your tag to create a clean edge.
4. Assemble and finish the luggage tag.

Place your tag front on top of your tag back with wrong side of tag front facing right side of tag back, matching up the bottom and side edges. Make sure the unstitched edge of your tag back is lined up with the tag front. Topstitch through all layers of your luggage tag along the two long sides and bottom with a ¼” seam allowance.
Tip: When you topstitch the front and back tag layers together, the opening of the short edge on the luggage tag back will be stitched shut.

Leave the top open so that you can slide your name tag or info card into your luggage tag!
5. Insert the grommet.

Insert a grommet into the top of your luggage tag. Use ribbon, rope, or fabric straps to attach to your luggage and get ready for your next adventure!

Once you’re back from your travels, recap your trip with a fabric map personalized with embroidery and share your wanderlust-worthy DIYs with #spoonflower.


I can’t find the instructions for creating and inserting the clear vinyl window. Does the vinyl just slide inside when tag has been completed?
Hi Tanya!
I’ve gone back and added some step numbers to this tutorial to make this easier to point out, as at the bottom of Step 2 (in the post text) it says the following:
Optional: If installing a clear material into the front window, place your piece of clear material on the wrong side of the tag front, sandwiching the top of the clear material in the top ½” fold you just created. Stitch along the top of the tag front with a ¼” top stitch. Make sure to sew through all layers of the fabric and clear material.
As adding the plastic piece is an optional step, it is written in as an optional step, vs. as a part of the main tutorial itself.
Hope that helps!
Best,
Betsy
Spoonflower
At the end, the top layer is shorter at the top than it is on the three sides. Where does this occur in the directions?
Hi Sharon,
The top layer is made slightly smaller than the back in the following step: Press the top edge of your tag front toward the wrong side by ½”. I hope that helps, but if you have any more questions don’t hesitate to ask!
Do you only use the interfacing for the \”window\” piece? Is this strong enough or would you recommend using interfacing throughout the entire piece?
Hi KJ,
If you’re using a fabric like Spoonflower’s Lightweight Cotton Twill or something, we only suggest interfacing the window portion of the tag. If you’re using a lightweight fabric like quilting cotton, we would suggest interfacing all of your fabric pieces. I hope that helps, but if you have any more questions don’t hesitate to ask! – Meredith
I seem to be missing a step somewhere… I only see two 4×6″ pieces being used for the backing and then just one 3.5×5.5″ piece of fabric for the front window assembly. Where does the third piece of 4×6″ fabric get used?
Hi Kimmy,
Thanks so much for your question! For the tag, you’ll want to cut (3) 4 x 6” rectangles in your fabric and then (1) 3 ½ x 5 ½” rectangle of fusible interfacing. The third piece of fabric is used in the step labeled “Create the Front of the Luggage Tag”. I hope that helps, but if you have any more questions don’t hesitate to ask! -Meredith
What kind of fusible interfacing should be used? I have pellon sf101, pellon 911ff, pellon 805, pellon 807, and heat N bond lite.
I honestly have no idea which is used for what so I bought one of everything the store had.
R/
Yahaira
Hi Yahaira,
A lightweight to medium-weight interfacing for woven fabrics should do the trick! I hope that helps, but if you have any more questions don’t hesitate to ask! -Meredith
Can you suggest the sizes of fabric to cut for making the strap? I would think it would need to be a certain length in order to get secured to the suitcase or backpack. A photo of the finished product with a strap would be helpful.
Hi Anne,
Thanks so much for your question! We recommend cutting a 9-10″ piece of fabric or ribbon to create the strap. I hope that helps, but if you have any more questions don’t hesitate to ask! – Meredith from Spoonflower
Those tags are adorable. I have one too, and they are made by Essmak. It makes me find my luggage easier when Im in travel.
Clear Vinyl Shower Curtain (sometimes known as shower curtain liners) at the 99cent Store, Dollar General, Dollar Store, etc. beats the heck out of buying vinyl by the yard! 🙂
Hi Staci,
We didn’t even think about that! Thanks for sharing your sewing tip.
-Meredith from Spoonflower