


Materials & Tools
- Students’ artwork
- Scanner
- Adobe Photoshop photo editing software
- Quilt batting
- 1 yard cheater quilt Fill-a-Yard™ fabric ( 42″ x 36″)
- 1 yard of fabric for backing ( 42″ x 36″)
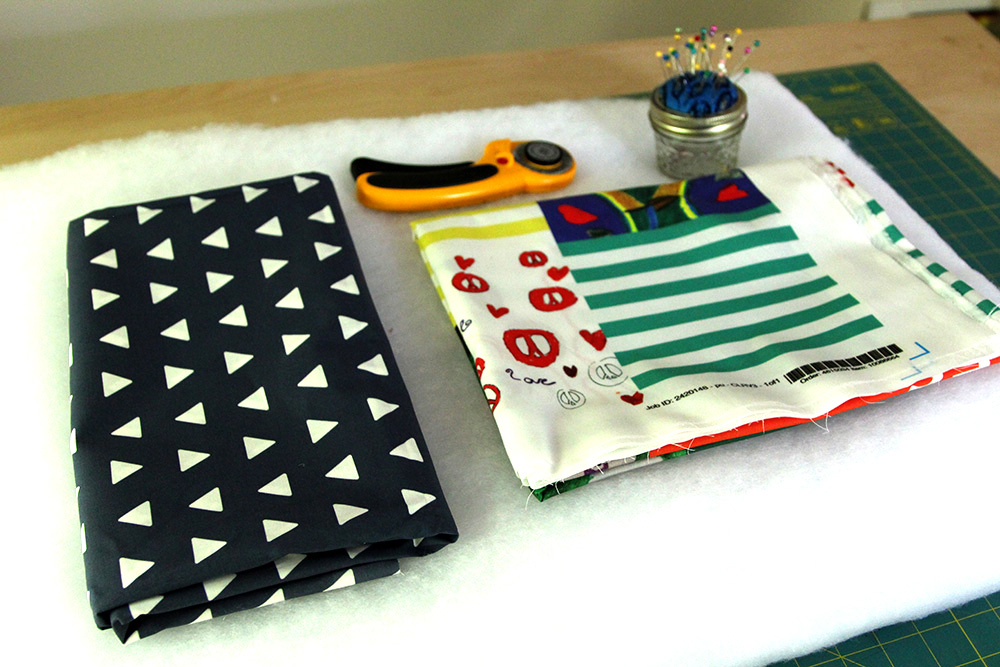
- Rotary blade or fabric scissors
- Sewing machine
Part 1 : Create Your Fill-a-Yard™ Project
Step 1 : Scan and Format the Students’ Artwork
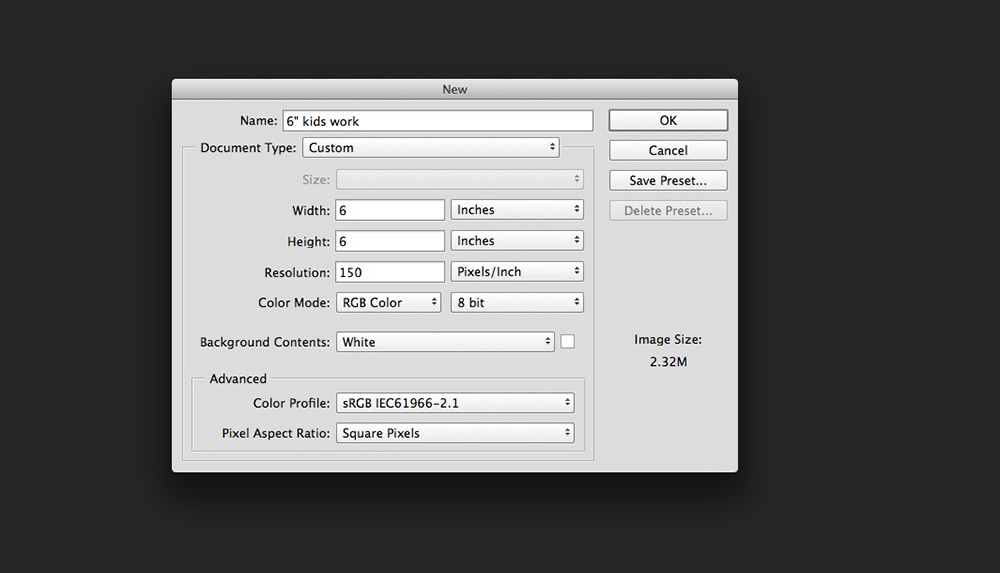
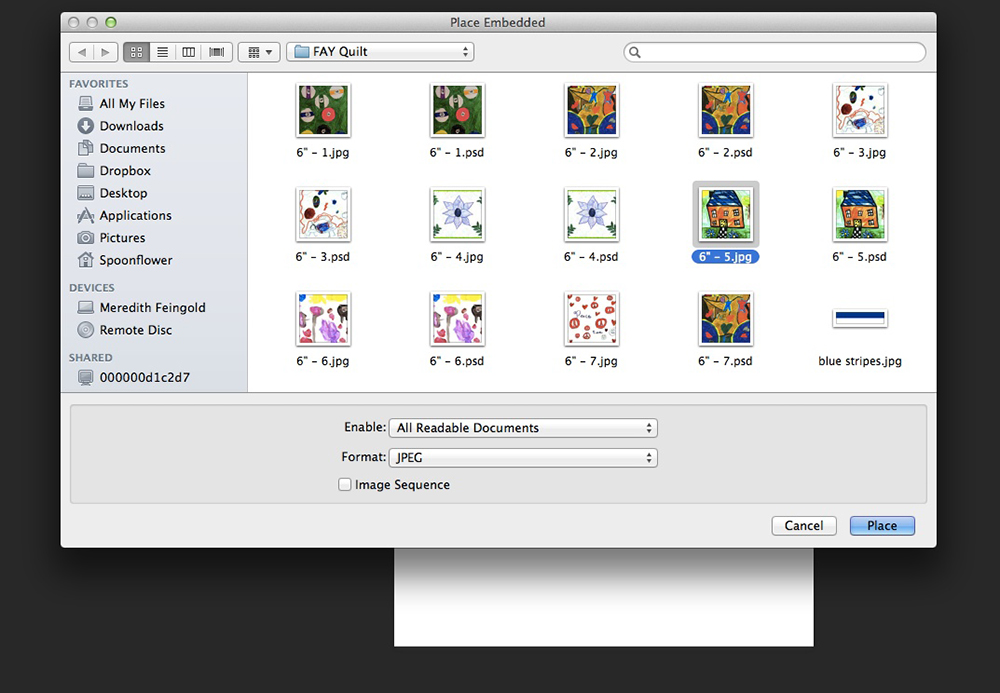
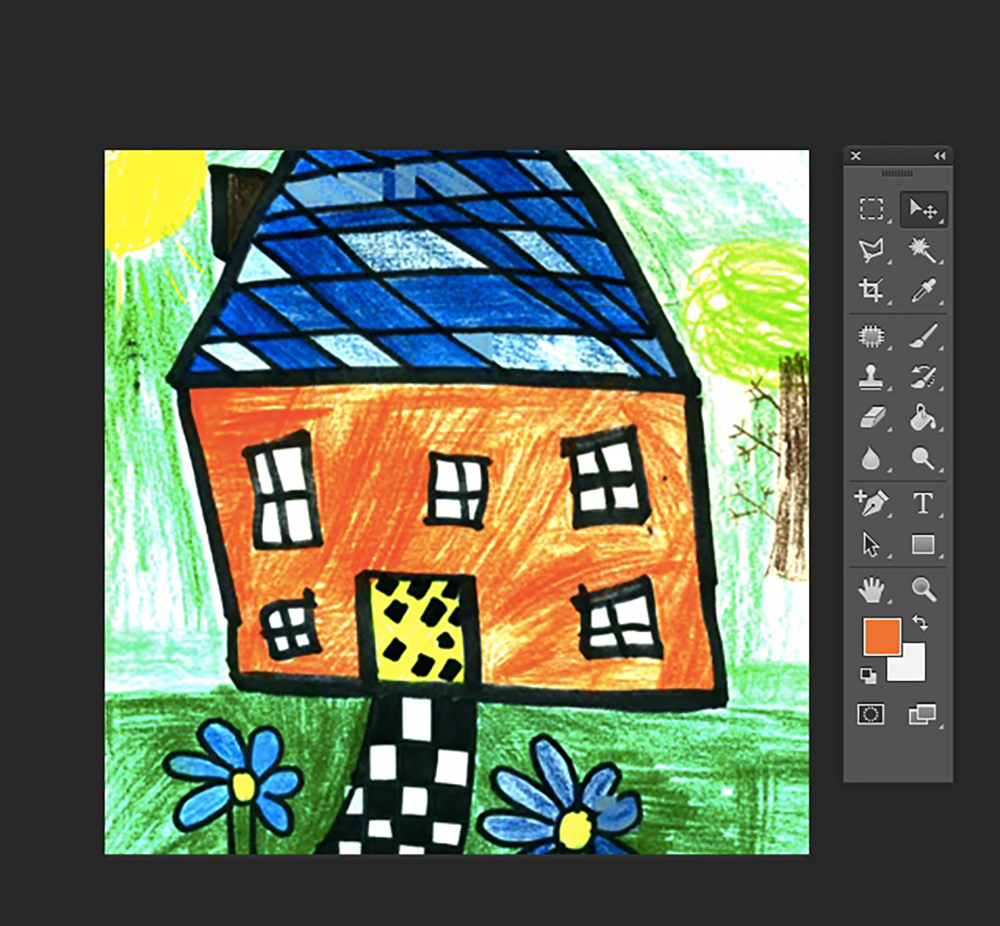
To start your project, collect the students’ artwork and individually scan each piece into your computer as a JPG or PNG. Once in digital form, create a Photoshop canvas that is the same size as your Fill-a-Yard™ project. For the 1 yard 42 6″ square cheater quilt, create a canvas that is 6″ x 6″ at 150 dpi. Next, select File > Place Embedded and select one scanned drawing to place on the canvas. Once the artwork is placed on the canvas, save the artwork as a JPG or PNG. For additional information on how to transform your kid’s artwork into fabric, we recommend visiting this blog post. You’ll learn all the steps to adjust your scanned artwork so it’s ready for printing on fabric!
Helpful tips : When the students are making their artwork, you may want to keep in mind what Fill-a-Yard™ project you’ll be working with. Since I’ll be making the 1-yard 42-square cheater quilt (6″ squares), it was helpful to have the students create their artwork on a piece of paper this size.
Step 2. Upload Your Design
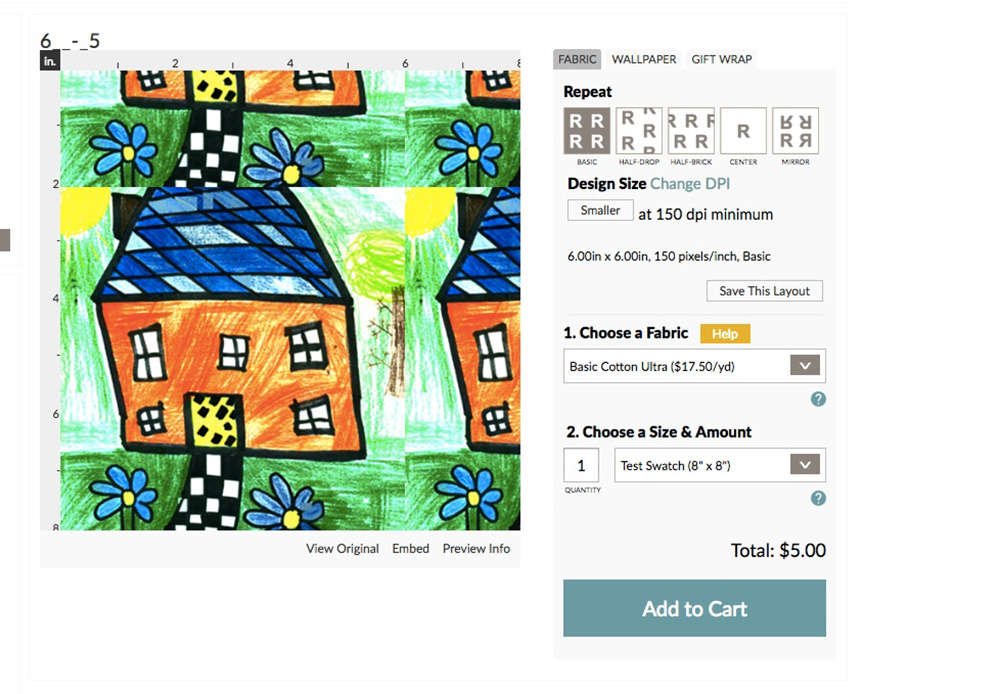
Once you have saved each drawing as a 6″ x 6″ square, log-in to your Spoonflower account and upload each drawing.
Step 3. Create a Collection
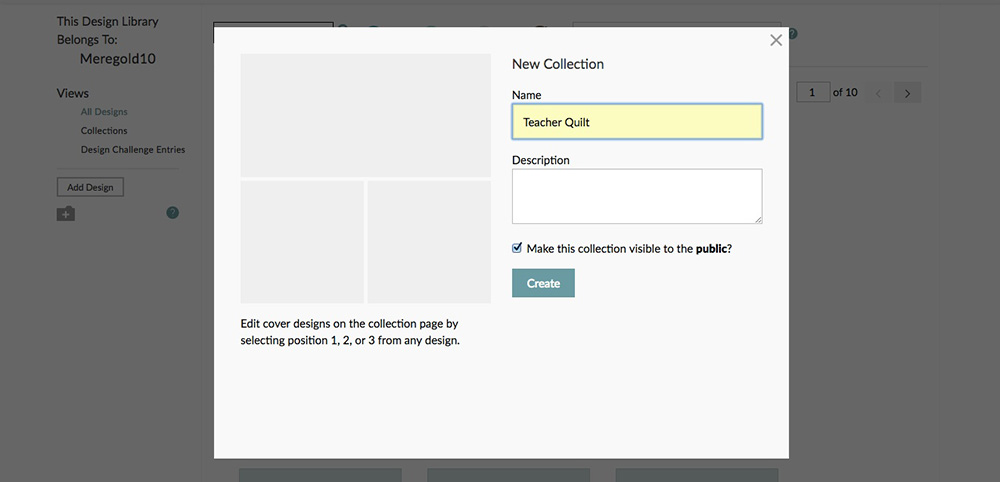
In order to create a Fill-a-Yard™ project, you will need to create a collection to house the designs you’ll be using in the project. To create a collection, access your design library through the My Studio drop-down menu. On the left hand side, select the + folder icon to create your new collection.
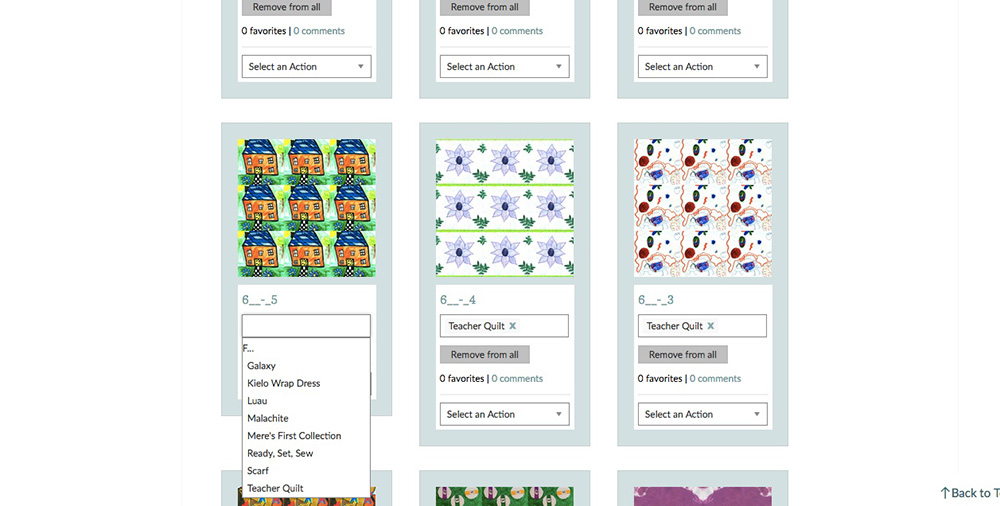
Add each design to the collection you’ll be using for your Fill-a-Yard™ project by selecting the collection name in the collection drop-down menu.
Helpful tip : Need additional help creating a collection? Visit our handy tutorial here!
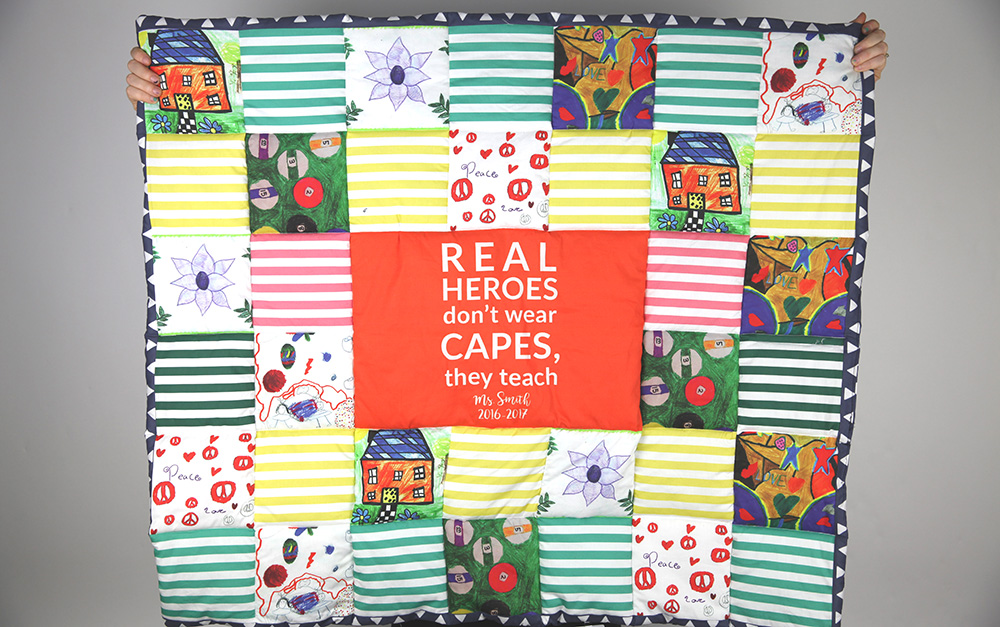
Step 4. Add a Personal Touch – Create a Centered Quote
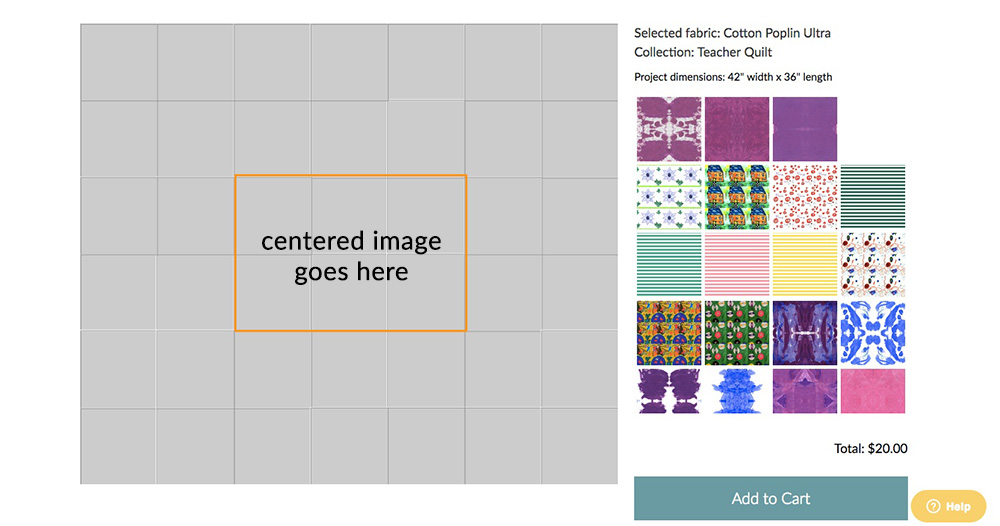
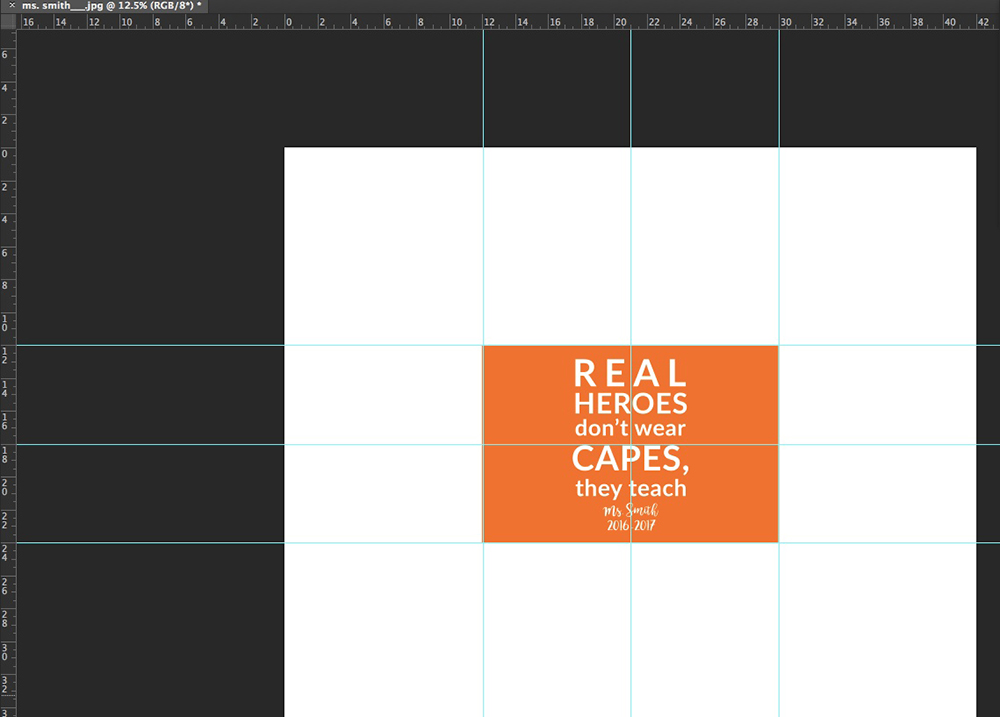
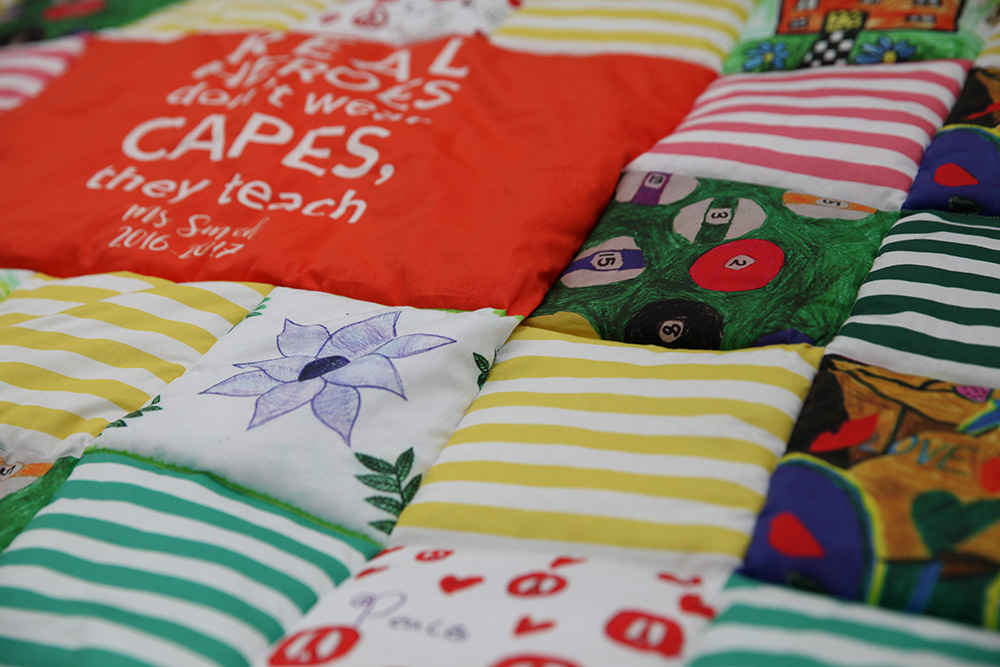
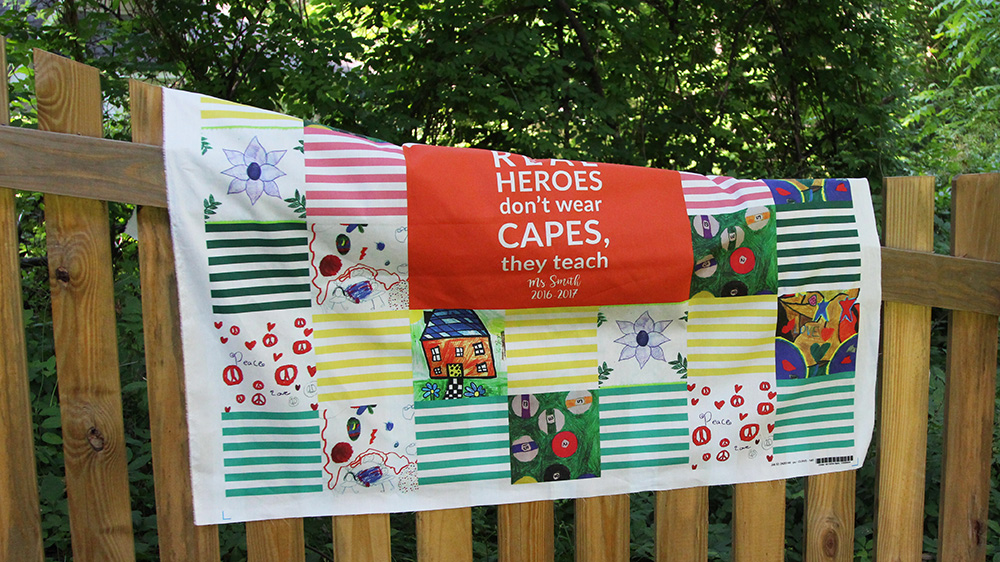
To add a personal touch to the quilt, we created an 18″ x 12″ design block with a quote and included the teacher’s name and school year. To create an engineered print on a Fill-a-Project™ cheater quilt, we’ll need to do a bit of (easy) math! First, you’ll want to see the layout of your unfilled cheater quilt. Skip ahead to Step 6 to see how to access a Fill-a-Yard™ project. For the 42″ x 36″ cheater quilt, every quilt square is 6″x 6″. Using this information, I was able to determine that my block would need to be 18″ x 12″, centered on a file that is the size of the entire quilt ( 42″ x 36″).
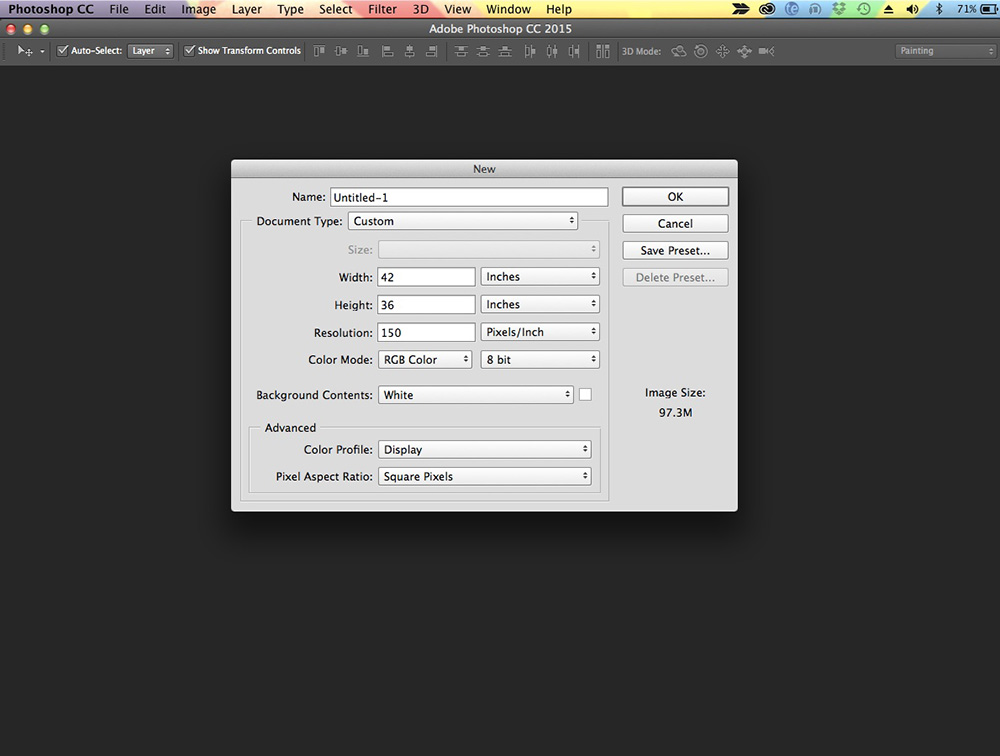
To create the engineered print for the quilt, I went back to Photoshop and created a new canvas at a size of 42″ x 36″ at 150 dpi. Using the rulers at the top and left side of your canvas, find the center of the canvas. This will also be the center of your quilt. Create your quote or focal point graphic at the determined size ( ours will be 18″ x 12″) and save as a JPG or PNG. Upload the center image to your Spoonflower account and add to your collection.
Step 5. Create Your Fill-a-Yard™ Project

Select Collections in the My Studio drop-down menu and choose the Fill-a-Yard™ icon located in the center of your new icon. When your designs are set to private (for your personal use only) a lock icon will be shown on your collection. Once you’ve selected your collection, choose your Fill-A-Project™ and fabric base. For this project, we’ll be making a 1 yard Cotton Poplin Ultra cheater quilt.
Step 6. Add Designs to Your Fill-a-Project™ Cheater Quilt
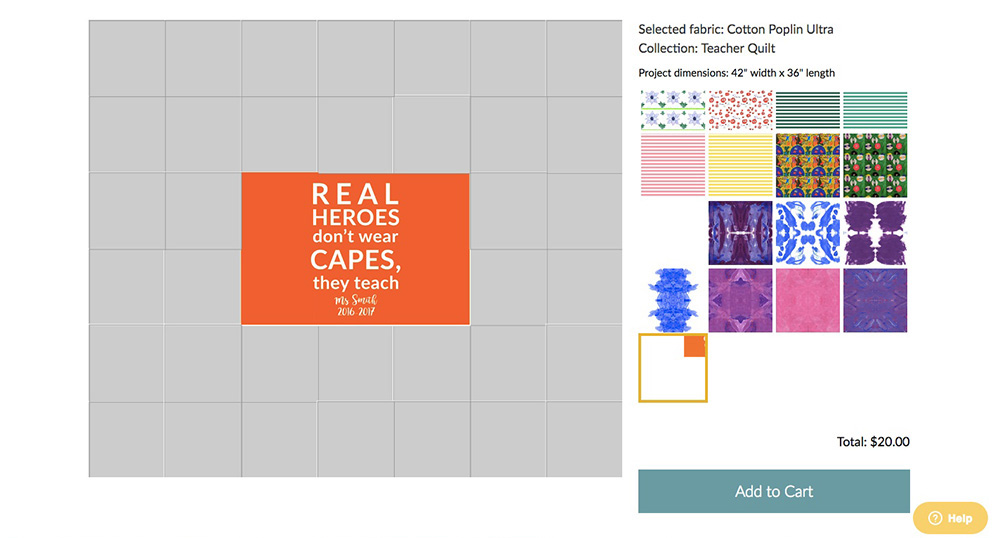
To fill your cheater quilt with designs from your collection, select the design on the right and then click the specific square you want to fill on your quilt. I started with the center quote by selecting the design and then clicking on the 6 center squares. Repeat this step for the rest of your quilt until it is completely filled.
Fill-a-Project™ Tip : If you are planning on using the same design for multiple squares, select your design on the right and click all of the squares that will be using this design before choosing a different design.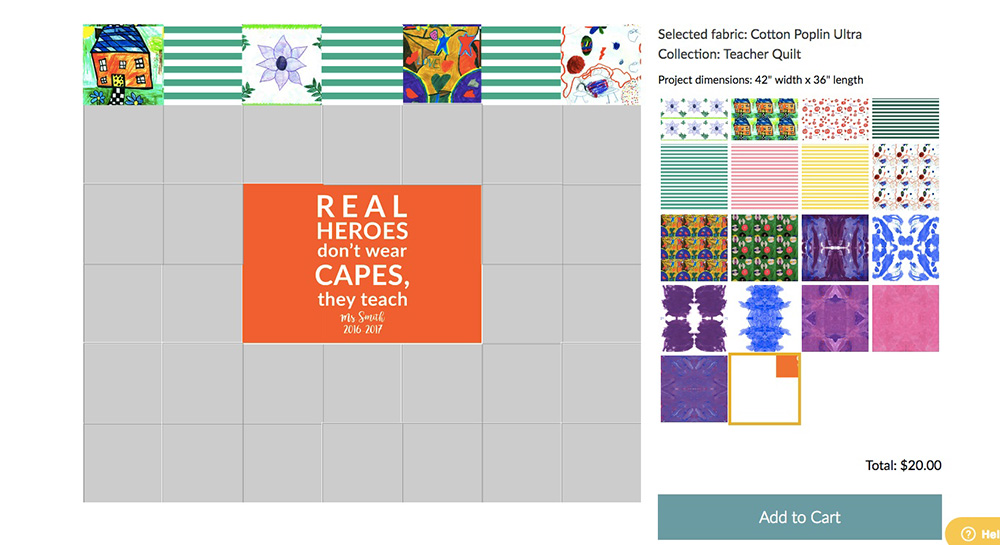
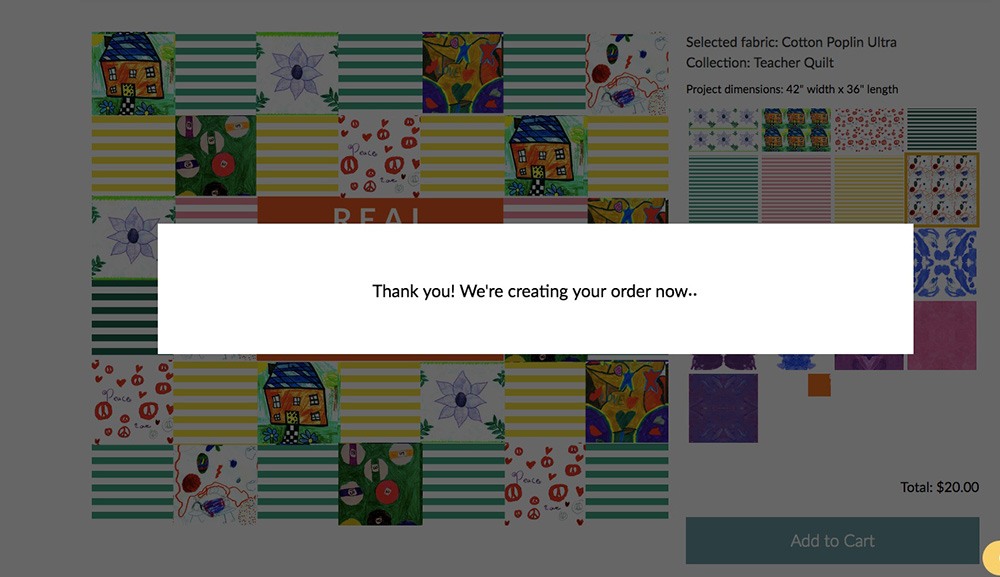
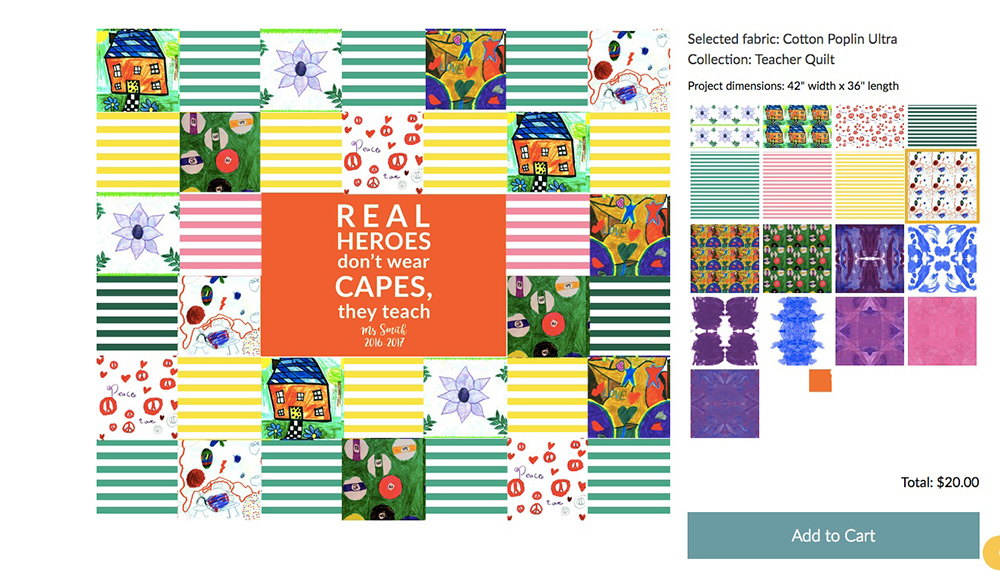 Once you have completed your quilt, select the Add to Cart button and complete your order.
Part 2 : Sew Your Fill-a-Project™ Cheater Quilt

The construction of your cheater quilt can be done in a few different methods. I chose a pillowcase method where I put the printed sides of my Fill-a-Project™ and backing fabric together and then added the batting on top. I stitched around the edges, making sure to leave an opening to flip the fabric right side out. More experienced quilters may prefer to take a more traditional route to finish their quilt but like many sewing projects, there’s lots of different finishing options! Want to see another way to finish your quilt? See how The Spoonflower Handbook co-author Becka Rahn finished her photo cheater quilt in a 5-part series on the blog.


