


With the recent launch of our Lightweight Cotton Twill and NASA’s release of these awesome vintage space tourism posters to the public domain, we saw it as a perfect opportunity to create some custom space-themed wall art canvases. Our Lightweight Cotton Twill prints vibrant colors and has enough stretch to mimic canvas! Read on for the full how-to.
Materials:
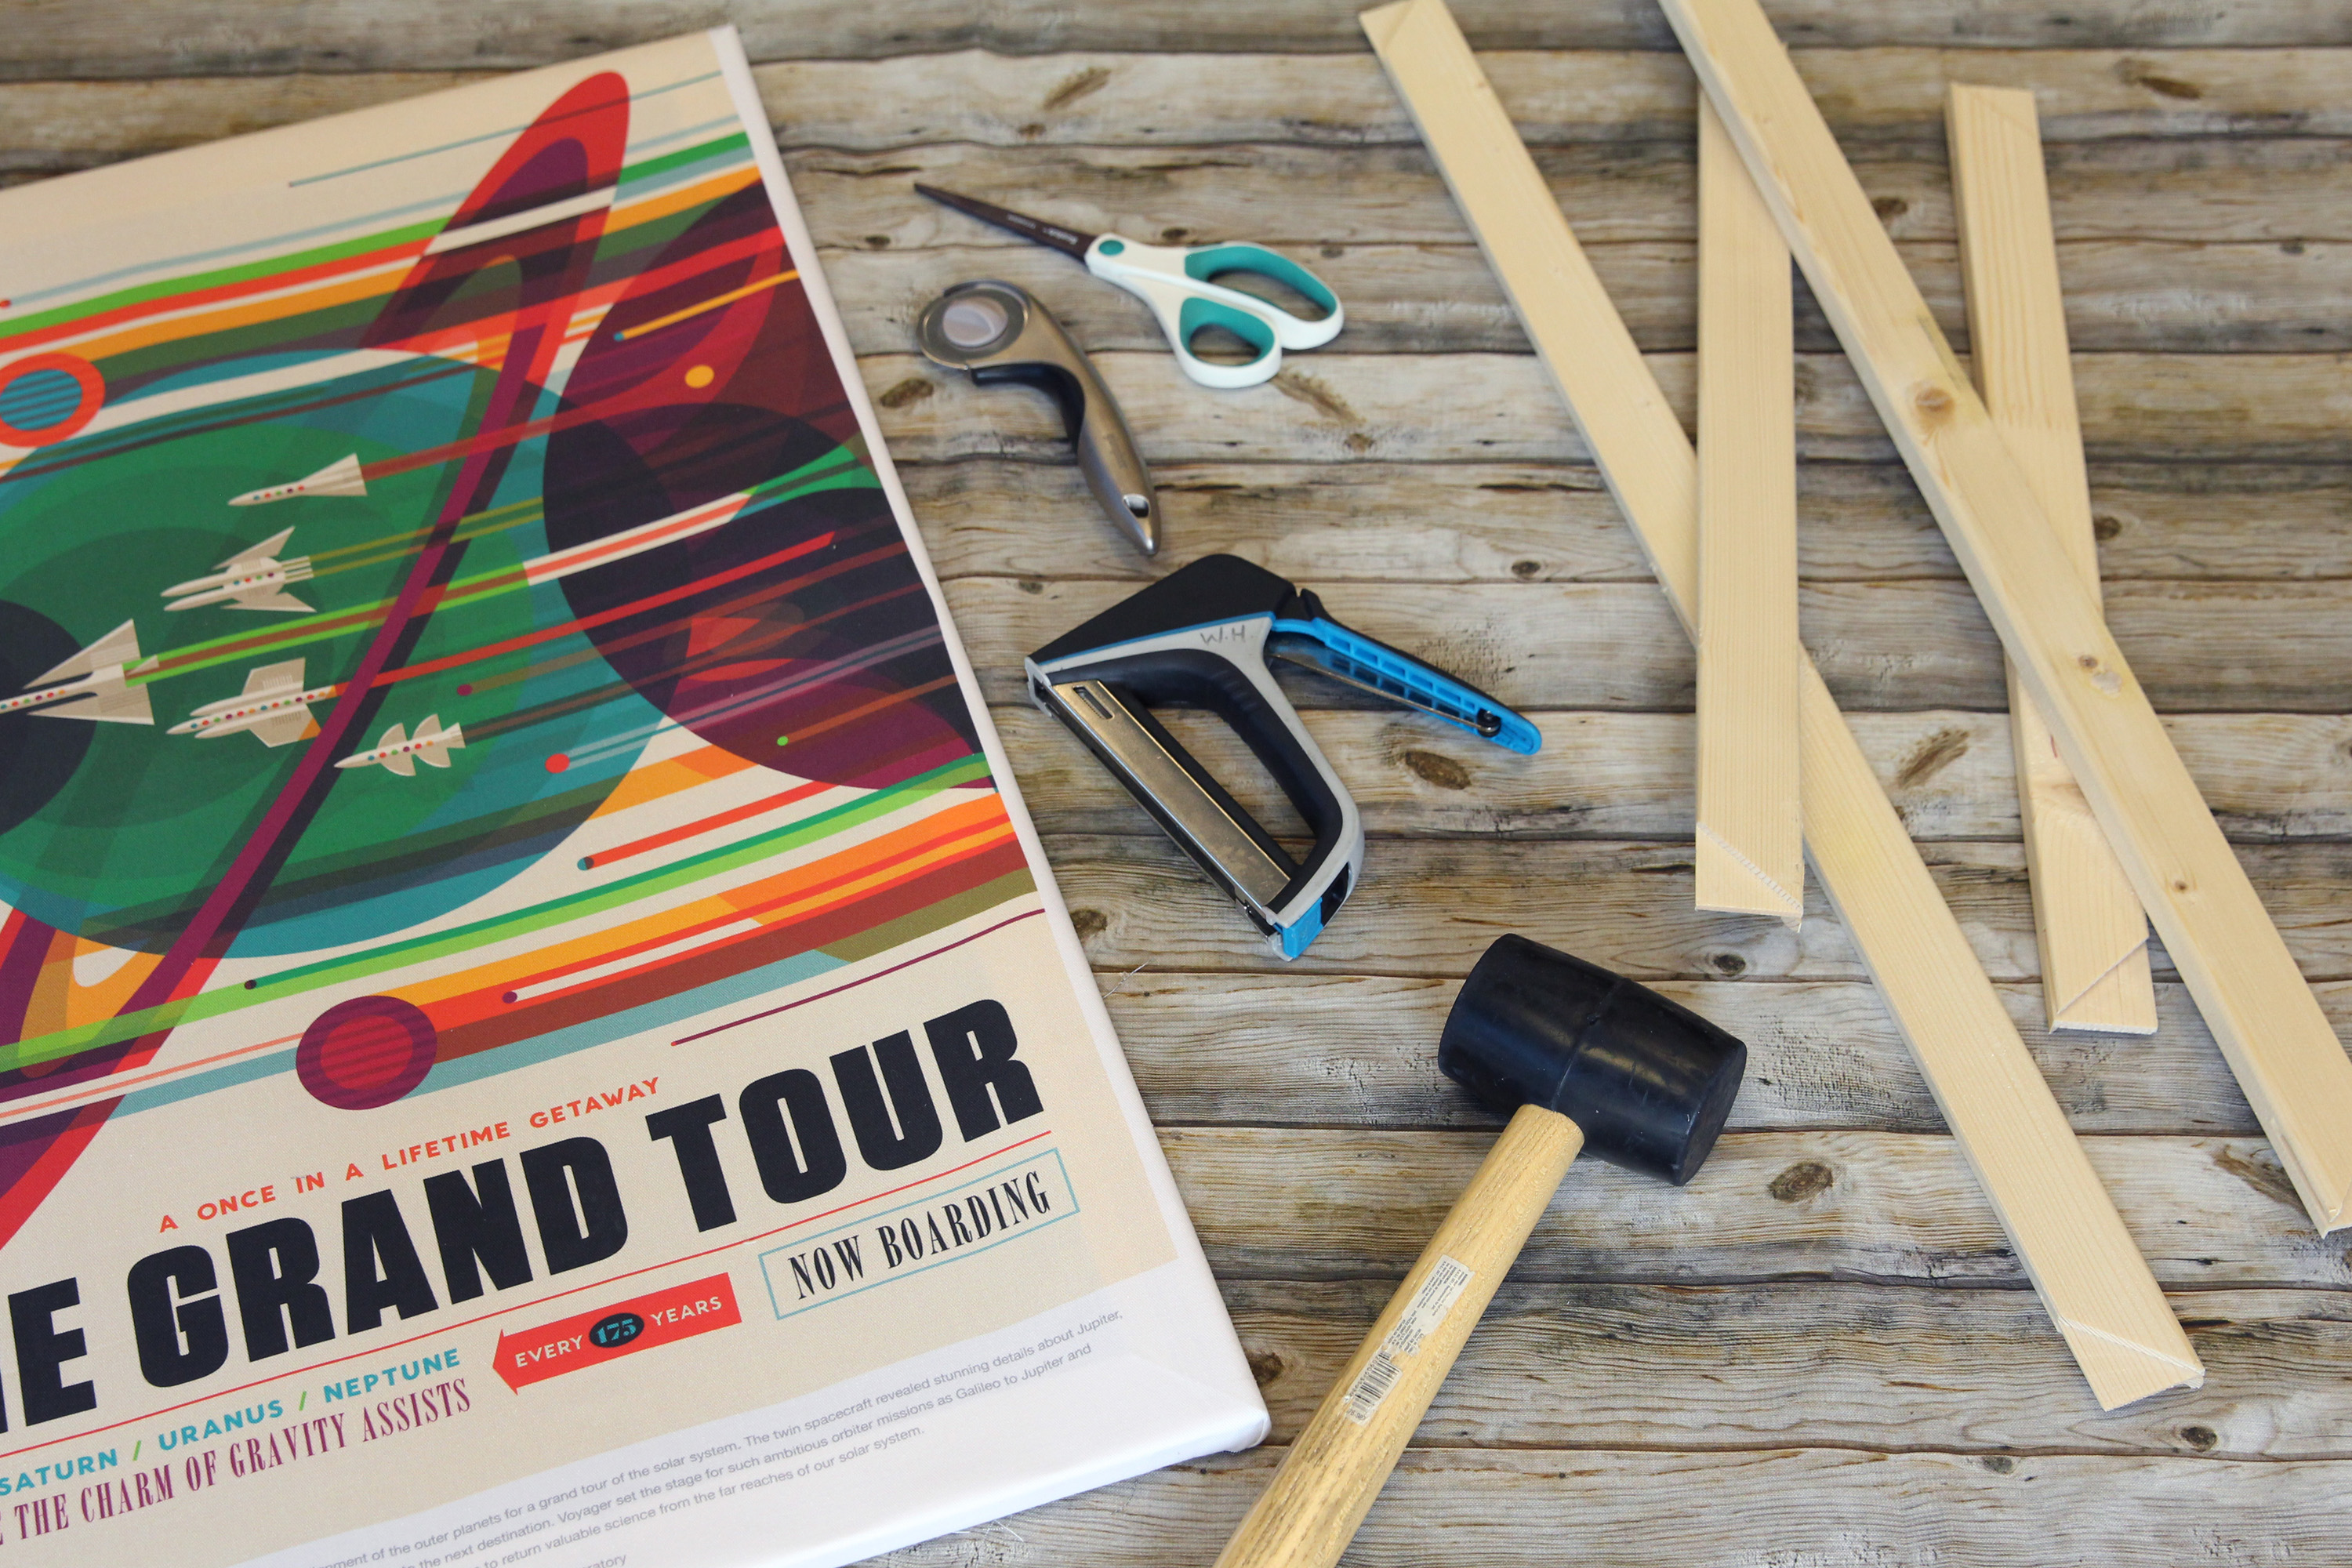
- 1 yard of Spoonflower’s Lightweight Cotton Twill
- 2 sets of stretcher bars (ours were for 20″x30″ canvases)
- Scissors or a rotary blade
- A staple gun
- Mallet (this is optional, but it can help to assemble stretcher bars)
Poster Designs, begin by downloading the digital files here. These posters are for private use only, they cannot be uploaded and made for sale in our Marketplace. All poster designs Courtesy of NASA/JPL-Caltech
Part 1: Setting up Your File to Print
After downloading the posters you’d like to use, open Photoshop and create a new document.
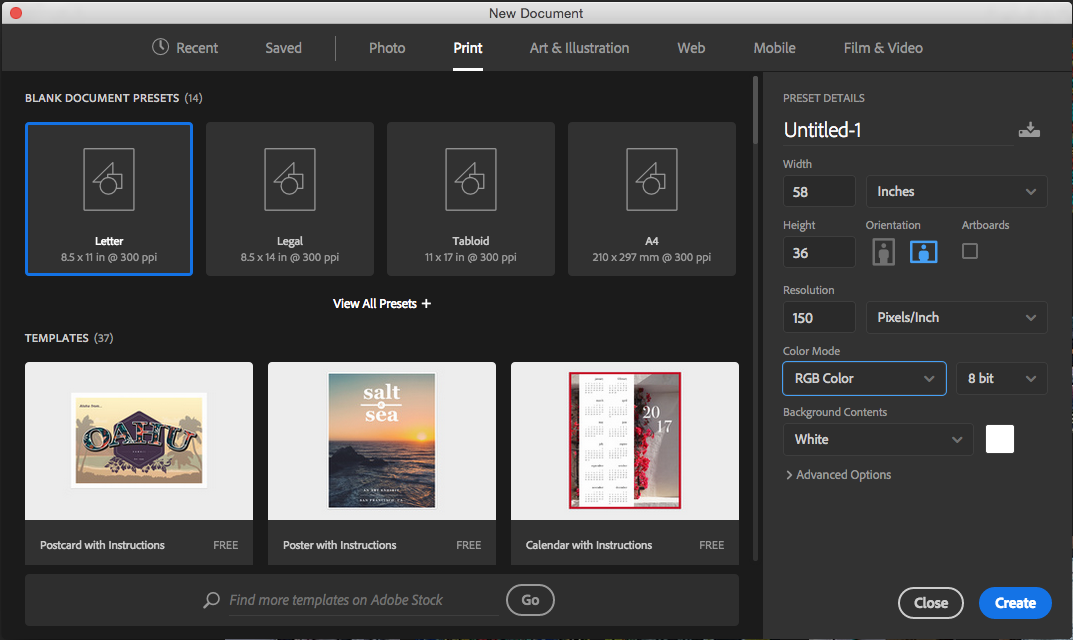
It should be set to 58in wide, 36in high at a minimum of 150dpi/ppi, in RGB color mode.
Next make a rectangle that is slightly larger than your finished canvas size. Since our canvases were 20in x 30in we added 2 inches to each side so there would be plenty of excess fabric to fold around each of the stretcher bars.
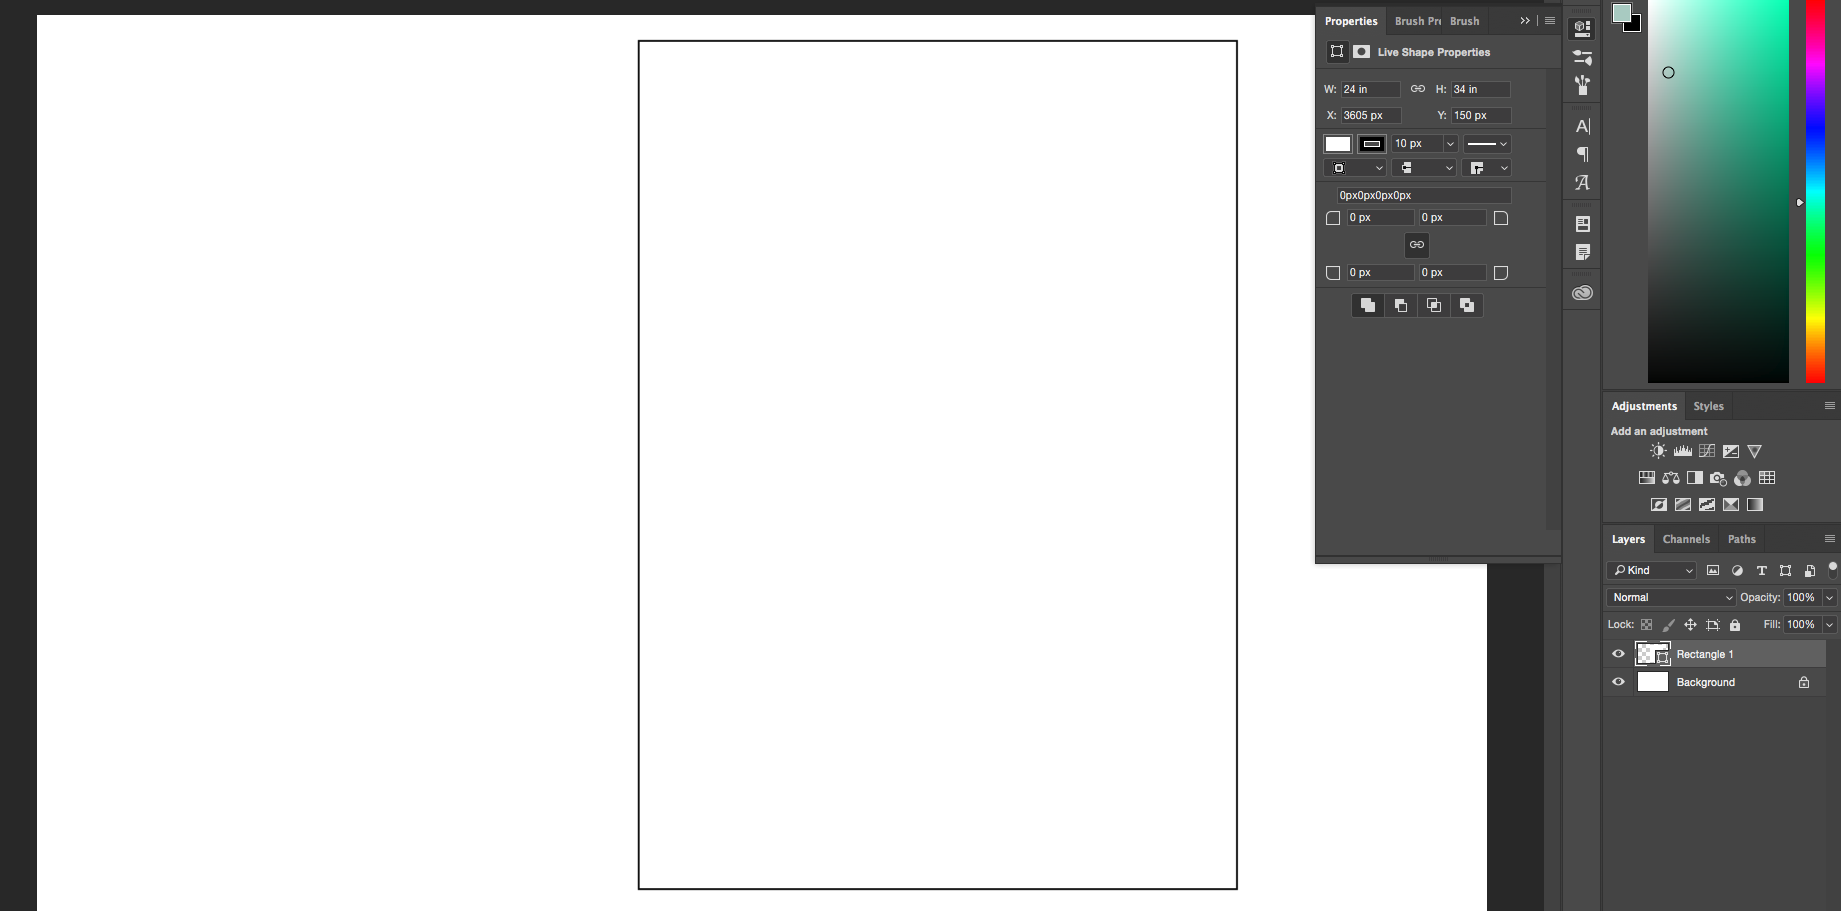
Our final rectangle was 24in x 34in. Set the shape to have a white fill and at least a 1pt stroke (this will help make cutting easier later!)
 Duplicate your rectangle layer, place the shapes side-by-side and center them in the document.
 Create another rectangle that is 20in x 30in (the size of the canvas frame) with no stroke and a light grey fill. Duplicate it and center one inside of each of the larger rectangles.
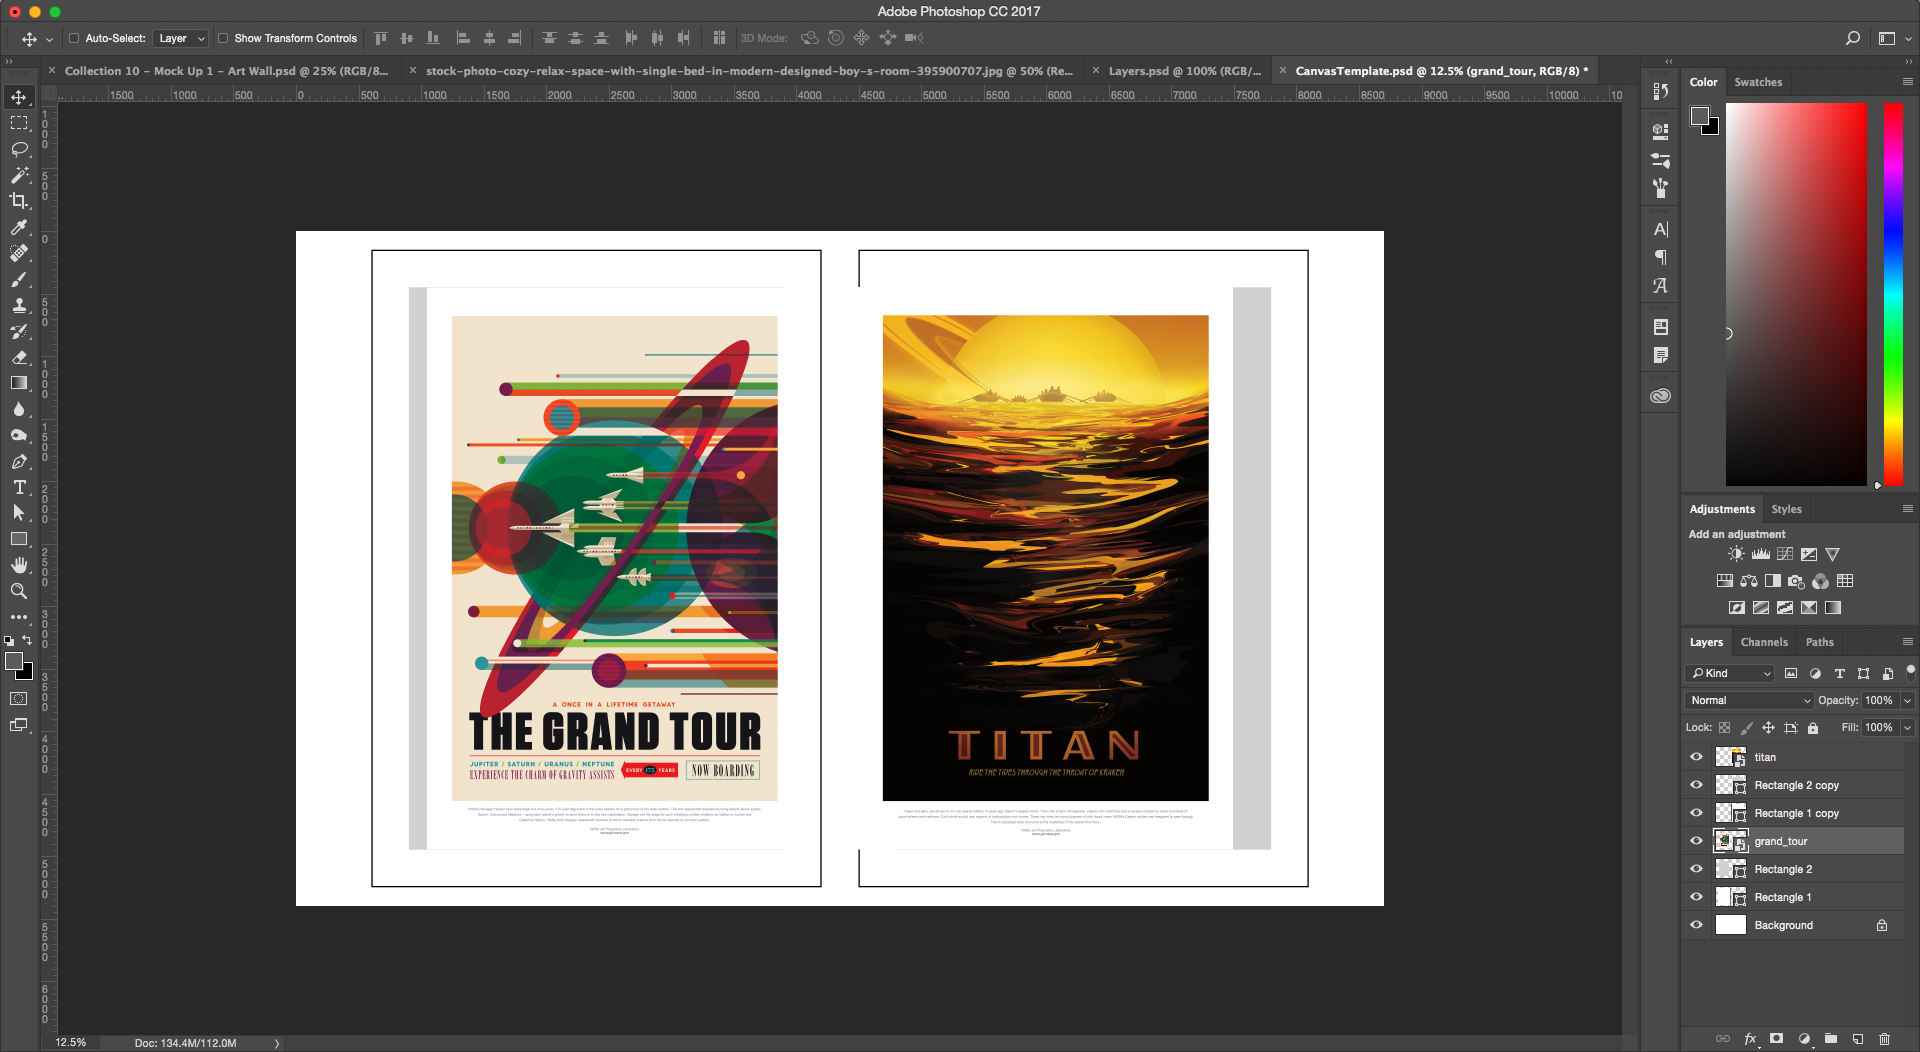 Drag and drop your poster designs of choice into the file. Place each one over a grey rectangle making sure that the poster layer is directly above its corresponding rectangle layer.
  With one of the poster layers selected, hold down the Option key and hover between that layer and the rectangle layer below it (the cursor should change to a down arrow with a box) and click in between the layers. This will clip the image to the lower 20in x 30in rectangle. Adjust the sizing of the poster layer as needed. Repeat this process for the other poster. In the end your layers should look similar to the photo above.
(Note: Be careful when sizing the images, just make sure they go all the way to the edges of the rectangle otherwise some grey will print around each poster. You could change the lower rectangle layer to have a white fill instead.)
Save your file as a JPEG or PNG and upload to Spoonflower!
 Once uploaded set the repeat to “Center,” the fabric to Lightweight Cotton Twill, and the size to Yards. Then add it to your cart and checkout!
Part 2: Finishing the canvases
Now that you’ve patiently waited for your Spoonflower order and it has arrived it’s time to finish our canvases!
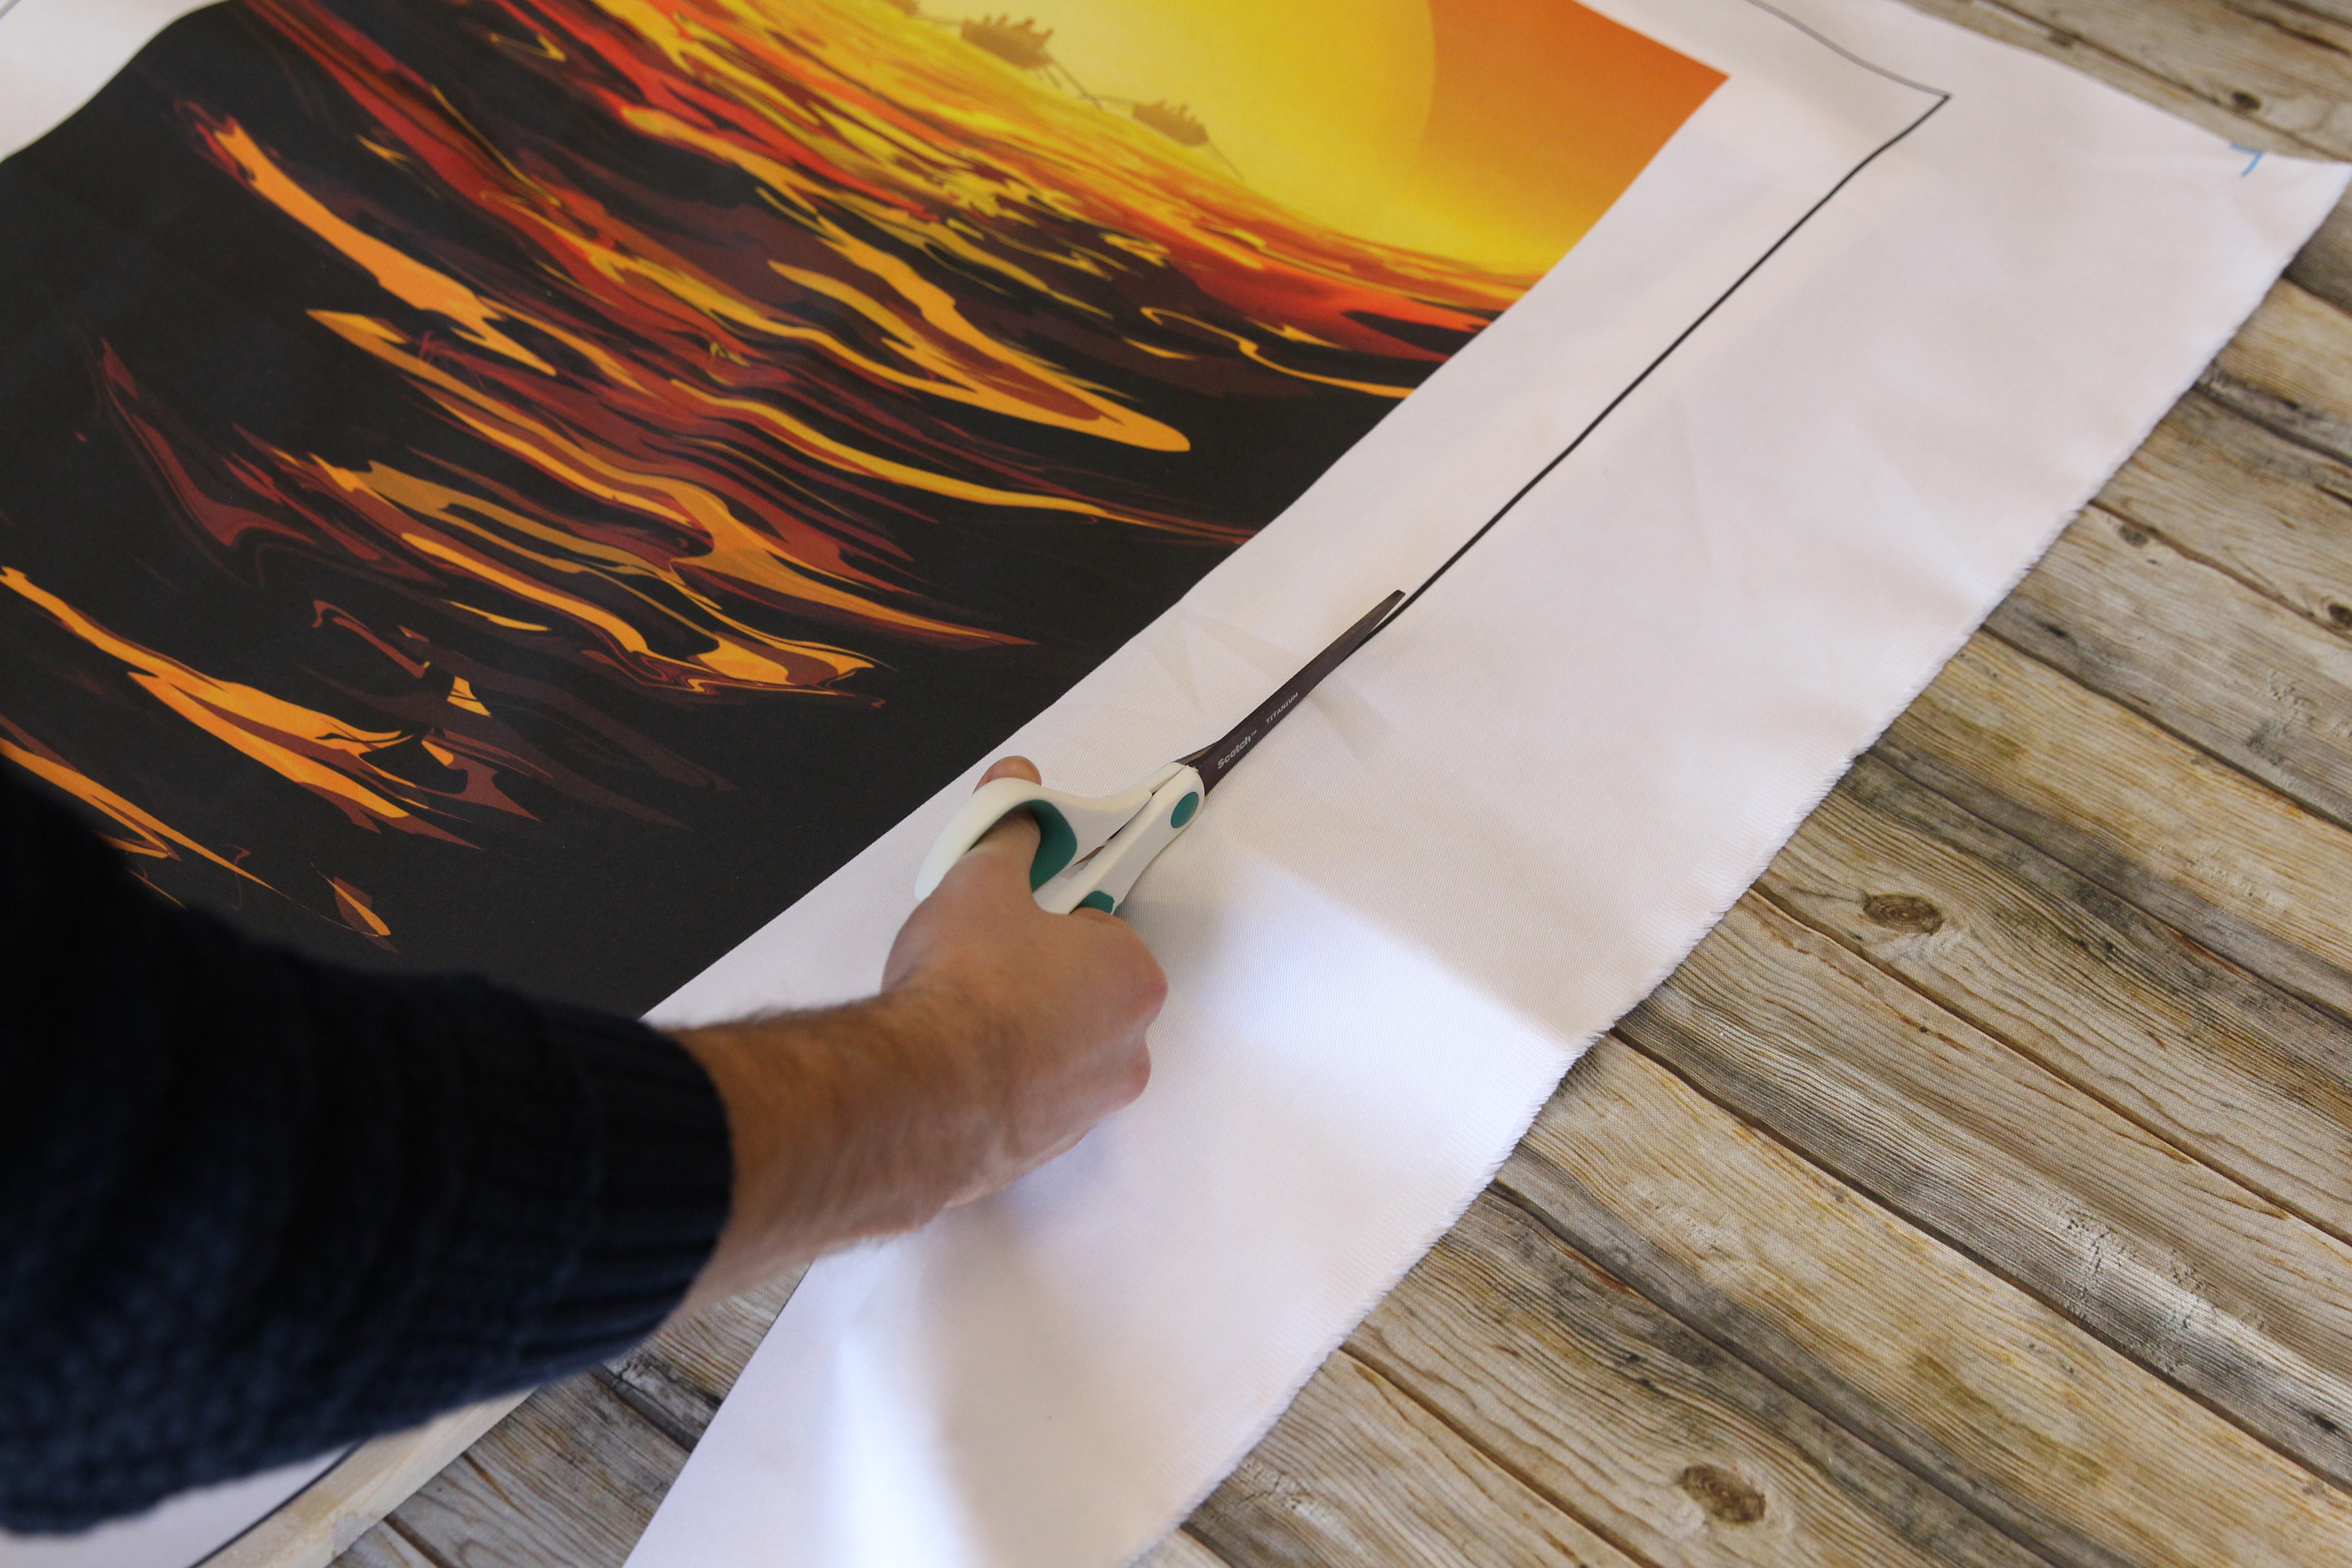 To begin cut out your posters along the cut lines we made in photoshop. Iron the fabric to take out any creases (we recommend ironing print-side down). And set the fabric aside.
(We suggest pre-washing fabrics when making garments, but since this was meant to hang on a wall it wasn’t necessary.)
 Next begin assembling the stretcher bars to make the frame, here’s where a mallet can come in handy for any stubborn pieces.

Once that’s put together lay your fabric print-side down on a flat surface and place the assembled frame on top of the fabric.

Start folding the excess fabric around the frame edges, and staple it in place. it’s a good idea to flip it around periodically to check that everything is centered and being pulled evenly. As you staple the fabric to the frame alternate the sides you staple and make sure to pull the fabric taut as you go along.

Don’t staple too close to the corners as you go along, you’ll want enough loose fabric to get a clean fold. Start by folding the fabric in on itself from one side and making it flush with the top of the frame. The fold it down onto the back of the frame and staple it into place. You can have multiple staples to keep everything in place, but for ours one in the middle did the trick.
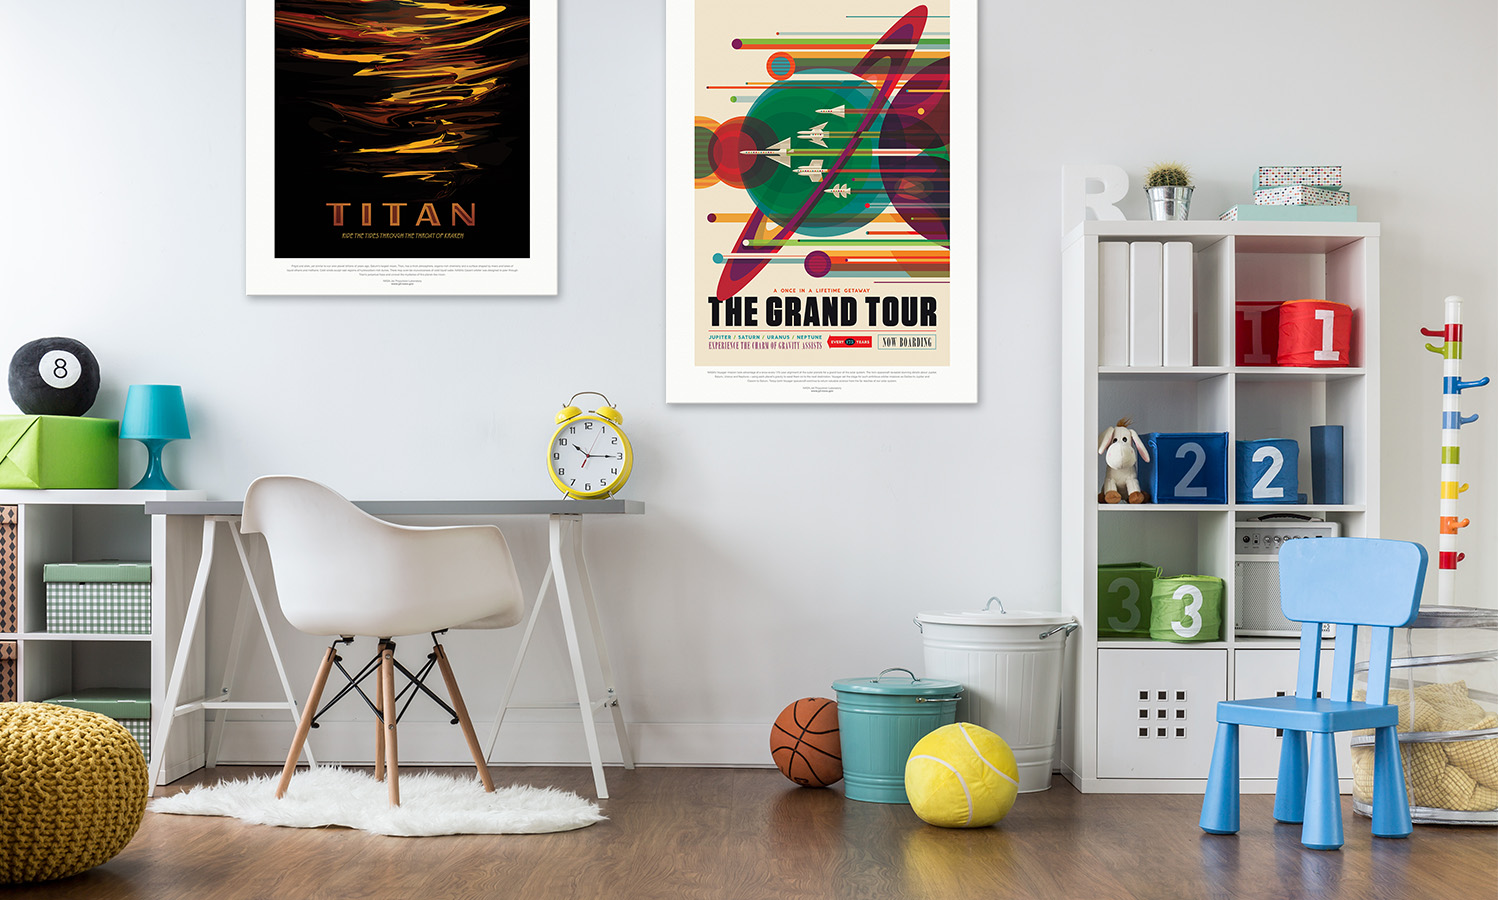
 Feel free to trim excess fabric off after everything is stapled into place. And with that you’re done! Go forth, hang and enjoy your awesome new wall art! These posters would look amazing in any part of your home, but we love it particularly for kids’ bedrooms. Looking for more home dec ideas for kids’ spaces? Check out what we’ve saved on Pinterest.


