


Sometimes hemming knit fabric garments can be a little fussy, but Spoonflower crew member Teri is here to show you how to finish off your knit tops beautifully with a simple rounded neckline. Armed with this technique, you’ll be sewing knit necklines, armholes and hemlines with ease!

Teri: Knit fabrics are my favorite to sew and wear, yet all too often my sewing friends say they are intimidated by knits. Creating a clean, beautiful neckline on a knit top can be super easy and quick. Start with your favorite pattern for a knit top and a lovely knit fabric, like Performance Piqué. I chose this adorable print, Como Se Llama? by happygoluckycreations, so the sweet llamas can cheer you on.
To achieve a smooth neckline that does not ripple or gape open, the binding needs to be slightly smaller than the neckline. A tiny bit of stretching will keep the binding flat and close to the body.
This technique is not just for necklines! It’s a great way to finish armholes and even hems on knits.
1. Figure out the length of your binding.
Don’t be frightened; we’re going to do a little math now. First, to know how much binding you’ll need lengthwise, measure your neckline opening and multiply by .90, then add 1/2″, to allow for two 1/4″ seam allowances, one at either end of the binding.
For example, the neckline of my pattern is 28″. Therefore, I multiplied 28 x .9, which came to 25.2. For the sake of simplicity, I rounded that to 25. Next, I added 1/2″ for the 1/4″ seam allowance at either end: 25 + .5 = 25.5. So now I know my binding will be 25.5″ in length.
2. Next, mark the width and cut out your binding.
Figuring out the width is a lot easier because the llamas and I have already figured that out for you—it’s 1.5″ wide.
Cut out your binding, with the length you calculated in step 1 and a width of 1.5″.
The binding for this project will be folded in half with a 1/4″ seam allowance. If you’d like a thicker or thinner binding, your width may vary.
3. Sew the two short ends of the binding together.
Sew the two short ends together, using a 1/4″ seam allowance.
4. Mark the binding into 4 equal parts using pins.
With right sides together, pin the binding to the neckline, matching the quarter marks.
Remember, the binding is a little bit smaller than the neckline opening, so it won’t match up evenly.
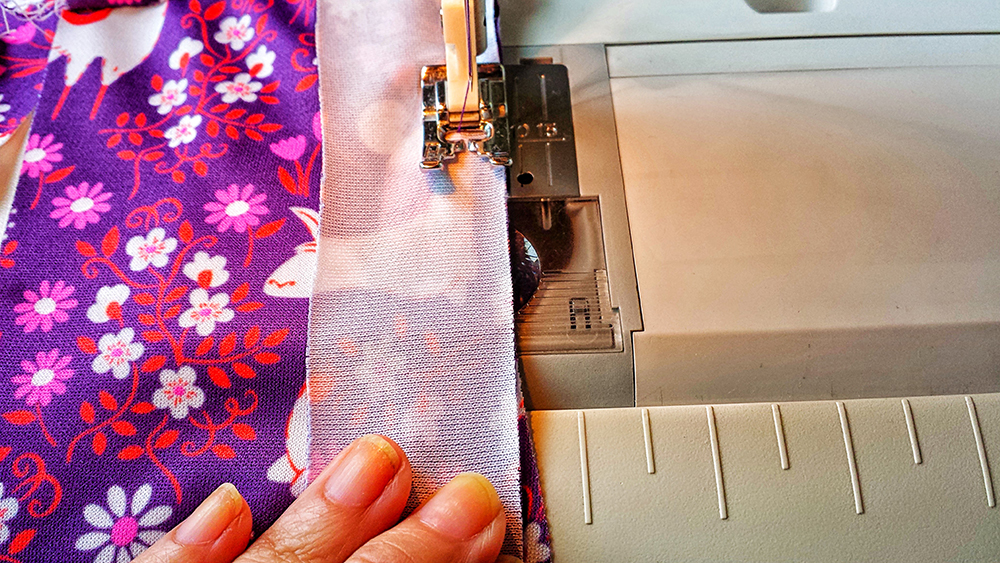
5. Sew your binding to your neckline.
Stitch the binding to the neckline with a 1/4″ seam allowance, gently stretching the binding to fit the neckline as you sew.
For this project, I set my zig zag stitch was set to 3 for length and 3.5 for width.
6. Don’t worry if it looks a little wavy.
We will fix that in a few minutes. This sleepy little llama certainly is not concerned about a little ripple in the stitching.
7. Press the binding up, towards the zig zag stitching.
I like to use a piece of plain cotton fabric over the knit fabric as a pressing cloth when using steam, just in case the iron decides to spit out too much water.
Now, wrap the binding over the seam allowance and to the inside. Pin the binding in place, making sure that the binding fully overlaps the zig zag stitching on the inside.
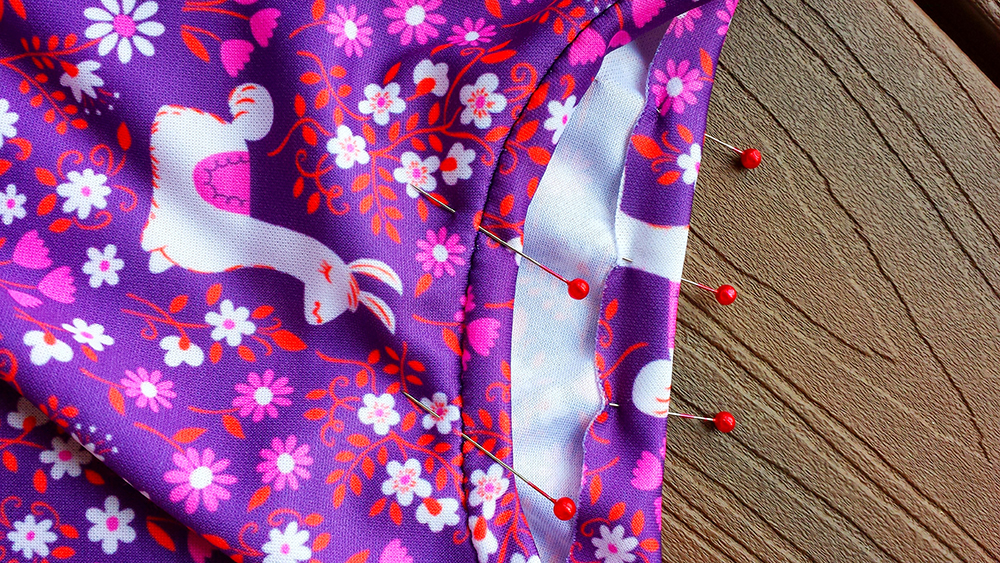
Press the binding up, towards the zig zag stitching. I like to use a piece of plain cotton fabric over the knit fabric as a pressing cloth when using steam, just in case the iron decides to spit out too much water.
Now, wrap the binding over the seam allowance and to the inside. Pin the binding in place, making sure that the binding fully overlaps the zig zag stitching on the inside.
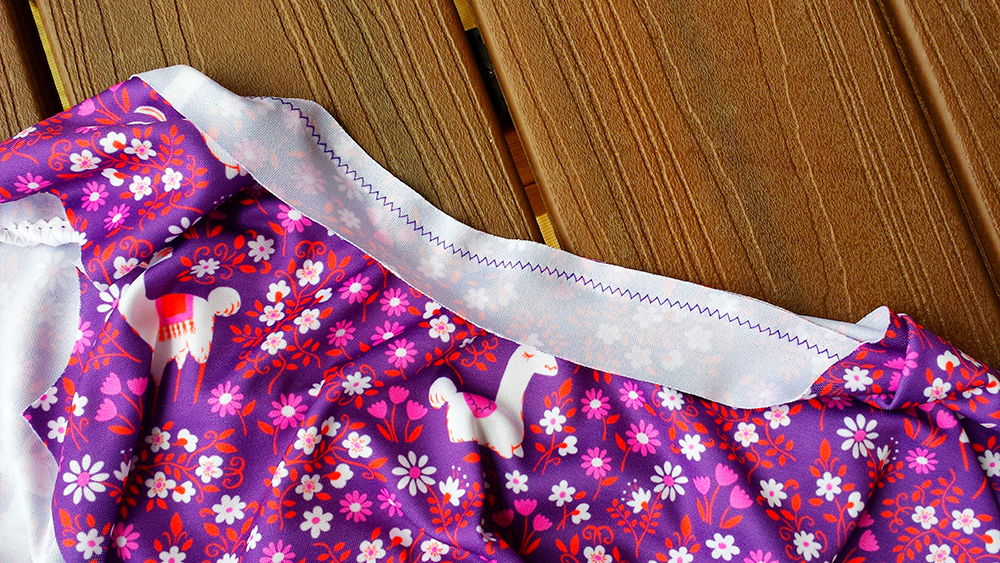
8. Stitch in the ditch.
From the right side, “stitch in the ditch” (in the existing seam line) between the body of the shirt and the binding. It takes a bit of concentration to keep the needle in the right place. This gets much easier with practice.

9. Press your binding.
Once you’ve finished step 8, the last step is to press the neckline with a good shot of steam to eliminate any waviness from the stretching and stitching. The llamas are so proud of you for making such a beautiful neckline!
I hope this technique will make sewing with knits more fun and less fussy. Share links to your favorite sewing with knits’ tips and techniques with us in the comments below!


Hi, I have a few ready to wear shirts I would like to lower the neckline on. Any suggestions on what I can use for binding?
Hi Joanne,
Thanks for your interest in these tips! You can create binding with a woven cotton.
Best of luck with your project,
Amy
Spoonflower
I have saved this method on my “Tried and True”, board on Pintrest. No fail, always good results. Thks!
The finished product looks great. Did you turn the edge under on the inside before you stitched in the ditch? It doesn’t look like it from the picture.
Hi Jeannie,
Since you’re working with a knit fabric that won’t fray, it is not necessary to turn under the raw edge before stitching in place! I hope that helps, but if you have any more questions don’t hesitate to ask. – Meredith
Thanks for the tips,t will solve my problem…cant’t wait to try 🙂
We’d love to hear how it goes!
I’m confused. The first sewing picture is a serger, looks just like my Brother 1034D. You’re not doing a zig zag. Then in the next picture, there’s a straight stitch showing, which wouldn’t have been from the serger OR a zig zag. I don’t see a zig zag stitch anywhere. The last picture showing stitching ON the binding, not in the ditch.
Do we follow the text or the pictures?
Hi Tracy,
We’re sorry for the confusion! Please follow the written instructions and stay tuned for updated photos!
I wondered this too.
do you zigzag or do a straight stitch when you stitch in the ditch?
Very cute, nice hem job. very good work you’ve done here 🙂
Lovely, a simple zigzag is every bit as good as using a twin needle. This is my preferred binding method and I’ve tried a lot of them.
Or use a stretch stitch (or serge if possible). I’d also point out that there’s a specific foot for stitching in the ditch that comes with a lot of newer machines. It has a blade like piece that goes ahead of the needle to keep it in the ditch, but check your needle position to make sure the needle lands where you think it will. Oh, and great fabric, happygoluckycreations!
Nice. Simple. Much appreciated.
maybe you should consider using a twin needle so that the stretch fabric can work with the stitch. if you use af single needle stitch the stictch will brake when you stretch the fabric..